
St. Patrick’s Day is such a delightful occasion, filled with laughter, parades, and, of course, all things green! One of my absolute favorite ways to celebrate this festive holiday is by making homemade treats, and trust me, you can’t go wrong with *St. Patrick’s Day marshmallows*. These fluffy, sweet bites are perfect for adding a touch of whimsy to your celebration.
There’s something so satisfying about creating marshmallows from scratch. The process is surprisingly simple, and the joy of watching them transform into soft, pillowy goodness is just magical. You can get the kids involved too! They’ll love getting their hands dusted with powdered sugar and experimenting with colors. You can even make them as green as a leprechaun or swirl in a rainbow — the possibilities are endless!
Imagine serving these charming marshmallows in hot cocoa, or as a fun topping for cupcakes at your St. Paddy’s Day gathering. They’re not just delicious; they’re a sweet way to bring everyone together and spread some cheer. So, let’s dive into making these delightful *St. Patrick’s Day marshmallows* and create some tasty memories!
Ingredients List
To whip up the most delightful *St. Patrick’s Day marshmallows*, you’ll need a few simple ingredients. Each one plays a vital role in achieving that fluffy, sweet texture and festive color. Here’s what you’ll need:
- 2 cups granulated sugar: This is the base sweetness that makes these marshmallows so irresistible.
- 1/2 cup corn syrup: This helps keep the marshmallows soft and prevents them from becoming too firm.
- 1/2 cup water: Used to dissolve the sugar and gelatin, this ensures everything blends smoothly.
- 1 tablespoon vanilla extract: Adds a lovely depth of flavor that complements the sweetness beautifully.
- 1/4 teaspoon salt: Just a pinch to enhance all the flavors and balance the sweetness.
- 2 packets unflavored gelatin: This is the magic ingredient that gives marshmallows their fluffy structure.
- 1/2 cup powdered sugar: For dusting the finished marshmallows and preventing them from sticking together.
- Green food coloring: Essential for that festive touch! You can adjust the amount to get your desired shade of green.
Gather these ingredients, and you’ll be well on your way to creating these delightful treats that everyone will love!
How to Prepare St Patricks Day Marshmallows
Making your own *St. Patrick’s Day marshmallows* is a fun and rewarding experience! Let’s walk through the steps together so you can create the lightest, fluffiest marshmallows that will impress everyone at your celebration.
Step 1: Combine Ingredients
Start by grabbing a medium saucepan and combine 2 cups of granulated sugar, 1/2 cup of corn syrup, and 1/2 cup of water. Place this mixture over medium heat and stir gently until the sugar dissolves. Now, keep an eye on it and let it come to a gentle boil. You want to see bubbling but not boiling over! This step is crucial because it creates that sweet syrup base for your marshmallows.
Step 2: Bloom Gelatin
While your sugar mixture is heating, it’s time to bloom the gelatin. In a separate bowl, sprinkle 2 packets of unflavored gelatin over 1/2 cup of cold water. Let it sit for about 5-10 minutes. This step is super important! Blooming the gelatin ensures it dissolves smoothly into the hot sugar mixture, giving your marshmallows that perfect fluffy texture.
Step 3: Mix Hot and Cold
Once your sugar mixture has reached a boil, carefully pour it into the bowl with the bloomed gelatin. Make sure to mix continuously until everything is completely dissolved. You don’t want any lumps! This should take about 2-3 minutes, and you’ll see the mixture become glossy and smooth. Be careful; it’s hot!
Step 4: Add Flavor and Color
Now for the fun part! Stir in 1 tablespoon of vanilla extract and 1/4 teaspoon of salt to enhance the flavor. Then, add in your green food coloring. Start with a few drops and mix until you achieve your desired shade of green. This is where you can really get creative — go for a vibrant emerald or a softer pastel green!
Step 5: Set the Mixture
Next, pour your marshmallow mixture into a greased pan. I like to use an 8×8 inch pan for thicker marshmallows. Make sure to spread it evenly. Let it sit at room temperature for at least 4 hours (or overnight if you can wait!). This resting period is crucial because it allows the marshmallows to firm up and develop that perfect texture.
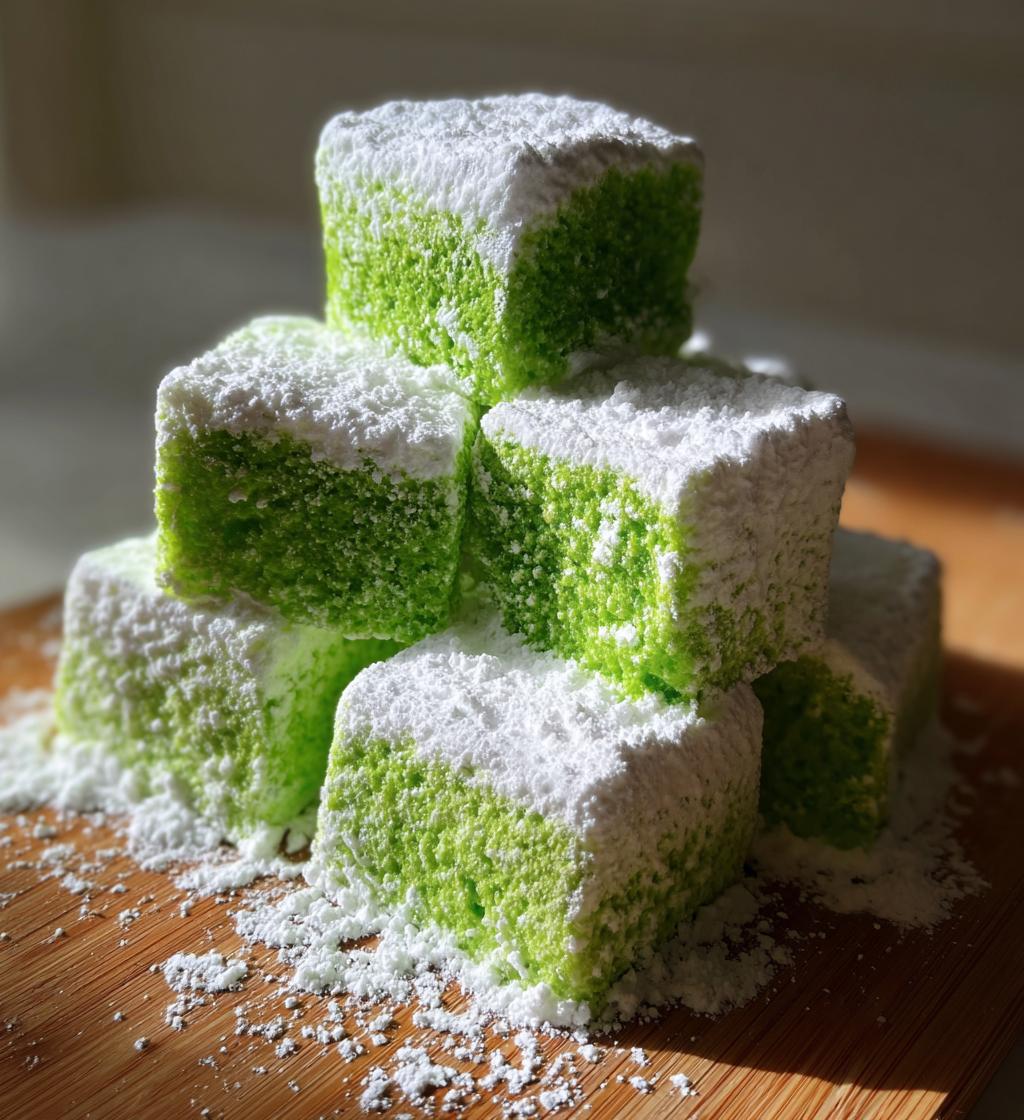
Step 6: Cut and Dust
Once your marshmallows are set, it’s time to cut them! Lightly dust a cutting board with powdered sugar to prevent sticking. Use a sharp knife (or kitchen scissors) to cut them into squares. Don’t forget to dust the freshly cut marshmallows with more powdered sugar to keep them from sticking together. And there you have it! Your delightful *St. Patrick’s Day marshmallows* are ready to be enjoyed!
Why You’ll Love This Recipe
Making *St. Patrick’s Day marshmallows* is an absolute joy, and here’s why you’ll adore this recipe:
- Easy to Make: With just a handful of ingredients and straightforward steps, you’ll find that creating these marshmallows is simpler than you might think!
- Fun for Kids: Get the little ones involved! They’ll love mixing, pouring, and especially dusting with powdered sugar. It’s a great way to create lasting memories together.
- Customize to Your Heart’s Content: You can play around with colors and even flavors! Why not try adding a hint of mint or chocolate for a fun twist?
- Perfect for Celebrations: These festive treats are not only delicious but also visually appealing, making them a hit at any St. Patrick’s Day gathering.
- Great for Gifts: Wrap them up in cute packaging, and you’ve got the perfect homemade gift that’s sure to bring a smile!
These marshmallows are more than just a treat; they’re a delightful way to celebrate and share the joy of the holiday!
Storage & Reheating Instructions
Once you’ve whipped up your delightful *St. Patrick’s Day marshmallows*, it’s important to store them properly so they stay fresh and fluffy! Place your marshmallows in an airtight container to keep out moisture and prevent them from sticking together. I recommend separating layers of marshmallows with parchment paper or dusting them lightly with powdered sugar again, just to be safe.
Stored this way, your marshmallows can last for about 1-2 weeks at room temperature. But trust me, they won’t last that long because they’re just too tasty! If you want to save them for longer, you can pop them in the refrigerator, which can extend their freshness up to a month. Just remember, the colder environment may slightly change their texture, making them a bit firmer.
If you find yourself wanting to enjoy them in a warm, gooey form, you can easily reheat your marshmallows! Just place them in the microwave for a few seconds until they puff up (about 5-10 seconds should do the trick). Keep an eye on them — they can get sticky in a hurry! Enjoy them melted over hot cocoa or as a fun topping for desserts!
Nutritional Information Section
Now, let’s talk about the nutritional goodness of these delightful *St. Patrick’s Day marshmallows*! Each serving, which is one marshmallow, contains approximately:
- Calories: 60
- Sugar: 14g
- Sodium: 5mg
- Fat: 0g
- Saturated Fat: 0g
- Carbohydrates: 15g
- Protein: 0g
Keep in mind that these values can vary slightly based on the specific brands and ingredients you use. For instance, if you decide to add any fun flavors or different colors, those might change the nutritional content a bit. But regardless, these homemade marshmallows are a sweet treat that everyone can enjoy, especially during the festive St. Patrick’s Day celebrations!
FAQ Section
Got questions about making your own *St. Patrick’s Day marshmallows*? No worries, I’ve got the answers! Here are some common queries you might have:
Can I use flavored gelatin instead of unflavored?
While unflavored gelatin gives you that classic marshmallow texture, you can absolutely experiment with flavored gelatin! Just keep in mind that it will change the taste and color of your marshmallows. Think about using lime or even raspberry for a fun twist!
What if I don’t have corn syrup?
If you find yourself without corn syrup, you can substitute it with an equal amount of honey or agave syrup. This may alter the flavor slightly, but it’ll still work to keep your marshmallows soft and chewy!
How should I store leftovers?
To keep your *St. Patrick’s Day marshmallows* fresh, store them in an airtight container at room temperature. They’ll stay good for about 1-2 weeks. Just make sure to separate layers with parchment paper to prevent sticking!
Can I freeze marshmallows?
Yes, you can freeze them! Just place your marshmallows in a freezer-safe bag or container, separating layers with parchment paper. They can last for up to 3 months in the freezer, but be aware that the texture may change slightly once thawed.
What other colors can I use?
The sky’s the limit with colors! Use different food coloring to create a rainbow effect, or even mix in pastel colors for a softer look. Just have fun with it and let your creativity shine!
Tips for Success
Making *St. Patrick’s Day marshmallows* can be a breeze if you keep a few handy tips in mind!
- Measure Accurately: Precision is key! Make sure to measure your ingredients carefully. Too much sugar or too little gelatin can affect the texture.
- Temperature Matters: When heating your sugar mixture, keep a close eye on it. If it boils too hard, it can caramelize, which isn’t what you want for fluffy marshmallows.
- Let Them Set: Don’t rush the setting time! Allowing your marshmallows to rest for at least 4 hours is crucial for achieving that perfect texture.
- Keep It Clean: Use a lightly greased knife or kitchen scissors to cut the marshmallows. This helps prevent sticking and keeps your edges nice and clean.
- Experiment with Flavors: Feel free to add other flavors or extracts to customize your marshmallows! A bit of mint or almond can add a delightful twist.
Follow these tips, and you’ll be well on your way to creating the most delightful *St. Patrick’s Day marshmallows* that everyone will love!
Print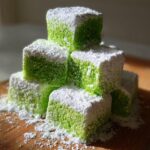
St Patrick’s Day Marshmallows: 5 Steps to Joyful Treats
- Total Time: 4 hours 25 minutes
- Yield: 16 servings 1x
- Diet: Vegetarian
Description
Delicious marshmallows perfect for St. Patrick’s Day.
Ingredients
- 2 cups granulated sugar
- 1/2 cup corn syrup
- 1/2 cup water
- 1 tablespoon vanilla extract
- 1/4 teaspoon salt
- 2 packets unflavored gelatin
- 1/2 cup powdered sugar
- Green food coloring
Instructions
- In a saucepan, combine sugar, corn syrup, and water. Heat over medium until boiling.
- In a bowl, bloom gelatin in 1/2 cup cold water.
- Pour hot sugar mixture into bloomed gelatin and mix until dissolved.
- Add vanilla extract and salt, then mix well.
- Mix in green food coloring until desired color is achieved.
- Pour mixture into a greased pan and let it set for at least 4 hours.
- Once set, dust with powdered sugar and cut into squares.
Notes
- Store in an airtight container.
- Use different food colors for variety.
- Can be used in hot chocolate or as toppings.
- Prep Time: 15 minutes
- Cook Time: 10 minutes
- Category: Dessert
- Method: Stovetop
- Cuisine: Irish
Nutrition
- Serving Size: 1 marshmallow
- Calories: 60
- Sugar: 14g
- Sodium: 5mg
- Fat: 0g
- Saturated Fat: 0g
- Unsaturated Fat: 0g
- Trans Fat: 0g
- Carbohydrates: 15g
- Fiber: 0g
- Protein: 0g
- Cholesterol: 0mg
Keywords: St. Patrick's Day marshmallows, festive treats, homemade marshmallows


