
There’s something truly magical about making your own chocolates for Valentine’s Day. I absolutely love the idea of crafting these delightful little gifts in the comfort of my kitchen. The moment you melt that rich dark chocolate and mix in the silky cream, it’s like love is swirling in the air! These homemade chocolates are not just a treat; they’re a heartfelt gift that shows you care. Imagine the joy on your loved one’s face when they unwrap a sweet surprise you made just for them. Plus, you can personalize them with their favorite nuts or toppings, making each piece unique. Trust me, there’s nothing quite like the satisfaction of presenting a box of your own creations. Whether you’re sharing them with someone special or indulging yourself, these valentines chocolate will surely bring smiles and sweet moments to your celebration. So, let’s dive into the delicious details and get started on this delightful journey!
Ingredients List
Gathering your ingredients is the first step to creating these delightful valentines chocolate. Here’s what you’ll need:
- 1 cup dark chocolate chips
- 1/2 cup heavy cream
- 1 teaspoon vanilla extract
- 1/4 cup powdered sugar
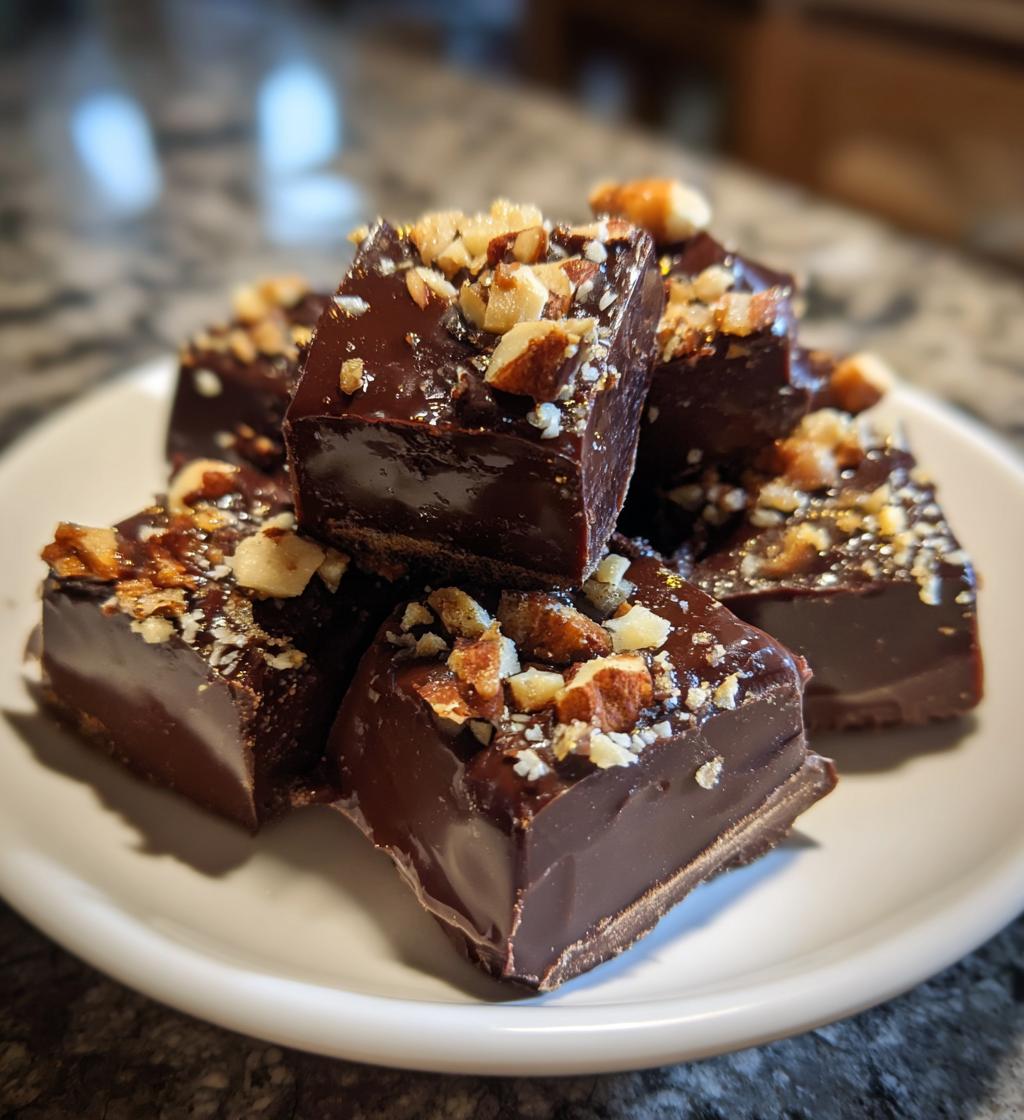
- 1/2 cup crushed nuts (your choice of walnuts, almonds, or hazelnuts work wonderfully!)
Make sure to choose high-quality dark chocolate for the best flavor. Trust me, it makes a world of difference in your final chocolates!
How to Prepare Instructions
Now, let’s get into the fun part – making your valentines chocolate! It’s super easy, and I promise you’ll be amazed at how quickly it all comes together. Just follow these simple steps:
- Start by heating the heavy cream in a saucepan over medium heat. Keep an eye on it, and let it simmer – don’t let it boil! This step is crucial to infuse that creamy goodness into your chocolate.
- Once the cream is simmering, remove it from the heat and immediately add the dark chocolate chips. Give it a good stir until everything is melted and smooth. Oh, that rich aroma is heavenly!
- Next, add the vanilla extract and powdered sugar to the melted mixture. Stir it all together until you have a luscious, glossy blend. This is where the magic happens!
- Carefully pour the chocolate mixture into your chosen molds. If you don’t have molds, silicone ice cube trays work great too. Just make sure they’re clean and dry!
- Now, sprinkle those crushed nuts on top, pressing them gently into the chocolate to ensure they stick. Feel free to get creative with your toppings!
- Pop the molds into the refrigerator and let them chill for about 2 hours. This is the hardest part – waiting! But it’s worth it for those perfectly set chocolates.
- Once they’re firm, gently remove the chocolates from the molds. Just flip them upside down and give them a little tap. They should slide right out!
And there you have it! Your homemade valentines chocolate, ready to impress. Enjoy them yourself or gift them to someone special!
Why You’ll Love This Recipe
This recipe for valentines chocolate is simply irresistible, and here’s why:
- Quick and Easy: You can whip up these chocolates in no time! With just 15 minutes of prep and 5 minutes of cook time, you’ll be done before you know it.
- No Baking Required: This is a no-bake recipe, so you don’t have to worry about the oven! Just melt, mix, and chill.
- Perfect for Gifting: These chocolates make stunning gifts! Package them in a cute box, and you’ve got a heartfelt present that’s sure to impress.
- Personalized Touch: You can customize them with your favorite nuts or even add a sprinkle of sea salt for that extra flair!
Trust me, once you try these, you’ll want to make them for every occasion!
Tips for Success
To make sure your valentines chocolate turns out perfectly every time, here are some of my favorite pro tips:
- Use High-Quality Chocolate: Don’t skimp on the chocolate! Go for the best dark chocolate chips you can find. The flavor of your chocolates will shine through, and trust me, it makes all the difference.
- Keep Everything Dry: Make sure your mixing bowl and molds are completely dry. Any moisture can affect how the chocolate sets, so it’s worth double-checking!
- Be Patient with Cooling: I know it’s hard to wait, but letting the chocolates chill for a full 2 hours ensures they set properly. Rushing this step might leave you with soft, messy chocolates!
- Store Correctly: After they’re set, store your chocolates in a cool, dry place, away from sunlight. If you’re keeping them for a while, a sealed container in the fridge is perfect!
- Experiment with Toppings: Don’t be afraid to get creative! Try adding different toppings like sea salt, dried fruit, or even a drizzle of white chocolate for added flair. Each batch can be a new adventure!
Following these tips will help you create the most delicious and beautiful valentines chocolate that everyone will love!
Variations
If you want to switch things up with your valentines chocolate, I’ve got some fun ideas for you! Here are a few variations to try:
- Flavor Infusions: Add a teaspoon of peppermint extract for a refreshing minty twist, or try orange zest for a citrusy kick!
- Different Nuts: Experiment with various nut toppings! Pecans, pistachios, or macadamia nuts can add unique flavors and crunch.
- Fruit Additions: Consider incorporating dried fruits like cranberries or apricots for a sweet and chewy texture that complements the chocolate beautifully.
- Chocolate Drizzle: Drizzling white or milk chocolate on top creates a stunning presentation and adds extra sweetness!
With these simple tweaks, you can create a whole range of delightful chocolates that will wow your loved ones!
Nutritional Information Section
Here’s the estimated nutritional information for each piece of your delicious valentines chocolate:
- Serving Size: 1 piece
- Calories: 120
- Total Fat: 8g
- Saturated Fat: 5g
- Unsaturated Fat: 3g
- Trans Fat: 0g
- Cholesterol: 10mg
- Sodium: 5mg
- Total Carbohydrates: 12g
- Dietary Fiber: 1g
- Sugars: 10g
- Protein: 2g
Keep in mind that these values are estimates and can vary based on the specific ingredients you use. Enjoy every delicious bite of your homemade chocolates!
FAQ Section
Got questions about making these delicious valentines chocolate? No worries, I’ve got you covered! Here are some common questions and my answers:
- Can I use milk chocolate instead of dark chocolate? Absolutely! While dark chocolate gives a rich flavor, milk chocolate works great too. Just remember it’ll be a bit sweeter!
- How long do these chocolates last? If stored properly in a cool, dry place, your valentines chocolate should last about a week. In the fridge, they can last up to two weeks!
- What if I don’t have any molds? No problem! You can use a baking dish lined with parchment paper. Just pour the chocolate mixture in and cut it into squares once set.
- Can I make these ahead of time? Yes, you can prepare these chocolates a day or two in advance. Just keep them stored in an airtight container until you’re ready to gift or enjoy!
- How do I know when the chocolates are set? They’re ready when they feel firm to the touch and easily come out of the mold without any stickiness.
If you have any other questions, feel free to ask while you’re creating these sweet treats!
Storage & Reheating Instructions
Storing your homemade valentines chocolate properly is key to keeping them delicious and fresh! After they’ve set, I recommend placing your chocolates in an airtight container. This prevents any moisture from sneaking in and keeps them from getting all sticky. You can store them at room temperature if you plan to eat them within a week, but if you want them to last longer, keeping them in the fridge is a great option. Just make sure they’re in a cool, dry spot!
Now, if you find yourself with some leftover chocolates (which is rare, but hey, it happens!), they can last up to two weeks in the fridge. Just remember to bring them back to room temperature for the best flavor and texture before enjoying. There’s really no need to reheat these chocolates, as they’re best served cool and firm. However, if you’re looking to melt them down for a new treat, you can gently warm them in a microwave or over a double boiler. Just be careful not to overheat them, or you’ll lose that lovely smoothness!
Print
valentines chocolate: 7 Irresistible Recipes to Melt Hearts
- Total Time: 2 hours 20 minutes
- Yield: 12 pieces 1x
- Diet: Vegetarian
Description
Delicious homemade chocolates perfect for Valentine’s Day.
Ingredients
- 1 cup dark chocolate chips
- 1/2 cup heavy cream
- 1 teaspoon vanilla extract
- 1/4 cup powdered sugar
- 1/2 cup crushed nuts
Instructions
- Heat the heavy cream in a saucepan until it simmers.
- Remove from heat and add the chocolate chips. Stir until melted.
- Add vanilla extract and powdered sugar. Mix well.
- Pour the mixture into a mold.
- Sprinkle crushed nuts on top.
- Refrigerate until set, about 2 hours.
- Remove from mold and serve.
Notes
- Use high-quality chocolate for best results.
- Store chocolates in a cool, dry place.
- Experiment with different toppings like sea salt or dried fruit.
- Prep Time: 15 minutes
- Cook Time: 5 minutes
- Category: Dessert
- Method: No-bake
- Cuisine: American
Nutrition
- Serving Size: 1 piece
- Calories: 120
- Sugar: 10g
- Sodium: 5mg
- Fat: 8g
- Saturated Fat: 5g
- Unsaturated Fat: 3g
- Trans Fat: 0g
- Carbohydrates: 12g
- Fiber: 1g
- Protein: 2g
- Cholesterol: 10mg
Keywords: valentines chocolate, homemade chocolate, chocolate recipe


