
Nothing says “Christmas is here!” quite like the smell of traditional Christmas cookies baking in the oven. That sweet, buttery scent filling the house takes me straight back to childhood—standing on a chair next to my mom, flour dusting my nose as we cut out snowflakes and decorated them with rainbow sprinkles. These classic cookies have been my family’s holiday signature for generations.
What I love most about traditional Christmas cookies is how they bring people together. Whether you’re baking with kids, gifting tins to neighbors, or setting out a plate for Santa (with extra for you, of course), these simple treats create moments you’ll cherish. The recipe I’m sharing today is my great-aunt’s version—just sweet enough, perfectly crisp at the edges, and ready for whatever festive decorations your heart desires. Trust me, one bite will have you saying, “Now this tastes like Christmas!”
Why You’ll Love These Traditional Christmas Cookies
Oh, where do I even start? These cookies are pure holiday magic—the kind that makes your kitchen smell like Santa’s workshop and brings everyone running when the timer dings. Here’s why they’ve been my go-to for years:
- Buttery bliss: That first bite melts in your mouth with rich, sweet perfection (I may or may not sneak extra dough…)
- Decorator’s dream: Flat tops mean sprinkles stick like glitter on a snow globe—kids go wild with the icing tubes!
- Gift-worthy goodness: Stack them in cellophane bags with ribbon, and boom—instant neighbor/friend/co-worker brownie points.
- Easy-peasy: No fancy techniques here, just good old-fashioned mixing and baking (perfect for chaotic holiday schedules).
Seriously, these cookies are like edible holiday cheer—impossible not to love!
Ingredients for Traditional Christmas Cookies
Gathering the right ingredients is like assembling Santa’s sleigh—everything needs to work together perfectly! Here’s what you’ll need for cookies that’ll have everyone begging for the recipe (measurements matter, so no eyeballing!):
- 2 1/4 cups all-purpose flour – Spooned and leveled, not packed (trust me, this makes all the difference for tender cookies)
- 1/2 teaspoon baking powder – The secret lift that keeps them from turning into hockey pucks
- 1/4 teaspoon salt – Just enough to make the flavors pop without tasting salty
- 3/4 cup unsalted butter, softened – Leave it out for 30 minutes—it should dent gently when pressed (no microwave shortcuts!)
- 3/4 cup granulated sugar – Regular white sugar gives that classic crisp edge we all love
- 1 large egg – Crack it into a separate bowl first—no shell surprises!
- 1 teaspoon vanilla extract – The good stuff, please! Imitation vanilla just won’t give you that cozy holiday flavor
- 1/2 teaspoon almond extract (optional) – My grandma’s special touch—adds a warm, nutty note that’s divine
- Assorted sprinkles and icing for decoration – Go wild! I’m partial to red and green sanding sugar myself
Pro tip: Measure everything before you start—it’s called “mise en place” and makes you feel fancy while preventing mid-mix panic. Now let’s make some magic!
Equipment You’ll Need
No fancy gadgets required—just the basics that make baking these traditional Christmas cookies a breeze (and cleanup easier too!):
- Mixing bowls – One for dry ingredients, one for creaming butter and sugar (I use my favorite chipped red one—it’s lucky!)
- Electric mixer – A hand mixer works perfectly, though I’ve been known to go old-school with a wooden spoon when the mood strikes
- Baking sheets – Two standard sheets keep the cookie assembly line moving
- Parchment paper – No-stick magic that also saves you from scrubbing pans
- Measuring cups/spoons – Precision matters for that perfect texture
- Spatula – For scraping every last bit of dough (no waste allowed!)
How to Make Traditional Christmas Cookies
Okay, let’s get baking! These steps are foolproof—I’ve made them so many times I could do it in my sleep (and maybe have during late-night holiday baking marathons). Follow along, and you’ll have perfect traditional Christmas cookies in no time!
Step 1: Mix Dry Ingredients
First things first—get your dry team ready! In a medium bowl, whisk together the flour, baking powder, and salt. I like to whisk for a good 30 seconds to make sure everything’s evenly distributed. No sifting needed unless your flour’s lumpy (we’ve all been there with that bag at the back of the pantry). Set this aside—it’ll join the party soon!
Step 2: Cream Butter and Sugar
Now for the magic—creaming the butter and sugar. Using your electric mixer, beat the softened butter and sugar on medium speed for about 2-3 minutes. You’ll know it’s ready when the mixture turns pale yellow and looks fluffy like clouds. Scrape down the bowl halfway through—those sneaky uncreamed bits love to hide at the bottom!
Step 3: Add Wet Ingredients
Time to bring in the wet ingredients! Beat in the egg until fully incorporated—about 30 seconds. Then add both extracts (vanilla and almond if you’re using it) and mix just until combined. The batter should smell amazing by now—that’s how you know it’s working!
Step 4: Combine and Shape Dough
Here’s where gentle hands matter. Gradually add the dry ingredients to the wet, mixing on low speed just until no flour streaks remain. Overmixing makes tough cookies, and we want tender! The dough should be soft but not sticky. If it is, chill for 15 minutes. Then roll into 1-inch balls—about the size of a walnut—and place them 2 inches apart on parchment-lined baking sheets. Flatten slightly with a glass dipped in sugar for that perfect cookie shape.
Step 5: Bake and Decorate
Pop those beauties into your preheated 375°F oven for 8-10 minutes. Watch for golden edges—that’s your cue they’re done! They’ll look slightly soft in the center but firm up as they cool. Let them rest on the baking sheet for 2 minutes before transferring to a wire rack. Now the fun part—decorate while still slightly warm so sprinkles stick! Icing, sanding sugar, or even a simple dusting of powdered sugar all work wonders. Then try not to eat them all before the guests arrive!
Tips for Perfect Traditional Christmas Cookies
After years of baking these cookies (and eating my share of “learning experiences”), here are my can’t-live-without tips:
- Chill if sticky: If the dough sticks to your hands, pop it in the fridge for 15 minutes—cold dough spreads less too!
- Parchment is king: No more stuck cookies or scrubbing pans—worth every penny.
- Decorate while warm: Icing sets perfectly on cookies that are just slightly warm to the touch.
- Rotate pans: Switch racks halfway through baking for even browning (ovens lie sometimes!).
- Taste test: Always sample the first cookie—you know, for quality control purposes!
Ingredient Substitutions and Notes
Life happens, and sometimes you’re halfway through mixing when you realize you’re out of something—don’t panic! Here’s how to adapt my traditional Christmas cookies without losing that holiday magic (but fair warning, the original is still the best!):
Butter Blues
I’ll admit, I side-eye margarine, but in a pinch, you can use equal amounts of salted margarine. Just skip the added salt in the recipe. For dairy-free folks, coconut oil works too—but chill the dough longer since it melts faster. The texture will be slightly different, but hey, they’ll still taste like Christmas!
Flour Fixes
Gluten-free? Swap in a 1:1 gluten-free flour blend (I like the ones with xanthan gum already added). For whole wheat flour, use half whole wheat and half all-purpose—otherwise the cookies get too dense. And if you accidentally pack your flour? Just add a splash more milk to balance it out.
Egg Emergency
Forgot eggs? For each egg, mix 1 tablespoon ground flaxseed with 3 tablespoons water, let it sit for 5 minutes until gooey. Or use 1/4 cup applesauce—it makes the cookies extra soft and gives a subtle fruity note that’s actually lovely with the spices.
Extract Options
No almond extract? Double the vanilla or try a dash of cinnamon instead. If you’re out of vanilla entirely (gasp!), maple syrup or bourbon make fun grown-up twists—use 2 teaspoons instead of 1 tablespoon. Just don’t tell the kids about that last one!
Sugar Swaps
Granulated sugar can be replaced with coconut sugar for a deeper flavor—they’ll be darker in color but still delicious. Powdered sugar works too, but reduce it to 2/3 cup since it’s sweeter. Brown sugar gives a chewier texture that some folks prefer—just know your cookies will spread more.
Remember, baking is part science, part magic—don’t stress if your substitutions change things a bit. The most important ingredient is always the love you mix in!
Storing and Freezing Traditional Christmas Cookies
Here’s my foolproof system for keeping these cookies fresh (because let’s be honest – you’ll want to stash some away from cookie monsters!): Store cooled cookies in an airtight container at room temperature with a slice of bread tossed in – the bread keeps them soft for up to a week. To freeze, layer cookies between parchment paper in freezer bags – they’ll stay perfect for 3 months. Thaw at room temperature for an hour, then decorate if needed. Pro tip: Hide the frozen stash behind the frozen peas – no one looks there!
Nutritional Information
Now, I’m no dietitian (and let’s be real – it’s Christmas cookie season!), but here’s the scoop on what’s in these little bites of joy. Remember, these are estimates and can vary based on your specific ingredients and decorations:
- Serving Size: 1 cookie (about 2 inches across)
- Calories: 120
- Total Fat: 6g (3.5g saturated)
- Cholesterol: 20mg
- Sodium: 25mg
- Total Carbohydrates: 15g
- Sugars: 8g
- Protein: 1.5g
A few notes from my kitchen experiments: The almond extract adds negligible calories but major flavor. Icing and sprinkles will bump up the sugar content (but come on – it’s the holidays!). And if you’re watching portions… well, good luck stopping at just one!
FAQs About Traditional Christmas Cookies
Over the years, I’ve gotten so many questions about these cookies that I could probably write a book! Here are the ones that pop up most often—with my tried-and-true answers (learned the hard way through many batches!):
Can I Make These Cookies Ahead?
Absolutely! The dough freezes beautifully—just roll it into balls, freeze on a baking sheet, then transfer to a freezer bag for up to 3 months. When the holiday rush hits, bake straight from frozen, adding 1-2 extra minutes. Already baked? They’ll stay fresh in an airtight container for a week, though good luck keeping them around that long!
Why Are My Cookies Too Crumbly?
Oh honey, I’ve been there! Usually it means either too much flour (always spoon and level, never scoop!) or overmixed dough. Next time, stop mixing as soon as the flour disappears, and if your dough seems dry, add a teaspoon of milk. Crumbly cookies still taste amazing dunked in milk—my nephew calls them “cookie cereal!”
How Do I Prevent Spreading?
Three simple tricks: 1) Make sure your butter is softened, not melted 2) Chill sticky dough for 15 minutes before baking 3) Always use cool baking sheets between batches. If they still spread, try reducing the sugar slightly—sometimes humidity plays tricks on us!
Can I Use Cookie Cutters With This Dough?
You can! Just chill the dough for at least 1 hour first, then roll between parchment paper to 1/4-inch thickness. Cut shapes, freeze for 10 minutes on the pan before baking. They won’t hold super sharp edges like sugar cookies, but you’ll get adorable rustic shapes—perfect for when kids “help” with decorating!
Nothing makes me happier than seeing your holiday baking adventures! Tag me in your cookie photos—I want to see your sprinkle masterpieces and creative icing designs (and maybe steal some decorating ideas for next year!). Did you add a special twist to the recipe? Found the perfect gift packaging? Had a hilarious baking fail that still tasted amazing? Share it all in the comments below or use #ChristmasCookieMagic so we can celebrate together.
These traditional Christmas cookies have brought so much joy to my family over the years, and I’d love to hear how they become part of your holiday traditions too. Leave a rating if you tried the recipe—your feedback helps other bakers know what to expect. Most importantly, take a moment to enjoy your delicious creations with loved ones. That’s what holiday baking is really all about!
P.S. If you catch me posting cookie pics at 2am during my annual holiday baking marathon… no you didn’t. 🎄🍪
Print
Irresistible Traditional Christmas Cookies Recipe in Just 8 Steps
- Total Time: 25 minutes
- Yield: 24 cookies 1x
- Diet: Vegetarian
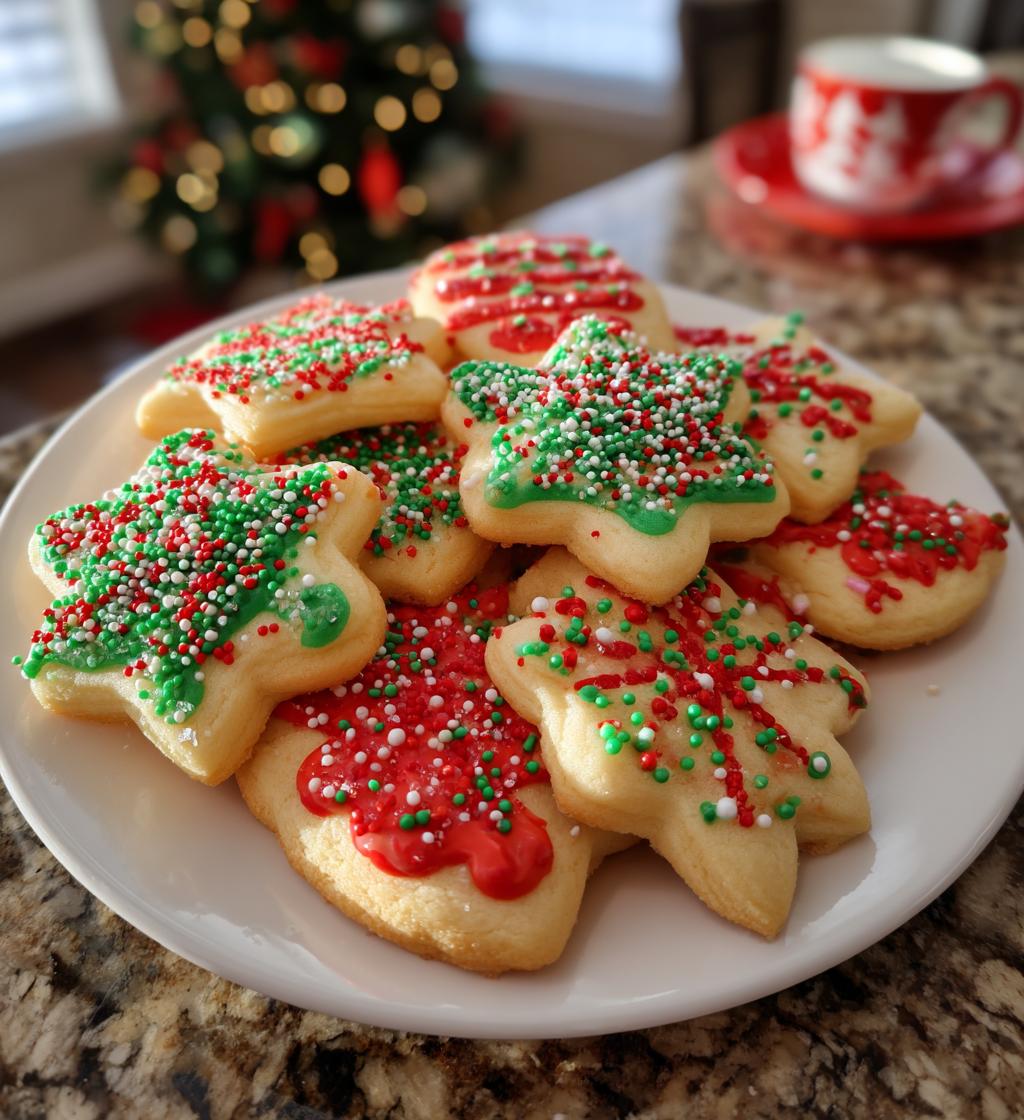
Description
Classic Christmas cookies with a buttery, sweet flavor and festive decorations.
Ingredients
- 2 1/4 cups all-purpose flour
- 1/2 teaspoon baking powder
- 1/4 teaspoon salt
- 3/4 cup unsalted butter, softened
- 3/4 cup granulated sugar
- 1 large egg
- 1 teaspoon vanilla extract
- 1/2 teaspoon almond extract (optional)
- Assorted sprinkles and icing for decoration
Instructions
- Preheat oven to 375°F (190°C).
- Whisk flour, baking powder, and salt in a bowl.
- Cream butter and sugar until fluffy.
- Beat in egg and extracts.
- Mix in dry ingredients gradually.
- Roll dough into 1-inch balls and place on baking sheets.
- Flatten slightly with a glass dipped in sugar.
- Bake for 8-10 minutes until edges are golden.
- Decorate with icing and sprinkles while warm.
Notes
- Chill dough for 30 minutes if too soft.
- Use parchment paper for easy cleanup.
- Store in an airtight container for up to a week.
- Prep Time: 15 minutes
- Cook Time: 10 minutes
- Category: Dessert
- Method: Baking
- Cuisine: American
Nutrition
- Serving Size: 1 cookie
- Calories: 120
- Sugar: 8g
- Sodium: 25mg
- Fat: 6g
- Saturated Fat: 3.5g
- Unsaturated Fat: 2g
- Trans Fat: 0g
- Carbohydrates: 15g
- Fiber: 0.3g
- Protein: 1.5g
- Cholesterol: 20mg
Keywords: Christmas cookies, holiday baking, festive cookies, butter cookies


