
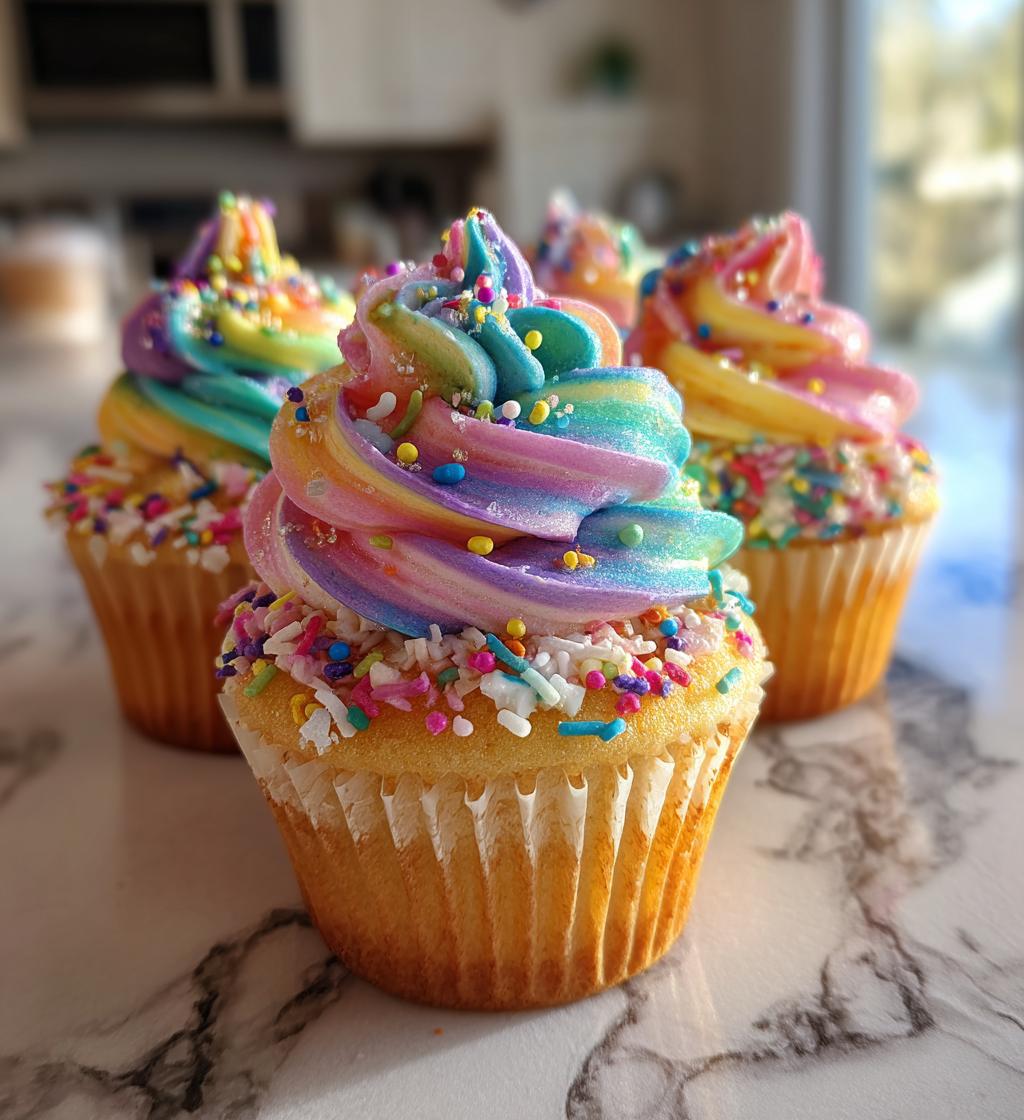
Ah, spring! A season bursting with color, life, and the promise of warmer days. It’s the perfect time to celebrate, and what better way to do that than with *spring cupcakes*? These delightful little treats are not just a feast for the eyes but also a party for your taste buds. I can hardly contain my excitement when I whip up a batch; the vibrant colors and fluffy texture remind me of blooming flowers and sunny picnics. Trust me, there’s something magical about biting into a cupcake that looks as bright and cheerful as a spring day!
Whether you’re hosting a garden party, celebrating a birthday, or just indulging in a sweet moment, these colorful cupcakes fit right in. They’re easy to make and even easier to customize, so you can let your creativity shine. Picture this: a table filled with an array of pastel-colored cupcakes, each topped with fluffy buttercream and shimmering sprinkles. It’s a scene that invites everyone to dig in and savor the season. So, let’s dive into this delicious recipe that’s bound to bring smiles and joy to any spring gathering!
Ingredients List
To whip up a batch of those delightful *spring cupcakes*, you’ll need the following ingredients:
- 1 1/2 cups all-purpose flour
- 1 cup granulated sugar
- 1/2 cup unsalted butter, softened to room temperature
- 2 large eggs
- 1/2 cup milk
- 2 teaspoons baking powder
- 1 teaspoon vanilla extract
- 1/4 teaspoon salt
- Food coloring (various colors to make those cupcakes pop!)
- Buttercream frosting (homemade or store-bought, your choice!)
- Sprinkles for decoration (because what’s a cupcake without sprinkles?)
With these simple ingredients, you’re just a few steps away from creating colorful delights that are sure to brighten up any spring celebration!
How to Prepare Instructions
Alright, let’s get down to the fun part – making those scrumptious *spring cupcakes*! This step-by-step process is straightforward, and soon you’ll have a batch of colorful delights to enjoy. Just follow along, and before you know it, your kitchen will be filled with sweet aromas and vibrant colors!
Preparing the Batter
First things first, preheat your oven to 350°F (175°C). Trust me, getting that oven nice and toasty is crucial for perfectly baked cupcakes! While that’s warming up, grab a mixing bowl and whisk together the flour, baking powder, and salt. This step ensures that your dry ingredients are well combined and ready to make magic happen.
In another bowl, beat the softened butter and granulated sugar together until the mixture is light and fluffy. This usually takes about 3-4 minutes. You’ll know it’s ready when it looks like creamy clouds! Next, add in those two large eggs and the vanilla extract, mixing until everything is well combined.
Now, it’s time to bring it all together! Gradually add the dry ingredient mixture to your wet ingredients while alternating with the milk. Start and finish with the dry ingredients. This method helps keep the batter smooth and avoids lumps. Mix just until combined; we don’t want to overdo it!
Coloring the Cupcake Batter
Now comes the fun part! Divide the batter into separate bowls, depending on how many colors you want to use. I usually go for four or five vibrant shades. Add a few drops of food coloring to each bowl, and mix until you achieve your desired hues. If you’re aiming for bright colors, gel food coloring works wonders! It’s super concentrated, so a little goes a long way.
For a marbled effect, don’t worry about mixing the colors completely – just swirl them gently together in the bowl. This way, each cupcake will turn out uniquely beautiful!
Baking the Cupcakes
Line your cupcake pan with liners and start spooning in the colored batter. Fill each liner about two-thirds full, leaving some room for the cupcakes to rise. Pop them into your preheated oven and bake for 18-20 minutes. To check for doneness, insert a toothpick into the center of one cupcake. If it comes out clean or with just a few crumbs, you’re golden!
Once baked, let them cool in the pan for about 5 minutes before transferring them to a wire rack. Allow them to cool completely before frosting. Patience is key here! We don’t want melted frosting on warm cupcakes, do we?
Frosting and Decorating
Now that your cupcakes are cool and ready, it’s time to frost! Use your favorite buttercream frosting – whether homemade or store-bought, it’s all good in my book. I like to use a piping bag for a fun swirl, but a simple knife will do just fine, too!
Once frosted, it’s time to let your creativity shine with sprinkles! Sprinkle them generously on top; they add that festive touch that screams spring! You can even mix and match different types of sprinkles to make them extra special.
And voilà! You now have a batch of beautiful *spring cupcakes* ready to dazzle your friends and family. Enjoy every colorful bite!
Why You’ll Love This Recipe
These *spring cupcakes* are not just a treat for your taste buds but also a delight for your eyes! Here are a few reasons why this recipe is sure to become a favorite:
- Easy to follow: The steps are simple and straightforward, making it perfect for both novice bakers and seasoned pros!
- Quick preparation time: You can whip up a batch in about 40 minutes, so you can satisfy those sweet cravings in no time!
- Perfect for celebrations: Whether it’s a birthday, a garden party, or just a sunny afternoon, these colorful cupcakes bring joy to any occasion!
- Colorful and fun: With vibrant hues and sprinkles galore, they’re a feast for the eyes as much as they are for the palate.
- Versatile for different occasions: You can easily customize the flavors and decorations to fit any theme or event. Change it up for holidays or special gatherings!
Trust me, once you make these cupcakes, you’ll want to share them at every opportunity. They’re not just cupcakes; they’re little bundles of joy!
Tips for Success
To ensure your *spring cupcakes* turn out perfectly every time, here are some essential tips that I’ve learned along the way. Trust me, these little tricks will elevate your baking game and give you those gorgeous, colorful results you’re dreaming of!
Use gel food coloring for vibrant colors
If you want your cupcakes to really pop, opt for gel food coloring instead of liquid. Gel colors are more concentrated, meaning you need just a tiny bit to achieve those bright, stunning shades. Plus, they won’t change the consistency of your batter like liquid colors can. Just a few drops will do the trick!
Store cupcakes properly
Once your *spring cupcakes* are frosted and decorated, you’ll want to store them correctly to keep them fresh. Place them in an airtight container at room temperature for up to three days. If you have leftovers (which is rare with these beauties!), you can refrigerate them, but let them come back to room temperature before serving. This helps keep the frosting nice and creamy!
Achieving a marbled effect
If you’re aiming for that dreamy marbled look, don’t stress about mixing the colors too much! When you’re adding the food coloring, just swirl it gently with a toothpick or knife into the batter before spooning it into the liners. The key is to keep some definition between the colors, so each cupcake has its own unique pattern. It’s all about that playful spring vibe!
Don’t overmix the batter
When combining your wet and dry ingredients, remember: less is more! Overmixing can lead to dense cupcakes, and we want light, fluffy ones! Mix just until you see no more dry flour. A few lumps are totally okay – they’ll bake out beautifully.
With these tips, you’re all set to create the most delightful *spring cupcakes* that will impress everyone at your celebration. Happy baking!
Variations
While these *spring cupcakes* are already a delightful treat, there’s always room for a little creativity! Here are some fun variations you can try to mix things up and make them even more special for your celebrations:
Different Flavors
Why not switch up the flavor profile? You can easily transform these cupcakes by incorporating different extracts or add-ins:
- Citrus Burst: Add the zest of lemons or oranges to the batter for a fresh, zesty kick. A hint of lemon extract can also brighten up the flavor!
- Chocolate Delight: Replace 1/4 cup of flour with cocoa powder for rich chocolate cupcakes. Top with chocolate buttercream for a double chocolate treat!
- Almond Joy: Swap vanilla extract with almond extract and toss in some chopped nuts or chocolate chips for a delightful twist.
- Carrot Cake: Mix in some grated carrots and crushed pineapple for a spring-inspired carrot cake version. Don’t forget the cream cheese frosting!
Alternative Frostings
Frosting can make or break your cupcake experience! Here are some alternative frosting ideas that can elevate your *spring cupcakes*:
- Cream Cheese Frosting: Perfect for those carrot cake cupcakes or for a tangy twist that pairs beautifully with any flavor!
- Chocolate Ganache: For a luscious finish, pour some glossy chocolate ganache over the top. It’s indulgent and perfect for chocolate lovers!
- Whipped Cream: Lighten things up with a fluffy whipped cream topping. Add a sprinkle of crushed berries for a fresh touch.
- Fruit-Infused Frosting: Blend in pureed strawberries, raspberries, or even mango into your buttercream for a fruity, vibrant frosting!
Seasonal Decorations
Don’t forget the fun of decorating! Tailor your cupcakes to the season with these decoration ideas:
- Fresh Flowers: Edible flowers like pansies or violets can add a beautiful touch to your cupcakes. Just make sure they’re safe to eat!
- Fruit Toppers: Decorate with slices of fresh fruit like strawberries, kiwi, or citrus for a burst of color and flavor.
- Seasonal Sprinkles: Change up your sprinkles based on the holiday or season. Think pastel colors for Easter or vibrant shades for a summer picnic!
- Chocolate Shavings: For a touch of elegance, sprinkle some chocolate shavings on top of the frosting. It’s an easy way to elevate the look!
With these variations, you can keep your *spring cupcakes* fresh and exciting for every gathering. Get creative, have fun, and let your baking reflect the beauty of the season!
Nutritional Information Section
When it comes to enjoying your *spring cupcakes*, it’s always good to know what you’re indulging in! However, please keep in mind that the nutritional values can vary based on the specific ingredients and brands you choose. So, while I can provide some typical values, consider them as a general guideline rather than exact measurements.
Here’s what you can expect for each cupcake:
- Calories: 200
- Fat: 8g
- Saturated Fat: 5g
- Sodium: 180mg
- Carbohydrates: 30g
- Fiber: 1g
- Protein: 2g
- Cholesterol: 30mg
- Sugar: 15g
Remember, these values can shift depending on what you use, like different types of frosting or whether you add any special ingredients. So, feel free to adjust and enjoy your delightful *spring cupcakes* with a little flexibility in mind!
FAQ Section
Got questions about making those fabulous *spring cupcakes*? You’re not alone! Here are some common queries that I often get, along with my trusty answers to help you navigate your baking adventure:
Can I make these cupcakes gluten-free?
Absolutely! You can swap out the all-purpose flour for a gluten-free flour blend. Just make sure to choose a blend that has a good balance of starches and flours for the best texture. I recommend adding a little xanthan gum (about 1/4 teaspoon) to help give the cupcakes that fluffy quality we love!
How can I store leftover cupcakes?
If you find yourself with leftover cupcakes (which can be a rare occurrence!), make sure to store them in an airtight container. They’ll stay fresh at room temperature for about three days. If you want to keep them longer, pop them in the fridge, but let them come to room temperature before serving. This keeps the frosting nice and creamy and the cupcakes moist!
What is the best way to frost cupcakes?
Frosting can be as fun as baking! I love using a piping bag with a decorative tip for a lovely swirl, but if you don’t have one, a simple knife works just as well. Just spread the frosting on top and let it flow over the edges for a charming look. For a little extra flair, sprinkle on some colorful toppings right after frosting, so they stick beautifully!
Feel free to ask any other questions you might have. Baking should be enjoyable and stress-free, and I’m here to help you make the most of your *spring cupcakes*! Happy baking!
Serving Suggestions
Now that you’ve whipped up a gorgeous batch of *spring cupcakes*, it’s time to think about how to serve them! These colorful delights are perfect for brightening up any gathering, and pairing them with the right treats can elevate the whole experience. Here are some delightful ideas to consider:
- Fresh Fruit Platter: Serve your cupcakes alongside a vibrant platter of seasonal fruits like strawberries, blueberries, and slices of kiwi. The freshness of the fruit complements the sweetness of the cupcakes beautifully and adds a refreshing touch to your dessert spread.
- Tea or Lemonade: Pair your cupcakes with a refreshing beverage! A nice iced tea or a pitcher of homemade lemonade can be the perfect complement to your sweet treats. The lightness of these drinks balances out the rich frosting and adds a delightful spring vibe.
- Mini Cheesecakes: For a dessert table that impresses, consider adding mini cheesecakes. They’re creamy and rich, offering a nice contrast to the lightness of your cupcakes. Plus, you can decorate them to match your spring theme!
- Chocolate Dipped Pretzels: These salty-sweet snacks can be a fun addition! The crunch of the pretzels and the sweetness of the chocolate create a delightful contrast to your soft, fluffy cupcakes. They also add a nice visual element to your dessert display!
- Spring Salad: If you’re serving these cupcakes at a brunch or outdoor gathering, consider a beautiful spring salad with mixed greens, strawberries, goat cheese, and a light vinaigrette. It’s a great way to balance out the sweetness of the cupcakes while keeping things fresh and light.
With these serving suggestions, your *spring cupcakes* will shine even brighter at any occasion. Whether it’s a tea party, birthday bash, or just a sunny afternoon treat, these ideas will enhance your gathering and leave everyone smiling. Enjoy the festive spirit of spring with every bite!
Print
spring cupcakes That Brighten Your Celebration in 5 Ways
- Total Time: 40 minutes
- Yield: 12 cupcakes 1x
- Diet: Vegetarian
Description
Delicious and colorful cupcakes perfect for spring celebrations.
Ingredients
- 1 1/2 cups all-purpose flour
- 1 cup granulated sugar
- 1/2 cup unsalted butter, softened
- 2 large eggs
- 1/2 cup milk
- 2 teaspoons baking powder
- 1 teaspoon vanilla extract
- 1/4 teaspoon salt
- Food coloring (various colors)
- Buttercream frosting
- Sprinkles for decoration
Instructions
- Preheat your oven to 350°F (175°C).
- In a bowl, mix flour, baking powder, and salt.
- In another bowl, beat butter and sugar until fluffy.
- Add eggs and vanilla; mix until combined.
- Gradually add dry ingredients and milk; mix well.
- Divide batter into separate bowls and add food coloring.
- Spoon colored batter into cupcake liners.
- Bake for 18-20 minutes or until a toothpick comes out clean.
- Let cupcakes cool completely.
- Frost with buttercream and add sprinkles.
Notes
- Store cupcakes in an airtight container.
- Use gel food coloring for brighter colors.
- Mix colors for a marbled effect.
- Prep Time: 20 minutes
- Cook Time: 20 minutes
- Category: Dessert
- Method: Baking
- Cuisine: American
Nutrition
- Serving Size: 1 cupcake
- Calories: 200
- Sugar: 15g
- Sodium: 180mg
- Fat: 8g
- Saturated Fat: 5g
- Unsaturated Fat: 2g
- Trans Fat: 0g
- Carbohydrates: 30g
- Fiber: 1g
- Protein: 2g
- Cholesterol: 30mg
Keywords: spring cupcakes, colorful cupcakes, festive desserts


