
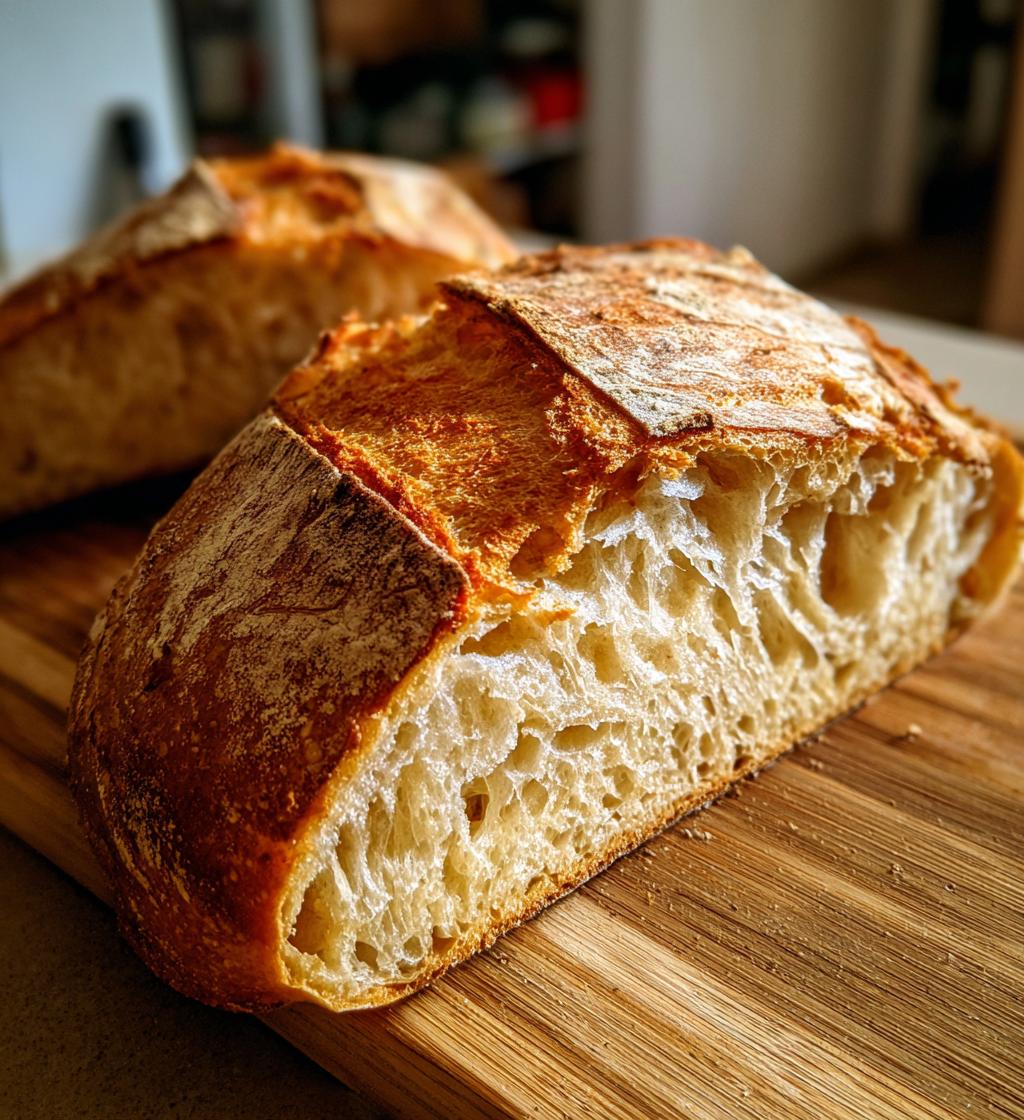
Ah, sourdough bread! There’s something truly magical about it, isn’t there? The way it fills your kitchen with that warm, inviting aroma as it bakes is pure bliss. Sourdough has this wonderful charm that not only makes your home smell amazing but also elevates your baking game to a whole new level. Trust me, once you dive into the world of sourdough, you’ll wonder how you ever lived without it!
This sourdough recipe is as simple as it gets, making it perfect for both beginners and seasoned bakers alike. You don’t need a ton of fancy equipment or complicated techniques. Just a few basic ingredients and a little bit of patience, and you’re on your way to creating something truly delicious. The best part? You get to say, “I made this!” when you share it with friends and family.
There’s a unique satisfaction that comes from crafting your own bread. Each loaf tells a story, and every bite is a testament to your hard work and care. So, get ready to roll up your sleeves and embrace the joy of homemade sourdough! It’s more than just a recipe; it’s an experience that will fill your heart and home with warmth.
Ingredients List
Here’s everything you’ll need to whip up this delightful sourdough bread. I promise, it’s super straightforward! Gather these ingredients, and you’ll be well on your way to baking a beautiful loaf.
- 3 cups all-purpose flour (spooned and leveled for accuracy)
- 1 cup sourdough starter (make sure it’s active and bubbly)
- 1 cup water (room temperature, not too hot or cold)
- 1 teaspoon salt (kosher works best for this recipe)
Just a few simple ingredients, right? You might already have most of these in your pantry! Make sure to measure everything accurately, as it really does make a difference in how your bread turns out. Trust me, you want that gorgeous rise and crust! Now, let’s get baking!
How to Prepare Instructions
Alright, let’s get to the fun part—making your own sourdough bread! I promise, each step is a little adventure, and soon you’ll be savoring the fruits of your labor. Just follow these simple instructions, and you’ll be well on your way to bread-making glory!
Step-by-Step Guide
- Combine 3 cups of all-purpose flour, 1 cup of active and bubbly sourdough starter, and 1 cup of room temperature water in a large mixing bowl.
- Mix everything together until a shaggy dough forms. Don’t worry if it looks a bit messy—that’s totally normal!
- Add in 1 teaspoon of kosher salt and knead the dough on a lightly floured surface for about 10 minutes. You’ll want the dough to become smooth and elastic. It’s a bit of a workout, but it’s so worth it!
- Now, place the kneaded dough in a lightly greased bowl, cover it with a damp cloth or plastic wrap, and let it rise for 4-6 hours. You’re looking for it to double in size—just be patient and let the magic happen!
- Once it’s risen, gently shape the dough into a round loaf. Let it rest on the counter for about 30 minutes. This is a great time to preheat your oven to 450°F (232°C). Get that oven nice and hot!
- When the oven is ready, carefully place the shaped dough on a baking sheet or in a Dutch oven lined with parchment paper. This makes for easier cleanup and helps prevent sticking.
- Bake for 30-35 minutes until the bread is golden brown and sounds hollow when you tap the bottom. Oh, just wait until you catch that heavenly aroma wafting through your kitchen—it’ll make your heart sing!
And there you have it! Fresh, homemade sourdough bread that you made with your own two hands. Isn’t that just the best feeling? Don’t forget to let it cool before slicing—if you can resist the temptation! Enjoy every warm, crusty bite!
Nutritional Information
Let’s talk nutrition! Here’s the estimated nutritional data for one delicious slice of this homemade sourdough bread. Keep in mind that these values are approximations, but they give you a good idea of what you’re indulging in!
- Calories: 150
- Fat: 1g
- Saturated Fat: 0g
- Unsaturated Fat: 0g
- Trans Fat: 0g
- Sodium: 200mg
- Carbohydrates: 30g
- Fiber: 1g
- Protein: 5g
- Sugar: 0g
- Cholesterol: 0mg
This hearty bread is not only satisfying but also made with wholesome ingredients. It’s perfect for sandwiches, toast, or just enjoying on its own! So, go ahead and enjoy that warm slice—you deserve it!
Why You’ll Love This Recipe
There are so many reasons to fall head over heels for this sourdough recipe! Here are just a few that I’m sure will convince you to give it a try:
- Easy to follow: The steps are straightforward, making it perfect for beginners and experienced bakers alike. You won’t feel overwhelmed at all!
- Delicious homemade flavor: There’s nothing quite like the taste of fresh, homemade sourdough bread. It has that perfect balance of tanginess and warmth that you just can’t replicate with store-bought bread.
- Perfect for sandwiches or toast: Whether you’re slapping together a classic sandwich or toasting it up with some butter, this bread is versatile and delicious every time!
- Healthy ingredients: With just a few simple, wholesome ingredients, you know exactly what’s going into your bread. No preservatives or strange additives—just pure goodness!
- Customizable with additional flavors: Get creative! You can easily add herbs, seeds, or even cheese to make this bread uniquely yours. The possibilities are endless!
I can’t wait for you to experience the joy of making and sharing this bread. Trust me, it’s a game-changer!
Tips for Success
Alright, friends! Let’s talk about how to make sure your sourdough bread turns out perfectly every single time. I’ve gathered my favorite tips that I’ve learned from experience (and a few delightful mishaps along the way). These little nuggets of wisdom will set you up for success, so pay attention!
Handling Your Dough
First things first, be gentle with your dough! It’s like a little living thing that needs some love. When you’re kneading, don’t go overboard—just enough to get that smooth and elastic texture. If it’s too sticky, sprinkle a bit of flour on your work surface, but try not to add too much. You want that perfect hydration for a lovely crumb!
Monitoring Rise Times
Ah, the rise! It’s where the magic happens. Don’t rush it! Every kitchen is different, so your dough might need a bit more or less time to rise depending on the temperature and humidity. I usually check it every hour after the first three hours. Look for it to double in size and feel slightly puffy—this is your go-ahead to move on to shaping!
Achieving the Ideal Crust
To get that gorgeous crust, steam is your best friend! If you’re using a Dutch oven, it helps trap steam, which makes your crust nice and crispy. If you’re baking on a baking sheet, try placing a pan of hot water at the bottom of your oven while it preheats. This creates steam, which gives you that bakery-quality crust that’s hard to resist!
Cooling Your Bread
Once your bread is out of the oven, let it cool on a wire rack. This is crucial! I know it’s hard to resist the smell and the temptation to slice right in, but cooling helps the structure set and enhances the flavor. If you slice it too soon, you might end up with a gummy texture. Patience, my friend!
With these tips in your pocket, you’re well on your way to sourdough success! Baking bread is as much about intuition as it is about following a recipe, so trust your instincts and enjoy the process. Happy baking!
Variations
One of the best things about sourdough bread is its versatility! You can easily customize this recipe to suit your taste or to mix things up a bit. Here are some fun and delicious variations to inspire your next baking adventure:
- Herb-Infused Sourdough: Add a tablespoon or two of your favorite fresh herbs—like rosemary, thyme, or basil—into the dough during mixing. It adds a delightful aroma and flavor that pairs beautifully with soups and salads!
- Seeded Sourdough: Toss in sunflower seeds, pumpkin seeds, or sesame seeds for a delightful crunch. You can add about half a cup to the dough right before the kneading stage. Trust me, it’ll give your bread a fantastic texture!
- Cheesy Delight: Who doesn’t love a little cheese? Fold in shredded cheese, like cheddar or Parmesan, during the mixing stage. It adds richness and a savory flavor that makes for an irresistible loaf!
- Whole Wheat Sourdough: Swap out a cup of all-purpose flour for whole wheat flour for a heartier and more nutritious bread. It gives the sourdough a lovely nutty flavor and is a fantastic option for those looking to incorporate more whole grains into their diet.
- Dried Fruit and Nut Sourdough: For a sweet twist, add chopped dried fruits like cranberries or apricots and a handful of nuts, such as walnuts or pecans, into the mix. This variation is perfect for breakfast or as a snack!
- Spice It Up: Experiment with spices like cinnamon or nutmeg for a warm, spiced flavor. Just a teaspoon or two can transform your loaf into a delightful treat that’s perfect for toasting!
Feel free to get creative! Each variation allows you to explore different flavor profiles and textures. The best part? You’ll still have that wonderful sourdough base to build upon. Happy experimenting, and I can’t wait to hear about your tasty creations!
Storage & Reheating Instructions
So, you’ve baked this beautiful loaf of sourdough, and now you’re wondering how to store it for maximum freshness. Don’t worry, I’ve got you covered! Proper storage is key to keeping your bread delicious and avoiding that dreaded stale texture.
First off, let your sourdough bread cool completely on a wire rack before you wrap it up. This step is so important because it prevents moisture from building up inside, which can lead to a soggy loaf. Once it’s cooled, you have a few options for storing it:
- Short-Term Storage: If you plan to eat your sourdough within a few days, simply wrap it in a clean kitchen towel or place it in a paper bag. This method allows the bread to breathe and keeps the crust nice and crispy.
- Long-Term Storage: For longer storage, slice your bread and place the slices in an airtight container or a resealable plastic bag. You can also wrap the whole loaf tightly in plastic wrap and then place it in a freezer bag. Just make sure to squeeze out as much air as possible to prevent freezer burn!
Now, when it comes to reheating your sourdough bread, you want to bring back that fresh-baked taste and texture. Here’s how to do it:
- Toaster or Oven: For sliced bread, pop it in the toaster or reheat in a preheated oven at 350°F (175°C) for about 10-15 minutes. This will help revive that lovely crust and warm the inside. If you’re reheating a whole loaf, wrap it in foil to keep it from getting too crusty, and heat for about 20-25 minutes.
- Stovetop Method: If you want that crust to be extra crispy, you can also try the stovetop method. Just sprinkle a little water on the surface of the bread and place it in a hot skillet, covering it with a lid for a few minutes. This will create steam and help warm it up perfectly!
And there you have it! With these storage and reheating tips, you can enjoy your homemade sourdough bread for days to come. So, go ahead and make that delicious toast or sandwich—you’ve earned it!
FAQ Section
Got questions? No problem! Here are some of the most common queries I’ve encountered about sourdough bread, along with my answers. Let’s clear up any confusion so you can bake with confidence!
What is a sourdough starter?
A sourdough starter is a mixture of flour and water that has fermented over time, capturing wild yeast and bacteria from the environment. This magical mixture is what gives sourdough bread its delightful tangy flavor and helps it rise. Think of it as your bread’s best friend! Make sure it’s active and bubbly before using it in your recipe for the best results.
How do I know when the dough has risen enough?
Great question! The dough is ready when it has doubled in size and feels puffy to the touch. You can do a simple “poke test” by gently pressing your finger into the dough. If the indentation stays and doesn’t spring back immediately, you’re good to go! Just remember, every kitchen is different, so trust your instincts and don’t rush it.
Can I use whole wheat flour?
Absolutely! Whole wheat flour can be a fantastic option. Just keep in mind that it will give your bread a denser texture and a nuttier flavor. I recommend starting with a 50/50 mix of all-purpose and whole wheat flour to see how you like it. Adjusting the hydration might be necessary since whole wheat flour absorbs more water, so keep an eye on the dough’s consistency!
What should I do if my bread is too dense?
If your bread turns out dense, don’t fret! It could be due to several factors, like not enough rise time or using an inactive starter. Make sure your sourdough starter is bubbly and at its peak when you bake. Also, check your kneading technique—ensure you’re developing that gluten properly. If all else fails, don’t hesitate to turn it into breadcrumbs or croutons for future meals!
Feel free to reach out if you have more questions! Baking is a journey, and I’m here to help you every step of the way. Happy sourdough baking!
Print
Sourdough Recipes: 7 Secrets to Perfect Artisan Bread
- Total Time: 6 hours
- Yield: 1 loaf 1x
- Diet: Vegetarian
Description
A simple and delicious sourdough bread recipe.
Ingredients
- 3 cups all-purpose flour
- 1 cup sourdough starter
- 1 cup water
- 1 teaspoon salt
Instructions
- Combine flour, sourdough starter, and water in a bowl.
- Mix until a dough forms.
- Add salt and knead the dough for 10 minutes.
- Let the dough rise for 4-6 hours until doubled in size.
- Shape the dough and let it rest for 30 minutes.
- Preheat the oven to 450°F (232°C).
- Bake for 30-35 minutes until golden brown.
Notes
- Use a kitchen scale for accurate measurements.
- Adjust water based on humidity.
- Allow the bread to cool before slicing.
- Prep Time: 30 minutes
- Cook Time: 35 minutes
- Category: Baked Goods
- Method: Baking
- Cuisine: American
Nutrition
- Serving Size: 1 slice
- Calories: 150
- Sugar: 0g
- Sodium: 200mg
- Fat: 1g
- Saturated Fat: 0g
- Unsaturated Fat: 0g
- Trans Fat: 0g
- Carbohydrates: 30g
- Fiber: 1g
- Protein: 5g
- Cholesterol: 0mg
Keywords: sourdough recipes


