
There’s nothing quite like the smell of bread baking in the oven—especially when it’s this garlic rosemary skillet bread. The moment those earthy rosemary and garlic aromas hit your nose, you know you’re in for something special. I first fell in love with this recipe when my cast iron skillet became my best baking buddy—no fancy equipment needed, just simple ingredients and that magical crispy-on-the-outside, soft-on-the-inside texture we all crave. This rustic loaf tastes like it came straight from a Mediterranean kitchen, yet it’s so easy you’ll want to make it weekly (trust me, I do!).
Why You’ll Love This Rustic Garlic Rosemary Skillet Bread
This bread is the kind of recipe that makes you feel like a kitchen hero with minimal effort. Here’s why it’s about to become your go-to:
- Effortless magic: No fancy kneading skills needed—just mix, rise, and bake. Even beginners nail this one.
- Aroma therapy: The garlic and rosemary will make your kitchen smell like an Italian bakery (warning: neighbors might drop by).
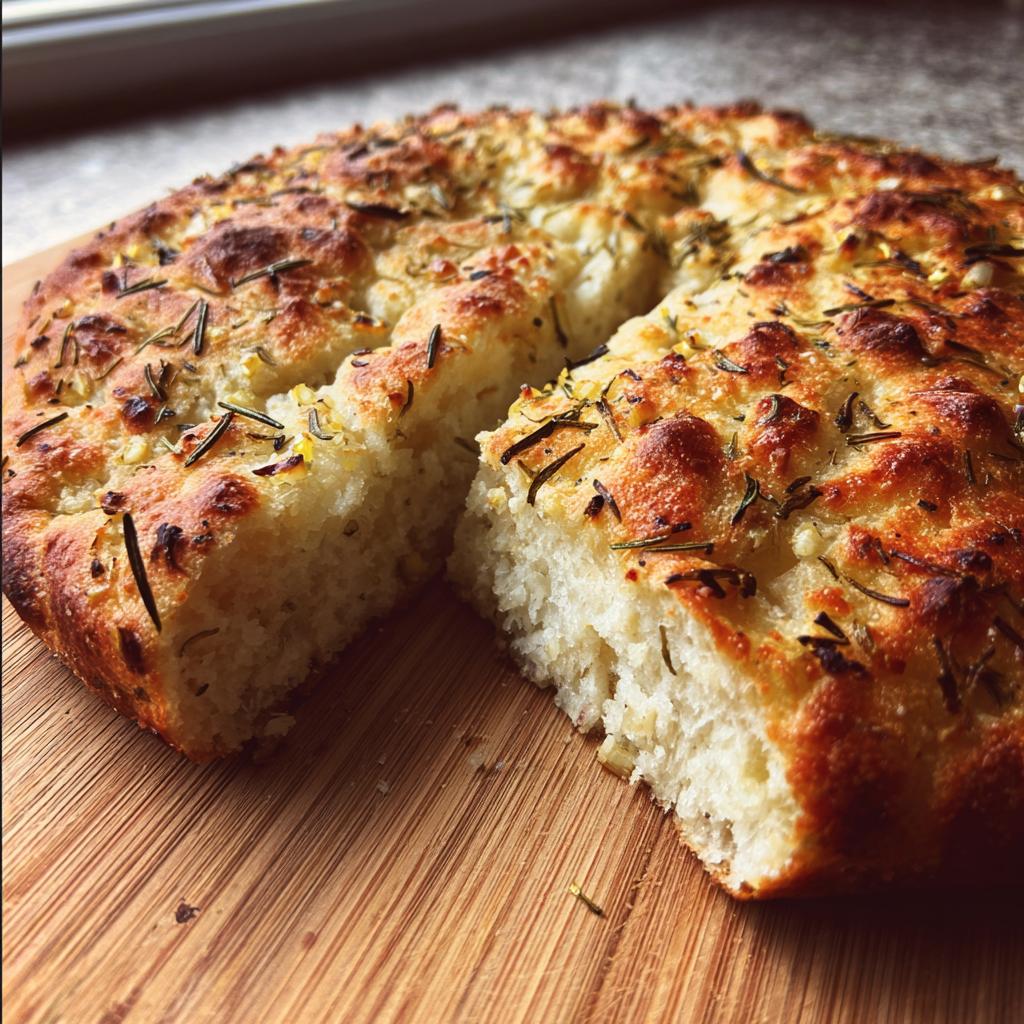
- Textural dream: Crackly golden crust gives way to a pillowy-soft center—every bite’s a little celebration.
- Versatile star: Equally happy next to soups, dipped in olive oil, or just torn apart warm with your hands (no judgment here).
Ingredients for Rustic Garlic Rosemary Skillet Bread
This bread keeps it simple with pantry staples—but each one plays a starring role. Here’s what you’ll need:
- 3 cups all-purpose flour (spooned & leveled—don’t scoop!)
- 1 tsp salt (I use fine sea salt for even distribution)
- 1 tbsp fresh rosemary, chopped (see notes below for dried sub)
- 3 cloves garlic, minced (about 1 tbsp—or go wild with an extra clove)
- 1 tsp active dry yeast (that little packet has big power)
- 1 1/4 cups warm water (think baby-bottle warm, around 110°F)
- 2 tbsp olive oil (plus extra for greasing the bowl)
Ingredient Notes & Substitutions
Rosemary: Fresh is best here—it infuses the bread with bright, piney notes. If you must use dried, halve the amount (1 ½ tsp) since it’s more concentrated. Rub it between your fingers first to wake up the oils.
Yeast: Active dry yeast works perfectly, but instant yeast is fine too (use the same amount). Just skip the 5-minute frothing step—mix it right into the dry ingredients.
Flour swaps: For whole wheat, replace up to half the all-purpose flour. Fully gluten-free? A 1:1 GF blend can work, but expect a denser crumb (add 1 tsp xanthan gum if your blend doesn’t include it).
Olive oil: Regular is great, but a fruity extra-virgin gives deeper flavor. In a pinch, melted butter works too—just know the crust won’t get quite as crackly.
How to Make Rustic Garlic Rosemary Skillet Bread
This is where the magic happens—turning simple ingredients into golden, fragrant perfection. Don’t let the word “bread” intimidate you. I’ve broken it down into foolproof steps that even my 12-year-old niece can follow (she’s made this three times already!). The key? Trust the process—especially that glorious rise time.
Step 1: Mixing the Dough
First, grab your biggest mixing bowl—this dough likes to stretch its legs. Whisk together the flour, salt, rosemary, and garlic like you’re making confetti (those rosemary flecks peeking through the flour? That’s flavor confetti!). In a separate cup, stir the yeast into warm water and let it sit until it looks foamy, about 5 minutes. This is your yeast’s “wake-up call”—if it doesn’t bubble, your yeast might be sleepy (aka expired). Pour this yeasty water and the olive oil into the dry ingredients, then stir with a wooden spoon until it forms a shaggy ball. The dough should look rough and sticky—that’s perfect! We’re not going for smooth yet.
Step 2: Kneading & First Rise
Now, flour your hands and the counter like you’re preparing for a mini workout. Dump the dough out and knead it by pushing it away with the heel of your hand, then folding it back over itself. Do this for about 5 minutes—you’ll feel it transform from sticky mess to smooth, elastic dough. When it springs back slightly when poked, it’s ready. Wipe out the mixing bowl, drizzle in a little olive oil, and plop the dough back in, turning to coat it all over. Cover with a damp towel and let it rise in a warm spot (I use my oven with just the light on) until doubled—about 1 hour. Patience is key here—let that gluten network build!
Step 3: Shaping & Baking
About 30 minutes before your dough is done rising, preheat your oven to 425°F (220°C) with the cast iron skillet inside—this gives it time to get screaming hot. When the dough is puffy and jiggly, punch it down (so satisfying!) and shape it into a round loaf by tucking the edges underneath. Carefully remove the hot skillet (oven mitts, please!), drizzle in a teaspoon of olive oil, and plop in your dough. It’ll sizzle slightly—that’s the start of your crust! Slash the top with a sharp knife (this lets it expand beautifully) and bake for 25-30 minutes until it’s deeply golden and sounds hollow when tapped. That crackly exterior? Worth every second.
Tips for Perfect Rustic Garlic Rosemary Skillet Bread
After making this bread more times than I can count (my neighbors keep “volunteering” as taste testers), I’ve picked up some game-changing tricks. These little nuggets of wisdom will take your skillet bread from good to “can I have the recipe?” greatness:
Yeast check-in: Before you commit, make sure your yeast is alive and kicking! If your warm water-yeast mixture doesn’t get frothy after 5 minutes, your yeast might be past its prime. I keep an extra packet in the fridge just in case—bread emergencies are real!
Flour with finesse: When kneading, add just enough flour to prevent sticking—about a tablespoon at a time. Too much flour makes the bread dense. The dough should still feel slightly tacky, like a post-it note, not dry. I always say, “Better sticky than sorry!”
Crust control: Want extra crackle? For the last 5 minutes of baking, I sometimes switch to broil (watch it like a hawk!). Or, spritz the loaf with water right before baking—the steam creates that artisanal blistered crust we all love.
Garlic placement: If you’re garlic-obsessed like me, reserve half the minced garlic to press into the shaped dough right before baking. Those little pockets of roasted garlic? Absolute heaven. Just don’t tell my Italian grandma I messed with tradition!
Serving Suggestions for Rustic Garlic Rosemary Skillet Bread
Oh, the places this bread will go! Honestly, I’ve been known to just rip into it straight from the skillet—that first warm, garlicky bite is irresistible. But if you want to get fancy (or share, I guess), here are my favorite ways to serve it:
- Soup’s best friend: Dunk it into creamy tomato basil or a hearty minestrone. The crust holds up beautifully against broths, and those rosemary flecks make every spoonful sing.
- Cheese board superstar: Pair thick slices with soft brie, sharp cheddar, and a drizzle of honey. The garlic plays so nicely with creamy cheeses—it’s my go-to move when friends come over.
- Breakfast upgrade: Toast slices and top with smashed avocado and a sprinkle of chili flakes. Trust me, it beats plain toast any day.
- Olive oil dip: Pour good olive oil on a plate, add a pinch of flaky salt and cracked pepper, then tear off hunks of warm bread for dipping. Simple, but oh-so-addictive.
- Leftover magic: Day-old bread? Grill it with butter for garlic-rosemary toast, or make the world’s best croutons for salads.
Truth be told, this bread rarely lasts long enough to get creative—it’s that good on its own. But when it does, these pairings turn it into a whole experience. Now if you’ll excuse me, I need to go rescue that last slice from my husband…
Storing & Reheating Rustic Garlic Rosemary Skillet Bread
Here’s the beautiful truth—this bread disappears fast in my house. But on the rare occasion there are leftovers (or if you’re smart and bake extra), here’s how to keep it tasting like it just came out of the oven:
Room temp storage: Once completely cooled, wrap your bread tightly in aluminum foil or beeswax wrap. None of that plastic bag business—it’ll turn the crust soggy! Keeps well on the counter for 2-3 days. My Italian aunt swears by storing it in a bread box with a cut side down on a wooden board—works like a charm.
Freezing for later: Slice the loaf before freezing—this lets you grab just what you need. Wrap slices in parchment paper, then pop them in a freezer bag. They’ll keep for up to 3 months. Pro tip: write the date with a sharpie before your future self forgets—frozen bread amnesia is real!
Reheating magic: To revive that freshly-baked magic, preheat your oven to 350°F (175°C). For whole slices: wrap in foil and warm for 10 minutes, then unwrap and bake 2 more minutes to crisp up. For frozen slices—no need to thaw! Just place directly on the oven rack for 12-15 minutes. That rosemary aroma will fill your kitchen all over again.
Crust rescue mission: If your bread lost its crunch, spritz it lightly with water before reheating. The steam works wonders! My husband thinks I’m crazy when I mist bread with a water bottle, but the results speak for themselves—crispy exterior, soft interior, just like day one.
Rustic Garlic Rosemary Skillet Bread FAQs
After sharing this recipe with countless friends (and fielding their texts at all hours), I’ve rounded up the most common questions. Here’s everything you need to know before you bake—and yes, I’ve made all the mistakes so you don’t have to!
“Can I use dried rosemary instead of fresh?”
Absolutely! Use 1 ½ teaspoons of dried rosemary instead of the fresh—it’s more concentrated. Crush it between your fingers first to release the oils, or it’ll taste like little pine needles. But honestly? If you can get fresh, do it. That bright, herby punch is worth the extra chopping.
“How do I know when the bread is done?”
Three foolproof tests: 1) Tap the bottom—it should sound hollow, like a drum. 2) Check the color—deep golden brown, not pale. 3) Use a thermometer if you’re nervous—internal temp should hit 190°F (88°C). My grandma’s method? She’d say “When your kitchen smells like heaven and your stomach’s growling, it’s done.” Wise woman.
“My dough didn’t rise—what went wrong?”
Usually one of three culprits: 1) Your yeast was old (always check that foam test!). 2) The water was too hot and killed the yeast (aim for 110°F—wrist-test warm). 3) Your rising spot was too cold. No warm spot? Heat a mug of water in the microwave for 2 minutes, then put the dough in there with the door closed. Works like magic!
“Can I make this without a cast iron skillet?”
Yes! A regular baking sheet works—just shape the dough into a flatter oval. For skillet-level crust, put a metal pan on the oven’s bottom rack while preheating. When you put the bread in, toss a few ice cubes into the hot pan below—the steam mimics a Dutch oven’s effect. Not quite as crisp, but still delicious.
“Why is my bread so dense?”
Over-kneading or too much flour are the usual suspects. The dough should be slightly sticky—when in doubt, err on the wetter side. Also, don’t rush the rise! That first hour lets gluten develop properly. Think of it as the bread’s beauty sleep—would you want to be woken up early?
Nutritional Information
Here’s the breakdown for one slice of this garlic rosemary skillet bread—because let’s be real, you’re probably eating more than one! Keep in mind, these are estimates and can vary based on your specific ingredients. (Also, I’m not a nutritionist, just a bread enthusiast with a calculator!)
- Serving Size: 1 slice (about 1/12 of the loaf)
- Calories: 150
- Total Fat: 3g (Saturated Fat: 0.5g, Unsaturated Fat: 2g)
- Cholesterol: 0mg
- Sodium: 200mg
- Total Carbohydrates: 28g (Dietary Fiber: 1g, Sugars: 0g)
- Protein: 4g
Note: Nutritional values are estimates and vary based on ingredients used.
Final Thoughts
If there’s one thing I’ve learned from making this rustic garlic rosemary skillet bread, it’s that good food doesn’t have to be complicated. This recipe is my love letter to simple, honest baking—just a few ingredients, a trusty skillet, and a little patience. Every time I pull that golden loaf out of the oven, I’m reminded why I fell in love with cooking in the first place. It’s not just about the food; it’s about the joy it brings, the way it fills your home with warmth and your heart with pride.
So, whether you’re a seasoned baker or someone who’s never touched yeast before, I hope you give this recipe a try. Trust me, there’s nothing quite like slicing into that crusty exterior and seeing the soft, garlicky crumb inside. And when you do, I’d love to hear about it! Tag me in your bread adventures or drop a comment sharing how it turned out. Because really, isn’t food just better when it’s shared? Now go grab that skillet—your kitchen’s about to smell amazing.
Print
Irresistible Rustic Garlic Rosemary Skillet Bread in 3 Easy Steps
- Total Time: 1 hour 45 minutes
- Yield: 1 loaf 1x
- Diet: Vegetarian
Description
A simple and flavorful rustic bread infused with garlic and rosemary, baked in a skillet for a crispy crust and soft interior.
Ingredients
- 3 cups all-purpose flour
- 1 tsp salt
- 1 tbsp fresh rosemary, chopped
- 3 cloves garlic, minced
- 1 tsp active dry yeast
- 1 1/4 cups warm water
- 2 tbsp olive oil
Instructions
- Mix flour, salt, rosemary, and garlic in a large bowl.
- Dissolve yeast in warm water and let sit for 5 minutes until frothy.
- Add yeast mixture and olive oil to the dry ingredients. Stir until a dough forms.
- Knead the dough on a floured surface for 5 minutes until smooth.
- Place dough in a greased bowl, cover, and let rise for 1 hour or until doubled in size.
- Preheat oven to 425°F (220°C) with a cast-iron skillet inside.
- Shape the dough into a round loaf and place it in the hot skillet.
- Bake for 25-30 minutes until golden brown.
- Cool slightly before slicing.
Notes
- Use fresh rosemary for the best flavor.
- Let the dough rise in a warm place for better results.
- Adjust baking time based on your oven.
- Prep Time: 15 minutes
- Cook Time: 30 minutes
- Category: Bread
- Method: Baking
- Cuisine: Mediterranean
Nutrition
- Serving Size: 1 slice
- Calories: 150
- Sugar: 0g
- Sodium: 200mg
- Fat: 3g
- Saturated Fat: 0.5g
- Unsaturated Fat: 2g
- Trans Fat: 0g
- Carbohydrates: 28g
- Fiber: 1g
- Protein: 4g
- Cholesterol: 0mg
Keywords: rustic bread, garlic rosemary bread, skillet bread, homemade bread


