
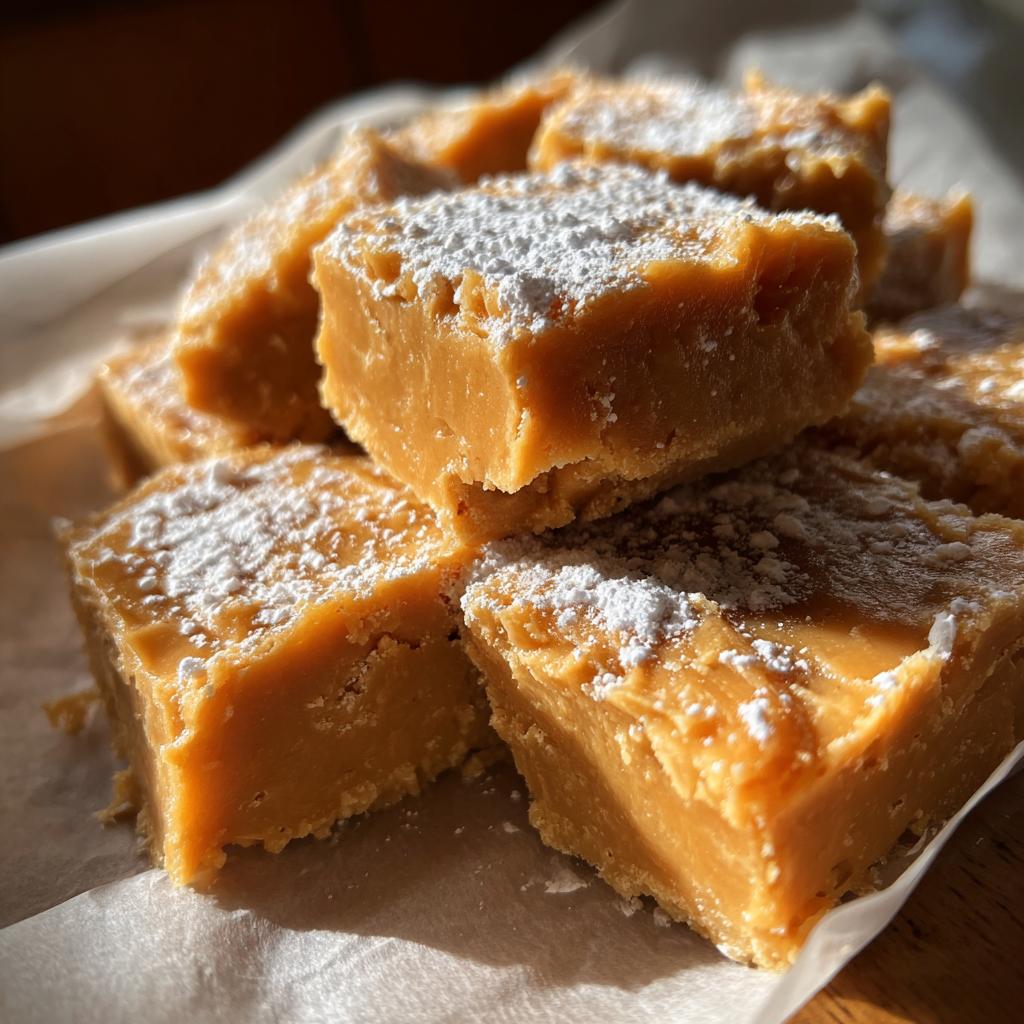
Oh wow, where do I even begin with peanut butter fudge? This creamy, dreamy dessert has a way of making my heart skip a beat every time I take a bite. The rich, sweet flavor combined with that oh-so-smooth texture just melts in your mouth, making it an absolute favorite in my household. I mean, who can resist the allure of peanut butter, right? It’s like a hug in a square! This recipe is not just a treat; it’s a celebration of simple, delicious ingredients that come together in a matter of minutes. Trust me, once you whip up a batch, you’ll understand why it’s a go-to dessert for any occasion. So, let’s dive into how to make this delightful peanut butter fudge that’s sure to have everyone coming back for seconds—and maybe even thirds!
Ingredients List
Here’s what you’ll need to create your own luscious peanut butter fudge:
- 1 cup peanut butter
- 1 cup powdered sugar
- 1/2 cup butter
- 1 teaspoon vanilla extract
That’s it! Just four simple ingredients that blend together to create a mouthwatering treat. Trust me, you’ll be amazed at how these basics come together to make something so indulgent!
How to Prepare Peanut Butter Fudge
Now that you’ve got your ingredients ready, let’s walk through how to whip up this delectable peanut butter fudge step-by-step. I promise it’s easier than you think, and the result is absolutely worth it!
Step 1: Combine Ingredients
First things first, grab a saucepan and scoop in that glorious cup of peanut butter along with the half cup of butter. It’s so important to have these two beauties combined right from the get-go. Make sure the butter is at room temperature so it melts easily with the peanut butter. You want a smooth and creamy blend that’ll set the stage for the rest of this fudge magic!
Step 2: Heating the Mixture
Next, you’re going to place your saucepan over low heat. This part is crucial, so don’t rush it! Stir the mixture frequently as it warms up; you want it to melt gently without burning. Keep an eye on it until everything is beautifully melted and well combined—think of it as creating a silky, peanut-buttery potion. Once it’s all melted and smooth, you’re ready to move on!
Step 3: Mixing in Sugar and Vanilla
Now, take that saucepan off the heat and let’s add in the magic ingredients: the powdered sugar and the teaspoon of vanilla extract. Stir it all together until everything is beautifully incorporated. It might look a bit thick at first, but just keep mixing until your fudge mixture is smooth and creamy—no lumps allowed! This is where the flavor really comes together, so give it your all!
Step 4: Spreading the Mixture
Time to transfer your fudge mixture into a greased pan. I usually use an 8×8 inch pan, but any similar size works great. Pour the mixture in and use a spatula to spread it out evenly. Make sure to pack it down well so it holds together nicely once it’s set. You want that beautiful, smooth surface to shine when you take it out to serve!
Step 5: Refrigeration
Now comes the hardest part—waiting! Pop your pan in the fridge and let it chill for at least two hours. This step is super important because it allows the fudge to firm up perfectly. If you can wait a bit longer, even better! The longer it sits, the more the flavors meld together, and trust me, it’s worth the patience.
Step 6: Cutting and Serving
Once your fudge has set, it’s time for the fun part—cutting and serving! Carefully lift it from the pan using the edges (if you lined it with parchment paper, even better!). Cut it into squares—how big or small is totally up to you! For a little extra flair, you can serve it as is, or drizzle it with some melted chocolate or sprinkle some sea salt on top. Either way, get ready for the compliments to roll in!
Why You’ll Love This Recipe
Alright, let me tell you why this peanut butter fudge is a total game-changer! First off, the prep time is just a breeze—like, you can whip this up in about 10 minutes flat! Seriously, who doesn’t love a quick dessert that doesn’t keep you in the kitchen all day? And the best part? You don’t even need to turn on your oven. Just a stovetop and a few simple steps, and you’re golden!
Now, let’s talk about the flavor. Oh boy, it’s rich, creamy, and utterly indulgent. The combination of peanut butter and buttery goodness creates that perfect melt-in-your-mouth experience that’ll have everyone begging for more. Plus, you can totally customize it! Want to sprinkle in some chocolate chips or a pinch of sea salt? Go for it! This fudge is so versatile, and it’s bound to impress at any gathering.
And did I mention how satisfying it is to make? Watching that mixture come together, feeling the smoothness as you stir, and then cutting into those perfect squares—it’s pure joy! Trust me, once you try this recipe, it’ll become a regular in your dessert rotation. You’ll love how easy it is to make and how delicious it turns out every single time!
Tips for Success
Ready to take your peanut butter fudge to the next level? I’ve got some tried-and-true tips to ensure your fudge turns out perfectly every single time. Let’s make this fudge-making experience as smooth as the fudge itself!
Use Room Temperature Ingredients
First off, make sure your butter is at room temperature before you start. If it’s too cold, it won’t blend well with the peanut butter, and you could end up with a lumpy mixture. Trust me, you want that smooth, creamy consistency right from the start!
Be Patient While Heating
When you’re heating the mixture, take your time. Low and slow is the name of the game! If you crank up the heat, you risk burning the peanut butter, and nobody wants that! Stir frequently and watch as it transforms into a silky dream. It’s worth the wait!
Mix Thoroughly
Don’t skimp on mixing! When you add the powdered sugar and vanilla, be sure to mix it in thoroughly until you achieve a smooth consistency. Any lumps will show up in your final fudge, and we definitely want it to look as good as it tastes!
Grease Your Pan Well
Make sure to grease your pan generously. You don’t want your fudge to stick when you’re trying to cut it into those beautiful squares. You could also line the pan with parchment paper for easy removal—just lift it out when it’s set, and you’re good to go!
Give It Time to Set
Lastly, don’t rush the refrigeration process. Let it chill for at least two hours, but if you can resist the temptation, letting it sit longer will deepen the flavors. The wait is hard, but believe me, it pays off when you finally get to dig in!
With these tips in your back pocket, you’ll be a peanut butter fudge pro in no time! Enjoy the process and the delicious results that follow!
Variations of Peanut Butter Fudge
Oh, the fun doesn’t stop with just one version of peanut butter fudge! This recipe is like a blank canvas waiting for your creative touch. Let’s explore some delightful variations that’ll take your fudge to the next level!
Chocolate Chip Delight
One of my absolute favorites is adding chocolate chips. Just stir in about a half-cup of semi-sweet or milk chocolate chips into the mixture right after you’ve combined the sugar and vanilla. The chocolate melts slightly and creates these dreamy pockets of gooey goodness throughout the fudge. Trust me, the combination of peanut butter and chocolate is a match made in dessert heaven!
Nut Butter Swap
Feeling adventurous? Why not switch up the peanut butter for another nut butter? Almond butter or cashew butter can create a unique twist on the classic fudge flavor. Just keep in mind that the taste and texture might vary a little, but it’ll still be delicious! If you’re using a thicker nut butter, you may need to adjust the butter amount slightly to maintain the creamy consistency.
Crunchy Add-Ins
If you love a bit of texture, consider adding some chopped nuts! Chopped peanuts, walnuts, or even pecans can bring an enjoyable crunch to your fudge. Just fold in about a half-cup of your favorite nuts after mixing in the sugar and vanilla. It adds that lovely contrast to the smooth fudge, and it’s perfect for those who enjoy a little bite in their dessert!
Swirls of Flavor
How about a swirl of flavor? You can drizzle some melted chocolate or caramel on top of the fudge before it sets. Just take a spoon and swirl it in lightly for a beautiful marbled effect. Not only does it look stunning, but it also adds an extra layer of flavor that’s sure to impress your friends and family!
Seasonal Spices
Don’t forget about seasonal spices! For a festive touch, try adding a pinch of cinnamon or a dash of nutmeg into the mix. These warm flavors can give your peanut butter fudge a cozy vibe, especially during the holidays. You could even experiment with a bit of pumpkin spice for a unique autumn treat!
With these fun variations, you can keep your peanut butter fudge exciting and new every time you make it. So go ahead, get creative, and enjoy the delicious journey of fudge-making! Each tweak not only makes the fudge your own but also opens up a whole new world of flavor possibilities!
Storage & Reheating Instructions
Once you’ve made your delicious peanut butter fudge, you’ll want to make sure it stays as fresh and delightful as the moment it set! Storing it properly is key to enjoying those creamy squares for days to come.
First off, make sure your fudge is completely cooled and set before moving it to storage. Once it’s ready, grab an airtight container—this is crucial to keep that fudgy goodness from drying out. I usually cut mine into squares first, then layer them in the container with parchment paper between each layer. This way, they don’t stick together, and you can easily grab a piece whenever the craving hits!
Now, if you plan to enjoy your fudge within a week, just pop it in the fridge. It’ll stay fresh and tasty for up to a week! But if you want to keep it around longer (trust me, it’s hard to resist), you can freeze it for up to three months. Just wrap each piece in plastic wrap before placing it in a freezer-safe container. This extra step helps protect against freezer burn, keeping your fudge in prime condition.
When you’re ready to enjoy some frozen fudge, simply take out the desired amount and let it thaw in the fridge for a couple of hours. If you’re in a hurry, you can also let it sit at room temperature for about 30 minutes—you’ll have that creamy texture back in no time!
So there you have it! With these storage tips, you can savor your peanut butter fudge for days—or even months—after making it. Enjoy every last bite, and don’t forget to share (if you can resist the temptation)!
Nutritional Information
Alright, let’s talk numbers! Here’s the estimated nutritional information for each square of this delightful peanut butter fudge:
- Calories: 130
- Fat: 8g
- Saturated Fat: 3g
- Unsaturated Fat: 5g
- Trans Fat: 0g
- Carbohydrates: 15g
- Sugar: 10g
- Fiber: 1g
- Protein: 3g
- Cholesterol: 10mg
- Sodium: 50mg
Keep in mind that these values are estimates, and they can vary based on the specific brands of ingredients you use. But this gives you a good idea of what you’re getting in each sweet, creamy bite of peanut butter fudge. Enjoy every indulgent square guilt-free—after all, you deserve it!
FAQ Section
Q1. Can I use natural peanut butter for this fudge recipe?
Absolutely! Natural peanut butter works wonderfully in this peanut butter fudge. Just keep in mind that it may have a slightly different texture, and you might need to adjust the amount of sugar depending on how sweet your peanut butter is. It’s still going to be delicious, I promise!
Q2. How long does peanut butter fudge last?
When stored in an airtight container in the fridge, your peanut butter fudge can last up to a week. If you’re looking to keep it longer, you can freeze it for about three months. Just make sure to wrap each piece well to prevent freezer burn!
Q3. Can I add toppings to my peanut butter fudge?
Definitely! Toppings can add a whole new dimension to your fudge. You can sprinkle some sea salt on top, drizzle melted chocolate, or even add chopped nuts for a little crunch. Get creative with it—the possibilities are endless!
Q4. What’s the best way to cut peanut butter fudge?
To cut your fudge into perfect squares, use a sharp knife that’s been warmed under hot water. Wipe it clean between cuts to keep those edges neat. If you lined your pan with parchment paper, lifting the fudge out makes this step even easier!
Q5. Can I make this fudge without butter?
While butter adds creaminess and richness, you can substitute it with coconut oil or a vegan butter alternative if you want a dairy-free option. Just keep in mind the flavor might change a bit, but it’ll still be tasty!
Peanut Butter Fudge: 6 Irresistible Secrets
- Total Time: 2 hours 15 minutes
- Yield: 16 squares 1x
- Diet: Vegetarian
Description
Delicious and creamy peanut butter fudge.
Ingredients
- 1 cup peanut butter
- 1 cup powdered sugar
- 1/2 cup butter
- 1 teaspoon vanilla extract
Instructions
- Combine peanut butter and butter in a saucepan.
- Heat over low until melted, stirring frequently.
- Remove from heat and mix in powdered sugar and vanilla.
- Spread the mixture into a greased pan.
- Refrigerate for at least 2 hours.
- Cut into squares and serve.
Notes
- Store in an airtight container.
- Can add chocolate chips for variation.
- Prep Time: 10 minutes
- Cook Time: 5 minutes
- Category: Dessert
- Method: Stovetop
- Cuisine: American
Nutrition
- Serving Size: 1 square
- Calories: 130
- Sugar: 10g
- Sodium: 50mg
- Fat: 8g
- Saturated Fat: 3g
- Unsaturated Fat: 5g
- Trans Fat: 0g
- Carbohydrates: 15g
- Fiber: 1g
- Protein: 3g
- Cholesterol: 10mg
Keywords: peanut butter fudge


