
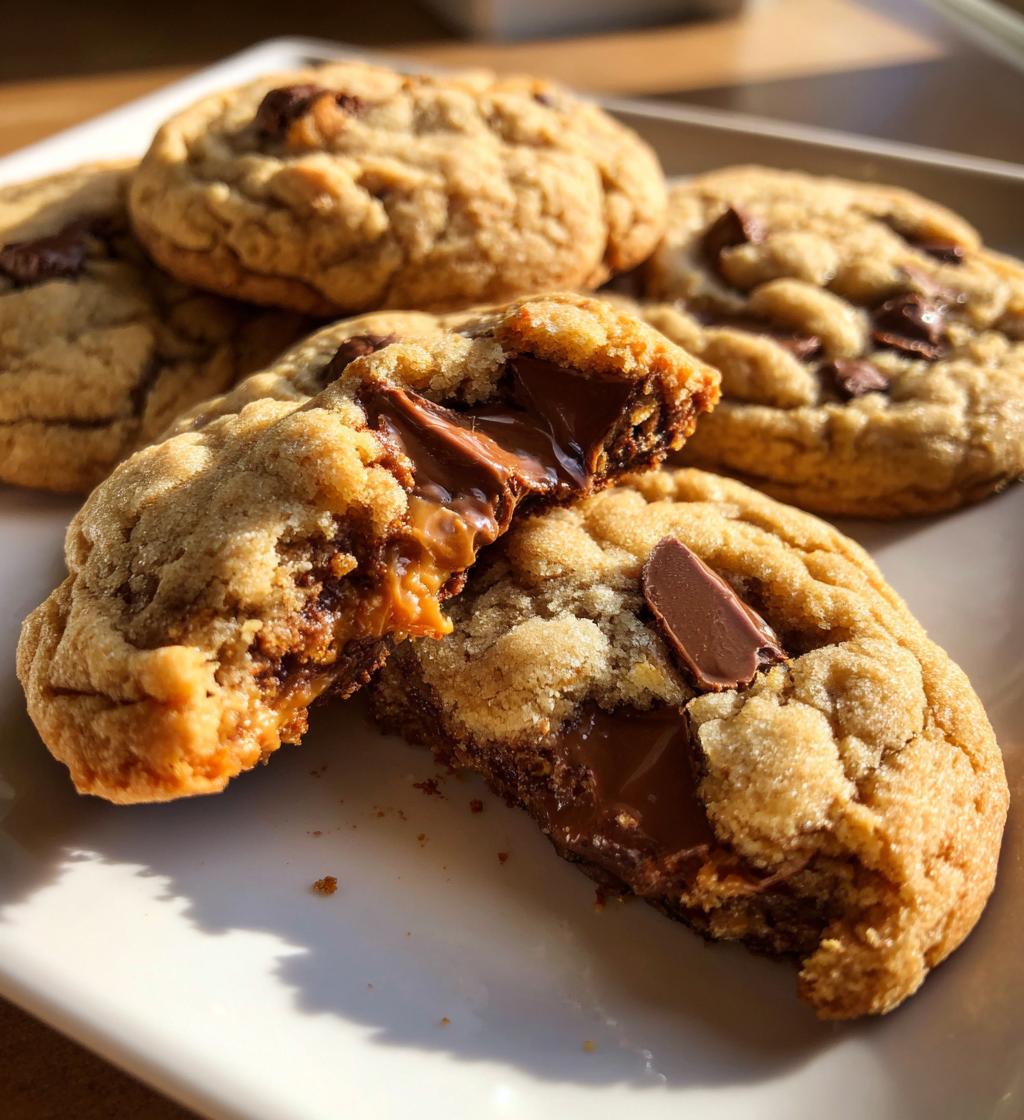
You know that moment when you bite into a warm cookie and discover a gooey peanut butter cup surprise inside? That’s exactly what these peanut butter cup cookies deliver – pure magic in every bite! I’ve been making this recipe for years, ever since my aunt passed it down to me with a wink and a “trust me, you’ll make these every week.” And guess what? She was right.
These cookies are dangerously easy to whip up – we’re talking just 15 minutes of prep before they hit the oven. But the real beauty is how they turn basic pantry ingredients into something spectacular. The cookie itself is perfectly soft and buttery, with just enough structure to cradle that melty peanut butter center. My kids go absolutely wild when they smell these baking, and I’ll admit I’ve been known to “test” a few straight from the pan when no one’s looking!
What makes this recipe so special is how it captures that classic peanut butter cup flavor but in warm, fresh-baked form. It’s the kind of treat that disappears fast at potlucks and always earns recipe requests. I’ve lost count of how many batches I’ve made for bake sales, new neighbors, or just because it’s Tuesday. Once you try them, you’ll understand why they’ve become my most-requested cookie.
Why You’ll Love These Peanut Butter Cup Cookies
Let me tell you why these cookies have become my absolute go-to dessert – and why they’ll become yours too! There’s just something magical about biting into warm cookie dough and finding that melty peanut butter surprise waiting inside. Here’s what makes them irresistible:
- Quick & easy – From mixing bowl to oven in just 15 minutes flat! No fancy techniques or hard-to-find ingredients here.
- That perfect texture – The cookie stays soft and chewy while the peanut butter cup gets gloriously gooey. It’s a match made in dessert heaven!
- Crowd-pleasing magic – I’ve never met anyone who could resist these. Kids go crazy for them, and adults suddenly remember how to act like kids again.
- Looks fancy, tastes amazing – They’re impressive enough for parties but simple enough for a random Tuesday night craving. My secret? I always keep the ingredients on hand!
Seriously, these cookies check all the boxes. They’re the kind of treat that makes people think you spent hours in the kitchen when really, you were barely breaking a sweat. The best part? That moment when someone takes their first bite and their eyes light up – gets me every time!
The Secret Ingredients for Perfect Peanut Butter Cup Cookies
Okay, let’s talk ingredients – because these cookies are only as good as what you put in them! After making countless batches, I’ve learned that quality matters here. You want that perfect balance of buttery cookie and melty peanut butter goodness. Here’s exactly what you’ll need:
- 1 cup all-purpose flour – Spoon and level it, don’t scoop! Too much flour makes dry cookies.
- 1/2 cup unsalted butter, softened – And I mean softened, not melted. Leave it out for 30 minutes before baking.
- 1/2 cup granulated sugar – For that classic cookie sweetness.
- 1/2 cup packed brown sugar – The molasses notes make all the difference – trust me!
- 1 large egg – Room temperature blends better with the butter.
- 1 tsp pure vanilla extract – The good stuff, not imitation. It’s worth it.
- 1/2 tsp baking soda – Just enough lift without puffing up too much.
- 1/4 tsp salt – Balances all that sweetness perfectly.
- 24 mini peanut butter cups, unwrapped – The star of the show! Keep them chilled until use.
A quick tip from my many kitchen experiments: measure everything before you start mixing. There’s nothing worse than realizing you’re short on peanut butter cups mid-bake (yes, I’ve been there). And don’t skip the brown sugar – it’s what gives these cookies their signature chewiness that pairs so beautifully with the creamy peanut butter centers.
Equipment You’ll Need
Don’t worry – you don’t need any fancy gadgets for these cookies! Just grab these basic kitchen tools (chances are you already have most of them):
- Large mixing bowl – For all that buttery, sugary goodness
- Hand mixer or stand mixer – Though honestly, I’ve made these with just a wooden spoon when I was feeling nostalgic
- Mini muffin tin – The real MVP here! Makes perfect little cookie cups
- Measuring cups and spoons – Accuracy matters with baking
- Rubber spatula – For scraping every last bit of dough (no wasting!)
- Cooling rack – Because patience is hard when cookies smell this good
That’s it! No special pans or expensive equipment needed. Though I will say – if you bake often, those non-stick mini muffin tins are worth their weight in gold. The first time I made these in regular tins? Let’s just say some cookies… stayed behind. Oops! Lesson learned.
How to Make Peanut Butter Cup Cookies
Alright, let’s get baking! These peanut butter cup cookies come together in three simple steps that even beginner bakers can master. I’ve made this recipe so many times I could probably do it in my sleep (and some sleepy Sunday mornings, I practically have!). Follow along for perfect cookies every time.
Step 1: Prepare the Dough
First things first – preheat that oven to 350°F (175°C). While it’s heating up, let’s make magic happen in your mixing bowl!
Grab your softened butter and both sugars. Here’s my little secret: cream them together for a good 2-3 minutes until the mixture turns light and fluffy. This isn’t just mixing – you’re creating tiny air pockets that’ll give your cookies that perfect texture. When it looks like pale yellow clouds, you’re golden!
Now crack in that egg and splash of vanilla. Mix just until combined – no need to overdo it. In another bowl, whisk together your flour, baking soda, and salt. Gradually add these dry ingredients to your butter mixture. I like to do this in three batches, mixing just until the flour disappears each time. The dough should come together beautifully – soft, slightly sticky, and smelling like heaven.
Step 2: Shape and Bake
Time to get hands-on! Scoop out about a tablespoon of dough (I use my trusty #60 cookie scoop) and roll it into a smooth ball. Drop each one into the cups of your mini muffin tin – no greasing needed if you’re using non-stick.
Pop them in the oven and set your timer for exactly 10 minutes. They’ll puff up beautifully and develop those perfect golden edges. Your kitchen will smell incredible – fair warning, family members may come sniffing around!
Step 3: Add Peanut Butter Cups
Here comes the best part! The moment those cookies come out of the oven, grab your chilled peanut butter cups. Working quickly (but carefully – those pans are hot!), press one PB cup into the center of each warm cookie. You’ll see the edges crack slightly – that’s perfect!
Let them cool in the pan for about 5 minutes before transferring to a wire rack. This waiting period is crucial – it lets the peanut butter cups melt just enough to become one with the cookie, but not so much that they turn into a messy puddle (been there, done that!).
Pro tip: If any peanut butter cups resist going in, give them a gentle twist as you press. They’ll settle right in!
Tips for Perfect Peanut Butter Cup Cookies
After making these cookies more times than I can count (and eating my fair share of “test” batches), I’ve picked up some tricks that’ll take yours from good to “oh-my-goodness-I-need-another” amazing. Here are my can’t-live-without tips:
- Butter temperature is key – Your butter should be soft enough to leave a fingerprint when pressed, but not greasy or melted. Too cold and it won’t cream properly; too warm and your cookies will spread too much. I leave mine on the counter for exactly 30 minutes before baking – works like a charm every time!
- Watch that baking time – Set your timer for 9 minutes and check. The cookies should look slightly underdone when you pull them out – they’ll continue cooking from residual heat. Overbaking is the #1 reason for dry cookies. When in doubt, take them out earlier rather than later!
- Keep those PB cups cold – I stash mine in the freezer until the very last second. Room-temperature cups melt too quickly when pressed into warm cookies. Chilled cups hold their shape better while still getting that perfect melty center.
- Storage smarts – These taste best within 2 days, but they’ll keep in an airtight container for up to 5 days (if they last that long!). Layer them between parchment paper to prevent sticking. For longer storage, freeze baked cookies without the peanut butter cups, then add fresh cups after thawing and warming slightly.
One last secret from my kitchen to yours: make a double batch. Trust me, you’ll thank yourself later when the first dozen disappears before they’ve fully cooled. I’ve learned this lesson the hard way – nothing worse than realizing you only have two cookies left to photograph!
Variations and Substitutions
One of the best things about these cookies is how easily you can mix things up! Over the years, I’ve tried countless variations – some intentional, some born out of “oops, I’m out of that ingredient” moments. Here are my favorite twists that still deliver that magical peanut butter cup experience:
- Chocolate lovers’ dream – Swap the mini peanut butter cups for dark chocolate or even mint chocolate cups. The contrast between the sweet cookie and richer chocolate is incredible. My husband begs me to make this version!
- Gluten-free goodness – Use a 1:1 gluten-free flour blend instead of all-purpose. I like the ones with xanthan gum already added – they mimic regular flour perfectly. Just be sure to mix gently since GF dough can be more delicate.
- Nutty alternatives – For peanut allergies, try sunflower seed butter cups (they exist and they’re delicious!) or almond butter cups. The texture stays the same, just with a different nutty flavor.
- Extra peanut punch – Sometimes I add 1/4 cup peanut butter to the dough itself for double the peanut flavor. Just reduce the butter by a tablespoon to compensate for the extra fat.
- Holiday special – Around Christmas, I use those festive red and green wrapped peanut butter bells instead of cups. They make the cookies look so cheerful on cookie plates!
A quick word about substitutions: If you use natural peanut butter cups (the kind without stabilizers), chill them extra well before adding to the cookies. They tend to melt faster than conventional ones. And if you’re out of brown sugar? White sugar works in a pinch, but your cookies will be crisper – I like to add an extra tablespoon of butter to keep them tender.
The beauty of this recipe is how forgiving it is. As long as you keep that basic dough structure intact, you can play around with the additions to make it your own. My neighbor swears by adding a pinch of espresso powder to enhance the chocolate flavor, and my sister always tosses in some chopped peanuts for crunch. What will your signature twist be?
Storing and Freezing Peanut Butter Cup Cookies
Now, I know what you’re thinking – “Like these will last long enough to store!” But hear me out, because I’ve learned some storage tricks the hard way (read: many sad, stale cookies later). These peanut butter cup cookies actually keep beautifully if you treat them right.
At room temperature, they’ll stay fresh and delicious for up to 5 days – just make sure to store them in an airtight container with a piece of parchment paper between layers. That prevents any sticking and keeps the peanut butter cups from smearing everywhere. I like using those cute cookie tins with the tight-fitting lids – they look pretty on the counter and do the job perfectly.
For longer storage, freezing is your best friend! Here’s my foolproof method:
- Freeze before adding PB cups – Bake and cool the cookie bases completely, then freeze them plain in a single layer on a baking sheet before transferring to freezer bags. When you’re ready to serve, just pop them in a 300°F oven for 5 minutes to warm, then press in fresh peanut butter cups. The results taste like you just baked them!
- Already assembled? No worries! Freeze the finished cookies in a single layer until solid (about 2 hours), then stack them in freezer containers with parchment between layers. They’ll keep for up to a month this way. To serve, let them thaw at room temperature for about an hour – or if you’re impatient like me, 15 seconds in the microwave gives you that just-baked warmth.
One important note: the peanut butter cups will lose their pretty shape after freezing and thawing, so these are best for when you care more about taste than presentation (which, let’s be honest, is most of the time in my house!). For special occasions where looks matter, I always bake fresh and add the peanut butter cups right before serving.
Pro tip from my freezer adventures: label your containers with the date! It’s too easy to forget whether those cookies are from last week or last month when they’re hidden behind frozen peas. Not that I’ve ever done that… more than once…
Nutritional Information
Now, let’s be real – we’re not eating peanut butter cup cookies for their health benefits! But I know some of you like to keep track, so here’s the nutritional lowdown per cookie (based on using standard ingredients). Just remember – these are estimates, and your exact numbers might vary depending on specific brands or if you tweak the recipe.
- Calories: About 120 per cookie (but who stops at one?)
- Sugar: 10g – hey, it’s dessert, not a salad!
- Sodium: 50mg – not bad for such a flavorful treat
- Fat: 6g (3g saturated) – that’s the butter and PB cups working their magic
- Carbohydrates: 15g – worth every delicious gram
- Protein: 2g – peanut butter counts as protein, right?
If you’re watching certain nutrients, you can make small adjustments – like using reduced-fat peanut butter cups or swapping half the flour for whole wheat. But personally? I say life’s too short not to enjoy the full, glorious version. Everything in moderation, including moderation!
One last thing – these values are for one cookie, but let’s be honest… nobody eats just one. My “serving size” is usually three (or four if it’s been a long day). No judgment here!
Frequently Asked Questions
Over the years, I’ve gotten so many questions about these peanut butter cup cookies – and I love helping people get them just right! Here are the answers to the most common questions that pop up (usually while we’re enjoying them with coffee).
Can I use regular muffin tins instead of mini?
Absolutely! You’ll just get fewer, larger cookies – about 12 instead of 24. Increase the baking time by 2-3 minutes since the dough will be thicker. And fair warning – these big boys are dangerously decadent. My kids call them “cookie cakes” and claim they need extra milk!
How long do these cookies stay fresh?
At room temperature in an airtight container, they’re perfect for about 3 days. After that, they start to lose that magical softness (though I’ve never had them last that long!). If you need to keep them longer, freeze them – they’ll stay delicious for up to a month.
Can I use full-size peanut butter cups?
You can, but I find the mini cups work best for that perfect cookie-to-filling ratio. If you use regular size, press them in halfway and expect some overflow – which honestly just means more peanut butter goodness! Just be sure to adjust your baking time since the larger cups make the cookies thicker.
Why did my peanut butter cups melt completely?
This usually happens if the cookies are too hot when you add the cups or if the cups were at room temperature. Always use chilled cups and let the cookies cool for about 2 minutes first. If they do melt too much? No worries – they’ll firm up as they cool and still taste amazing!
Can I make the dough ahead of time?
Definitely! The dough keeps well in the fridge for up to 3 days or in the freezer for a month. Just let it come to room temperature before scooping and baking. I often make a double batch of dough to have ready for last-minute treats – future me is always grateful!
Share Your Peanut Butter Cup Cookies
Okay, friend – now it’s your turn! I want to hear all about your peanut butter cup cookie adventures. Did you stick to the classic recipe or try one of the fun variations? Maybe you discovered a brilliant new twist I haven’t thought of yet? (If so, spill the beans – I’m always looking for excuses to bake another batch!)
Leave a comment below telling me how yours turned out – the good, the bad, and the deliciously messy. Did your family go crazy for them like mine always does? Any funny kitchen mishaps along the way? (We’ve all been there – my first attempt involved forgetting the baking soda. Flat cookies still taste amazing!)
And if you snapped a photo of your cookie creations, I’d absolutely love to see them! There’s nothing more satisfying than seeing that melty peanut butter center peeking out from golden cookie edges. Tag me if you share on social – I’ll be your biggest cheerleader!
Most importantly – enjoy every bite. These cookies were made for sharing stories over, for celebrating small victories, and for turning ordinary days into something special. Now go forth and bake up some happiness!
Print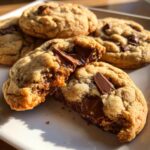
Irresistible Peanut Butter Cup Cookies in Just 15 Minutes
- Total Time: 25 mins
- Yield: 24 cookies 1x
- Diet: Vegetarian
Description
Easy-to-make cookies with a peanut butter cup center.
Ingredients
- 1 cup all-purpose flour
- 1/2 cup unsalted butter, softened
- 1/2 cup granulated sugar
- 1/2 cup brown sugar
- 1 egg
- 1 tsp vanilla extract
- 1/2 tsp baking soda
- 1/4 tsp salt
- 24 mini peanut butter cups, unwrapped
Instructions
- Preheat oven to 350°F (175°C).
- Cream butter and sugars in a bowl.
- Add egg and vanilla, mix well.
- Combine flour, baking soda, and salt in a separate bowl.
- Gradually add dry ingredients to wet mixture.
- Roll dough into 1-inch balls and place in muffin tins.
- Bake for 10 minutes.
- Press a peanut butter cup into each cookie while still warm.
- Let cool before serving.
Notes
- Use mini muffin tins for best results.
- Store in an airtight container.
- Can be frozen for up to 1 month.
- Prep Time: 15 mins
- Cook Time: 10 mins
- Category: Dessert
- Method: Baking
- Cuisine: American
Nutrition
- Serving Size: 1 cookie
- Calories: 120
- Sugar: 10g
- Sodium: 50mg
- Fat: 6g
- Saturated Fat: 3g
- Unsaturated Fat: 2g
- Trans Fat: 0g
- Carbohydrates: 15g
- Fiber: 0.5g
- Protein: 2g
- Cholesterol: 15mg
Keywords: peanut butter cup cookies, easy dessert, cookie recipe


