
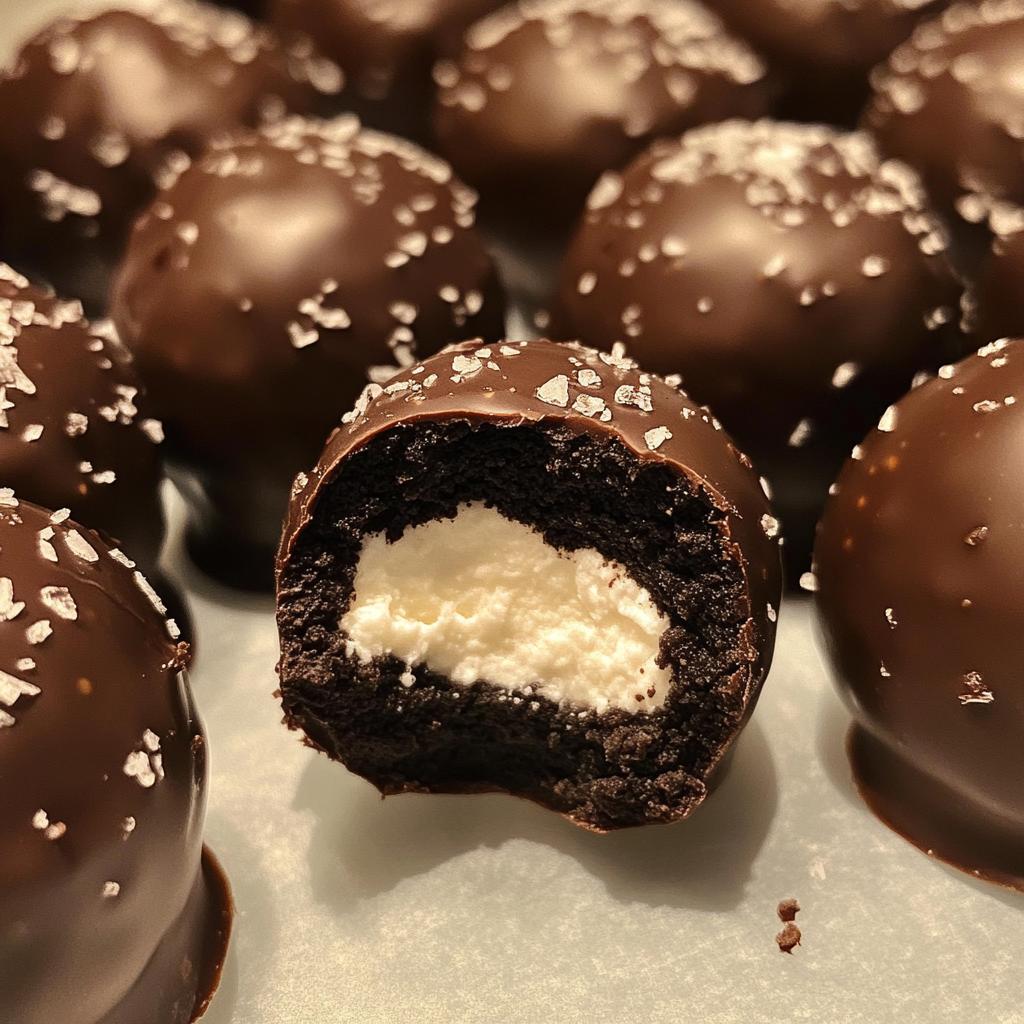
Who doesn’t love a good dessert? I mean, dessert is like the cherry on top of a perfect day, and that’s where my *Oreo truffle balls* come in! These little bites of heaven are a crowd-pleaser, rich and creamy with that unmistakable Oreo flavor. Trust me, once you make these, you’ll be the star of every gathering. They’re so easy to whip up, and they require no baking – just mix, roll, chill, and dip! My kids can’t get enough of them, and I love how they bring everyone together, whether it’s a casual family night or a festive celebration. I remember the first time I made these – the smiles on their faces were priceless as they devoured each truffle. Now, it’s become a family tradition to make them for every birthday and holiday. Let’s dive into this simple recipe that’s sure to become a favorite in your home too!
Ingredients
- 24 Oreo cookies, crushed
- 8 oz cream cheese, softened
- 12 oz chocolate, melted
How to Prepare Oreo Truffle Balls
Making these *Oreo truffle balls* is as fun as it is delicious! Follow along with these simple steps, and soon you’ll have a plate of treats that’ll impress anyone who gets a taste. Ready? Let’s go!
Step 1: Crush the Oreo Cookies
First things first, let’s get those Oreos ready. Grab a food processor (or a sturdy ziplock bag and a rolling pin if you’re feeling a bit old-school). Toss in the 24 crushed Oreo cookies and pulse until they resemble fine crumbs. You want them to be almost powdery but still have a few chunks for texture – it adds to the experience! If you’re using the bag method, just don’t hold back; crush away until you feel those cookies give in!
Step 2: Mix with Cream Cheese
Now, take out your softened cream cheese and combine it with the crushed Oreos in a mixing bowl. Using an electric mixer or even a sturdy spatula, mix until everything is well blended. It should form a thick, dough-like consistency. Trust me, you’ll want to make sure it’s all incorporated – no one likes a rogue chunk of cream cheese in their truffle! If the mix feels too thick, don’t worry; that’s just how it should be!
Step 3: Form the Balls
Time to get your hands a little messy! Scoop out about a tablespoon of the mixture and roll it into a ball between your palms. Aim for uniform size, about 1 inch in diameter, so they all look cute on the platter. If you find the mixture sticking to your hands, just give them a little rinse with cold water; it helps! Place the formed balls on a baking sheet lined with parchment paper.
Step 4: Chill the Balls
This is a crucial step! Pop the baking sheet with your truffle balls in the refrigerator for at least 30 minutes. Chilling helps them firm up, making the next steps way easier. Plus, it’s what gives them that perfect, melt-in-your-mouth texture. While they chill, you can catch up on your favorite show or prepare for the next steps!
Step 5: Dip in Chocolate
Once chilled, it’s time for the fun part – dipping! Melt your chocolate in the microwave or on a double boiler until it’s smooth and shiny. Take each chilled ball and dip it into the melted chocolate, ensuring it’s fully coated. Use a fork to lift it out, allowing the excess chocolate to drip off before placing the truffle back on the baking sheet. Don’t worry if they don’t look perfect; the homemade vibe is part of their charm!
Step 6: Let the Chocolate Set
Finally, let the chocolate-coated truffle balls sit at room temperature for about 10-15 minutes until the chocolate sets. If you’re in a hurry, you can pop them back into the fridge for a quicker chill! Once set, they’re ready to be devoured. Trust me, the wait is worth it when you take that first bite!
Why You’ll Love This Recipe
- Quick Preparation: Whip these up in just 15 minutes! Who doesn’t love a speedy dessert?
- No-Bake Delight: Forget the oven! These truffle balls are a no-bake wonder, perfect for hot days or when you’re short on time.
- Rich Flavor: With the perfect blend of cream cheese and Oreo goodness, these truffles are decadently delicious!
- Crowd-Pleasing Treat: Whether it’s a party or a family gathering, everyone will rave about these little bites of bliss!
- Customizable: Feel free to mix it up with different chocolate coatings or toss in some sprinkles for a fun twist!
Tips for Success
Ready to take your *Oreo truffle balls* to the next level? Here are some pro tips that’ll help you nail this recipe and impress your friends and family!
Choose Your Chocolate Wisely
When it comes to coating your truffle balls, you have options! While I love using semi-sweet chocolate for that classic taste, don’t hesitate to experiment with milk chocolate for a sweeter touch or dark chocolate for a richer flavor. You can even try white chocolate for a fun twist! Just remember, if you go with white chocolate, a sprinkle of sea salt on top can elevate those flavors beautifully.
Get the Right Consistency
As you’re rolling your truffle balls, if you find the mixture too sticky, just pop it back in the fridge for a few minutes. Chilling the mixture helps make the rolling process smoother and prevents them from getting too messy. Trust me, a little patience goes a long way in achieving that perfect shape!
Use a Melting Aid
If you want your chocolate to glide smoothly over the truffles, consider adding a teaspoon of coconut oil or vegetable shortening to the melted chocolate. This helps thin it out and gives your coating that gorgeous glossy finish. Plus, it makes for an easier dipping experience!
Decorate for Fun
Once your chocolate is set, why not add some flair? Drizzle some contrasting chocolate on top, or roll the truffles in crushed nuts, sprinkles, or even coconut flakes. It not only adds a pop of color but also gives a delightful crunch with every bite!
Serving Suggestions
For a fun serving idea, arrange your truffle balls on a cake stand or in cute little cupcake liners. It makes for a beautiful presentation that’ll wow your guests. And don’t forget to keep some for yourself – you’ll want to enjoy these little bites of joy throughout the week!
With these tips, you’re all set to make the most amazing *Oreo truffle balls* that’ll leave everyone wanting more. Happy baking!
Storage & Reheating Instructions
Storing your delicious *Oreo truffle balls* is super easy, and they actually get even better after a day or two in the fridge! Just pop them in an airtight container and keep them chilled. This helps maintain their creamy texture and rich flavor. I like to layer them between sheets of parchment paper to prevent sticking, especially if you’ve decorated them with sprinkles or chocolate drizzle.
These little treats can last in the refrigerator for up to one week, but trust me, they’ll likely disappear way before then! If you want to keep them for longer, you can freeze them. Just make sure they’re well-wrapped in plastic wrap or stored in a freezer-safe container. When you’re ready to enjoy them, let them thaw in the fridge for a few hours – they’ll taste just as amazing as when you first made them!
And no need for reheating; they’re best enjoyed chilled or at room temperature. Just grab one from the fridge, take a bite, and savor that delightful Oreo goodness!
Nutritional Information
Curious about what’s in these delightful *Oreo truffle balls*? Here’s a quick look at the estimated nutritional values per serving (that’s one truffle ball):
- Calories: 120
- Fat: 7g
- Saturated Fat: 4g
- Unsaturated Fat: 2g
- Trans Fat: 0g
- Cholesterol: 10mg
- Sodium: 50mg
- Carbohydrates: 15g
- Fiber: 1g
- Sugar: 10g
- Protein: 2g
Keep in mind that these values are estimates and can vary based on the specific ingredients you use. But no matter how you slice it, these are a delicious treat you can enjoy without too much guilt! Happy indulging!
FAQ Section
Got questions about making the best *Oreo truffle balls*? I’ve got answers! Let’s dive into some common queries that pop up when whipping up these delightful treats.
Can I use different types of chocolate for coating?
Absolutely! While semi-sweet chocolate is a classic choice, feel free to get creative. Milk chocolate offers a sweeter flavor, while dark chocolate gives a rich depth. And if you’re feeling adventurous, white chocolate can be a fun twist. Just remember to adjust the sweetness of your truffles accordingly, especially if you’re using milk or white chocolate!
What can I use instead of cream cheese?
If you’re looking for alternatives to cream cheese, there are a few options! You can try using mascarpone cheese for a similar creamy texture with a slightly different flavor. For a lighter option, Greek yogurt works well too, though it will change the flavor a bit. Just make sure whatever you choose has that rich, creamy quality to keep the truffles decadent!
How far in advance can I make these truffles?
You can definitely make these *Oreo truffle balls* ahead of time! They actually taste even better after a day or two in the fridge as the flavors meld together. I recommend making them up to a week in advance; just keep them stored in an airtight container in the refrigerator. If you want to prep even earlier, you can freeze them for up to a month. Just thaw them in the fridge overnight before serving!
Can I add flavors or mix-ins to the filling?
Oh, you bet! Adding flavors or mix-ins can take your truffles to the next level. You could fold in some mini chocolate chips, crushed nuts, or even a splash of vanilla or almond extract for an extra kick. Just remember to keep the balance so they don’t overpower that classic Oreo taste!
What’s the best way to decorate my truffles?
Decorating your *Oreo truffle balls* is a fantastic way to personalize them! You can drizzle contrasting chocolate over the top for a beautiful design, or roll them in crushed nuts, sprinkles, or even coconut flakes for a fun finish. Get creative with your toppings – your guests will love the extra flair!
Print
Oreo Truffle Balls: 6 Blissful Bites to Indulge
- Total Time: 45 minutes
- Yield: 24 truffle balls 1x
- Diet: Vegetarian
Description
Oreo truffle balls are a rich and creamy dessert made from crushed Oreos and cream cheese, coated in chocolate.
Ingredients
- 24 Oreo cookies, crushed
- 8 oz cream cheese, softened
- 12 oz chocolate, melted
Instructions
- Crush the Oreo cookies in a food processor.
- Mix the crushed Oreos with softened cream cheese until well combined.
- Roll the mixture into small balls.
- Chill the balls in the refrigerator for 30 minutes.
- Dip each ball in melted chocolate and place on a baking sheet.
- Let the chocolate set before serving.
Notes
- Use any chocolate of your choice for coating.
- Store in the refrigerator for up to one week.
- Prep Time: 15 minutes
- Cook Time: 0 minutes
- Category: Dessert
- Method: No-bake
- Cuisine: American
Nutrition
- Serving Size: 1 truffle ball
- Calories: 120
- Sugar: 10g
- Sodium: 50mg
- Fat: 7g
- Saturated Fat: 4g
- Unsaturated Fat: 2g
- Trans Fat: 0g
- Carbohydrates: 15g
- Fiber: 1g
- Protein: 2g
- Cholesterol: 10mg
Keywords: oreo truffle balls, dessert, no-bake dessert


