
Oh my gosh, you HAVE to try these no-bake peanut butter bars! They’re my go-to when I need something sweet in a hurry – no oven required, just creamy peanut butter goodness with that perfect crunch. I’ve been making them since my college days (hello, dorm room cooking!), and they never fail to disappear within hours. The best part? That irresistible combo of smooth chocolate over a peanut butter base that’s just firm enough to hold its shape. Trust me, once you taste these babies, you’ll understand why my friends beg me to bring them to every potluck!
Why You’ll Love These No-Bake Peanut Butter Bars
Seriously, what’s not to love about these bars? Let me count the ways:
- No oven needed – Perfect for summer days when turning on the heat sounds like torture
- Ready in just 15 minutes (plus chilling) – My secret weapon when surprise guests show up
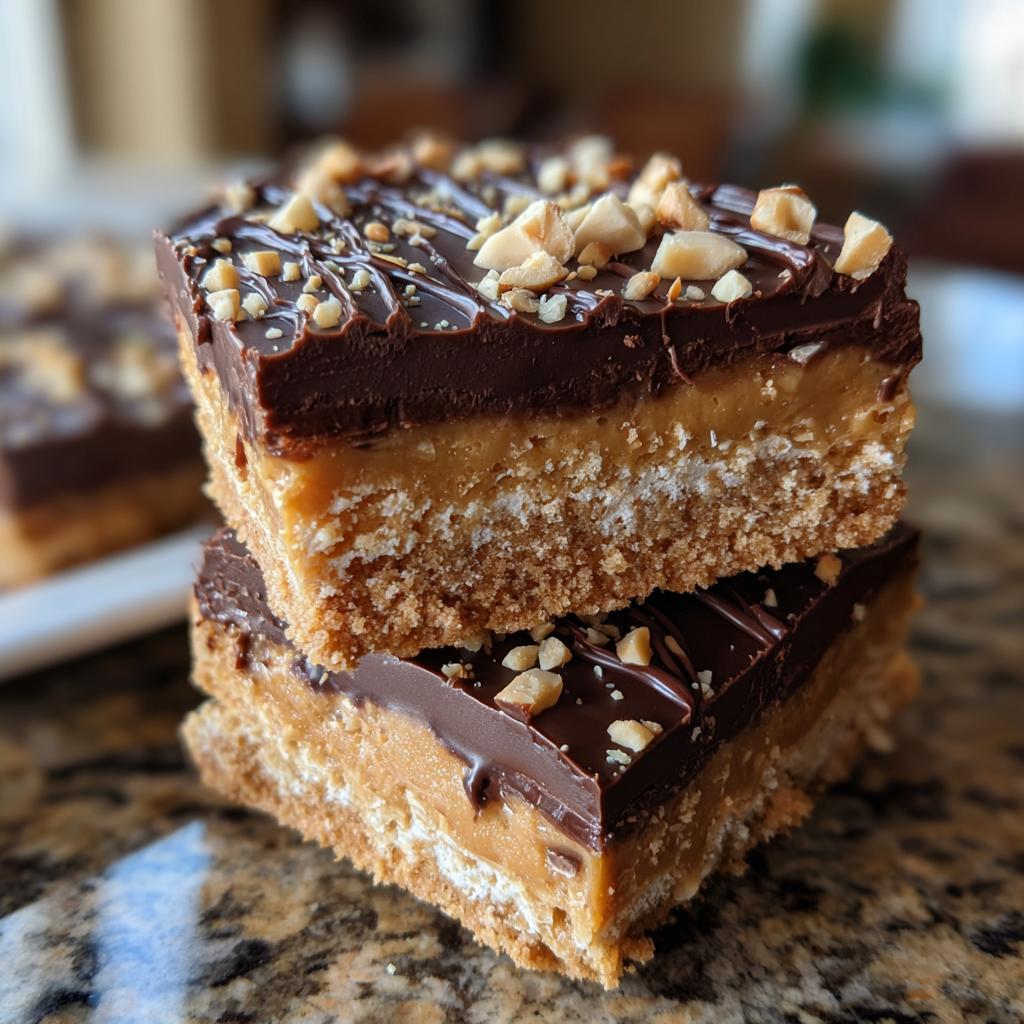
- That magical texture – Creamy peanut butter meets crunchy graham crackers in every bite
- Only 6 ingredients – Probably all sitting in your pantry right now
- Kid-approved – My niece calls them “peanut butter candy” and begs for them constantly
The chocolate layer on top? That’s just showing off. But trust me, you won’t want to skip it!
Ingredients for No-Bake Peanut Butter Bars
Here’s what you’ll need to whip up these dreamy bars – I promise, it’s all super simple stuff:
- 1 cup creamy peanut butter (go for the good stuff, not the natural kind that separates)
- 1/2 cup honey (or maple syrup if you prefer)
- 1/2 cup unsalted butter, melted (let it cool just a bit before mixing)
- 2 cups graham cracker crumbs (I just crush the sheets in a bag – so satisfying!)
- 1 1/2 cups powdered sugar (sift it if you’re feeling fancy)
- 1 cup semi-sweet chocolate chips (melted to perfection)
- 1/4 cup chopped peanuts (optional, but oh-so-crunchy!)
That’s it! Told you it was easy. Now let’s get mixing!
How to Prepare No-Bake Peanut Butter Bars
Alright, let’s get to the fun part – making these dreamy bars! Don’t worry, I’ve made these so many times I could probably do it in my sleep (and after one late-night craving, I practically have). Here’s exactly how I do it:
- Prep your pan: Line that 8×8-inch baking dish with parchment paper, leaving some overhang on the sides. This little trick will save you SO much frustration later when you’re trying to get the bars out! (Learned that the hard way with my first batch.)
- Mix the magic: In a big bowl, stir together the peanut butter, honey, and melted butter until it’s smooth as silk. Pro tip – if your peanut butter is stubborn, microwave it for 10 seconds first to make it more cooperative.
- Add the crunch: Dump in those graham cracker crumbs and powdered sugar. At first it’ll seem dry, but keep mixing – suddenly it’ll all come together into this glorious, crumbly dough that smells like childhood happiness.
- Press it good: Now pour that mixture into your prepared pan and press it down FIRMLY with your hands or the back of a measuring cup. I mean really pack it in there – this gives you that perfect dense-but-not-too-dense texture.
- Chocolate time: Melt those chocolate chips (30 second bursts in the microwave, stirring between each, works like a charm). Spread it over the peanut butter layer while it’s still warm – it’ll glide on beautifully.
- The finishing touch: Sprinkle those chopped peanuts on top if you’re using them. The extra crunch is *chef’s kiss* perfection.
- Chill out: Pop it in the fridge for at least 2 hours (I know, the waiting is torture). This is when all the flavors really come together and the texture sets up just right.
See? I told you it was easy! Now try not to eat the whole pan in one sitting (no promises though).
Tips for Perfect No-Bake Peanut Butter Bars
After making these bars more times than I can count, I’ve picked up some foolproof tricks:
- Parchment is your BFF – That overhang makes lifting out the whole slab SO much easier (no more broken corners!)
- Chill like you mean it – 2 hours minimum, but overnight gives the cleanest slices
- Microwave chocolate carefully – 30 second bursts with stirring prevents scorching (ask me how I know)
- Warm your knife – Run it under hot water before slicing for picture-perfect bars
- Freeze for firmer bars – 30 minutes in the freezer makes them extra sturdy for packing in lunches
Trust me, these little tweaks make all the difference between good bars and “OMG what is this magic” bars!
Ingredient Notes and Substitutions
Let’s talk ingredients! I’ve experimented with these bars so much, I’ve got all the swaps figured out. If you’re out of creamy peanut butter, almond butter works beautifully – just know the flavor will be a bit nuttier. Not a fan of honey? Maple syrup is a fantastic alternative, though the bars might be slightly softer. For those with allergies, gluten-free graham crackers work just as well. And if you’re feeling fancy, swap the chocolate chips for dark chocolate or even butterscotch chips. The possibilities are endless!
Serving and Storing No-Bake Peanut Butter Bars
These bars are perfect straight from the fridge – cool, firm, and oh-so-satisfying. My favorite way to enjoy them? With a cold glass of milk or a hot cup of coffee. They’re also amazing crumbled over vanilla ice cream (trust me on this one). To store, keep them in an airtight container in the fridge for up to a week. If they last that long, that is. For longer storage, pop them in the freezer for up to 2 months – just thaw at room temperature before serving. Enjoy!
Nutritional Information
Just a heads up – these numbers are estimates since brands and exact measurements can vary. But here’s the scoop on what you’re getting in one delicious bar: about 280 calories, 18g fat (7g saturated), 28g carbs (2g fiber, 20g sugar), and 5g protein. Not bad for something that tastes this indulgent, right? Remember, these are treats – enjoy them that way!
Frequently Asked Questions
Can I use crunchy peanut butter instead of creamy?
Absolutely! I actually love the extra texture from crunchy peanut butter – just know your bars will have more bite to them. The recipe works exactly the same way, though you might want to skip the optional chopped peanuts on top to avoid overdoing the crunch.
How long do these peanut butter bars last?
In an airtight container in the fridge, they’ll stay perfect for about a week (if they last that long!). You can also freeze them for up to 2 months – just thaw at room temperature for 15 minutes before serving. The chocolate might get a little dull-looking in the freezer, but the taste stays amazing.
Can I make these without honey?
Sure thing! Maple syrup works beautifully as a substitute – use the same amount. The bars might be slightly softer, but just chill them longer and they’ll firm up nicely. I’ve even used agave nectar in a pinch with great results.
Why did my chocolate layer crack when I cut the bars?
Oh, I’ve been there! This usually happens if the chocolate is too thick or cold. Next time, try spreading a slightly thinner layer and let the bars sit at room temperature for 5 minutes before slicing. A warm knife helps too – just run it under hot water and dry it between cuts.
Share Your Experience
I’d love to hear how your no-bake peanut butter bars turned out! Did you add your own twist? Snap a pic and tag me on social media – I’m always looking for new ideas! And if you loved this recipe as much as I do, leave a comment or rating below. It makes my day to hear from fellow peanut butter fans!
Print
Irresistible No-Bake Peanut Butter Bars in 15 Minutes
- Total Time: 2 hrs 15 mins
- Yield: 12 bars 1x
- Diet: Vegetarian
Description
Creamy and crunchy no-bake peanut butter bars that are easy to prepare.
Ingredients
- 1 cup creamy peanut butter
- 1/2 cup honey
- 1/2 cup unsalted butter, melted
- 2 cups graham cracker crumbs
- 1 1/2 cups powdered sugar
- 1 cup semi-sweet chocolate chips
- 1/4 cup chopped peanuts (optional)
Instructions
- Line an 8×8-inch baking dish with parchment paper.
- In a large bowl, mix peanut butter, honey, and melted butter until smooth.
- Add graham cracker crumbs and powdered sugar. Stir until combined.
- Press the mixture firmly into the prepared dish.
- Melt chocolate chips in the microwave or over a double boiler.
- Spread melted chocolate evenly over the peanut butter layer.
- Sprinkle chopped peanuts on top if desired.
- Chill in the refrigerator for at least 2 hours before cutting into bars.
Notes
- Store in an airtight container in the fridge for up to a week.
- For a firmer texture, freeze for 30 minutes before slicing.
- Prep Time: 15 mins
- Cook Time: 0 mins
- Category: Dessert
- Method: No-Bake
- Cuisine: American
Nutrition
- Serving Size: 1 bar
- Calories: 280
- Sugar: 20g
- Sodium: 85mg
- Fat: 18g
- Saturated Fat: 7g
- Unsaturated Fat: 8g
- Trans Fat: 0g
- Carbohydrates: 28g
- Fiber: 2g
- Protein: 5g
- Cholesterol: 15mg
Keywords: peanut butter bars, no-bake dessert, easy dessert, chocolate peanut butter


