
Oh, mini tiramisu cups—where have you been all my life? These little jars of joy are my go-to when I need a fuss-free dessert that still feels special. Perfect for dinner parties, potlucks, or just treating yourself (no judgment here), these single-serve delights pack all the rich, creamy, coffee-kissed goodness of classic tiramisu without the hassle of slicing and serving a whole cake. Plus, they’re no-bake, which means more time for sipping espresso and less time sweating over the oven. Trust me, one bite of that fluffy mascarpone cream layered with espresso-dipped ladyfingers, and you’ll be hooked. Let’s make magic happen!
Why You’ll Love These Mini Tiramisu Cups
These mini tiramisu cups are the ultimate dessert hack—easy, elegant, and downright delicious. Here’s why they’ll become your new favorite:
- Perfect for sharing: Individual servings mean no messy slicing. Just grab a cup and enjoy!
- No-bake magic: Skip the oven and whip these up in 20 minutes flat. Perfect for hot days or when you’re short on time.
- Crowd-pleaser: The classic combo of coffee, mascarpone, and cocoa is a win every time. Everyone will be asking for the recipe.
- Make-ahead friendly: These cups actually taste better after chilling, so you can prep them ahead of time and stress less.
- Customizable: Want to jazz them up? Add a splash of liqueur, top with fresh berries, or sprinkle with chocolate shavings. The possibilities are endless!
Whether you’re hosting a party or just craving a little indulgence, these mini tiramisu cups are your new best friend. Trust me, they’re as fun to make as they are to eat!
Ingredients for Mini Tiramisu Cups
Gather these simple ingredients—most are pantry staples, and the rest are worth the trip to the store. I promise!
- 1 cup strong brewed coffee, cooled (I use espresso for extra punch, but regular coffee works too)
- 2 tbsp sugar (granulated or caster—whatever’s in your cupboard)
- 1 cup mascarpone cheese (trust me, splurge on the good stuff)
- 1 cup heavy cream (chilled is key for whipping)
- 1 tsp vanilla extract (pure vanilla makes all the difference)
- 12 ladyfinger biscuits (aka savoiardi—look for the crisp ones)
- Cocoa powder for dusting (Dutch-processed gives that rich, dark finish)
Ingredient Notes & Substitutions
Let’s talk about the stars of the show and how to tweak them if needed:
Mascarpone: This creamy Italian cheese is non-negotiable for authentic tiramisu flavor. It’s richer and less tangy than cream cheese—though in a pinch, you could mix cream cheese with a splash of heavy cream to mimic the texture (just don’t tell Nonna I said that).
Ladyfingers: Those light, airy biscuits soak up coffee like little sponges. Can’t find them? Substitute with sponge cake cut into strips, but reduce soaking time—they’ll get soggy fast!
Coffee: Freshly brewed is best, but if you’re desperate, instant espresso dissolved in hot water works. Just avoid flavored coffees—they’ll compete with the dessert’s delicate balance.
Heavy cream: Whipped topping can sub in for the whipped cream layer, but the texture won’t be quite as lush. For dairy-free, coconut cream (chilled overnight) is my favorite swap.
Remember: Great tiramisu starts with great ingredients. But hey, we’re all about making it work with what you’ve got!
How to Make Mini Tiramisu Cups
Alright, let’s dive into the fun part—building those dreamy little layers! Don’t worry, it’s easier than it looks, and I’ll walk you through every step. Just follow along, and you’ll have dessert magic in no time.
Step-by-Step Instructions
First things first: set out six small cups or glasses (I like clear ones to show off those gorgeous layers). Now, let’s break it down:
Assembling the Cups
Start with the coffee soak—this is where the magic begins. Mix your cooled coffee and sugar in a shallow bowl (I use a pie plate—perfect for dunking). Dip each ladyfinger in the coffee for just 2-3 seconds per side. You want them soaked but not falling apart—think “sponge that’s had a quick swim,” not “soggy mess.”
Break the dipped ladyfingers in half and layer them in your cups, covering the bottom completely. Now, grab your mascarpone cream—oh, that heavenly fluff! In a chilled bowl, whip the heavy cream until soft peaks form, then gently fold in the mascarpone and vanilla. Spread half this cloud-like cream over your first layer of ladyfingers. Repeat with another layer of dipped biscuits and the remaining cream. Easy, right?
Chilling Time
Here’s the hard part: waiting! Cover your cups and refrigerate for at least 2 hours, but overnight is even better. This lets the flavors meld and the biscuits soften into that perfect cake-like texture. Right before serving, dust with cocoa powder through a fine sieve—it’s like putting the final sprinkle of fairy dust on your masterpiece!
Pro tip: If you’re in a hurry, 30 minutes in the freezer will speed things up, but the texture won’t be quite as dreamy. Patience pays off with tiramisu!
Tips for Perfect Mini Tiramisu Cups
After making these little beauties more times than I can count, I’ve picked up some tricks that take them from good to wow. Here’s how to nail your mini tiramisu cups every single time:
Chill everything: I mean it—your mixing bowl, your whisk, even the mascarpone if it’s been sitting out. Cold tools make the cream whip up faster and hold its shape better. Pop them in the freezer for 10 minutes before starting.
The dip-and-flip method: When soaking ladyfingers, don’t drown them! Quick dips (2-3 seconds max) on each side prevent sogginess. If they start feeling mushy as you work, your coffee’s too warm or you’re soaking too long.
Layer like a pro: Use the back of a spoon to gently spread the mascarpone cream—don’t press down or you’ll squash the delicate ladyfingers below. Want picture-perfect layers? Pipe the cream using a ziplock bag with the corner snipped off.
Cocoa dusting secret: Wait until right before serving to dust with cocoa powder. Doing it too early lets moisture seep in, leaving you with blotches instead of that gorgeous speckled finish.
Taste as you go: Coffee too bitter? Add a touch more sugar to your soak. Cream not sweet enough? A pinch of powdered sugar won’t hurt. Tiramisu is all about balance—adjust to your taste!
The overnight advantage: These cups taste infinitely better after resting overnight. The flavors meld, the texture becomes velvety—it’s worth the wait. Just cover tightly with plastic wrap pressed directly on the surface to prevent drying.
Remember: Tiramisu forgives little mistakes. Even if your layers aren’t Instagram-perfect, they’ll still taste amazing. Now go forth and create creamy, coffee-kissed magic!
Serving Suggestions
Okay, here’s where we make these mini tiramisu cups shine—because let’s be honest, half the fun is in the presentation! These little guys are practically begging to be dressed up. Here are my favorite ways to serve them:
Espresso on the side: It’s a match made in heaven! Serve each cup with a tiny espresso shot for dipping or sipping between bites. The bitter coffee cuts through the sweetness perfectly—just like they do in Italian cafés.
Berry bonanza: Fresh raspberries or strawberries add a pop of color and tartness that plays so nicely with the creamy mascarpone. Scatter a few on top or serve them in a pretty bowl alongside.
Chocolate lover’s twist: Grate some dark chocolate over the cocoa dusting for extra decadence. Or—my personal weakness—drizzle with chocolate sauce right before serving.
Cocktail pairing: For adult gatherings, try serving with an amaretto sour or a splash of coffee liqueur in the whipped cream layer. The nutty flavors take it to another level!
Presentation pro-tip: Use mismatched vintage espresso cups or mini mason jars for rustic charm. Or go fancy with clear glass dessert cups—show off those beautiful layers!
Honestly? These are so good they don’t need anything extra. But when you want to impress, these little touches turn dessert into a full-on experience. Just don’t be surprised when your guests start asking when you’re opening your café!
Storage & Reheating
Okay, here’s the good news—these mini tiramisu cups actually get better with a little time in the fridge! But there are a few storage tricks you’ll want to know to keep them at their creamy best.
Fridge life: Store them covered tightly with plastic wrap (press it right against the surface to prevent drying) for up to 3 days. The flavors deepen overnight, making day two practically heavenly!
What not to do: Avoid freezing—trust me, I learned this the hard way. The texture turns icy and grainy, and the delicate cream separates when thawed. Not worth it!
Serving leftovers: If your cups have been sitting more than a day, you might notice some liquid at the bottom—that’s just the coffee working its magic. Give them a gentle stir before serving to redistribute the moisture.
Travel tip: Taking these to a party? Transport them in a cooler with ice packs to keep them chilled. Nothing ruins tiramisu faster than sitting out in warm temps!
Remember: These little cups are best enjoyed cold, straight from the fridge. No reheating needed—just grab a spoon and dive into that coffee-kissed perfection!
Nutritional Information
Let’s be real—we’re not eating tiramisu for its health benefits! But if you’re curious (or just keeping track), here’s the scoop on what’s in these dreamy little cups. Remember, these are estimates—actual values can vary depending on your brands and how generous you are with that mascarpone layer!
- Serving Size: 1 mini cup (about ½ cup volume)
- Calories: 280 (worth every one, if you ask me)
- Sugar: 15g (mostly from the ladyfingers and that touch of sugar in the coffee soak)
- Fat: 18g (hello, luxurious mascarpone!)
- Saturated Fat: 10g (the good stuff that makes it creamy)
- Carbohydrates: 22g (blame those irresistible ladyfingers)
- Protein: 5g (surprisingly not bad for a dessert!)
- Cholesterol: 80mg (let’s call it an investment in happiness)
Now, if you’re looking to lighten things up, try using low-fat mascarpone (it exists!) or reducing the sugar in the coffee soak by half. But personally? I say life’s too short not to enjoy the real deal—especially when we’re talking about portion-controlled mini cups!
Frequently Asked Questions
I know you’ve got questions—I’ve gotten them all! Here are the answers to the ones I hear most often about these mini tiramisu cups. (And hey, if you’ve got one I didn’t cover, drop it in the comments!)
Can I Use Instant Coffee?
Absolutely! While freshly brewed espresso gives the richest flavor, instant coffee works in a pinch. Dissolve 2 teaspoons of instant espresso powder (or 1 tablespoon regular instant coffee) in 1 cup of hot water, then let it cool completely before using. Just avoid flavored varieties—they’ll compete with the dessert’s delicate balance.
Pro tip: If you want to amp up the coffee flavor, add an extra teaspoon of instant coffee. My Italian friend swears by this trick for an extra kick!
How Long Do They Last?
These little cups are happiest when eaten within 3 days—stored covered in the fridge, of course. After that, the ladyfingers start breaking down too much, and the texture gets mushy. But let’s be honest—they rarely last that long in my house!
Important note: Always keep them refrigerated. The mascarpone and cream are dairy products, so they shouldn’t sit out more than 2 hours at room temperature.
Can I Freeze Mini Tiramisu Cups?
Oh honey, I wish! Freezing changes the texture completely—the cream separates and gets grainy when thawed, and the ladyfingers turn into sad, soggy sponges. It’s just not worth it for such a delicate dessert.
If you must prep ahead, your best bet is to assemble the cups (minus the cocoa dusting) and refrigerate for up to 3 days. Add the cocoa powder right before serving for that perfect finish. Trust me—fresh is best with tiramisu!
Final Thoughts
There you have it—my foolproof way to make mini tiramisu cups that’ll have everyone thinking you trained in Italy! Honestly, what’s not to love? They’re easy, elegant, and packed with all that classic tiramisu flavor we crave. Whether you’re prepping for a dinner party or just treating yourself to a little pick-me-up (hello, coffee and cream!), these individual servings are pure joy in a cup.
I’d love to hear how yours turn out! Did you add a splash of amaretto? Try them with fresh berries? Maybe you discovered your own brilliant twist? Drop me a comment below—I read every single one. And if you snap a photo of your beautiful creations, tag me! Nothing makes me happier than seeing my recipes come to life in your kitchens.
Now go grab those ladyfingers and get layering. Your taste buds (and your friends) will thank you!
Print
Mini Tiramisu Cups: 3-Layer Bliss You’ll Crave Forever
- Total Time: 2 hours 20 minutes
- Yield: 6 servings 1x
- Diet: Vegetarian
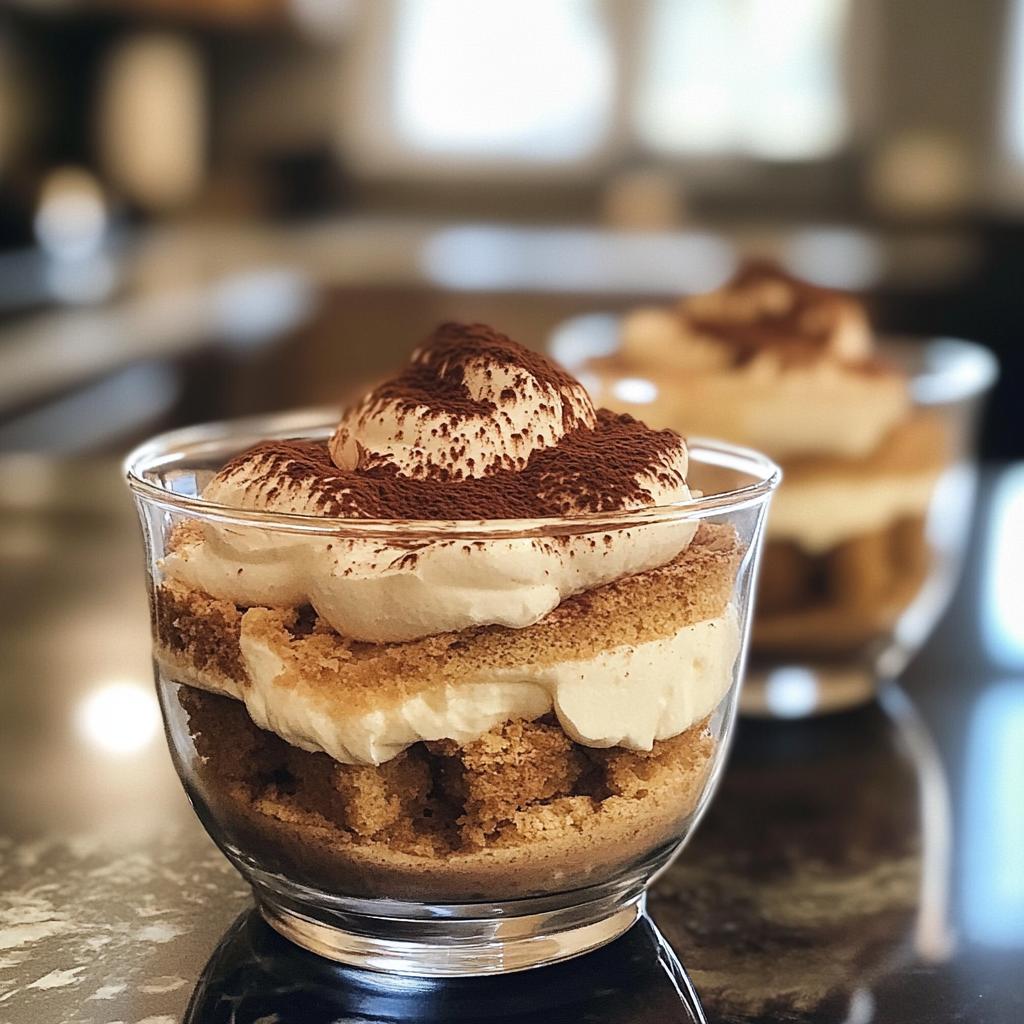
Description
Mini tiramisu cups are a delightful dessert featuring layers of coffee-soaked sponge and creamy mascarpone. Perfect for individual servings.
Ingredients
- 1 cup strong brewed coffee, cooled
- 2 tbsp sugar
- 1 cup mascarpone cheese
- 1 cup heavy cream
- 1 tsp vanilla extract
- 12 ladyfinger biscuits
- Cocoa powder for dusting
Instructions
- Mix coffee and sugar in a bowl.
- Dip ladyfinger biscuits in the coffee mixture and layer them in cups.
- In a separate bowl, whisk mascarpone, heavy cream, and vanilla until smooth.
- Spread the mascarpone cream over the soaked ladyfingers.
- Repeat the layers and finish with a dusting of cocoa powder.
- Refrigerate for at least 2 hours before serving.
Notes
- Use chilled mascarpone and heavy cream for best results.
- Adjust sugar to your taste preference.
- Serve chilled for the best texture.
- Prep Time: 20 minutes
- Cook Time: 0 minutes
- Category: Dessert
- Method: No-Bake
- Cuisine: Italian
Nutrition
- Serving Size: 1 cup
- Calories: 280
- Sugar: 15g
- Sodium: 120mg
- Fat: 18g
- Saturated Fat: 10g
- Unsaturated Fat: 6g
- Trans Fat: 0g
- Carbohydrates: 22g
- Fiber: 1g
- Protein: 5g
- Cholesterol: 80mg
Keywords: mini tiramisu cups, coffee dessert, mascarpone cream


