
Ah, traditional Irish desserts! They hold a special place in my heart, just like a warm hug on a chilly evening. Growing up, I remember the sweet scent of freshly baked soda bread and apple tart wafting through my grandmother’s kitchen, a true invitation to gather around the table. Irish desserts are all about comfort and warmth, filled with rich flavors that can satisfy even the sweetest of cravings. Trust me, there’s nothing quite like taking that first bite of a soft, buttery cake or a spiced fruit scone. Each dessert tells a story of the lush Irish countryside, where simple ingredients like flour, sugar, and butter come together to create something magical.
Whenever I whip up an Irish dessert, I feel like I’m connecting with my roots, and it’s not just about the taste—it’s about sharing memories and traditions with family and friends. Whether you’re indulging in a creamy bread pudding or a delightful slice of cake, these desserts bring people together in the most heartwarming way. So, let’s dive into some delicious Irish treats that will surely satisfy your sweet tooth and maybe even inspire you to create some sweet memories of your own!
Why You’ll Love This Recipe
Let me tell you why making these traditional Irish desserts is not just a treat for your taste buds, but also a delightful experience that brings a bit of magic into your kitchen. Here are just a few reasons to get excited about whipping up these sweet creations:
- Unforgettable Flavors: The combination of butter, sugar, and fresh ingredients creates a taste that’s rich and comforting. Each bite feels like a warm embrace, with notes of sweetness that linger on your palate.
- Easy to Prepare: Don’t worry if you’re not a pro baker! This recipe is straightforward, perfect for both novice and seasoned cooks. You’ll be amazed at how quick it is to pull together these delightful desserts!
- Cultural Connection: Making Irish desserts is a wonderful way to connect with rich traditions and heritage. Each recipe tells a story of the Irish countryside and the love of sharing food with others.
- Perfect for Any Occasion: Whether it’s a family gathering or a cozy night in, these desserts fit right in. They’re great for celebrations or just to brighten up an ordinary day!
- Versatile Enjoyment: Serve them warm with a dollop of whipped cream or custard, or enjoy them cold. No matter how you choose to savor them, they’re always a hit!
So, roll up your sleeves and get ready to make some magic happen in your kitchen. You won’t regret it, and neither will your taste buds!
Ingredients List
Gather these simple yet essential ingredients to create your delightful Irish desserts. Each one plays a vital role in crafting that rich, comforting flavor we all love:
- 2 cups all-purpose flour: Make sure to sift it for a lighter texture.
- 1 cup sugar: Use granulated white sugar for the perfect sweetness.
- 1/2 cup unsalted butter: Softened to room temperature so it mixes easily.
- 2 large eggs: Bring them to room temperature for better incorporation.
- 1 cup buttermilk: This adds moisture and a lovely tang to the batter.
- 1 tsp baking powder: Ensure it’s fresh for that perfect rise.
- 1 tsp baking soda: This will help give our dessert that nice fluffiness.
- 1 tsp vanilla extract: A must for enhancing the overall flavor.
- 1/2 cup raisins: These should be plump and juicy to add a sweet surprise in every bite.
Having these ingredients prepped and ready will make the baking process smooth and enjoyable. Trust me, the aroma of these components coming together is worth every moment spent in the kitchen! Happy baking!
How to Prepare Irish Desserts
Now that you’ve gathered all your ingredients, it’s time to bring everything together and create something truly delightful! Follow these easy steps to prepare your Irish desserts, and watch as your kitchen fills with wonderful aromas.
Preheat the Oven
First things first, let’s get that oven preheated to 350°F (175°C). This is such an important step! Preheating ensures that your desserts bake evenly, giving them that lovely golden color and perfect texture. You want your oven to be nice and toasty before you pop in your dish, so don’t skip this part!
Cream Butter and Sugar
Next, we’ll cream the softened butter and sugar together. I like to use a mixing bowl and a sturdy wooden spoon for this step, but an electric mixer works wonders too! You’ll want to mix them until the mixture becomes light and fluffy—this process incorporates air into the butter, giving your dessert that delicious, airy texture. It usually takes about 2-3 minutes of elbow grease or a few moments with a mixer. Trust me, it’s worth it!
Incorporate Eggs and Wet Ingredients
Now it’s time to add the eggs, one at a time. This is super important because it helps create a smooth batter. After you add each egg, mix well until it’s fully incorporated before adding the next. Then, stir in the buttermilk and vanilla extract. The buttermilk adds moisture and a subtle tang that really elevates the flavor. Mix until everything is well combined—your batter should look creamy and smooth!
Mix Dry Ingredients
In a separate bowl, combine the flour, baking powder, and baking soda. Give it a good whisk to ensure everything is evenly distributed. This step is crucial because it helps prevent any clumps in your batter. Fresh baking powder and baking soda are key players here, so make sure they’re not expired for that perfect rise!
Combine Mixtures
Now, let’s bring the two mixtures together! Gradually add the dry ingredients into the wet mixture. I like to do this in three parts, mixing gently after each addition. This avoids lumps and keeps the batter smooth. Don’t overmix—just stir until you see no more dry flour. You want to maintain that light texture we created earlier!
Add Raisins
Fold in those plump, juicy raisins gently. This step is important because it ensures the raisins are evenly distributed throughout the batter, giving you sweet surprises in every bite! Plus, the raisins add a lovely texture contrast to the soft cake. Just be careful not to overmix at this stage!
Bake the Mixture
Finally, pour your batter into a greased baking dish. I like to use a spatula to make sure I get every last bit of that delicious mixture into the pan. Bake in your preheated oven for about 25-30 minutes. To check for doneness, insert a toothpick into the center—if it comes out clean (or with a few moist crumbs), you’re golden! If it has wet batter on it, give it a few more minutes and then test again. Once baked, let it cool in the pan for a few minutes before transferring it to a wire rack. Your Irish dessert is now ready to be enjoyed!
Tips for Success
Now that you’re ready to create your delicious Irish desserts, here are some pro tips to ensure you achieve the best results every time. Trust me, these little nuggets of wisdom can make all the difference!
- Use Fresh Ingredients: Always check the expiration dates on your baking powder and baking soda. Fresh leavening agents are crucial for that perfect rise. A little freshness goes a long way!
- Room Temperature Ingredients: Make sure your eggs and butter are at room temperature before you start. This helps everything combine better, leading to a smoother batter and a more tender cake.
- Don’t Skimp on Creaming: Take your time when creaming the butter and sugar. The more air you incorporate, the lighter and fluffier your dessert will be. Don’t rush this step—it’s a game changer!
- Substitutions Can Work Wonders: If you don’t have buttermilk, you can easily make your own by adding a tablespoon of vinegar or lemon juice to a cup of milk and letting it sit for about 5-10 minutes. It’s a great trick that works like a charm!
- Customize with Add-Ins: Feel free to get creative! You can swap out raisins for other dried fruits like currants or cranberries. Or, add in chopped nuts for an extra crunch. Just remember to adjust the quantity based on your taste!
- Keep an Eye on Baking Time: Ovens can vary, so start checking your dessert a few minutes early. This way, you can avoid overbaking, which can dry out your lovely creation.
- Serve with Love: Presentation matters! Serve your Irish dessert warm with a generous dollop of whipped cream or a drizzle of custard. Trust me, it makes every bite feel extra special!
With these tips in your back pocket, you’re all set to create something truly magical in your kitchen. Happy baking, and enjoy the sweet rewards of your hard work!
Nutritional Information
When diving into the world of Irish desserts, it’s also nice to know what’s in them, right? Here’s a typical breakdown of the nutritional values for one piece of this delightful treat. Keep in mind that these values are estimates and can vary based on specific ingredients and portion sizes:
- Calories: 250
- Fat: 10g
- Saturated Fat: 6g
- Unsaturated Fat: 3g
- Trans Fat: 0g
- Cholesterol: 50mg
- Sodium: 150mg
- Carbohydrates: 35g
- Fiber: 1g
- Protein: 4g
- Sugar: 15g
This information will help you keep track of your sweet indulgences while enjoying every mouthful of these fabulous desserts. Just remember, a little sweetness goes a long way, so savor every bite!
Storage & Reheating Instructions
After you’ve whipped up these delightful Irish desserts, you might find yourself with some leftovers—if you’re lucky! Storing them properly ensures you can enjoy that sweet goodness for days to come. Here’s how to keep them fresh:
- Airtight Storage: Make sure to let your dessert cool completely before storing. Then, place it in an airtight container. This helps lock in moisture and keeps your dessert from drying out. If you don’t have a container, wrapping it tightly in plastic wrap works too!
- Refrigeration: If you plan to keep it for more than a day, it’s best to store your Irish dessert in the fridge. It can stay fresh for about 3-4 days. Just remember to take it out and let it come to room temperature before serving, as the flavors often shine brighter when not chilled!
- Freezing for Later: Want to save some for a special occasion? You can freeze these desserts! Slice them into individual pieces, wrap them well in plastic wrap, and then place them in a freezer-safe bag or container. They can last up to 2-3 months in the freezer. Just thaw them in the fridge overnight when you’re ready to enjoy again!
Now, when it comes to reheating, you’ll want to do it gently to preserve that lovely texture:
- Microwave: If you’re in a hurry, a quick zap in the microwave for about 10-15 seconds will do the trick. Just be careful not to overheat, as it can make the dessert a bit tough.
- Oven: For the best results, preheat your oven to 350°F (175°C) and place your dessert (covered with foil to prevent drying out) in for about 10-15 minutes. This method revives that fresh-baked taste and keeps it lovely and soft!
With these storage and reheating tips, you’ll be able to savor your Irish desserts long after they come out of the oven—perfect for those sweet cravings that can strike at any time!
FAQ Section
Let’s dive into some questions you might have about these delicious Irish desserts! I’ve compiled a few common queries, along with my answers, to make your baking experience even smoother.
What are traditional Irish desserts?
Traditional Irish desserts often feature simple ingredients like flour, sugar, butter, and fresh fruits. Some popular options include bread pudding, apple tart, and Irish whiskey cake. These desserts are all about comfort and warmth, reflecting Ireland’s rich culinary heritage.
Can I substitute ingredients in this Irish dessert recipe?
Absolutely! If you find yourself missing an ingredient, don’t worry. For instance, if you don’t have buttermilk, you can mix one tablespoon of vinegar or lemon juice with a cup of milk and let it sit for a few minutes to create a suitable substitute. As for the raisins, feel free to swap them out for dried cranberries or currants, depending on your preference!
How can I serve these Irish desserts?
These desserts are incredibly versatile! You can serve them warm with a generous dollop of whipped cream or a drizzle of custard for an extra indulgent treat. They’re also delightful when enjoyed cold, making them perfect for any occasion—whether it’s a cozy family dinner or a festive gathering with friends.
How should I store leftover Irish desserts?
To keep your leftovers fresh, store them in an airtight container once they’ve cooled completely. They can be kept in the refrigerator for about 3-4 days. If you want to save some for later, consider freezing them in individual portions. Just remember to wrap them well to prevent freezer burn!
Can I make these Irish desserts ahead of time?
Yes! Many Irish desserts actually taste even better the next day, as the flavors have time to meld. You can prepare them a day before your gathering and simply reheat them when it’s time to serve. This makes it so convenient for special occasions!
Do Irish desserts have unique flavor profiles?
Definitely! Irish desserts often highlight flavors like cinnamon, nutmeg, and vanilla, along with the natural sweetness of fruits. The use of ingredients like buttermilk adds a subtle tanginess that really enhances the overall taste. Each bite is a delightful journey through the flavors of Ireland!
I hope these FAQs help you feel more confident as you embark on your baking adventure with these scrumptious Irish desserts. Don’t hesitate to reach out if you have more questions or need tips along the way. Happy baking!
Print
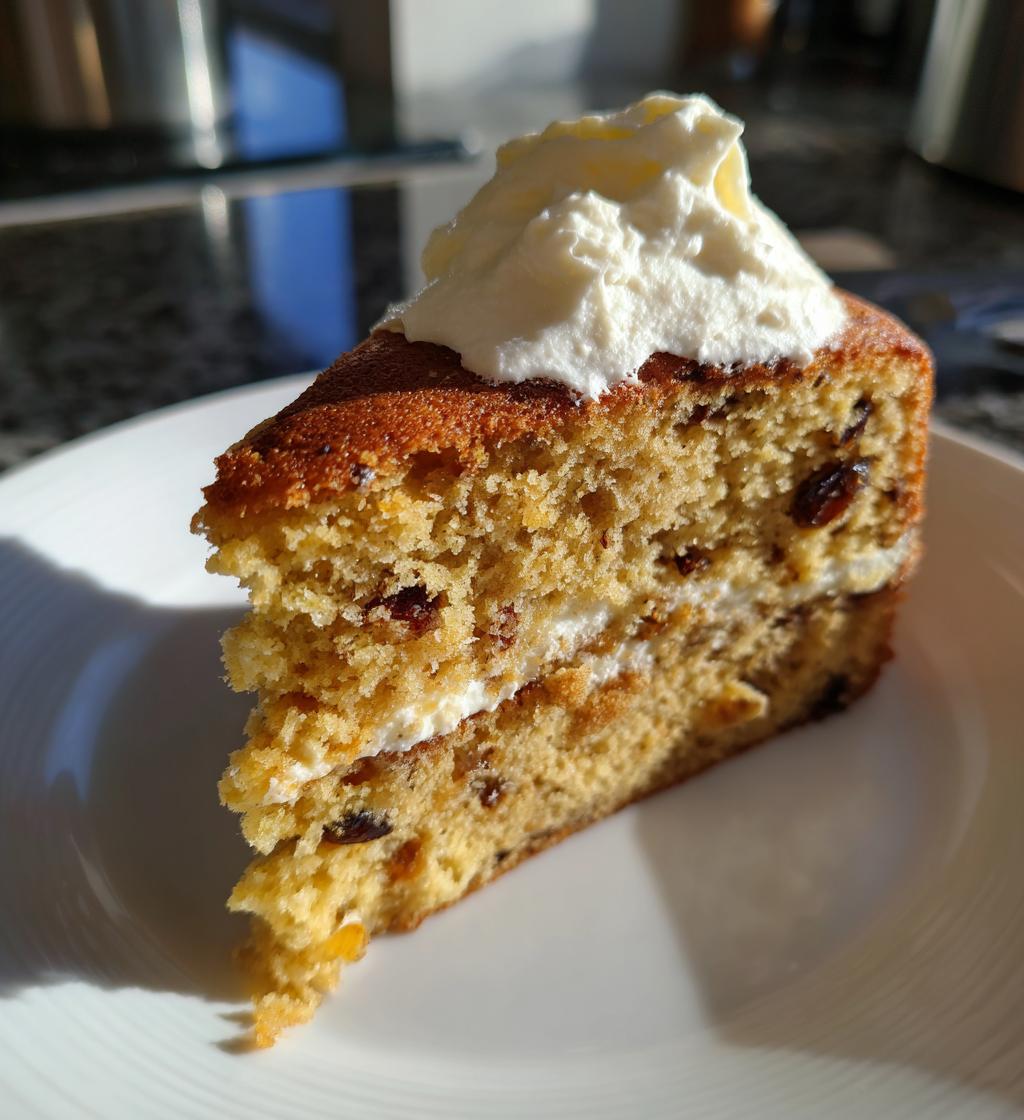
Irish Desserts that Evoke Sweet Memories and Comfort
- Total Time: 45 minutes
- Yield: 8 servings 1x
- Diet: Vegetarian
Description
A collection of traditional Irish desserts that satisfy your sweet cravings.
Ingredients
- 2 cups all-purpose flour
- 1 cup sugar
- 1/2 cup unsalted butter
- 2 large eggs
- 1 cup buttermilk
- 1 tsp baking powder
- 1 tsp baking soda
- 1 tsp vanilla extract
- 1/2 cup raisins
Instructions
- Preheat your oven to 350°F (175°C).
- In a bowl, cream the butter and sugar together.
- Add the eggs one at a time, mixing well after each.
- Stir in the buttermilk and vanilla extract.
- In another bowl, combine flour, baking powder, and baking soda.
- Gradually mix dry ingredients into the wet mixture.
- Fold in the raisins.
- Pour the batter into a greased baking dish.
- Bake for 25-30 minutes or until a toothpick comes out clean.
Notes
- Serve with whipped cream or custard.
- Store leftovers in an airtight container.
- Can be enjoyed warm or cold.
- Prep Time: 15 minutes
- Cook Time: 30 minutes
- Category: Dessert
- Method: Baking
- Cuisine: Irish
Nutrition
- Serving Size: 1 piece
- Calories: 250
- Sugar: 15g
- Sodium: 150mg
- Fat: 10g
- Saturated Fat: 6g
- Unsaturated Fat: 3g
- Trans Fat: 0g
- Carbohydrates: 35g
- Fiber: 1g
- Protein: 4g
- Cholesterol: 50mg
Keywords: irish desserts


