

You know those nights when you need dinner now, but takeout just won’t cut it? That’s when my cheesy chicken garlic wraps save the day. I’ve been perfecting this recipe since my college days (when a pan and tortillas were my only kitchen tools). The magic happens in 20 minutes flat—garlicky chicken, melty cheese, and a bright splash of lemon all wrapped up in a warm tortilla. My kids call them “mom’s magic rolls” because they disappear faster than I can make them. After a decade of wrap experiments, this version hits all the right notes—easy, flavorful, and seriously satisfying.
Ingredients for Irresistibly Delicious Cheesy Chicken Garlic Wraps
Here’s everything you’ll need for these flavor-packed wraps. I promise, it’s all super simple stuff – probably already in your kitchen! The key is having everything prepped and ready to go since this recipe comes together so fast.
- 2 boneless, skinless chicken breasts – thinly sliced (about 1/4 inch thick – this helps them cook quickly and evenly)
- 1 tablespoon olive oil – my grandma always said “good oil makes good food”
- 3 cloves garlic – minced (fresh is best here – that jarred stuff just doesn’t give the same punch)
- 1 teaspoon paprika – smoked or sweet, your choice (I use both depending on my mood!)
- 1/2 teaspoon salt – just enough to make all the flavors pop
- 1/4 teaspoon black pepper – freshly ground if you’ve got it
- 1 cup shredded cheddar cheese – sharp cheddar is my go-to, but see my substitution ideas later
- 4 large flour tortillas – burrito size (about 10-inch) work perfectly
- 1/4 cup sour cream – the creamy base that holds it all together
- 1/4 cup chopped fresh parsley – don’t skip this! That bright green freshness makes all the difference
- 1 tablespoon lemon juice – just a quick squeeze to brighten everything up
Pro tip from my many wrap-making adventures: Prep your garlic and parsley first so they’re ready when you need them. Nothing worse than trying to mince garlic with chicken sizzling in the pan!
How To Make Irresistibly Delicious Cheesy Chicken Garlic Wraps
Okay, let’s get cooking! This is where the magic happens. I’ve made these wraps so many times I could probably do it in my sleep (and honestly, after a long day, sometimes it feels like I do!). But follow these simple steps, and you’ll have dinner ready before you know it.
Cooking the Chicken and Garlic
First things first – grab your favorite skillet (mine’s that slightly battered one with the perfect seasoning) and heat your olive oil over medium heat. You’ll know it’s ready when a tiny piece of garlic sizzles immediately. Now add all that glorious minced garlic – the smell alone will make your stomach growl! Let it cook just until fragrant, about 30 seconds max. Don’t walk away here – garlic burns faster than you’d think. For more on cooking techniques, check out cooking techniques.
Next, toss in your thinly sliced chicken breasts. Here’s my trick: spread them out in a single layer so they all get that perfect golden edge. Sprinkle on the paprika, salt, and pepper. The paprika will make everything turn this gorgeous sunset color. Cook for about 3 minutes per side until there’s no pink left – I usually cut into the thickest piece to check. When the juices run clear, you’re golden (literally and figuratively!).
Assembling the Wraps
Now for the fun part! Lay out your tortillas on a clean surface. I like to warm them for about 10 seconds in the microwave first – it makes them way more pliable and less likely to crack when rolling. Spread that sour cream evenly over each one, going almost to the edges. Don’t be shy here – it’s the glue that holds everything together!
Sprinkle your cheese over the sour cream while the chicken’s still warm – the residual heat helps it start melting immediately. Then divide your garlicky chicken evenly among the tortillas. Top with that fresh parsley and a quick squeeze of lemon juice (this little pop of acidity cuts through all the richness perfectly).
Here’s how I roll them up tight: Fold in the sides about an inch, then start rolling from the bottom up, tucking as you go. If you’ve ever rolled a burrito, it’s the same move. Pro tip: Don’t overstuff! Leave about 2 inches at the top to prevent spillage. Sometimes I slice them in half diagonally – makes them look extra fancy and easier to eat.
That’s it! You’ve just made what might become your new favorite weeknight dinner. Now try not to burn your mouth as you take that first irresistible bite…
Why You’ll Love These Irresistibly Delicious Cheesy Chicken Garlic Wraps
Listen, I don’t mean to brag, but these wraps check all the boxes. They’ve saved my bacon (or should I say chicken?) on more crazy weeknights than I can count. Here’s why they’ve earned a permanent spot in my recipe rotation:
- Speed demon: From fridge to table in 20 minutes flat – faster than delivery and way tastier. I’ve literally made these while helping my kids with homework!
- Flavor bomb: Garlic + cheese + lemon? Come on. That crispy, golden chicken with melty cheddar is a combo that never gets old.
- Kid-approved: My picky eater actually asks for these. The wraps make finger food fun, and that sprinkle of parsley counts as “eating greens” in my book.
- Customizable canvas: Swap in whatever you’ve got – different cheeses, leftover veggies, even different proteins. My husband adds hot sauce; I pile on avocado.
- Minimal cleanup: One pan, a cutting board, and done. On exhausted nights, I’ve been known to eat straight from the skillet (no judgment).
- Meal prep superstar: The chicken keeps beautifully in the fridge for next-day wraps or salads. I often double the batch for easy lunches.
Honestly? The first time I made these, I knew I’d struck gold. They’re the kind of recipe that makes you feel like a kitchen rockstar with zero effort. Just wait till you see how fast they disappear from the plate!
Tips for Perfect Irresistibly Delicious Cheesy Chicken Garlic Wraps
After years of wrap-making trial and error (and a few messy failures!), I’ve learned all the tricks to make these cheesy chicken garlic wraps foolproof. These little nuggets of wisdom will take your wraps from good to “can I have the recipe?” status every single time.
Warm those tortillas! I can’t stress this enough – cold tortillas crack faster than my resolve on a diet. Ten seconds in the microwave or 30 seconds in a dry skillet makes them pliable. If you’re feeling fancy, brush them lightly with butter before warming for extra flavor.
Don’t skimp on the resting time. Let your cooked chicken sit for 2-3 minutes before adding to wraps. This keeps all those juicy flavors locked in instead of leaking into your tortilla. Plus, piping hot chicken can make the sour cream separate – not a good look!
The Goldilocks filling principle: Too little filling makes sad, limp wraps. Too much creates a structural disaster. Aim for about 1/2 cup of chicken mixture per 10-inch tortilla, leaving a 2-inch border at the top. Pro tip: Spread ingredients horizontally rather than piling them in the center.
Roll like you mean it! Here’s my foolproof technique: Fold in the sides first, then roll up from the bottom while gently tucking the filling in with your fingers. Wrap tightly in parchment or foil if you’re not serving immediately – it helps them hold their shape.
Knife matters: For clean cuts, use a serrated knife and press down firmly without sawing. Wipe the blade between slices if things get messy. I sometimes chill wraps for 5 minutes before cutting – it helps everything set.
Sauce strategy: If adding extra sauces (like ranch or hot sauce), drizzle after cutting to prevent soggy tortillas. I serve extras on the side for dipping – my kids love this “interactive” element.
Remember – even if your first attempt isn’t picture-perfect, it’ll still taste amazing. My early wraps looked like abstract art, but the flavor won everyone over. Now go forth and wrap with confidence!
Ingredient Substitutions and Variations
One of the best things about these wraps? They’re like a culinary choose-your-own-adventure! Over the years, I’ve tried every variation imaginable – sometimes by choice, sometimes because I was raiding an almost-empty fridge at midnight. Here are my favorite twists that still keep the spirit of the original recipe alive.
Cheese choices beyond cheddar
While sharp cheddar is my first love, I’ve had great success with:
- Mozzarella – melts beautifully and gives that classic pizza vibe
- Pepper jack – adds a subtle kick that works wonders with the garlic
- Monterey jack – super melty and mild for sensitive palates
- Feta – crumbled on top for a salty, tangy punch (my Greek friend’s brilliant idea)
One time I used up bits of three different cheeses – it was like a cheesy treasure hunt in every bite!
Protein swaps for chicken
No chicken? No problem! These work great:
- Leftover turkey – Thanksgiving leftovers never stood a chance
- Thinly sliced steak – cook it rare and slice against the grain
- Shrimp – cooks in half the time (add with the garlic to prevent rubberiness)
- Chickpeas – smashed slightly for my vegetarian friends
Protip: Pre-cooked rotisserie chicken is a total game-changer when you’re extra pressed for time.
Veggie boosters
My kids don’t always notice when I sneak in:
- Sautéed bell peppers and onions – cook with the garlic for extra flavor
- Spinach – wilts beautifully when added to the warm chicken
- Sliced avocado – add after cooking for creaminess
- Pickled jalapeños – for those who like it spicy
Last summer I used zucchini ribbons from my garden – they picked up all those garlicky flavors perfectly.
Sauce alternatives
Not a sour cream fan? Try:
- Greek yogurt – same tang with extra protein
- Avocado crema – blend avocado with lime and salt
- Hummus – spreads easily and adds depth
- Pesto – a little goes a long way for Italian flair
My college roommate swore by mixing mayo and hot sauce – messy but delicious!
The beauty of this recipe is how forgiving it is. As my grandma used to say while cooking, “Hungry people don’t care about rules.” So play around and make it your own – I’d love to hear what crazy combinations you come up with!
Serving Suggestions for Irresistibly Delicious Cheesy Chicken Garlic Wraps
Now that you’ve made these incredible wraps, let’s talk about how to turn them into a complete meal that’ll have everyone begging for seconds. I’ve served these at everything from casual family dinners to impromptu gatherings with friends – here are my favorite ways to round out the plate.
The perfect side salad: A simple mix of crisp romaine, cherry tomatoes, and cucumber with a light vinaigrette balances the richness of the wraps beautifully. My secret? Toss the greens with a squeeze of that same lemon you used in the wraps – it ties everything together. For heartier appetites, I’ll add quinoa or chickpeas to make it more substantial. For a similar fresh salad, try our Strawberry Spinach Salad with Walnuts.
Dipping sauce bonanza: While these wraps are fantastic on their own, setting out a few dipping sauces turns dinner into a fun, interactive experience. My family goes wild for:
- Chipotle mayo (just mix mayo with adobo sauce)
- Cooling ranch or blue cheese dressing
- Sriracha-lime crema (sour cream + lime zest + sriracha)
- Warmed marinara for a pizza-like twist
I arrange them in small bowls with spoons – the kids love mixing and matching flavors!
Roasted veggie magic: When I want something warm on the side, I’ll roast whatever vegetables I have on hand. Toss broccoli florets, zucchini slices, or sweet potato wedges with olive oil, salt, and a pinch of the same paprika used in the wraps. Roast at 425°F while you’re cooking the chicken – everything finishes at the same time. The caramelized edges pair amazingly with the creamy wraps.
Chips and salsa simplicity: For ultra-casual nights, I keep it easy with tortilla chips and fresh salsa or guacamole. The crunch contrasts nicely with the soft wraps, and it feels like a restaurant-style meal with zero fuss. Sometimes I’ll make “walking tacos” by crumbling chips right into the wrap for extra texture.
Soup companion: On chilly evenings, I love serving these with a simple tomato soup or chicken tortilla soup for dipping. It’s like grown-up grilled cheese and tomato soup – the ultimate comfort food combo. My mom always said “soup and sandwiches make any day better,” and she wasn’t wrong! For a similar comforting soup, check out our Classic Chicken Noodle Soup Recipe – Easy 30 Minutes.
Honestly? These wraps are so versatile they work with practically anything. I’ve even served them sliced into pinwheels as party appetizers with a platter of raw veggies. The only wrong way to enjoy them is… well, not enjoying them! What will you pair with yours tonight?
Storing and Reheating
Here’s the good news – these wraps actually hold up beautifully as leftovers (not that there’s usually many left in my house!). After years of trial and error (and a few sad, soggy failures), I’ve nailed the perfect way to store and reheat them so they taste just-made fresh.
Fridge storage like a pro
First rule: Let your wraps cool completely before storing – about 20 minutes on the counter. Trapped steam turns tortillas gummy faster than you’d think. I wrap each one individually in foil or parchment paper, then tuck them all into an airtight container. They’ll keep like this for up to 3 days in the fridge (though mine never last that long!).
If you’ve already sliced them, here’s my trick: Stand the halves upright in the container with parchment between layers. This prevents the cut sides from sticking together and getting mushy. Learned this the hard way after ruining a batch by stacking them flat!
Reheating for maximum deliciousness
Now, the microwave is fine in a pinch (30 seconds on 50% power does the trick), but if you want that just-made magic back, the oven’s your friend. Here’s my foolproof method:
- Preheat oven to 350°F
- Unwrap and place wraps on a baking sheet
- Lightly spritz with water or brush with melted butter
- Bake for 5-7 minutes until heated through
For extra crispness, I’ll sometimes finish them under the broiler for 1 minute – just keep a close eye so they don’t burn! The cheese gets all bubbly again, and the tortilla regains that perfect texture.
If you’re reheating pre-sliced wraps, arrange them cut-side up and bake for 3-4 minutes. I sometimes sprinkle a tiny bit of extra cheese on top – it melts into the most delicious crispy edges.
Freezer-friendly option
Yes, you can freeze these! Wrap tightly in foil, then place in freezer bags for up to 2 months. Thaw overnight in the fridge before reheating. The texture changes slightly, but when a craving hits at midnight, you won’t care one bit. My college-age niece keeps a stash in her dorm freezer for “emergency study snacks.”
One last tip: If you know you’ll have leftovers, consider storing the components separately. The chicken mixture keeps beautifully in its own container, and you can assemble fresh wraps each time. The sour cream and cheese stay fresher this way too. My meal prep Sundays often include a big batch of the garlic chicken just for this purpose!
Nutritional Information
Okay, let’s talk numbers – but keep in mind, these are rough estimates because we all know how cooking really goes! Your exact nutrition facts will dance around depending on your tortilla brand, cheese choices, and whether you go heavy-handed with that sour cream like I sometimes do. (No judgment here – life’s too short for skimpy portions!)
Each wrap gives you a solid balance of protein from the chicken, carbs from the tortilla, and yes, some fat from all that glorious cheese. It’s what I call a “happy medium” meal – satisfying enough to keep you full, but not so heavy that you need a nap afterward. The fresh parsley and lemon juice add little vitamin boosts too!
If you’re tracking specifics for dietary needs, I highly recommend plugging your exact ingredients into a nutrition calculator. Brands vary wildly – one store’s “large” tortilla might be another’s “medium”, and cheese shreds can differ in fat content. My friend the dietitian always reminds me that homemade meals are almost always healthier than takeout anyway, so enjoy every garlicky, cheesy bite!
Remember: Food is meant to nourish both body and soul. These wraps do both beautifully – they feed your hunger while making your taste buds dance. Now go eat that deliciousness without an ounce of guilt!
Frequently Asked Questions
Can I use pre-cooked chicken?
Absolutely! Rotisserie chicken is my secret weapon when I’m extra short on time. Just shred or chop about 2 cups of cooked chicken, warm it briefly with the garlic and spices, and you’re golden. Leftover grilled chicken works great too – the smokier the better!
How long do leftovers last in the fridge?
Wrapped tightly, these beauties keep for 3 days max before the tortillas start getting soggy. But here’s my pro tip: Store the filling separately from the tortillas and assemble fresh wraps when you’re ready to eat. The chicken mixture actually gets more flavorful overnight!
Can I make these ahead for meal prep?
You bet! I often prep all the components on Sunday for grab-and-go lunches. Keep the cooked chicken in one container, prepped veggies in another, and assemble as needed. The wraps taste best when freshly rolled, but pre-assembled ones will last 1 day in the fridge if wrapped tightly in parchment.
What’s the best way to keep wraps from getting soggy?
Three words: moisture barrier strategy. Spread your sour cream all the way to the edges – it creates a protective layer. Also, make sure your chicken isn’t piping hot when assembling, and don’t overdo wet ingredients like tomatoes. If packing for lunch, I’ll sometimes wrap mine in a paper towel before foil – it absorbs any excess moisture.
Can I use corn tortillas instead of flour?
You can, but they’ll be trickier to roll without cracking. If you’re gluten-free, look for extra-large GF flour tortillas. For corn tortilla fans, I recommend making them into quesadilla-style melts instead – same amazing flavors, easier execution!
Try this recipe and share your twist in the comments – I’m always looking for new variations to try on my family!
Print
20-Min Cheesy Chicken Garlic Wraps You’ll Crave Forever
- Total Time: 20 minutes
- Yield: 4 wraps 1x
- Diet: Low Lactose
Description
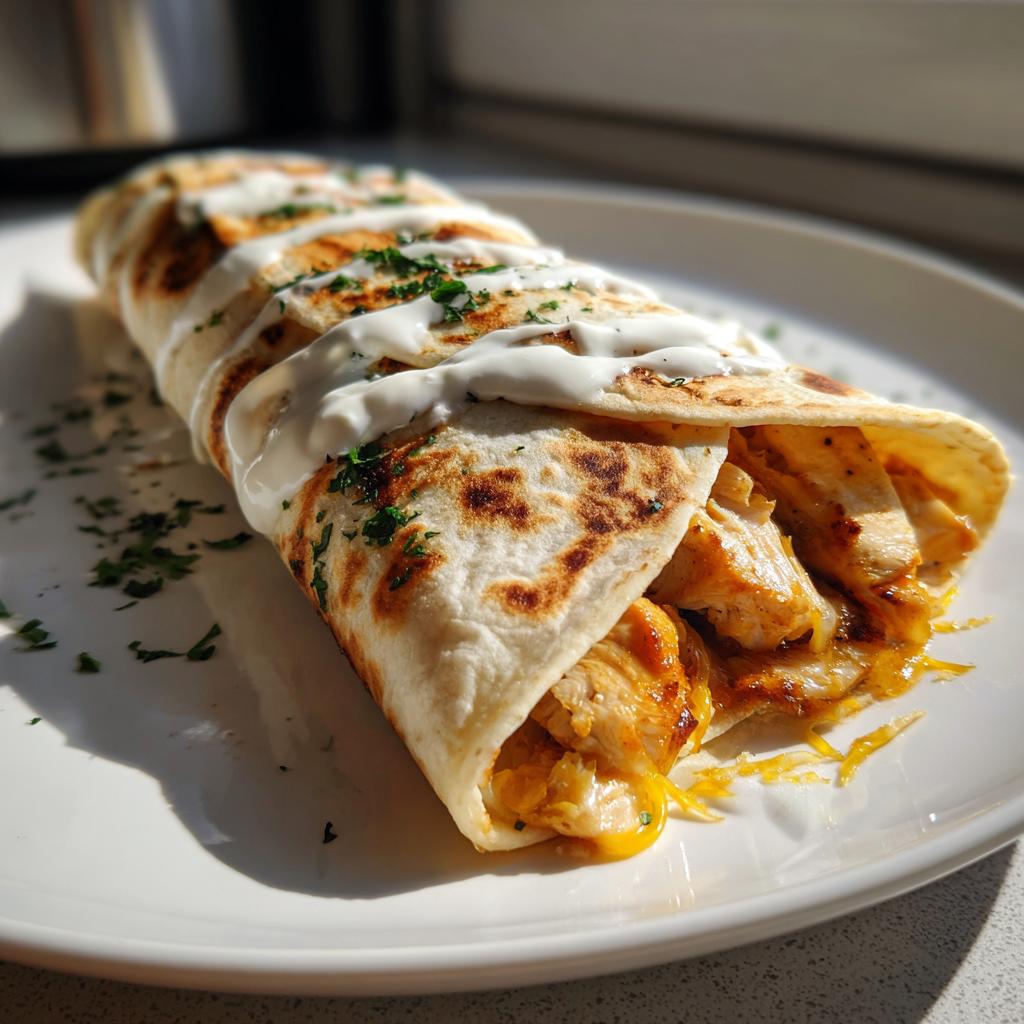
A simple and delicious recipe for cheesy chicken garlic wraps that are perfect for a quick meal or snack.
Ingredients
- 2 boneless, skinless chicken breasts, thinly sliced
- 1 tablespoon olive oil
- 3 cloves garlic, minced
- 1 teaspoon paprika
- 1/2 teaspoon salt
- 1/4 teaspoon black pepper
- 1 cup shredded cheddar cheese
- 4 large flour tortillas
- 1/4 cup sour cream
- 1/4 cup chopped fresh parsley
- 1 tablespoon lemon juice
Instructions
- Heat olive oil in a pan over medium heat.
- Add minced garlic and sauté for 30 seconds until fragrant.
- Add chicken slices, paprika, salt, and black pepper. Cook until chicken is fully done, about 5-7 minutes.
- Remove chicken from heat and let it cool slightly.
- Spread sour cream evenly on each tortilla.
- Sprinkle shredded cheddar cheese over the sour cream.
- Divide the cooked chicken evenly among the tortillas.
- Top with chopped parsley and a drizzle of lemon juice.
- Roll the tortillas tightly and slice in half if desired.
- Serve warm and enjoy.
Notes
- You can substitute cheddar cheese with mozzarella or any melting cheese.
- Add chopped vegetables like bell peppers or onions for extra crunch.
- For a spicier version, add a pinch of chili flakes.
- Prep Time: 10 minutes
- Cook Time: 10 minutes
- Category: Main Course
- Method: Stovetop
- Cuisine: American
Nutrition
- Serving Size: 1 wrap
- Calories: 350
- Sugar: 2g
- Sodium: 450mg
- Fat: 18g
- Saturated Fat: 7g
- Unsaturated Fat: 8g
- Trans Fat: 0g
- Carbohydrates: 25g
- Fiber: 2g
- Protein: 22g
- Cholesterol: 65mg
Keywords: cheesy chicken garlic wraps, easy wrap recipe, chicken wraps, quick meal


