
I still remember my first bite of real tiramisu in a tiny café in Rome – the perfect balance of creamy mascarpone, bitter espresso, and just a hint of sweetness that made me close my eyes and sigh. That moment sparked my love affair with this classic Italian dessert. Now, years later, I’ve perfected my own Homemade Tiramisu Cake that brings that same magic to my kitchen. The best part? It’s shockingly simple to make – no oven required! Just layer, chill, and let the flavors meld into something truly special. Trust me, once you taste this elegant no-bake dessert, you’ll never settle for store-bought again.
Why You’ll Love This Homemade Tiramisu Cake
This isn’t just any dessert – it’s the kind that makes people beg for the recipe! Here’s why it’ll become your go-to:
- No oven needed: Perfect for hot days or when you’re short on time (just mix, layer, and chill!)
- Crowd-pleasing flavors: That magical combo of coffee, creamy mascarpone, and cocoa will have everyone coming back for seconds
- Fancy-looking but foolproof: Looks like you spent hours, but the assembly is actually super simple
- Better with time: Tastes even more amazing after chilling overnight – great for making ahead!
Ingredients for Homemade Tiramisu Cake
Gathering the right ingredients makes all the difference with tiramisu – trust me, I’ve learned this the hard way! Here’s exactly what you’ll need:
- The creamy base: 6 large egg yolks (save the whites for omelets!), 3/4 cup granulated sugar, 16 oz mascarpone cheese (get the good stuff – full-fat only!), 2/3 cup milk, 1 1/4 cups heavy cream
- The coffee magic: 1 cup strong brewed coffee, cooled completely (I use espresso shots when feeling fancy), 2 tbsp coffee liqueur (optional but oh-so-good)
- The structure: 24-30 ladyfinger cookies (Savoiardi work best), 2 tbsp cocoa powder for dusting
Pro tip: Measure everything before starting – this dessert comes together fast once you begin!
Equipment You’ll Need
Don’t worry – you probably already have most of these in your kitchen! Here’s what I grab every time I make tiramisu:
- 2 mixing bowls (one heatproof for the egg mixture)
- Whisk (my trusty balloon whisk never fails me)
- Electric mixer or strong arm for whipping cream
- Shallow dish (I use a pie plate for dipping ladyfingers)
- 8×8 inch baking dish or pretty serving dish
- Rubber spatula (for gentle folding – no harsh stirring!)
That’s it! No fancy gadgets needed for this simple, elegant dessert.
How to Make Homemade Tiramisu Cake
Okay, let’s get to the fun part – making this dreamy dessert! I’ll walk you through each step like I’m right there in your kitchen with you. Just follow along, and you’ll have the most heavenly tiramisu ready in no time.
Preparing the Egg Mixture
First, we’ll make the rich custard base that gives tiramisu its luxurious texture. Grab your heatproof bowl and whisk together the egg yolks and sugar until they’re pale and smooth – about 2 minutes of good whisking should do it. Now, here’s the important part: place the bowl over a pot of simmering water (not boiling – we don’t want scrambled eggs!) and whisk constantly. I mean it – don’t stop whisking! After about 5 minutes, you’ll notice the mixture thickens enough to coat the back of a spoon. That’s your cue to remove it from heat. Let it cool slightly while you prep the other components – this prevents the mascarpone from melting when we fold it in later.
Assembling the Layers
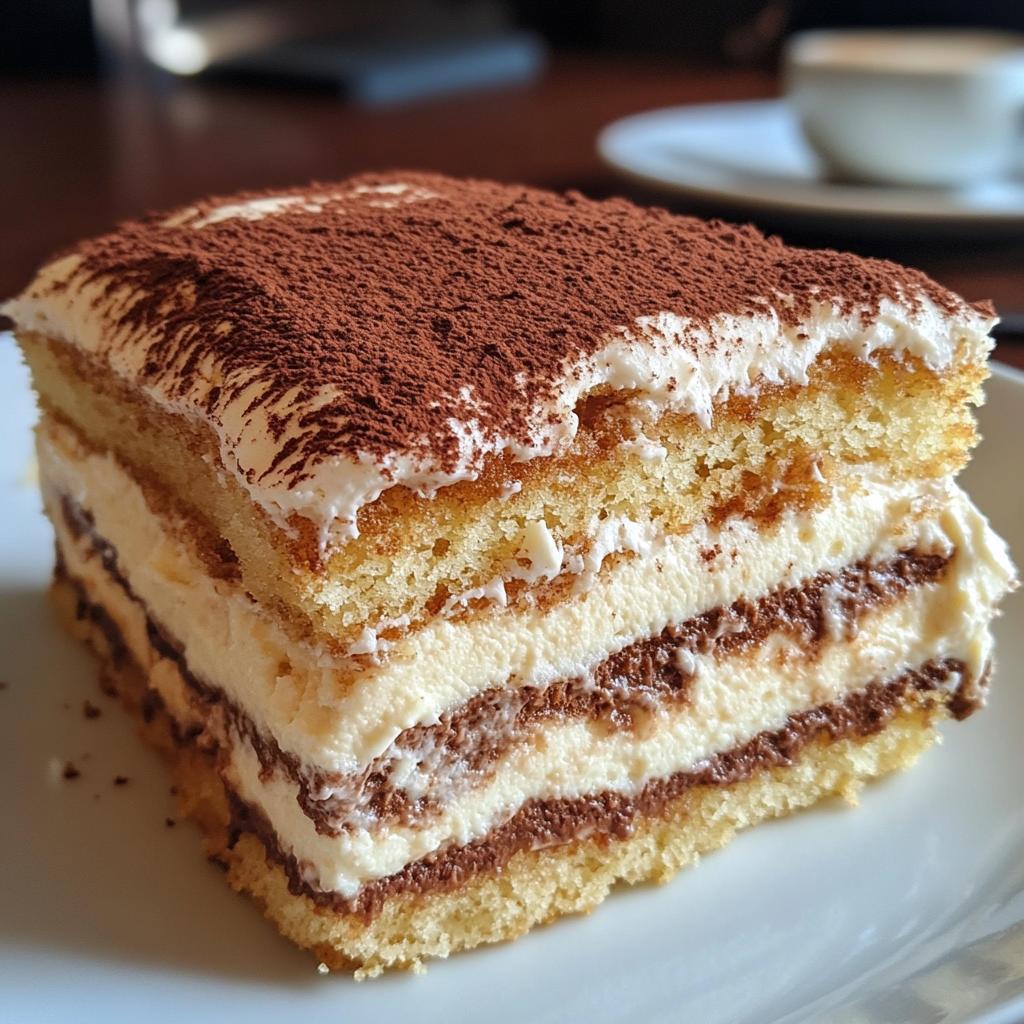
Now for the fun assembly! Mix your cooled coffee and liqueur (if using) in a shallow dish – I use my pie plate because it’s the perfect size. Quickly dip each ladyfinger into the coffee mixture – and I mean quickly! Just 1-2 seconds per side is enough. Any longer and they’ll turn to mush (learned that the hard way during my first attempt!). Arrange them in a single layer in your dish. Spread half the mascarpone mixture over the top, then repeat with another layer of dipped ladyfingers and the remaining cream. Here’s my secret: I like to gently shake the dish to help the cream settle evenly without overworking it. Finally, cover and chill for at least 4 hours (overnight is even better – the flavors really develop!). Just before serving, dust with cocoa powder through a fine mesh strainer for that perfect finishing touch.
See? Not complicated at all! The hardest part is waiting for it to chill – but trust me, it’s worth every minute.
Tips for Perfect Homemade Tiramisu Cake
After making this dessert more times than I can count, here are my can’t-live-without tips for tiramisu success:
- Mascarpone matters: Always use full-fat – the cheap stuff makes the cream runny and sad (trust me, I cried over a failed batch once)
- Patience pays off: Let it chill overnight if you can – the flavors meld into something magical
- Dip don’t dunk: Ladyfingers should just kiss the coffee – any longer and you’ll have a soggy mess
- Last-minute dusting: Wait to add cocoa powder until right before serving to prevent it from getting damp
- Temperature is key: Let all ingredients come to room temp before mixing – cold mascarpone clumps like crazy!
Follow these simple tricks, and you’ll have tiramisu that would make an Italian nonna proud!
Variations for Homemade Tiramisu Cake
One of the best things about tiramisu? How easily you can tweak it to suit your taste! Here are my favorite twists:
- Boozy swaps: Try amaretto instead of coffee liqueur for an almond kick, or skip alcohol entirely with vanilla extract
- Gluten-free: Use gluten-free ladyfingers – they work just as well when dipped carefully
- Decaf version: Substitute decaf espresso for regular if you’re serving it late
- Fruit twist: Add a layer of fresh raspberries between the cream for a pop of color and tartness
Don’t be afraid to play around – that’s how the best family recipes are born!
Serving and Storing Homemade Tiramisu Cake
Here’s how I serve my tiramisu for maximum wow factor: straight from the fridge with tiny espresso cups on the side. The contrast between cold, creamy cake and hot, bitter espresso is pure magic! For storage, just press plastic wrap directly on the surface (this prevents drying out) and refrigerate up to 3 days. Fair warning – it never lasts that long in my house! Avoid freezing though – the texture turns grainy and sad. Pro tip: Slice with a hot, dry knife for picture-perfect servings every time.
Homemade Tiramisu Cake FAQs
I’ve answered every question under the sun about this recipe at family gatherings – here are the ones I hear most often!
- Can I skip the alcohol? Absolutely! Just replace the coffee liqueur with an extra tablespoon of coffee or a splash of vanilla extract. The flavor will still be amazing.
- Help! My mascarpone mixture is runny – what now? No panic needed! Just pop it in the fridge for 20 minutes to firm up. Next time, make sure your mascarpone and cream are very cold before whipping.
- Can I make this ahead for a party? You bet! In fact, it’s better when made a day in advance – the flavors have time to get cozy together.
- What if I can’t find ladyfingers? Thin slices of pound cake work in a pinch, but adjust the coffee dipping time (they soak up liquid faster).
- Is raw egg safe? The egg yolks get cooked gently over simmering water, making them perfectly safe to eat. If you’re concerned, look for pasteurized eggs.
Still have questions? I’m happy to help – just ask in the comments!
Nutritional Information
Just a quick heads up – these numbers are estimates since ingredients can vary. But for those curious, each generous slice of Homemade Tiramisu Cake clocks in around 450 calories with 30g of fat (worth every bite if you ask me!). Remember, portion sizes and specific brands will change the exact counts.
Share Your Homemade Tiramisu Cake
I can’t wait to see your creations! Snap a photo of your masterpiece and tag me – I love celebrating kitchen wins with fellow dessert lovers. Did you put your own spin on it? Tell me all about it in the comments below!
Print
Irresistible Homemade Tiramisu Cake Recipe
- Total Time: 4 hours 40 minutes
- Yield: 8 servings 1x
- Diet: Vegetarian
Description
A classic Italian dessert made with layers of coffee-soaked ladyfingers and a rich mascarpone cream.
Ingredients
- 6 large egg yolks
- 3/4 cup granulated sugar
- 2/3 cup milk
- 1 1/4 cups heavy cream
- 16 oz mascarpone cheese
- 1 cup strong brewed coffee, cooled
- 2 tbsp coffee liqueur (optional)
- 24–30 ladyfinger cookies
- 2 tbsp cocoa powder for dusting
Instructions
- In a heatproof bowl, whisk egg yolks and sugar until smooth.
- Place the bowl over a pot of simmering water and whisk constantly until thickened.
- Remove from heat and let cool slightly.
- In a separate bowl, beat heavy cream until stiff peaks form.
- Fold mascarpone into the egg mixture, then gently fold in the whipped cream.
- Mix coffee and liqueur in a shallow dish.
- Dip each ladyfinger into the coffee mixture briefly and layer in a dish.
- Spread half the mascarpone mixture over the ladyfingers.
- Repeat with another layer of dipped ladyfingers and mascarpone.
- Chill for at least 4 hours or overnight.
- Dust with cocoa powder before serving.
Notes
- Use fresh, high-quality mascarpone for best results.
- Do not oversoak the ladyfingers to prevent sogginess.
- Chilling overnight enhances the flavors.
- Prep Time: 30 minutes
- Cook Time: 10 minutes
- Category: Dessert
- Method: No-Bake
- Cuisine: Italian
Nutrition
- Serving Size: 1 slice
- Calories: 450
- Sugar: 25g
- Sodium: 80mg
- Fat: 30g
- Saturated Fat: 18g
- Unsaturated Fat: 10g
- Trans Fat: 0g
- Carbohydrates: 35g
- Fiber: 1g
- Protein: 7g
- Cholesterol: 200mg
Keywords: tiramisu, homemade, Italian dessert, no-bake cake


