
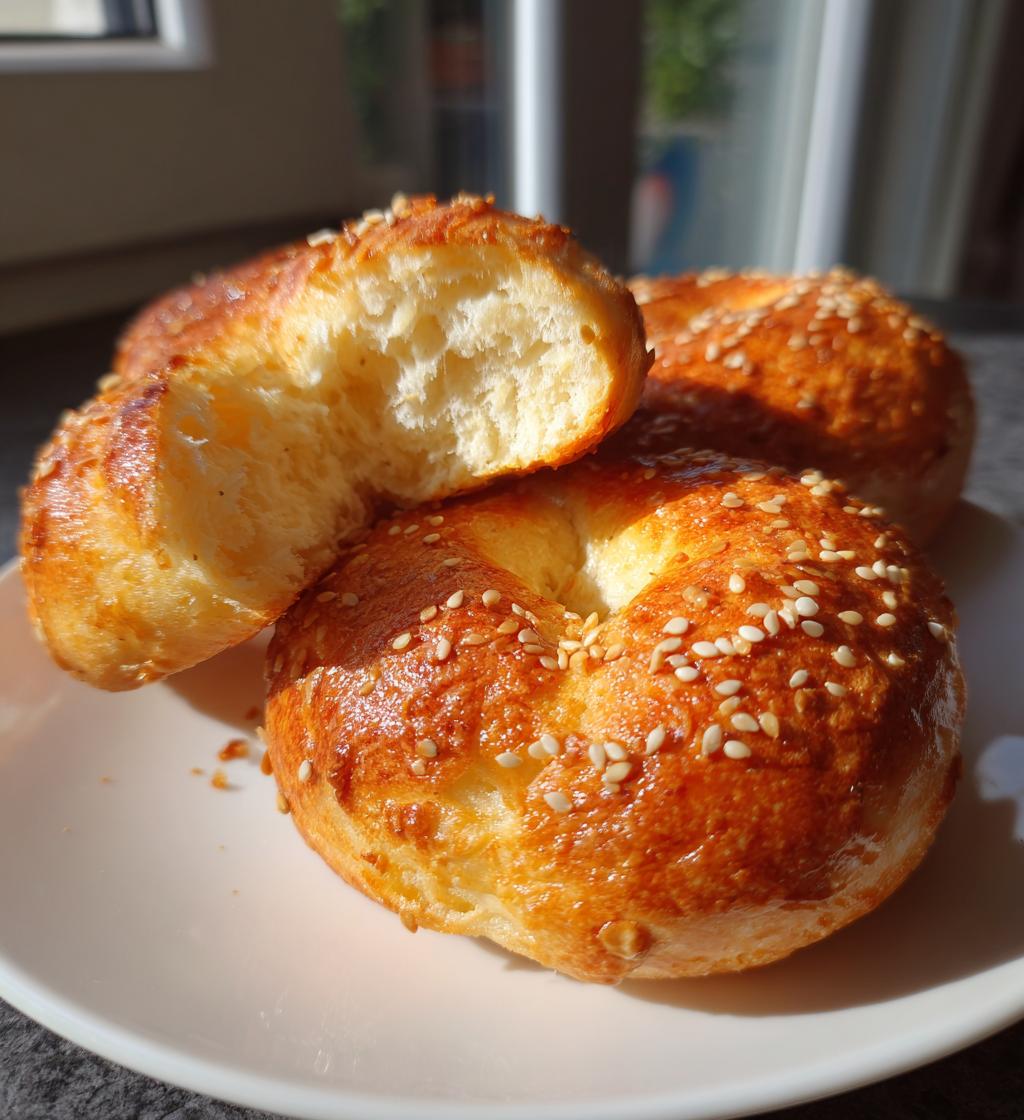
Oh my goodness, if you haven’t tried making gluten free protein bagels yet, you’re in for a treat! These little beauties are not just a tasty alternative to traditional bagels; they’re packed with nutrition and flavor that will make your breakfast feel like a celebration. I remember the first time I whipped up a batch in my kitchen. The smell of them baking filled the house, and I couldn’t wait to tear into one fresh out of the oven. I topped it with a little cream cheese and some fresh tomatoes, and let me tell you, it was a game changer!
These gluten free protein bagels are a fantastic way to start your day, especially if you’re looking for something that’s not only yummy but also high in protein and lower in carbs. With just a handful of simple ingredients, you can create a breakfast treat that not only satisfies but also fuels your day. They’re perfect for busy mornings or a cozy weekend brunch. Trust me, once you bake these up, you’ll be hooked!
Ingredients List
To make these delicious gluten free protein bagels, you’ll need the following ingredients:
- 1 cup gluten free flour
- 1/2 cup protein powder
- 1 tsp baking powder
- 1/2 tsp salt
- 1/4 cup yogurt
- 1/4 cup water
- 1 egg
- 1 tbsp olive oil
- 1 tbsp honey
Gather these ingredients before you start, and you’ll be on your way to creating a batch of bagels that not only taste amazing but also give you the boost you need to kickstart your day!
How to Prepare Gluten Free Protein Bagels
Making gluten free protein bagels is a breeze when you follow these simple steps! Trust me, you’ll find it so rewarding to shape and bake your very own bagels right at home. Let’s get started!
Step 1: Preheat the Oven
First things first, preheat your oven to 375°F (190°C). Preheating is crucial because it helps the bagels rise beautifully and develop that lovely golden color. Don’t skip this step!
Step 2: Mix Dry Ingredients
In a large mixing bowl, combine the gluten free flour, protein powder, baking powder, and salt. I like to whisk them together to make sure everything is evenly distributed. This step is key because it ensures that your bagels have a consistent flavor and texture throughout.
Step 3: Combine Wet Ingredients
Now, it’s time to add the wet ingredients! Pour in the yogurt, water, egg, olive oil, and honey into your dry mixture. Use a spatula or wooden spoon to mix everything together until well combined. You want to create a sticky dough that holds together nicely, but don’t worry if it seems a bit different than traditional wheat dough!
Step 4: Knead the Dough
Once your mixture is combined, it’s time to knead the dough. Lightly flour your hands (you can use more gluten free flour if you like) and start kneading right in the bowl or on a clean surface. Knead until the dough comes together and feels smooth—this should take about 2-3 minutes. If it’s too sticky, sprinkle a bit more flour as needed. Don’t over-knead, just enough to form a cohesive dough!
Step 5: Shape the Bagels
Now comes the fun part—shaping your bagels! Divide the dough into equal portions. I usually make eight bagels, but you can make them larger or smaller if you prefer. Roll each portion into a ball, then poke a hole in the center with your finger and gently stretch it to form a ring. Don’t worry if they’re not perfect; they’ll taste amazing regardless!
Step 6: Bake the Bagels
Place the shaped bagels on a baking sheet lined with parchment paper. Make sure they’re spaced out so they have room to expand. Pop them in the oven and bake for about 20-25 minutes, or until they’re golden brown and smell incredible. You’ll want to keep an eye on them towards the end to ensure they don’t overbake!
Step 7: Cool and Serve
Once out of the oven, let your bagels cool on a wire rack for a few minutes. This step is super important because it allows the bagels to firm up a bit before you dive in. Trust me, the wait is worth it! After they’ve cooled slightly, slice them up and enjoy with your favorite toppings!
Nutritional Information
Let’s talk numbers! Each gluten free protein bagel is like a little powerhouse of nutrition. Here’s the estimated nutritional breakdown per serving (that’s one bagel):
- Calories: 150
- Fat: 5g
- Saturated Fat: 1g
- Unsaturated Fat: 3g
- Trans Fat: 0g
- Cholesterol: 30mg
- Sodium: 150mg
- Carbohydrates: 20g
- Fiber: 3g
- Protein: 10g
- Sugar: 2g
Keep in mind, these values are estimates and can vary based on specific ingredients used. But isn’t it comforting to know you’re starting your day with a nutritious option that’s not only delicious but also full of protein? You can feel good about enjoying these bagels any time of day!
Why You’ll Love This Recipe
- Nutritious: These gluten free protein bagels pack a punch with wholesome ingredients, providing a great start to your day!
- High in Protein: With added protein powder, each bagel delivers a satisfying dose of protein to fuel your morning.
- Easy to Make: The straightforward steps make these bagels perfect for bakers of all skill levels. You don’t need to be a pro to whip these up!
- Customizable: Feel free to experiment with different toppings, from seeds to cheese, to make them your own!
- Freezer Friendly: You can make a big batch and freeze them for quick breakfasts on busy mornings. Just pop them in the toaster, and you’re good to go!
- Deliciously Satisfying: The texture and flavor of these bagels are simply irresistible; they’re sure to become a family favorite!
Tips for Success
Making gluten free protein bagels can be a delightful experience, and I want to share some of my favorite pro tips to ensure your bagels turn out perfect every single time! Trust me, these little gems will be your new go-to breakfast.
- Measure Carefully: Since gluten free flours can vary in density, I highly recommend using a kitchen scale for precision. This way, you’ll get the perfect balance of ingredients every time!
- Don’t Skip the Kneading: Kneading is essential for developing the right texture. It might feel different than traditional dough, but kneading helps bring everything together. Just remember, a little kneading goes a long way!
- Adjust for Humidity: If you’re in a humid environment, your dough might be a bit stickier. Don’t hesitate to add a touch more gluten free flour if needed, but be careful not to overdo it!
- Experiment with Flavor: Want to spice things up? Try adding herbs like garlic powder or onion powder to the dough for extra flavor. You can also fold in shredded cheese or seeds for a delightful twist!
- Watch the Baking Time: Every oven is different, so keep an eye on your bagels towards the end of the baking time. They should be golden brown, but if they start browning too quickly, you can cover them loosely with foil.
- Cool Properly: Allow your bagels to cool completely on a wire rack. This helps them firm up and enhances their texture. Plus, they’re easier to slice when cooled!
With these tips in your back pocket, you’ll be well on your way to mastering gluten free protein bagels that are as delightful as they are nutritious. Enjoy the process and get ready to impress your friends and family!
Variations
One of the best things about gluten free protein bagels is how versatile they are! You can easily switch things up to keep your breakfast exciting and personalized. Here are some fun variations to try:
- Herb-Infused Bagels: Add a tablespoon of dried herbs like oregano, basil, or garlic powder to the dry ingredients for a savory twist. These bagels are perfect for pairing with cream cheese or hummus!
- Cheesy Bagels: Fold in a half cup of shredded cheese (like cheddar or mozzarella) into the dough for a cheesy delight. You’ll love the gooey goodness in every bite!
- Seed-Topped Bagels: Before baking, sprinkle your bagels with sesame seeds, poppy seeds, or everything bagel seasoning for that classic bagel shop experience. It adds crunch and flavor that’s simply irresistible!
- Sweet Bagels: Want something sweeter? Substitute the honey with maple syrup and add a teaspoon of cinnamon to the dry mix. These bagels are perfect with a spread of peanut butter or a drizzle of honey!
- Fruit and Nut Bagels: Mix in a handful of chopped nuts or dried fruits like cranberries or blueberries. This adds a lovely texture and a burst of flavor that will brighten your morning!
- Spicy Bagels: For those who love a kick, add a pinch of cayenne pepper or crushed red pepper flakes to the dough. These spicy bagels are excellent with avocado or a spicy cream cheese spread!
Feel free to mix and match these variations to create your perfect bagel. The possibilities are endless, and each twist can bring a delightful new flavor to your breakfast table!
Storage & Reheating Instructions
Alright, so you’ve made your delicious gluten free protein bagels, and now you might be wondering how to store them and keep them fresh for later. Don’t worry, I’ve got you covered!
To store your bagels, let them cool completely on a wire rack first. Once they’re cool, place them in an airtight container. This helps prevent them from drying out and keeps them soft and tasty. If you plan on enjoying them within a few days, they’ll be just fine at room temperature. But if you want to save them for a longer time, pop them in the freezer!
For freezing, I recommend wrapping each bagel individually in plastic wrap, then placing them in a freezer-safe zip-top bag. This way, they won’t stick together, and you can grab just one or two at a time when the craving strikes. They can last in the freezer for about 2-3 months without losing flavor!
Now, when it’s time to enjoy your bagels, reheating them is super simple. If you’re in a hurry, you can pop a bagel in the microwave for about 20-30 seconds until warmed through. Just be careful not to overdo it, or they might get a bit chewy. For a crispier texture, I love to put them in the toaster or toaster oven. Just toast them until they’re golden brown and warm. It brings back that fresh-out-of-the-oven taste!
So, whether you’re storing them for a quick breakfast or just a snack, these tips will keep your gluten free protein bagels tasting fantastic. Enjoy every bite!
FAQ Section
Let’s tackle some of the most common questions I get about gluten free protein bagels. I want to make sure you feel confident and excited to bake your own!
Q1: Can I use a different type of gluten free flour for this recipe?
Absolutely! You can experiment with different gluten free flours like almond flour, coconut flour, or a gluten free all-purpose blend. Just keep in mind that some flours may absorb moisture differently, so you might need to adjust the liquid ingredients to get the right dough consistency.
Q2: How do I know when my bagels are done baking?
Great question! Your bagels are done when they’re golden brown and sound hollow when tapped on the bottom. The tops should feel firm to the touch, and the smell will be irresistible. If you’re not sure, you can always do the toothpick test in the center to check for doneness!
Q3: Can I make these bagels vegan?
Yes, you can! To make these gluten free protein bagels vegan, substitute the egg with a flax egg (1 tablespoon of ground flaxseed mixed with 2.5 tablespoons of water, allowed to sit for 5 minutes). You can also use a plant-based yogurt instead of dairy yogurt. They’ll still turn out delicious!
Q4: How long do these bagels last?
If stored properly in an airtight container, your gluten free protein bagels will stay fresh for about 2-3 days at room temperature. If you freeze them, they can last for up to 2-3 months. Just remember to wrap them well to maintain their freshness!
Q5: What toppings do you recommend for these bagels?
Oh, the possibilities are endless! You can top them with cream cheese, avocado, smoked salmon, or even peanut butter and banana for a sweet treat. For something savory, try adding sliced tomatoes and fresh herbs or a sprinkle of everything bagel seasoning. Get creative and enjoy!

gluten free protein bagels: 7 Deliciously Sweet Variations
- Total Time: 35 minutes
- Yield: 8 bagels 1x
- Diet: Gluten Free
Description
Gluten free protein bagels are a nutritious and tasty alternative to traditional bagels.
Ingredients
- 1 cup gluten free flour
- 1/2 cup protein powder
- 1 tsp baking powder
- 1/2 tsp salt
- 1/4 cup yogurt
- 1/4 cup water
- 1 egg
- 1 tbsp olive oil
- 1 tbsp honey
Instructions
- Preheat oven to 375°F (190°C).
- In a bowl, mix gluten free flour, protein powder, baking powder, and salt.
- Add yogurt, water, egg, olive oil, and honey to the dry ingredients.
- Knead the mixture until a dough forms.
- Divide the dough into equal portions and shape into bagels.
- Place bagels on a baking sheet lined with parchment paper.
- Bake for 20-25 minutes until golden brown.
- Let cool before serving.
Notes
- Store in an airtight container.
- These bagels can be frozen for later use.
- Experiment with different toppings like seeds or cheese.
- Prep Time: 10 minutes
- Cook Time: 25 minutes
- Category: Breakfast
- Method: Baking
- Cuisine: American
Nutrition
- Serving Size: 1 bagel
- Calories: 150
- Sugar: 2g
- Sodium: 150mg
- Fat: 5g
- Saturated Fat: 1g
- Unsaturated Fat: 3g
- Trans Fat: 0g
- Carbohydrates: 20g
- Fiber: 3g
- Protein: 10g
- Cholesterol: 30mg
Keywords: gluten free protein bagels, healthy bagels, gluten free breakfast


