
Oh, garlic aioli! It’s one of those magical things in the culinary world that can elevate just about any meal. I mean, who doesn’t love a creamy, garlicky dip that’s as versatile as it is delicious? This simple garlic aioli recipe is a staple in Mediterranean cuisine, and trust me, once you whip it up, you’ll find yourself reaching for it time and again. I absolutely adore slathering it on grilled seafood or using it as a dip for fresh veggies. It’s the perfect blend of rich and zesty, making every bite feel like a little celebration!
Whether you’re hosting a dinner party or just enjoying a quiet night in, this aioli adds that special touch to your dishes. The best part? It’s effortlessly easy to make, and it takes just a few minutes to prepare. So, let’s dive into making this delightful garlic aioli together!
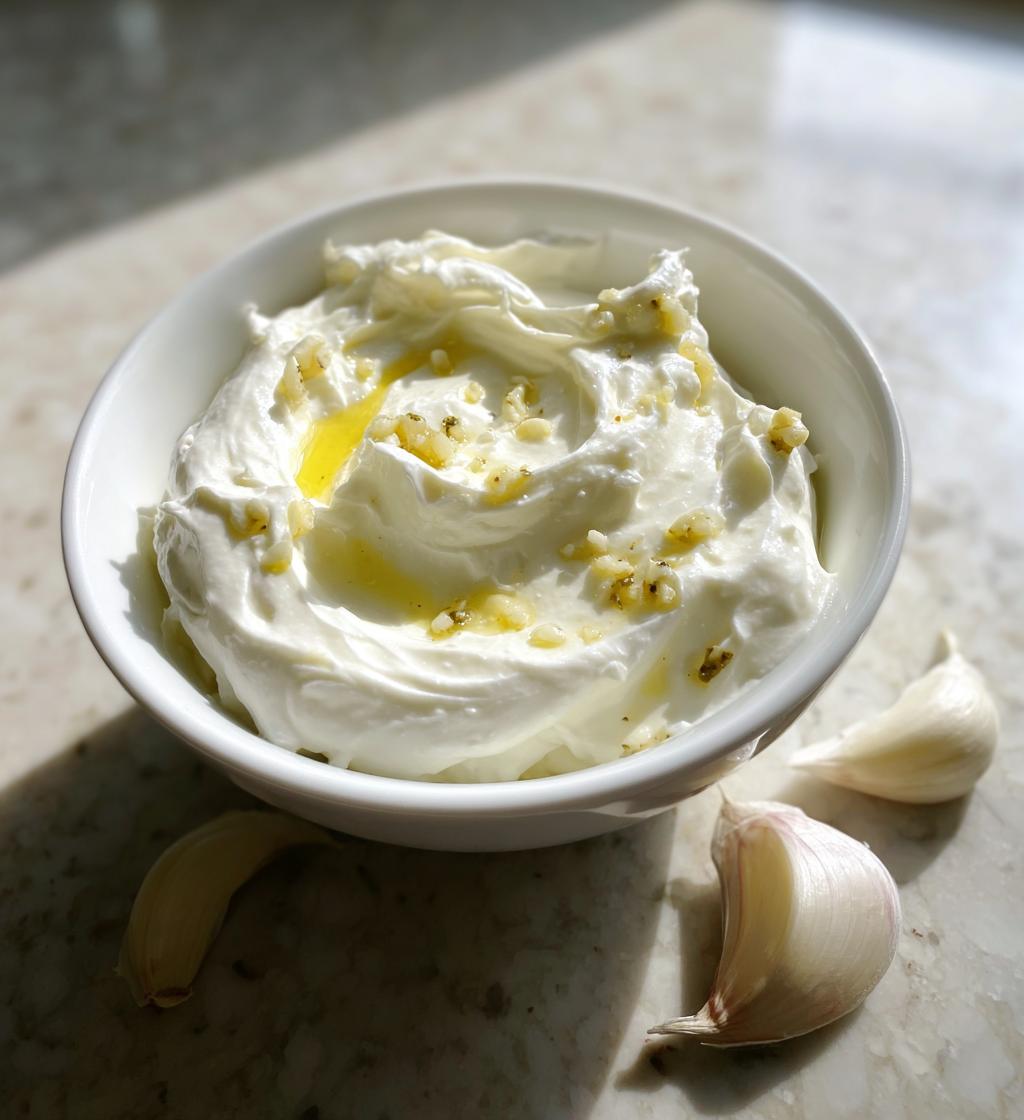
Ingredients List
Alright, let’s gather our ingredients! Making this garlic aioli is super simple and you’ll just need a handful of easy-to-find items:
- 1 cup mayonnaise: This is the creamy base of our aioli. You can use store-bought or homemade, whichever you prefer!
- 3 cloves garlic, minced: Fresh garlic is a must for that punchy flavor. Don’t skimp on this – the more, the merrier!
- 1 tablespoon lemon juice: This adds a bright, zesty kick that balances out the richness of the mayo.
- 1 teaspoon Dijon mustard: This gives a subtle depth and a hint of tanginess that takes the flavor to the next level.
- Salt to taste: Just a pinch or two will bring all those wonderful flavors together, but feel free to adjust based on your preference.
Make sure your garlic is fresh to really amp up that flavor! Now that we’ve got our ingredients ready, let’s move on to the fun part – preparing our delicious garlic aioli!
How to Prepare Garlic Aioli Recipe
Making this garlic aioli is a breeze! Just follow these simple steps, and you’ll have a creamy, garlicky delight ready in no time.
- Start by combining the mayonnaise and minced garlic: In a bowl, mix the 1 cup of mayonnaise with the 3 cloves of minced garlic. Give it a good stir until everything is nicely blended.
- Add the lemon juice and Dijon mustard: Pour in 1 tablespoon of lemon juice and 1 teaspoon of Dijon mustard. These ingredients will add that delightful zing we love. Mix it all together until smooth and creamy.
- Season it up: Now, it’s time to season! Sprinkle in some salt to taste. This step really enhances the flavors, so don’t forget to taste as you go.
- Chill it out: For the best flavor, cover the bowl and chill your garlic aioli in the refrigerator for at least 30 minutes. This allows all those wonderful flavors to meld together beautifully.
And just like that, you’ve got yourself a fantastic garlic aioli! You’ll want to slather it on everything. Just remember, the chilling step is key – it makes all the difference in flavor. So, let it chill and then dive in!
Nutritional Information
Now, let’s chat about the nutritional side of this garlic aioli recipe! It’s always good to know what you’re putting into your body, right? Here’s a breakdown of the estimated values per serving, which is about 2 tablespoons:
- Calories: 100
- Fat: 10g
- Saturated Fat: 1g
- Unsaturated Fat: 9g
- Trans Fat: 0g
- Cholesterol: 5mg
- Sodium: 150mg
- Carbohydrates: 1g
- Fiber: 0g
- Sugar: 0g
- Protein: 1g
Keep in mind that these values are estimates and can vary based on the specific ingredients you use. But overall, this garlic aioli packs a flavorful punch without being too heavy on the calories. It’s the perfect addition to your meals or snacks, making it a guilt-free indulgence!
Why You’ll Love This Recipe
This garlic aioli recipe is a game changer in the kitchen, and here’s why I’m absolutely smitten with it:
- Quick preparation: It takes just about 10 minutes to whip up this aioli, so you can have it ready in a flash!
- Effortless to make: With only a few simple steps, you’ll find it’s almost too easy. Anyone can do it, even if you’re a beginner!
- Delicious flavor: The combination of fresh garlic, zesty lemon, and creamy mayonnaise creates a flavor explosion that will elevate any dish.
- Incredible versatility: Whether you’re dipping veggies, spreading it on sandwiches, or pairing it with seafood, this aioli fits seamlessly into countless meals.
- Perfect for meal prep: Make a batch ahead of time, and you’ve got a flavorful condiment ready to jazz up your weeknight dinners!
Trust me, once you try this garlic aioli, you’ll be looking for excuses to put it on just about everything! It’s that good.
Tips for Success
Alright, let’s make sure your garlic aioli turns out absolutely perfect every single time! Here are my top pro tips that I swear by:
- Use fresh garlic: This is crucial! Freshly minced garlic packs way more flavor than pre-minced or jarred versions. Trust me, you want that bold garlic kick, so don’t skimp here!
- Let it chill: I can’t stress this enough – chilling the aioli is key! Letting it sit in the refrigerator for at least 30 minutes allows the flavors to meld and intensify. It’s worth the wait!
- Taste as you go: Don’t forget to taste your aioli while you’re mixing. Adjust the salt or lemon juice to suit your palate. Everyone’s taste buds are different, so make it your own!
- Experiment with garlic amount: If you’re a hardcore garlic fan (like me!), feel free to add an extra clove or two. Just remember, balancing flavors is key – you want to enhance, not overpower!
- Keep it airtight: Store your leftovers in an airtight container to keep it fresh. This helps maintain that lovely creamy texture and delicious flavor. Plus, you’ll want to have some on hand for your next meal!
With these tips in your back pocket, you’re all set to create the most scrumptious garlic aioli. Go on, impress your family and friends with your culinary skills – they won’t believe how easy it is!
Variations of Garlic Aioli Recipe
Now, let’s get a little adventurous with our garlic aioli! While the classic version is absolutely delightful on its own, I love experimenting with different flavors to keep things exciting. Here are some fun variations that you can try:
- Herbed Aioli: Add a tablespoon or two of freshly chopped herbs like basil, parsley, or dill. These herbs not only add a burst of color but also elevate the flavor profile, making it super fresh!
- Spicy Aioli: If you’re a fan of heat, stir in some sriracha or a pinch of cayenne pepper. This adds a nice kick that pairs perfectly with grilled meats or crispy fries.
- Lemon Garlic Aioli: Boost that citrusy zing by adding the zest of one lemon along with the juice. It creates a bright and refreshing twist that’s fantastic with seafood.
- Roasted Garlic Aioli: For a sweeter, more mellow garlic flavor, try roasting your garlic cloves first. Just pop a whole bulb in the oven until it’s soft, then squeeze the roasted goodness into your mayo mixture. Trust me, it’s a game changer!
- Smoky Aioli: A dash of smoked paprika or chipotle powder can add a lovely smoky flavor. This is perfect for barbecue dishes or dipping grilled veggies!
These variations are super easy to whip up, and they can transform your garlic aioli into something new and exciting each time. Feel free to mix and match these ideas – the sky’s the limit! Go ahead and let your creativity shine in the kitchen!
Serving Suggestions
Now that you’ve got this delicious garlic aioli ready to go, let’s talk about the best ways to enjoy it! Trust me, it pairs beautifully with a variety of dishes, making it a must-have in your kitchen.
- Grilled Seafood: Oh, this aioli is a match made in heaven with grilled shrimp or fish! Just drizzle or dip, and you’ll find that the creamy, garlicky goodness perfectly complements the smoky flavors.
- Fresh Vegetables: Serve it as a dip for an assortment of fresh veggies like carrots, cucumbers, and bell peppers. It’s a fantastic way to encourage everyone to munch on their greens!
- Sandwich Spread: Spread this luscious garlic aioli on sandwiches or wraps. It adds that extra layer of flavor to turkey, roast beef, or even veggie sandwiches. Your lunch game will never be the same!
- French Fries or Sweet Potato Fries: Who needs ketchup when you can have garlic aioli? Dip your fries into this creamy delight for a fabulous twist on a classic snack.
- Salad Dressing: Thin it out with a bit more lemon juice or olive oil, and use it as a dressing for salads. It adds a zesty finish that will make your greens sing!
These serving suggestions are just the tip of the iceberg! Feel free to get creative and find your favorite pairings. I promise, once you start using this garlic aioli, you’ll be dreaming up new ways to incorporate it into your meals. Enjoy every garlicky bite!
Storage & Reheating Instructions
Alright, let’s talk about how to store your leftover garlic aioli so you can enjoy it even longer! First things first, you’ll want to make sure it’s stored properly to maintain that luscious creaminess and flavor.
Once you’ve whipped up your garlic aioli, transfer any leftovers into an airtight container. This is super important to keep it fresh and prevent any weird odors from sneaking in from your fridge. I like to use a glass container with a tight lid, but any airtight option works just fine!
Pop it into the refrigerator, and it should stay good for about 3 to 5 days. Just make sure to give it a little stir before using, as it may separate slightly while sitting. No biggie – just a quick mix, and you’re good to go!
Now, as for reheating, there’s really no need to heat up garlic aioli since it’s typically served cold or at room temperature. Just take it out of the fridge, stir it up, and it’s ready to slather on whatever you fancy! However, if you’ve used it as a dressing or dip for hot dishes, you can warm them up separately and then serve the aioli alongside.
So, there you have it! Proper storage will ensure you can savor that delicious garlic aioli for days to come. Enjoy every creamy, garlicky bite!
FAQ Section
If you’re diving into making this garlic aioli recipe, you might have a few questions swirling around in your mind. Don’t worry, I’ve got you covered! Here are some of the most common queries I get about this delicious sauce:
- Can I make garlic aioli without mayonnaise? Absolutely! If you want a healthier twist, you can blend silken tofu or Greek yogurt as a base instead of mayonnaise. Just keep in mind that the texture and flavor will differ slightly, but it can still be delicious!
- How can I make my garlic aioli less garlicky? If you find the garlic flavor a bit strong for your taste, try roasting the garlic before adding it to the mix. Roasted garlic offers a sweeter, milder flavor that can mellow out the overall taste of your aioli.
- What can I use garlic aioli for besides dipping? Oh, the possibilities are endless! Use it as a spread on sandwiches and burgers, drizzle it over grilled vegetables, or even toss it with pasta for a creamy, flavorful dish. It’s a versatile condiment that can elevate just about anything!
- How do I store garlic aioli for the best freshness? Store your garlic aioli in an airtight container in the fridge. It should stay fresh for about 3 to 5 days. Just give it a quick stir before using, as it may separate a little over time.
- Can I add other flavors to my garlic aioli? Definitely! Feel free to experiment with different herbs, spices, or even some hot sauce for a spicy kick. Just remember to keep the balance in mind so that the garlic flavor doesn’t get lost!
These FAQs should help clarify any doubts you might have as you embark on your garlic aioli adventure! Enjoy the process and happy cooking!
Print
garlic aioli recipe: 5 Simple Steps to Culinary Bliss
- Total Time: 40 minutes
- Yield: 1 cup 1x
- Diet: Vegetarian
Description
A simple and delicious garlic aioli recipe.
Ingredients
- 1 cup mayonnaise
- 3 cloves garlic, minced
- 1 tablespoon lemon juice
- 1 teaspoon Dijon mustard
- Salt to taste
Instructions
- In a bowl, combine the mayonnaise and minced garlic.
- Add lemon juice and Dijon mustard.
- Mix well until smooth.
- Season with salt to taste.
- Chill in the refrigerator for at least 30 minutes before serving.
Notes
- Use fresh garlic for the best flavor.
- This aioli pairs well with seafood and vegetables.
- Store leftovers in an airtight container in the fridge.
- Prep Time: 10 minutes
- Cook Time: 0 minutes
- Category: Sauce
- Method: Mixing
- Cuisine: Mediterranean
Nutrition
- Serving Size: 2 tablespoons
- Calories: 100
- Sugar: 0g
- Sodium: 150mg
- Fat: 10g
- Saturated Fat: 1g
- Unsaturated Fat: 9g
- Trans Fat: 0g
- Carbohydrates: 1g
- Fiber: 0g
- Protein: 1g
- Cholesterol: 5mg
Keywords: garlic aioli recipe


