
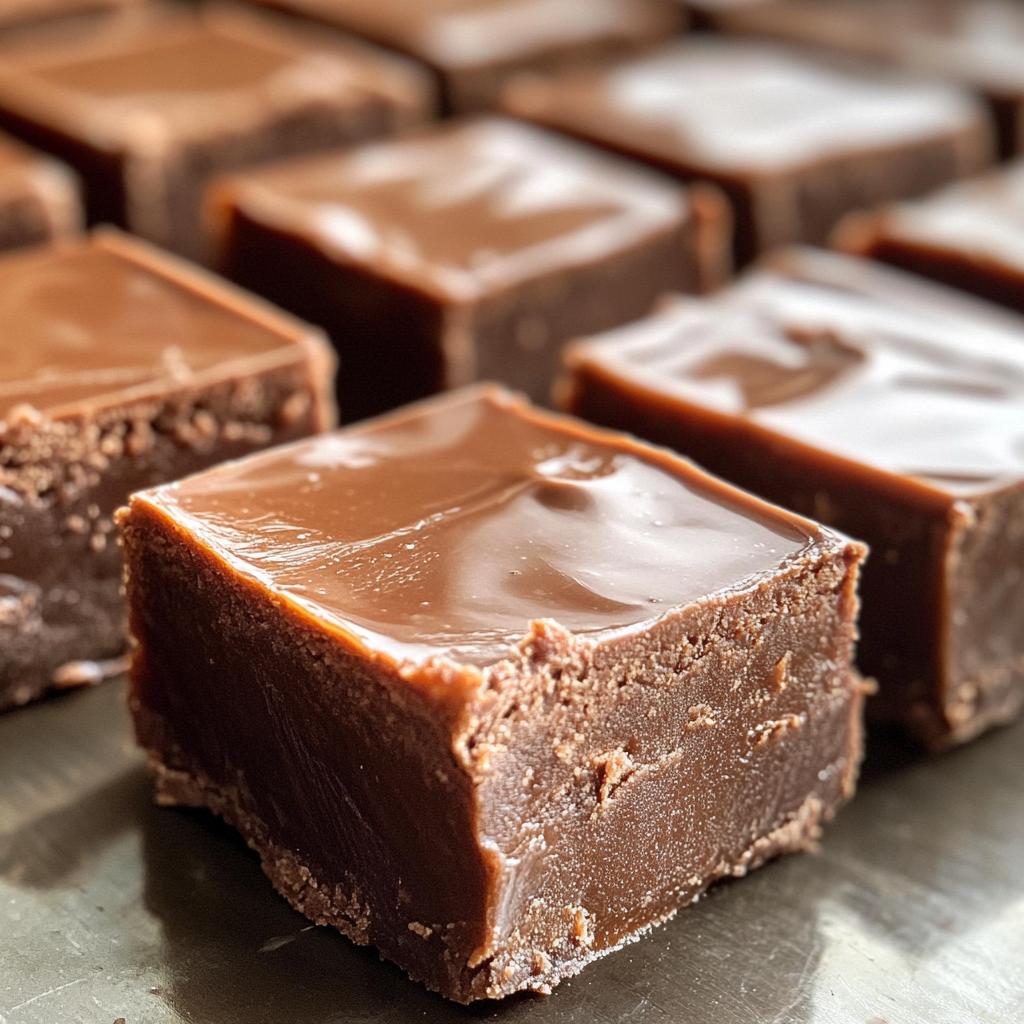
Oh my goodness, let’s talk about fudge! Is there anything more delightful than a rich, creamy piece of chocolate fudge melting in your mouth? Seriously, fudge is like a hug for your taste buds! It’s indulgent, it’s sweet, and it has this incredible ability to make any day a little brighter. I remember the first time I made fudge—it was a rainy afternoon, and I decided to whip up a batch on a whim. The smell of chocolate wafting through the house was simply irresistible, and my family couldn’t wait to dive in. This recipe is a total game-changer; it’s quick, simple, and produces the most luscious fudge you can imagine. You’ll love how it comes together in just 25 minutes, and trust me, when you share it with friends or family, they’ll be begging for the recipe! Each bite is a melt-in-your-mouth moment you won’t want to miss. So grab your ingredients, and let’s get started on this delicious journey into the world of fudge!
Ingredients List
Here’s what you’ll need to whip up this incredible fudge. Trust me, these ingredients come together to create a rich and creamy treat that’s hard to resist!
- 2 cups granulated sugar
- 1/2 cup unsalted butter
- 2/3 cup evaporated milk
- 2 cups semi-sweet chocolate chips
- 1 teaspoon vanilla extract
- 1 cup chopped nuts (optional, but highly recommended for some extra crunch!)
Make sure you have everything measured out before you start; it’ll make the process so much smoother. And remember, using fresh ingredients always makes a difference in flavor and texture!
How to Prepare Fudge Instructions
Now that you’ve got all your ingredients ready, let’s dive into the fun part—making your fudge! Follow these steps, and you’ll have a batch of creamy, dreamy fudge in no time. Trust me, it’s easier than you might think!
- Start with the base: Grab a medium saucepan and combine the 2 cups of granulated sugar, 1/2 cup of unsalted butter, and 2/3 cup of evaporated milk. Stir everything together gently over medium heat.
- Bring it to a boil: You’ll want to keep stirring constantly until the mixture starts to boil. This is super important to prevent the sugar from burning. Once it’s bubbling away, let it boil for exactly 5 minutes without stirring. Set a timer—this part is crucial!
- Mix in the chocolate: After the 5 minutes are up, remove the saucepan from heat. Now, add in your 2 cups of semi-sweet chocolate chips. Stir until they’re completely melted and the mixture is smooth. It’s like magic, watching that chocolate melt into the creamy base!
- Flavor it up: Pour in 1 teaspoon of vanilla extract and give it one last good stir. If you’re using nuts, this is the time to fold in 1 cup of chopped nuts. They add a delightful crunch that perfectly complements the smooth fudge.
- Pour it out: Now, grab a greased 9×13 inch pan and pour the chocolate mixture into it. Use a spatula to spread it evenly. This is where the fudge starts taking shape!
- Let it cool: It’s tempting, I know, but resist the urge to cut into it right away. Allow the fudge to cool completely at room temperature. This usually takes about 2 hours. If you’re in a hurry, you can pop it in the fridge to speed things up a bit.
- Cut and enjoy: Once it’s fully cooled and set, take a sharp knife and cut the fudge into squares. I love to serve mine on a pretty plate and watch everyone’s eyes light up when they see it!
And there you have it—your very own batch of homemade fudge! Just remember, the key to success is patience, especially when it comes to letting it cool completely. You won’t regret it when you take that first bite of velvety chocolate goodness!
Why You’ll Love This Recipe
Seriously, there are so many reasons to adore this fudge recipe! It’s not just about the delicious taste; it’s also super practical and customizable. Here’s why you’ll want to make this fudge again and again:
- Quick to make: You can whip up a batch in just 25 minutes! Perfect for those last-minute cravings or unexpected guests.
- Rich and creamy flavor: Each bite is a heavenly blend of chocolatey goodness that melts in your mouth. Trust me, it’s the ultimate chocolate fix!
- Perfect for gifting: Wrap it up in a cute box or a jar with a ribbon, and you’ve got a thoughtful homemade gift that friends and family will absolutely love.
- Customizable with nuts or flavors: Feel free to mix it up! Add your favorite nuts, try different types of chocolate, or even throw in some peppermint extract for a festive twist.
- Great for any occasion: Whether it’s a holiday, a birthday, or just a Tuesday, this fudge fits right in. It’s a treat that brings people together!
With all these benefits, it’s no wonder this fudge has become a staple in my kitchen. Once you try it, I know you’ll feel the same way!
Tips for Success
Making fudge can be a breeze, but there are a few tips and tricks I’ve picked up over the years that will ensure your fudge turns out perfectly every single time. Trust me, these little details can make all the difference!
- Use a candy thermometer: For precise boiling, I highly recommend using a candy thermometer. It helps you monitor the temperature for that perfect fudge consistency, making sure you hit the sweet spot right before it sets!
- Stir constantly: This is crucial! Keep stirring the mixture as it heats to prevent the sugar from burning. Once it starts to boil, you can stop stirring, but make sure you don’t walk away. It needs your undivided attention for those 5 minutes!
- Let the fudge cool completely: Resist the temptation to cut into your fudge too soon! Let it set completely at room temperature for at least 2 hours. If you’re in a hurry, feel free to pop it in the fridge, but let it sit out for a bit before cutting for the best texture.
- Use a greased pan: Don’t skip greasing your pan! It makes all the difference when it’s time to remove your fudge. You can also line it with parchment paper for easy lifting. Just a little extra prep can save you from a sticky situation!
- Experiment with mix-ins: Don’t be afraid to get creative! Whether you’re adding nuts, dried fruit, or flavored extracts, make sure to fold them in gently to keep your fudge smooth and creamy.
- Store properly: To keep your fudge fresh and delicious, store it in an airtight container. It can also be refrigerated for a longer shelf life. Just make sure to let it come to room temperature before serving for that melt-in-your-mouth experience!
With these tips in your back pocket, you’re all set to create fudge that’s not just good, but absolutely unforgettable. Happy fudging!
Variations
Now that you’ve mastered the classic fudge recipe, let’s have some fun with it! There are so many delicious variations to explore, and each one can take your fudge to new heights. Trust me, once you start experimenting, you’ll find it hard to stick to just one version!
- Different Types of Chocolate: Swap out the semi-sweet chocolate chips for milk chocolate, dark chocolate, or even white chocolate for a different flavor profile. For a fun twist, try using a mix of chocolates in one batch—think half dark and half milk chocolate for that perfect balance!
- Flavor Infusions: Add a splash of flavor by incorporating extracts like peppermint, almond, or orange. Just a teaspoon can elevate your fudge to something extraordinary, especially during the holidays!
- Nutty Goodness: Experiment with different nuts! Instead of the usual chopped walnuts or pecans, try adding slivered almonds, macadamia nuts, or hazelnuts. You can even toast the nuts beforehand to enhance their flavor and crunch!
- Fun Toppings: Before the fudge sets, sprinkle the top with sea salt, crushed candy canes, or colorful sprinkles to give it a festive touch. You can also drizzle some melted chocolate over the top for an extra layer of decadence!
- Dried Fruits and Other Mix-ins: Want to add a chewy texture? Toss in some dried cranberries, cherries, or apricots. You could even mix in some mini marshmallows for a rocky road vibe. The possibilities are endless!
- Layered Fudge: For a stunning presentation, consider making layered fudge. You can create a vanilla layer on the bottom and a chocolate layer on top, or alternate layers of different flavors. Just make sure to let each layer set before adding the next!
These variations not only keep things exciting but also make your fudge uniquely yours. So go ahead, get creative in the kitchen, and make a batch (or two) that speaks to your taste buds. I can’t wait to hear about your delicious adventures in fudge-making!
Storage & Reheating Instructions
Now that you’ve whipped up a batch of this irresistible fudge, you might be wondering how to store those delicious leftovers. Don’t worry, I’ve got you covered! Proper storage is key to keeping your fudge fresh and tasty for as long as possible.
First things first, let your fudge cool completely at room temperature before you store it. This prevents any condensation from forming, which can make your fudge sticky. Once it’s cooled, cut it into squares (if you haven’t already) and place them in an airtight container. I like to layer sheets of wax paper between the fudge pieces to keep them from sticking together. It’s a simple trick that makes serving so much easier later on!
For maximum freshness, store your fudge in a cool, dry place. If you want to extend its shelf life even further, pop that airtight container in the fridge. Refrigerated fudge can last for up to 2-3 weeks, but I bet it won’t last that long once you start sharing it with friends and family!
Now, if you find yourself needing to reheat your fudge to soften it up a bit (maybe for a special dessert topping), just take a couple of squares and place them in the microwave. Heat them in 10-15 second intervals, checking frequently until they reach the desired softness. Be careful not to overheat, though! You want to keep that creamy texture intact.
With these simple storage and reheating tips, your fudge will be ready to delight your taste buds whenever you need a little chocolate fix. Enjoy every last bite!
Nutritional Information
As you indulge in this delicious fudge, you might be curious about what’s in it! Here’s a breakdown of the estimated nutritional values for one piece of this rich chocolate treat. Keep in mind that these values are approximate, and they can vary based on the specific ingredients you use:
- Calories: 150
- Fat: 7g
- Saturated Fat: 4g
- Unsaturated Fat: 2g
- Trans Fat: 0g
- Cholesterol: 10mg
- Sodium: 10mg
- Carbohydrates: 22g
- Fiber: 1g
- Protein: 2g
- Sugar: 20g
This fudge is definitely a sweet treat, so it’s perfect for those moments when you want to indulge a little. Just remember to enjoy it in moderation, especially if you’re keeping an eye on your sugar intake. Each square is a little piece of chocolate heaven, and I promise it’s worth every calorie!
FAQ Section
Got questions about making this delicious fudge? Don’t worry, I’ve got you covered! Here are some of the most common queries I hear, along with my answers to help you navigate your fudge-making journey.
- Can I use different types of chocolate? Absolutely! Feel free to experiment with milk chocolate, dark chocolate, or even white chocolate chips. Each type brings its own unique flavor to the fudge. Just keep in mind that the sweetness level may vary, so adjust the sugar accordingly if necessary!
- How do I know when the fudge is done? The best way to check is by using the timer method. Boil your mixture for exactly 5 minutes without stirring once it reaches a boil. After that, the fudge should set up nicely once cooled. You can also do the “soft ball” test by dropping a small amount of the mixture into cold water; if it holds its shape, it’s ready!
- Can I freeze fudge? Yes, you can freeze fudge! Just make sure it’s completely cooled and cut into squares before wrapping each piece tightly in plastic wrap and placing them in an airtight container or freezer bag. It can last in the freezer for up to 3 months. When you’re ready to enjoy, just let it thaw in the fridge or at room temperature!
- What should I do if my fudge doesn’t set? If your fudge isn’t setting, it may not have been boiled long enough. Don’t panic! You can reheat the mixture gently in the saucepan, bringing it back to a boil for another minute or two. Then, pour it back into the pan and let it cool again!
- Can I add flavorings to the fudge? Yes, definitely! Adding extracts like peppermint, almond, or even coffee can elevate your fudge to a whole new level. Just be careful not to add too much; a teaspoon usually does the trick!
I hope these answers help clear up any confusion and get you excited to make your fudge. Remember, it’s all about having fun and enjoying the process. Happy fudging!
Print
Fudge: 7 Secrets to Perfectly Creamy Bliss
- Total Time: 25 minutes
- Yield: 36 pieces 1x
- Diet: Vegetarian
Description
A rich and creamy chocolate fudge recipe.
Ingredients
- 2 cups sugar
- 1/2 cup butter
- 2/3 cup evaporated milk
- 2 cups chocolate chips
- 1 teaspoon vanilla extract
- 1 cup chopped nuts (optional)
Instructions
- In a saucepan, combine sugar, butter, and evaporated milk.
- Bring to a boil over medium heat, stirring constantly.
- Boil for 5 minutes without stirring.
- Remove from heat and stir in chocolate chips until melted.
- Add vanilla extract and nuts, if using.
- Pour into a greased 9×13 inch pan.
- Let cool completely before cutting into squares.
Notes
- Store fudge in an airtight container.
- Use fresh ingredients for best results.
- Can be refrigerated for longer shelf life.
- Prep Time: 15 minutes
- Cook Time: 10 minutes
- Category: Dessert
- Method: Stovetop
- Cuisine: American
Nutrition
- Serving Size: 1 piece
- Calories: 150
- Sugar: 20g
- Sodium: 10mg
- Fat: 7g
- Saturated Fat: 4g
- Unsaturated Fat: 2g
- Trans Fat: 0g
- Carbohydrates: 22g
- Fiber: 1g
- Protein: 2g
- Cholesterol: 10mg
Keywords: fudge, chocolate, dessert, sweets


