
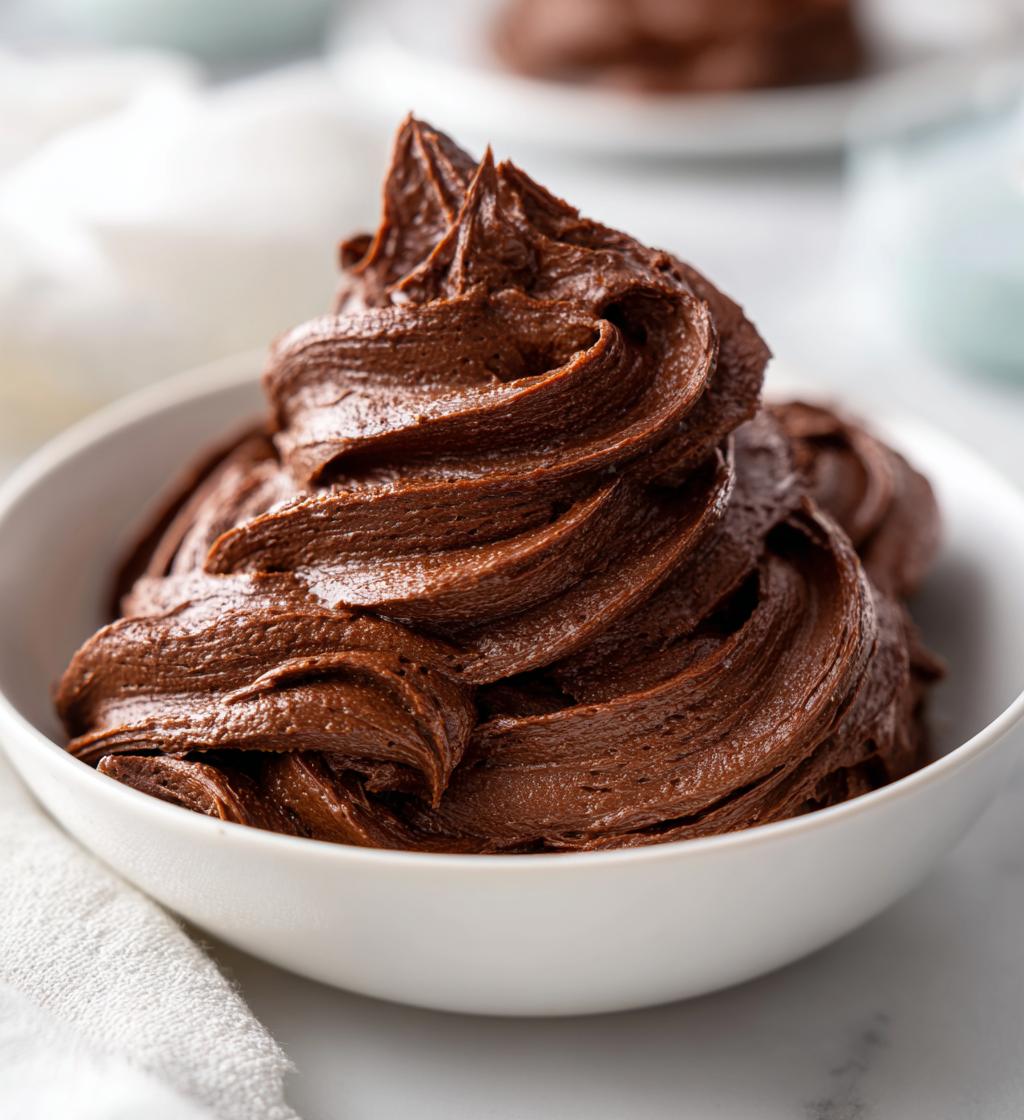
Oh my goodness, let me tell you about my absolute obsession – this chocolate fudge frosting that’s been my go-to for every birthday cake, cupcake, and “I-need-chocolate-now” emergency since I first whipped it up years ago. There’s something magical about how silky smooth it spreads, how rich it tastes, and how it makes even the simplest dessert feel special. I remember the first time I made it for my niece’s birthday – she took one bite of her cupcake and declared it “better than the bakery!” That’s when I knew this chocolate fudge frosting recipe was a keeper.
What I love most is how versatile it is. Whether you’re frosting a towering layer cake, piping swirls on cupcakes, or just eating it straight from the bowl (no judgment here!), this frosting holds its shape beautifully while staying creamy and dreamy. After years of testing different versions at my bakery job and for family gatherings, I’ve perfected the balance between fudgy richness and that light, fluffy texture that makes you want to lick the spoon clean.
Why You’ll Love This Chocolate Fudge Frosting
This frosting isn’t just good – it’s the kind of recipe that makes people ask for your secret. Here’s why it’s become my absolute favorite:
- Rich chocolate flavor that tastes like a melted fudge bar (but better!)
- Ready in 10 minutes – no cooking, no fuss, just creamy perfection
- Holds its shape for piping but spreads like a dream
- Works on everything from birthday cakes to midnight spoonfuls
- Customizable thickness – add more or less milk depending on your needs
Trust me, once you try this frosting, you’ll never go back to store-bought again!
Ingredients for Chocolate Fudge Frosting
Okay, let’s talk ingredients – and I mean the good stuff! This chocolate fudge frosting only needs six simple things, but quality matters here. I’ve learned through many batches that using the right ingredients makes all the difference between “good” and “oh-my-gosh-I-need-more” frosting.
- 1 cup (2 sticks) unsalted butter, softened – This is your base, so splurge on the good stuff. And yes, it must be softened! Cold butter will give you lumpy frosting nightmares.
- 4 cups powdered sugar, sifted – Don’t skip the sifting unless you enjoy picking out little sugar lumps with your fingers.
- 1/2 cup cocoa powder – Regular unsweetened works great, but if you want that deep, dark chocolate flavor, go for Dutch-processed.
- 1/4 cup whole milk – The fat content helps create that silky texture. If you must substitute, heavy cream works too.
- 2 teaspoons pure vanilla extract – The real stuff, please! It balances all that chocolatey goodness.
- 1/4 teaspoon fine salt – Just a pinch to make all the flavors pop.
See? Nothing fancy or hard to find. These are pantry staples that come together to create pure magic. I always double-check my measurements before starting – there’s nothing worse than realizing you’re short on powdered sugar halfway through!
Equipment You’ll Need
You won’t need fancy gadgets for this chocolate fudge frosting – just a few trusty tools from your kitchen:
- Electric mixer (stand or hand-held) – Your arm will thank you!
- Large mixing bowl – Big enough to contain the sugar cloud
- Rubber spatula – For scraping every last bit of frosting
- Fine-mesh sifter – Say goodbye to lumpy frosting
That’s it! Now let’s get mixing.
How to Make Chocolate Fudge Frosting
Alright, let’s dive into making this dreamy chocolate fudge frosting! I’ve made this recipe more times than I can count, and I’ve learned all the little tricks to get it perfect every single time. Follow these steps, and you’ll have frosting so good you might just eat it with a spoon before it ever touches a cake!
Step 1: Beat the Butter
First things first – that butter needs to be perfectly softened. Not melted, not cold, but soft enough that your finger leaves an indent without sinking in. I usually take mine out about an hour before baking. Throw it in your mixing bowl and beat it on medium speed for about 2 minutes until it’s creamy and pale yellow. Watch it closely – you want it smooth, but if you overbeat it, your frosting might get too airy.
Step 2: Sift Dry Ingredients
While your butter’s getting fluffy, grab that powdered sugar and cocoa powder. Here’s my golden rule: always sift together! I learned this the hard way after one too many batches with little sugar lumps. Pour them through a fine-mesh sieve into a separate bowl. This extra minute of effort makes all the difference for that velvety smooth texture we’re after.
Step 3: Combine Gradually
Now the magic happens! With your mixer on low speed, add the sugar-cocoa mix about 1/2 cup at a time. I know it’s tempting to dump it all in at once, but resist! Slow and steady wins the race here. After each addition, let it incorporate fully before adding more. This prevents that dreaded powdered sugar cloud from exploding all over your kitchen (though a little dusting of cocoa never hurt anyone!).
Step 4: Add Liquids
Once all your dry ingredients are mixed in, it’s time for the liquids. Pour in the milk, vanilla, and that pinch of salt. Start with just 3 tablespoons of milk – you can always add more if needed. Mix on medium until everything comes together beautifully. The frosting should look thick but spreadable at this point. If it’s too stiff? Add that last tablespoon of milk. Too runny? A bit more powdered sugar will fix it right up.
Step 5: Whip to Perfection
Final step! Crank your mixer up to medium-high for about 30 seconds to get that light, fluffy texture we all love. But here’s my pro tip: don’t overdo it! Stop as soon as it looks creamy and holds soft peaks. Overbeating can make the frosting too airy or even cause it to separate. Give it a taste test – because quality control is important – and you’re ready to frost!
See? In less time than it takes to watch your favorite sitcom episode, you’ve got homemade chocolate fudge frosting that puts anything from a can to shame. Now go decorate something delicious!
Tips for Perfect Chocolate Fudge Frosting
After making this frosting more times than I can count (seriously, I might have a problem), I’ve picked up some game-changing tricks:
- Butter temperature is everything – Too cold and it won’t cream properly; too warm and your frosting will be greasy. It should feel like softened ice cream when you poke it.
- Dark cocoa powder = next-level flavor – Swap regular cocoa for Dutch-processed and watch people’s eyes light up at that deep, rich chocolate taste.
- Adjust milk by the teaspoon – Need stiffer frosting for piping? Use less milk. Want it spreadable? Add a splash more.
- Store it right – Keep leftovers in an airtight container at room temp for 2 days or refrigerate for up to a week. Just let it come to room temp and rewhip before using.
Oh! And here’s my secret weapon – if your frosting ever gets too sweet, a tiny pinch of instant coffee powder balances it beautifully without tasting like coffee. You’re welcome!
Variations of Chocolate Fudge Frosting
One of my favorite things about this frosting is how easily you can dress it up for different occasions! Here are some fun twists I’ve tried over the years that always get rave reviews:
- Mocha magic: Add 1-2 teaspoons instant espresso powder with the dry ingredients for a coffee kick that enhances the chocolate flavor.
- Peppermint perfection: Swap vanilla extract for peppermint extract (start with 1/2 teaspoon – it’s strong!) for holiday treats.
- Orange dreamsicle: Replace milk with orange juice and add a teaspoon of zest for a citrusy surprise.
- Nutty delight: Fold in 1/2 cup finely chopped toasted hazelnuts or almonds at the end for crunch.
The possibilities are endless – have fun experimenting!
Serving Suggestions for Chocolate Fudge Frosting
Oh, where can’t you use this frosting? I’ve slathered it on everything from classic yellow cake (my husband’s favorite) to midnight spoonfuls straight from the fridge. It’s perfect for piping tall swirls on cupcakes or filling whoopie pies. Try it between chocolate chip cookies for an instant sandwich, or thin it slightly to drizzle over brownies. My neighbor swears by spreading it on graham crackers for a quick treat. Honestly, if it’s edible, this frosting will make it better!
Storage & Reheating Instructions
Here’s the good news – this chocolate fudge frosting keeps like a dream! I always make extra because it stores so well. Pop any leftovers in an airtight container at room temperature for up to 2 days (if you can resist eating it that long). For longer storage, refrigerate for up to a week.
When you’re ready to use refrigerated frosting, let it come to room temperature first – about 30 minutes should do it. Then give it a quick whip with your mixer to bring back that fluffy texture. If it seems too stiff, add a teaspoon of warm milk while mixing. Easy peasy!
Nutritional Information for Chocolate Fudge Frosting
Now, let’s be real – we’re not making chocolate fudge frosting because it’s health food! But I know some folks like to keep track, so here’s what you should know about the nutrition in this decadent treat.
The exact numbers will vary depending on the specific brands of ingredients you use (especially the cocoa powder and butter), but generally speaking, this frosting is rich, sweet, and meant to be enjoyed in moderation. The butter and powdered sugar give it that irresistible creamy texture we all love, while the cocoa powder packs that chocolate punch.
If you’re watching your sugar intake or have dietary restrictions, you can certainly play around with substitutions – but fair warning, changing the ingredients will affect both the taste and texture that make this recipe so special. That’s why I always say: when you’re indulging in something this delicious, savor every bite!
Remember, nutrition calculators online can give you more precise numbers if you need them – just plug in your exact ingredients. But personally? I’d rather spend that time licking the bowl clean!
Frequently Asked Questions
Over the years, I’ve gotten so many questions about this chocolate fudge frosting – and I love helping fellow bakers troubleshoot! Here are the answers to the ones I hear most often:
Can I use salted butter instead of unsalted?
Oh, this one comes up all the time! You can use salted butter in a pinch, but you’ll want to skip adding the extra salt in the recipe. The flavor might be slightly different, though – I find unsalted butter lets the chocolate really shine. If that’s all you’ve got, no worries – your frosting will still be delicious!
Help! My frosting is too runny – how do I fix it?
Been there, done that! First, pop it in the fridge for 15 minutes to firm up the butter. If it’s still too thin, add more sifted powdered sugar a quarter cup at a time until it reaches the right consistency. Remember – you can always add more, but you can’t take it out!
Can I make this chocolate fudge frosting ahead of time?
Absolutely! I actually recommend making it at least an hour before you need it. Store it covered at room temperature if using the same day, or refrigerate for up to a week. Just let it come to room temp and give it a quick whip with your mixer before using.
Why does my frosting have little lumps?
Ah, the dreaded lumps! This usually happens when the powdered sugar isn’t sifted properly or the butter wasn’t soft enough. Next time, make sure to sift your dry ingredients together and really take the time to cream that butter until it’s perfectly smooth before adding anything else.
Can I freeze leftover frosting?
You bet! Freeze it in an airtight container for up to 3 months. Thaw overnight in the fridge, then let it come to room temperature and rewhip before using. It might need a splash of milk to get creamy again. Perfect for when that chocolate craving hits unexpectedly!
Final Thoughts
Alright, my fellow chocolate lovers – it’s time to grab that mixer and make some magic! This chocolate fudge frosting has been my baking companion for years, and I can’t wait for you to fall in love with it too. Give it a whirl, then come tell me all about your creations – I live for your frosting success stories!
Print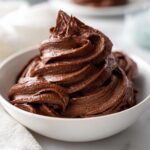
10-Minute Chocolate Fudge Frosting Recipe – Irresistible Bliss
- Total Time: 10 mins
- Yield: 3 cups 1x
- Diet: Vegetarian
Description
A rich and creamy chocolate fudge frosting perfect for cakes, cupcakes, and desserts.
Ingredients
- 1 cup unsalted butter, softened
- 4 cups powdered sugar
- 1/2 cup cocoa powder
- 1/4 cup milk
- 2 tsp vanilla extract
- 1/4 tsp salt
Instructions
- Beat softened butter until smooth.
- Sift powdered sugar and cocoa powder together.
- Gradually add sugar-cocoa mix to butter, beating well.
- Pour in milk, vanilla, and salt. Beat until fluffy.
- Spread or pipe onto cooled cakes or cupcakes.
Notes
- Store leftovers in an airtight container for up to a week.
- For thicker frosting, reduce milk by 1 tbsp.
- For a darker chocolate flavor, use dark cocoa powder.
- Prep Time: 10 mins
- Cook Time: 0 mins
- Category: Dessert
- Method: No-Cook
- Cuisine: American
Nutrition
- Serving Size: 2 tbsp
- Calories: 120
- Sugar: 15g
- Sodium: 20mg
- Fat: 6g
- Saturated Fat: 4g
- Unsaturated Fat: 2g
- Trans Fat: 0g
- Carbohydrates: 18g
- Fiber: 1g
- Protein: 0g
- Cholesterol: 15mg
Keywords: chocolate frosting, fudge frosting, cake frosting, homemade frosting


