
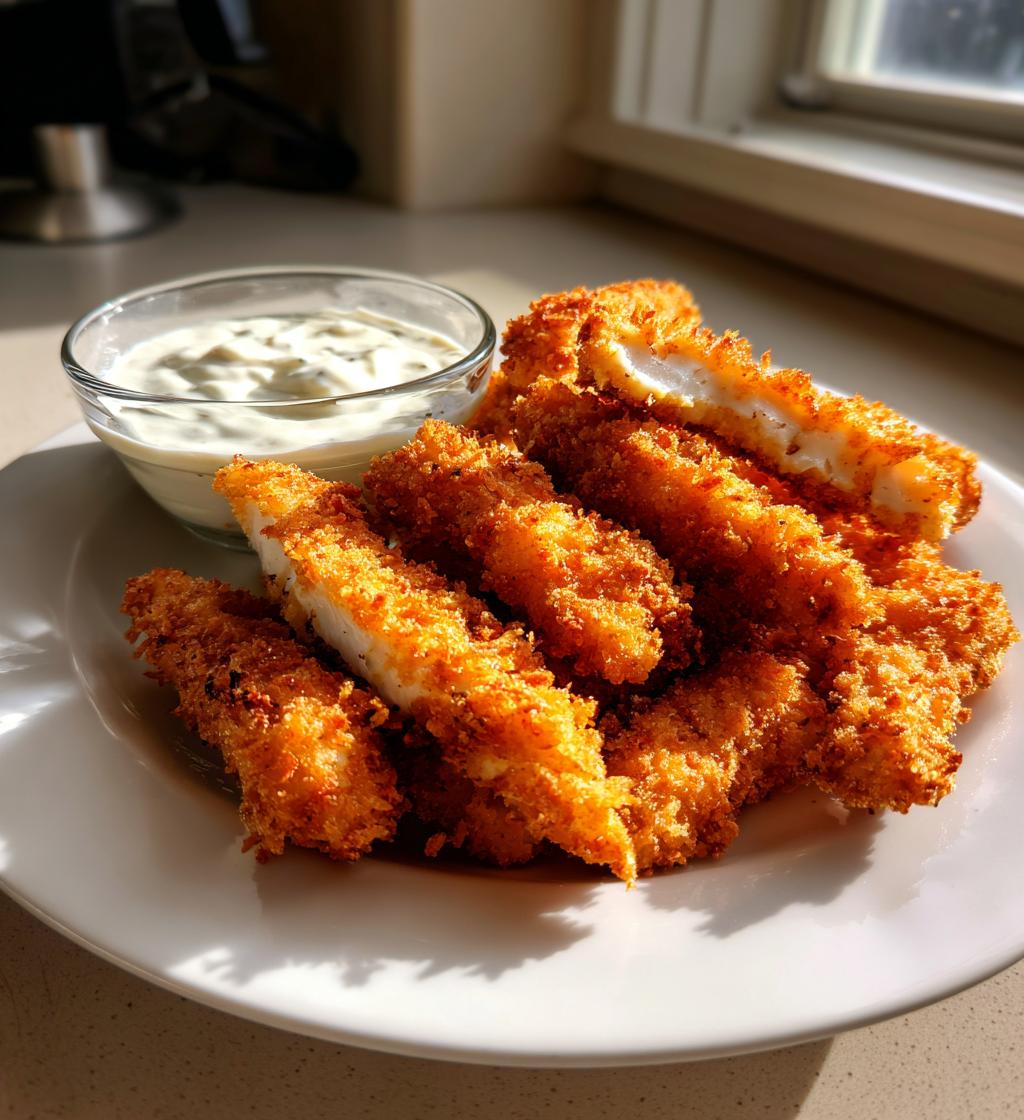
Let me tell you about my absolute favorite weeknight lifesaver – these Crispy Chicken Strips with Garlic Dip! I swear, every time I make them, my kitchen turns into a happy chaos zone with kids (and let’s be honest, adults too) sneaking strips before they even hit the serving plate. What makes them so special? That perfect golden crunch giving way to juicy chicken, all dipped in garlicky goodness that’ll make your taste buds dance.
Honestly, I’ve tried dozens of chicken strip recipes over the years – some fussy, some bland – before landing on this ridiculously simple version that never fails. The magic happens with just a few pantry staples and about 40 minutes from start to crispy finish. These beauties disappeared so fast at last year’s potluck that my neighbor begged for the recipe right then and there! Now it’s our go-to for everything from busy Tuesday dinners to game day spreads.
What I love most? No deep fryer required! The oven does all the work while you whip up that addictive garlic dip (three ingredients, two minutes flat). Trust me, once you try this combo, you’ll understand why my family requests it at least twice a week!
Ingredients for Crispy Chicken Strips with Garlic Dip
Okay, let’s gather our lineup – I promise everything here is simple and probably already in your kitchen! The beauty of this recipe is how ordinary ingredients transform into something extraordinary. I’ve learned through trial and error that precise measurements matter here – too much flour makes the coating pasty, too little garlic in the dip and… well, why bother?
For the Chicken Strips
- 500g chicken breast – cut into 1-inch strips (this size cooks evenly and gives that perfect bite-through crunch)
- 1 cup all-purpose flour – spooned and leveled (trust me, packing it makes the coating too thick)
- 2 large eggs – beaten with a fork until uniform (room temp eggs coat better!)
- 1 cup breadcrumbs – I use plain, but panko works wonders for extra crunch
- 1 tsp salt – divided between flour and chicken
- 1 tsp black pepper – freshly ground if you can
- 1 tsp paprika – gives that gorgeous golden color
For the Garlic Dip (the real MVP)
- 1/2 cup mayonnaise – full fat please, this isn’t diet food!
- 2 cloves garlic – minced super fine (or pressed if you’re lazy like me sometimes)
- 1 tbsp lemon juice – fresh squeezed makes all the difference
See? Nothing fancy – just good ingredients prepped right. Now let’s make some magic!
How to Make Crispy Chicken Strips with Garlic Dip
Alright, let’s get cooking! This process is so simple you’ll wonder why you ever bothered with takeout. Just follow these steps, and in less than an hour, you’ll have crispy golden perfection ready to dunk in that dreamy garlic dip.
Preparing the Chicken Strips
First things first – crank that oven to 200°C (400°F) so it’s nice and hot when our strips are ready to bake. While it heats up, let’s set up our coating station – I use three shallow bowls lined up assembly-line style:
- Season and dredge: Toss those chicken strips with half the salt, all the pepper and paprika. Then roll each one in flour until lightly coated – shake off any excess or they’ll get clumpy.
- Egg bath: Dip the floured strips into the beaten eggs, letting any extra drip off. This sticky layer helps the breadcrumbs stick like glue!
- Crunch time: Press each strip firmly into the breadcrumbs, rolling to coat completely. Pro tip: Use one hand for dry ingredients and one for wet to avoid “breadcrumb fingers” (you’re welcome!).
Arrange the coated strips on a baking sheet – don’t crowd them! Pop them in the oven for 10 minutes, then flip each one (tongs work great here). Bake another 10-15 minutes until they’re gorgeously golden brown and crispy. The smell will drive you crazy!
Making the Garlic Dip
While the chicken works its magic, let’s whip up that garlicky goodness. This couldn’t be easier:
- Mash your minced garlic with the remaining 1/2 tsp salt until it forms a paste (this mellows the raw bite).
- Whisk together the mayo, garlic paste, and lemon juice until perfectly smooth.
- Taste and adjust – more garlic if you’re brave, more lemon if you like it tangy!
That’s it! The dip thickens slightly as it sits, so I usually make it first and let it hang out in the fridge while the chicken bakes. Now just try not to eat it all with a spoon while you wait!
Tips for Perfect Crispy Chicken Strips with Garlic Dip
After making these countless times (seriously, my family won’t let me stop), I’ve picked up some game-changing tricks to guarantee perfect results every single time. These little tweaks take good chicken strips to unbelievable territory!
- Go panko for maximum crunch: Swap regular breadcrumbs for Japanese-style panko – those big, flaky crumbs create an extra crispy shell that stays crunchy for hours. I keep both in my pantry just for this recipe!
- Spray before baking: A quick spritz of cooking oil on the breaded strips makes them bake up golden like they’re fried. I use an oil mister, but even brushing lightly with melted butter works magic.
- Check your temp: Chicken’s done at 75°C (165°F) internally, but I pull mine at 70°C (160°F) since carryover cooking finishes it. No dry chicken on my watch! A $5 meat thermometer saved me from so many overcooked disasters.
- Pat chicken dry first: Moisture is the enemy of crispy coatings! Always blot chicken strips with paper towels before seasoning – that way the flour sticks perfectly without clumping.
- Let garlic dip rest: That quick 10-minute fridge time for the garlic dip? Non-negotiable! It lets the flavors meld and the garlic mellows just enough so it doesn’t overpower.
Oh, and a bonus tip from my last BBQ disaster – don’t try to bake these on parchment paper! The steam gets trapped and makes the bottoms soggy. A plain baking sheet or wire rack works best for that all-over crunch.
Ingredient Substitutions and Notes
Listen, I’m all about making recipes work with what you’ve got – some of my best kitchen wins came from improvisation! Here’s how to tweak these crispy chicken strips when life (or dietary needs) throws you curveballs:
When You Need Gluten-Free
No problem! Swap the all-purpose flour for your favorite GF blend (I’ve had great results with Cup4Cup), and use gluten-free panko crumbs. The texture comes out nearly identical – just bake them a minute or two longer since GF coatings sometimes need extra time to crisp up.
Mayo Alternatives
That garlic dip still shines with substitutions:
- Greek yogurt: Use equal parts plain Greek yogurt instead of mayo for a tangier, lighter dip. Full-fat works best – low-fat versions can get watery.
- Sour cream: Another 1:1 swap, though you might want an extra squeeze of lemon to balance the richness.
- Vegan mayo: Works perfectly if you need dairy-free! Just note it tends to be thinner, so start with 1 tsp lemon juice and add more to taste.
Breadcrumb Variations
Out of breadcrumbs? Get creative:
- Crushed cornflakes: Measure 1 cup and crush lightly for insane crunch (my kids’ favorite version!).
- Pretzel crumbs: Pulse 1 cup pretzels in a food processor – salty perfection!
- Almond flour: For low-carb, use 1/2 cup almond flour mixed with 1/2 cup grated parmesan.
Chicken Shortcuts
Busy weeknight? I’ve been there:
- Pre-cut tenders: Save 5 minutes by buying pre-cut chicken tenders – just trim any uneven bits.
- Thighs work too: Swap breast for thighs cut into strips (more flavor, slightly longer bake time).
A quick note about garlic – fresh is best, but in a pinch, 1/4 tsp garlic powder per clove works in the dip. Just let it sit 10 minutes with the lemon juice to “bloom” the flavor!
Serving Suggestions for Crispy Chicken Strips with Garlic Dip
Oh, the possibilities! These golden beauties are basically the social butterflies of the snack world – they get along with everyone at the party. Here’s how I love to serve them (though let’s be real, they’re often gone before they even hit a plate!):
Classic Pairings That Never Fail
- Crinkle-cut fries: The ultimate comfort combo – crispy meets crispy! I bake a batch alongside the chicken during the last 20 minutes.
- Cool coleslaw: That creamy crunch cuts through the richness perfectly. My quick version? Shredded cabbage, mayo, apple cider vinegar, and a pinch of sugar.
- Buttery corn on the cob: Summer or winter (frozen works!), that sweet pop contrasts the garlic dip beautifully.
When You Want to Feel Fancy
- Bistro-style salad: Toss mixed greens with cherry tomatoes, avocado, and a light vinaigrette. The chicken strips make it a meal!
- Roasted veggie platter: Zucchini, bell peppers, and carrots roasted with olive oil turn this snack into a balanced feast.
- Pasta salad: Toss cold pasta with pesto and veggies – kids go nuts when I let them dip the chicken and the pasta!
Game Day MVP
For parties, I set up a whole DIY station:
- Keep chicken strips warm in a low oven
- Put the garlic dip in a bowl surrounded by ice to stay chilled
- Add bowls of pickles, celery sticks, and potato wedges
- Let everyone build their perfect bite!
Pro tip: Double the garlic dip recipe if serving a crowd – it disappears faster than the chicken! Last time I made these for book club, they were using carrot sticks to scrape the bowl clean.
Storing and Reheating Your Crispy Chicken Strips
Here’s the good news – these chicken strips stay delicious for days if you store them right! I’ve tested every method imaginable (after many sad, soggy failures), and here’s what actually works to keep that perfect crunch.
Smart Storage Tips
First rule: let the strips cool completely before storing (about 20 minutes). Trapped steam is the enemy of crispiness! Then:
- Airtight is everything: I use a shallow container with parchment between layers. Plastic wrap pressed directly on the strips makes them sweat – ick!
- Separate the dip: Store garlic dip in its own small jar or bowl with a tight lid. It’ll keep for up to 5 days in the fridge.
- Freezing works too: Lay strips single-layer on a baking sheet to freeze solid (1 hour), then transfer to freezer bags. They’ll keep 2 months – perfect for emergency snack attacks!
Reheating Like a Pro
Microwaving is tempting but don’t do it! Here’s how to bring back that fresh-from-the-oven magic:
- Oven method: 180°C (350°F) for 8-10 minutes on a wire rack (lets heat circulate). Spritz lightly with oil if they look dry.
- Air fryer revival: 190°C (375°F) for 3-4 minutes – it’s like they’re brand new! No preheating needed.
- For frozen strips: Bake at 200°C (400°F) for 12-15 minutes straight from freezer – no thawing!
Fun fact: The garlic dip actually tastes better after a day in the fridge! Just give it a good stir and let it sit at room temp for 10 minutes before serving. If it thickens too much, a teaspoon of water or milk loosens it perfectly.
Nutritional Information
Okay, let’s be real – we’re not eating crispy chicken strips for their health benefits! But for those who like to keep track (or need to for dietary reasons), here’s the scoop on what’s in each serving. Remember, these are estimates – your exact numbers will vary based on ingredient brands and how much dip you use (no judgment if you double-dip!).
Per serving (about 4 strips with 2 tbsp dip):
- Calories: 320
- Protein: 25g (hello, muscle fuel!)
- Total Fat: 18g
- Saturated Fat: 3g
- Carbohydrates: 22g
- Fiber: 1g
- Sugar: 2g
- Sodium: 450mg
A few notes from my nutritionist friend who helped me crunch these numbers: Most of the fat comes from the mayo in the dip (worth it!), and using panko instead of regular breadcrumbs adds about 15 extra calories but gives you that amazing crunch. If you’re watching sodium, you can reduce the salt in the coating by half – the dip will still give plenty of flavor.
Pro tip: Adding a big green salad on the side balances this meal perfectly. But sometimes? Just enjoy every crispy, garlicky bite without overthinking it – life’s too short!
FAQs About Crispy Chicken Strips with Garlic Dip
Can I fry these chicken strips instead of baking?
Absolutely! While I love the easier cleanup of baking, frying gives unbeatable crunch. Heat 2 inches of oil to 180°C (350°F) and fry strips in batches for 3-4 minutes until golden. Drain on paper towels – they’ll be extra crispy but still juicy inside. Just watch that oil temp doesn’t drop too much when adding chicken!
How long does the garlic dip last in the fridge?
That magical garlic mayo stays good for up to 5 days in a sealed container. The flavors actually deepen over time! If it separates, just give it a good stir. I don’t recommend freezing it though – the texture gets weird when thawed.
Can I make these chicken strips ahead of time?
You sure can! Here’s my party-prep trick: Bread the raw strips and arrange them on a baking sheet, then freeze for 1 hour before transferring to bags. When ready, bake from frozen – just add 5 extra minutes. The coating stays crispier than pre-cooked reheated strips!
What’s the best way to get breading to stick to chicken?
After years of trial and error, my foolproof method is: 1) Pat chicken SUPER dry, 2) Season before flouring, 3) Let egg-dipped strips sit 5 minutes before breading, and 4) Press crumbs on firmly. That combo creates a crust that stays put through baking or frying!
Why do my baked chicken strips sometimes turn out soggy?
The usual culprits are overcrowding the pan (steam can’t escape) or not flipping halfway. Always use a regular baking sheet (no parchment for this recipe!) and space strips about 2cm apart. If they’re browning too fast, lower your oven temp by 10°C – uneven heat causes sogginess.

7 Irresistible Crispy Chicken Strips with Garlic Dip You Must Try
- Total Time: 40 mins
- Yield: 4 servings 1x
- Diet: Low Lactose
Description
Crispy chicken strips with a flavorful garlic dip make a perfect snack or meal. They’re easy to prepare and loved by all ages.
Ingredients
- 500g chicken breast, cut into strips
- 1 cup all-purpose flour
- 2 eggs, beaten
- 1 cup breadcrumbs
- 1 tsp salt
- 1 tsp black pepper
- 1 tsp paprika
- 1/2 cup mayonnaise
- 2 cloves garlic, minced
- 1 tbsp lemon juice
Instructions
- Preheat your oven to 200°C (400°F).
- Season the chicken strips with salt, pepper, and paprika.
- Dredge each strip in flour, then dip in beaten eggs, and coat with breadcrumbs.
- Place the strips on a baking sheet and bake for 20-25 minutes, flipping halfway, until golden and crispy.
- For the garlic dip, mix mayonnaise, minced garlic, and lemon juice in a bowl.
- Serve the crispy chicken strips hot with the garlic dip on the side.
Notes
- For extra crispiness, spray the strips with cooking oil before baking.
- You can use panko breadcrumbs for a crunchier texture.
- Adjust garlic in the dip to your taste.
- Prep Time: 15 mins
- Cook Time: 25 mins
- Category: Appetizer
- Method: Baking
- Cuisine: American
Nutrition
- Serving Size: 1 serving
- Calories: 320
- Sugar: 2g
- Sodium: 450mg
- Fat: 18g
- Saturated Fat: 3g
- Unsaturated Fat: 10g
- Trans Fat: 0g
- Carbohydrates: 22g
- Fiber: 1g
- Protein: 25g
- Cholesterol: 120mg
Keywords: crispy chicken strips, garlic dip, baked chicken, easy snack


