
Oh, the joy of baking during the holidays! There’s something truly magical about gathering in the kitchen with family, the air filled with the warm, sweet scents of cookies baking in the oven. One of my absolute favorite traditions is making Christmas thumbprint cookies — they’re just the epitome of festive cheer! I can still remember the first time I made these delightful treats with my mom. We’d roll the dough into little balls, laughing as we pressed our thumbs into the centers, creating those perfect little wells just waiting to be filled with jam.
As the cookies baked, we’d sneak a taste of the jam, giggling over how we each had our favorite flavors. These thumbprint cookies not only taste incredible with their buttery, melt-in-your-mouth texture, but they also hold a special place in my heart because they bring us all together. They’re perfect for holiday gatherings, and trust me, they disappear faster than you can say “Christmas!” So, gather your loved ones, roll up your sleeves, and let’s dive into making these delicious Christmas thumbprint cookies that will surely become a cherished part of your holiday traditions too!
Ingredients for Christmas Thumbprint Cookies
To whip up these delightful Christmas thumbprint cookies, you’ll need the following ingredients. Each item plays a crucial role in creating that perfect texture and flavor, so make sure you gather everything before you start!
- 1 cup unsalted butter, softened – This adds a rich, creamy base to your cookies.
- 1 cup sugar – Sweetness is key, and this helps create that beautiful balance with the jam.
- 2 large eggs – They’ll help bind everything together and add some fluffiness!
- 2 teaspoons vanilla extract – Trust me, this is a must for that warm, inviting flavor.
- 3 cups all-purpose flour – The backbone of your cookie, giving it structure.
- 1/4 teaspoon salt – Just a pinch to enhance all the lovely flavors.
- 1/2 cup fruit jam (your choice) – I love using raspberry or apricot, but feel free to get creative!
Once you have all these ingredients ready, you’re just a few steps away from cookie bliss!
How to Prepare Christmas Thumbprint Cookies
Now that we’ve got our ingredients, it’s time to roll up our sleeves and get baking! Follow these simple steps to create those beautiful Christmas thumbprint cookies that everyone loves. Trust me, the process is just as delightful as the end result!
Prepping Your Ingredients
Before you dive in, let’s set up your baking space. Start by preheating your oven to 350°F (175°C) so it’s nice and hot when your cookies are ready to go in. While that’s heating up, gather all your ingredients and tools — a mixing bowl, a wooden spoon, and a baking sheet lined with parchment paper. Trust me, having everything at hand makes the process smoother and way more fun!
Mixing the Dough
Alright, let’s start creaming! In your mixing bowl, combine the softened butter and sugar. Use that wooden spoon to mix them together until it’s light and fluffy — this usually takes about 2-3 minutes. You want it to look almost like whipped cream! Next, crack in those eggs, one at a time, and add the vanilla extract. Mix well until everything is combined. The butter and sugar should be creamy, and the eggs should be fully incorporated.
Now, gradually add the flour and salt to the mixture. I like to do this in parts, stirring gently each time to avoid a flour explosion! You’re aiming for a soft dough that holds together nicely. If it feels a bit crumbly, don’t worry; just give it a little more mixing until it comes together.
Shaping the Cookies
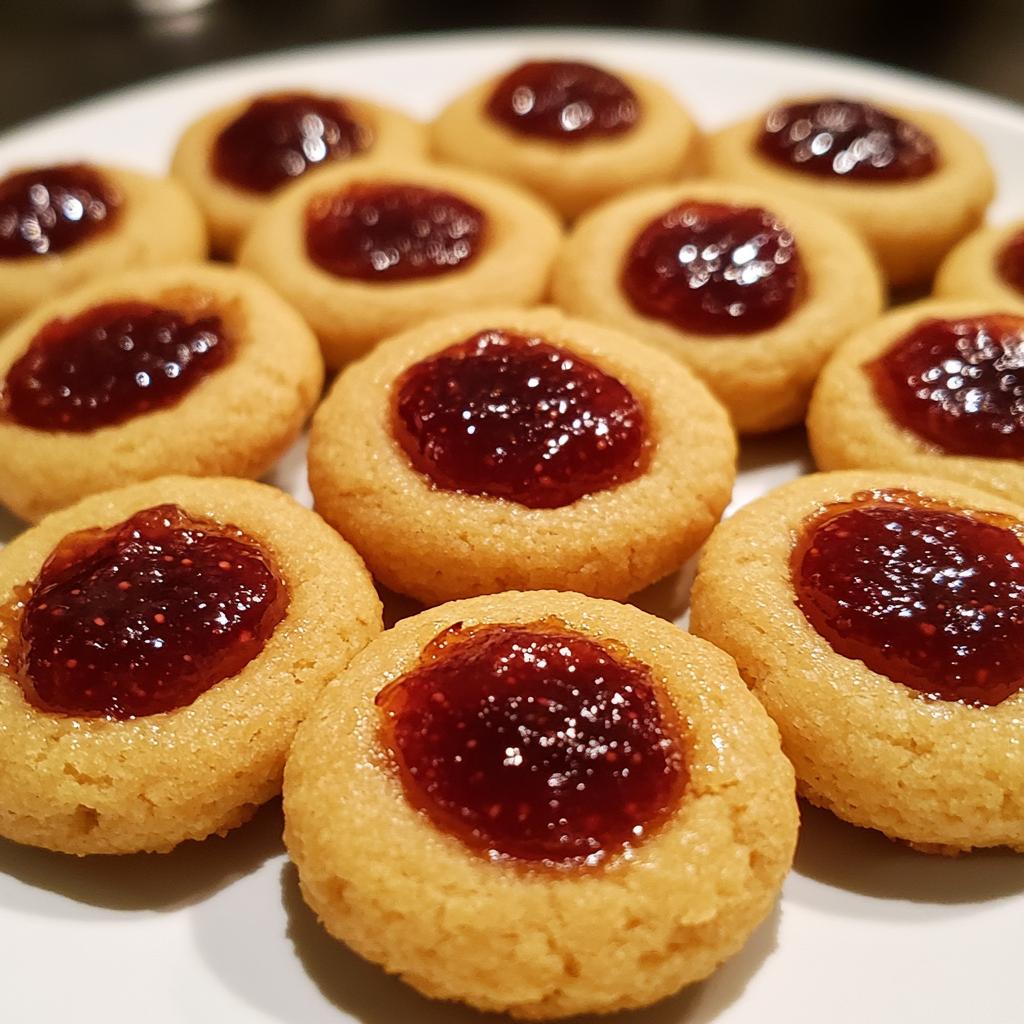
Time to shape those cookies! Take a scoop of dough (about a tablespoon works perfectly) and roll it into a ball in your hands. Place the dough balls on your lined baking sheet, leaving some space in between them — they’ll spread a bit while baking. Now for the fun part! Use your thumb (or the back of a teaspoon if you prefer) to gently press down in the center of each ball, creating a little well. Make sure not to press too hard; you want it just deep enough to hold that jam!
Adding the Jam
Now, let’s fill those lovely indentations! Take your favorite fruit jam and spoon a little into each well. I love raspberry, but apricot or even strawberry works wonders too. Don’t be shy! Fill them generously, but be careful not to overflow — we want the jam to stay snug inside while baking.
Baking Process
With your cookies prepped and filled, it’s time to bake! Slide your baking sheet into the preheated oven and let those cookies work their magic for about 12-15 minutes. You’ll know they’re done when the edges are lightly golden, and the centers look set but still soft. Don’t worry if they’re a bit puffed; they’ll settle as they cool. Once done, carefully remove them from the oven and let them cool on the baking sheet for a few minutes before transferring them to a wire rack to cool completely. And just like that, you’ve created a batch of Christmas thumbprint cookies ready to be enjoyed!
Why You’ll Love Christmas Thumbprint Cookies
These Christmas thumbprint cookies are not just delicious; they’re a holiday staple for so many reasons! Here are some of the top reasons you’ll fall head over heels for them:
- Quick to Make: With just 20 minutes of prep time, you can whip up a batch of these cookies in no time, making them perfect for last-minute holiday baking.
- Festive and Fun: The vibrant colors of the jam peeking through the cookie add a festive touch to your holiday spread, making them a delightful treat for gatherings.
- Versatile Jam Options: You can use any fruit jam you love! Whether it’s raspberry, strawberry, apricot, or even a mix, the possibilities are endless, allowing you to customize each batch.
- Perfect for Sharing: These cookies are great for holiday gifting! Just package them up in a cute box or tin, and you’ve got a thoughtful, homemade treat for friends and family.
- Melt-in-Your-Mouth Texture: The buttery, soft texture combined with the sweet jam filling creates a delightful experience in every bite that’s sure to impress!
- Kid-Friendly Activity: Making these cookies is a fantastic way to involve kids in the kitchen! Rolling the dough and making thumbprints is fun and engaging for little hands.
Trust me, once you try these Christmas thumbprint cookies, they’ll become a beloved tradition in your home, just like they are in mine!
Tips for Success with Christmas Thumbprint Cookies
If you want your Christmas thumbprint cookies to turn out absolutely perfect, I’ve got some tried-and-true tips that will make all the difference! Trust me, these little details can elevate your cookies from good to downright amazing.
Check the Butter’s Softness
First things first, make sure your butter is softened but not melted. You’re aiming for that sweet spot where it’s pliable enough to cream easily but still holds its shape. If you’ve forgotten to take it out of the fridge, you can cut it into small pieces and let it sit at room temperature for about 15-20 minutes. This will help it soften faster without losing its integrity.
Don’t Overmix the Dough
When you’re combining the flour into the butter mixture, be gentle! Overmixing can lead to tough cookies, and nobody wants that. Just mix until everything is combined, and you’ll be rewarded with tender, melt-in-your-mouth cookies.
Experiment with Baking Times
Oven temperatures can vary, so keep an eye on your cookies as they bake. If you prefer softer cookies, you might want to pull them out a minute or two early. They’ll continue to firm up as they cool, so don’t worry if they seem a bit underdone when you first take them out. For a slightly crispier texture, leave them in for the full time. It’s all about finding your personal sweet spot!
Use a Cookie Scoop for Uniformity
For perfectly uniform cookies, consider using a cookie scoop! This handy tool not only ensures all your dough balls are the same size but also makes the process a lot quicker. Plus, your cookies will bake evenly, which is a win-win!
Chill the Dough if Needed
If you find your dough is a bit too soft to handle, don’t hesitate to chill it in the refrigerator for about 30 minutes. This will make it easier to roll the dough balls and help prevent them from spreading too much in the oven.
With these tips in your back pocket, you’re all set to create the most delightful Christmas thumbprint cookies. Happy baking!
FAQ about Christmas Thumbprint Cookies
Got questions about these irresistible Christmas thumbprint cookies? Don’t worry, I’ve got you covered! Here are some common queries and answers that will help you enjoy these treats even more:
Can I use different types of jam?
Absolutely! One of the best things about thumbprint cookies is their versatility. You can use any fruit jam you love. Raspberry, strawberry, apricot, or even mixed berry jam all work wonderfully. Feel free to experiment and find your favorite combinations!
How should I store the cookies?
To keep your cookies fresh and tasty, store them in an airtight container at room temperature. They should stay good for about a week — but trust me, they probably won’t last that long! If you want, you can also freeze them for up to three months. Just make sure to separate layers with parchment paper to prevent sticking.
Can I make these cookies gluten-free?
Yes, you can! Substitute the all-purpose flour with a gluten-free flour blend that measures cup-for-cup like regular flour. Just double-check that your other ingredients (like the jam) are gluten-free, and you’re all set!
What if I want to make these cookies dairy-free?
No problem! You can use a dairy-free butter substitute to replace the unsalted butter in the recipe. There are many great options available now that will work just as well, so you can still enjoy these delightful cookies!
How can I make the cookies more festive?
For a fun twist, you can add some festive sprinkles on top of the jam before baking. You could also use colored jam or even drizzle some melted chocolate over the cooled cookies for a little extra flair. Get creative and make them your own!
With these FAQs in mind, you’re all set to bake, share, and enjoy these Christmas thumbprint cookies! Happy baking!
Nutritional Information for Christmas Thumbprint Cookies
When it comes to enjoying Christmas thumbprint cookies, it’s nice to know what you’re indulging in! Here’s a breakdown of the typical nutritional values per cookie. Keep in mind that these values are estimates and can vary based on the specific ingredients you use and how large you make your cookies.
- Calories: 150
- Fat: 8g
- Saturated Fat: 5g
- Unsaturated Fat: 2g
- Trans Fat: 0g
- Cholesterol: 30mg
- Sodium: 50mg
- Carbohydrates: 18g
- Fiber: 1g
- Sugar: 8g
- Protein: 2g
These delightful cookies are rich and satisfying, making them a perfect treat for the holidays. Enjoy them in moderation, and savor every delicious bite!
Storage & Reheating Instructions
To keep your Christmas thumbprint cookies fresh and delicious, it’s essential to store them properly. Once they’ve cooled completely, place them in an airtight container. This will help maintain their soft, melt-in-your-mouth texture. They’re best enjoyed within a week, but I doubt they’ll last that long!
If you want to keep them for a longer period, you can freeze them! Just layer the cookies between sheets of parchment paper in a freezer-safe container, and they’ll last for up to three months. When you’re ready to enjoy them again, simply let them thaw at room temperature. No need to rush; they’ll taste just as delightful!
Now, if you find yourself with a few leftover cookies and want to bring back that fresh-out-of-the-oven warmth, reheating is a breeze. Preheat your oven to 300°F (150°C) and place the cookies on a baking sheet. Warm them up for about 5-7 minutes. This gentle heat will revive their softness, and you’ll be greeted by that lovely buttery aroma all over again. Enjoy every scrumptious bite!
Print
Christmas Thumbprint Cookies: 7 Sweet Secrets
- Total Time: 35 minutes
- Yield: 24 cookies 1x
- Diet: Vegetarian
Description
Delicious Christmas thumbprint cookies filled with jam.
Ingredients
- 1 cup unsalted butter, softened
- 1 cup sugar
- 2 large eggs
- 2 teaspoons vanilla extract
- 3 cups all-purpose flour
- 1/4 teaspoon salt
- 1/2 cup fruit jam (your choice)
Instructions
- Preheat your oven to 350°F (175°C).
- In a bowl, cream the butter and sugar until light and fluffy.
- Add the eggs and vanilla, mixing well.
- Gradually add the flour and salt, mixing until combined.
- Roll dough into small balls and place on a baking sheet.
- Make an indentation in the center of each ball with your thumb.
- Fill each indentation with jam.
- Bake for 12-15 minutes or until lightly golden.
- Allow to cool before serving.
Notes
- Store cookies in an airtight container.
- Use different jams for variety.
- Adjust baking time for softer cookies.
- Prep Time: 20 minutes
- Cook Time: 15 minutes
- Category: Dessert
- Method: Baking
- Cuisine: American
Nutrition
- Serving Size: 1 cookie
- Calories: 150
- Sugar: 8g
- Sodium: 50mg
- Fat: 8g
- Saturated Fat: 5g
- Unsaturated Fat: 2g
- Trans Fat: 0g
- Carbohydrates: 18g
- Fiber: 1g
- Protein: 2g
- Cholesterol: 30mg
Keywords: christmas thumbprint cookies, holiday cookies, jam cookies


