
Nothing says Christmas like the smell of homemade fudge wafting through the house! This easy Christmas fudge recipe has been my go-to holiday treat for years – it’s the first thing my nieces and nephews ask for when they come over. What I love most is how simple it is to make with just a few basic ingredients, yet it feels so special wrapped up in pretty tins for gifts.
My grandma used to make a version of this every December, and now I carry on the tradition. The secret is in that perfect creamy texture that melts in your mouth. Whether you’re hosting a cookie exchange or just want something sweet to nibble on while wrapping presents, this fudge hits all the right festive notes. Trust me, once you try this recipe, it’ll become part of your holiday traditions too!
Why You’ll Love This Christmas Fudge
Oh my gosh, where do I even start? This fudge is seriously magical – here’s why:
- It comes together in under 30 minutes (perfect for last-minute holiday panic!)
- Only 7 simple ingredients you probably already have
- Endlessly customizable – toss in whatever mix-ins make you happy
- That rich, creamy texture will make everyone think you’re a candy-making pro
- Festive as can be with those colorful sprinkles peeking through
Seriously, this is the kind of recipe that’ll have your family begging you to make it every year. Mine does!
Ingredients for Christmas Fudge
Okay, let’s gather our fudge-making essentials! Here’s what you’ll need to create that perfect creamy texture:
- 3 cups granulated sugar – trust me, no skimping here!
- 3/4 cup unsalted butter – I always use the real stuff, never margarine
- 2/3 cup evaporated milk – not regular milk, this makes all the difference
- 12 oz semisweet chocolate chips – packed full for that rich chocolate flavor
- 7 oz marshmallow creme – the secret to that dreamy smooth texture
- 1 tsp vanilla extract – pure vanilla if you’ve got it
- 1/2 cup chopped nuts (optional) – walnuts or pecans add nice crunch
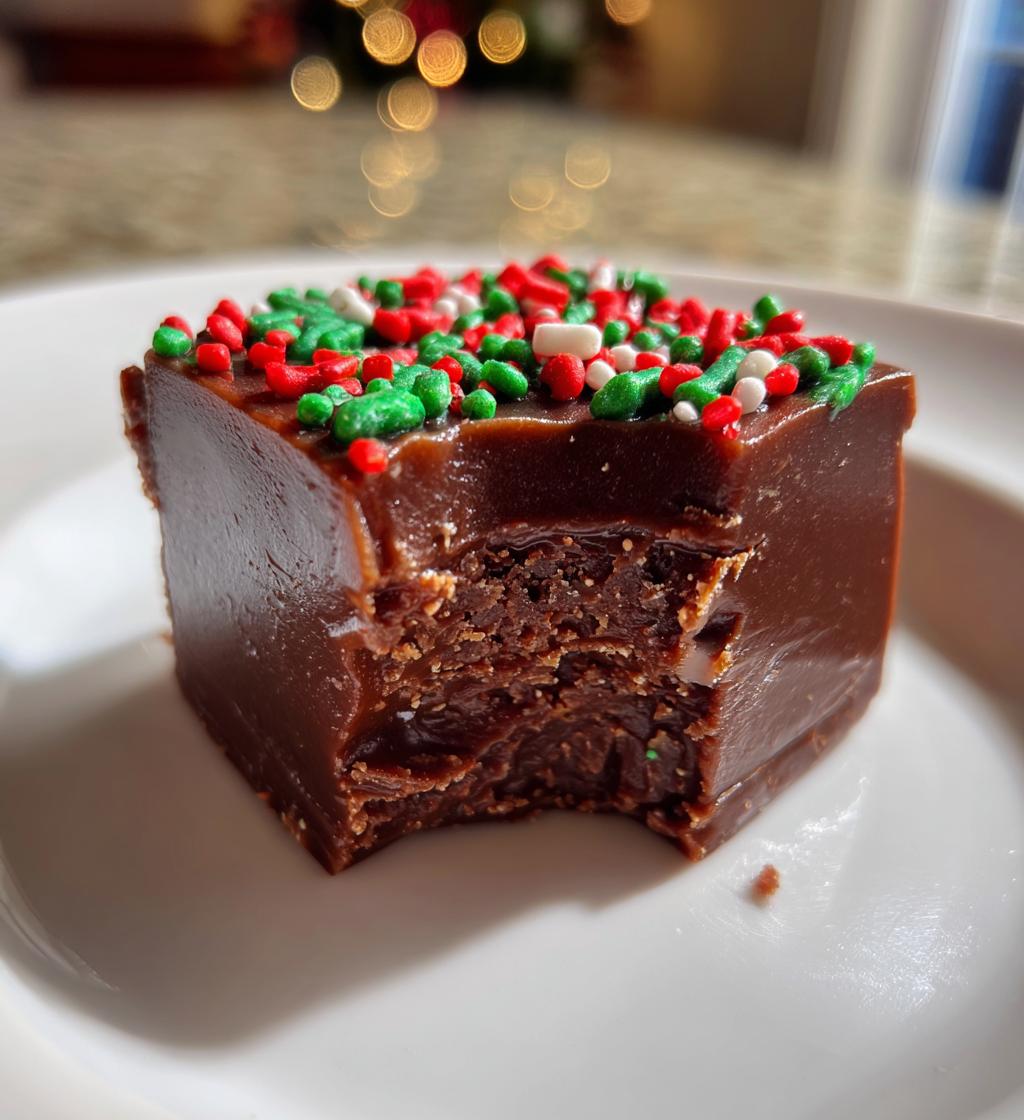
- 1/2 cup festive sprinkles (optional) – because everything’s better with sprinkles!
See? Nothing fancy – just good old-fashioned ingredients that work their magic together!
Equipment You’ll Need
Don’t worry – you don’t need any fancy gadgets for this fudge! Just grab:
- A heavy-bottomed saucepan (trust me, it prevents burning)
- Parchment paper for easy pan lining
- A wooden spoon for constant stirring
- A candy thermometer if you want to be precise
- An 8×8-inch baking pan – glass or metal both work great
That’s it! Now let’s get cooking!
How to Make Christmas Fudge
Alright, let’s dive into the fun part – making this magical Christmas fudge! I’ve made this so many times I could probably do it in my sleep, but I’ll walk you through every step so yours turns out perfect.
Step 1: Prepare the Pan
First things first – line that 8×8-inch pan with parchment paper, leaving some overhang on the sides. This little trick is my lifesaver – it makes popping out the fudge SO much easier! Smooth out any wrinkles so your fudge has nice clean edges. Set it aside while you work on the good stuff.
Step 2: Melt the Base
Now grab your heavy saucepan and combine the sugar, butter, and evaporated milk. Here’s where you need patience – medium heat is key! Stir constantly (I mean it – no wandering off to check your phone!) until it comes to a full rolling boil. Once bubbling, set a timer for exactly 5 minutes and keep stirring. That sugar mixture gets crazy hot, so be careful!
Step 3: Add Chocolate and Mix-Ins
Remove the pan from heat immediately when time’s up. Quickly stir in those chocolate chips until they’re completely melted and glossy. Then add the marshmallow creme and vanilla – this is when the magic happens and it turns into that dreamy fudge texture! If you’re using nuts or sprinkles, now’s the time to gently fold them in.
Step 4: Set and Cut
Pour your gorgeous fudge mixture into the prepared pan and smooth the top. Let it cool completely at room temperature – I know it’s tempting, but don’t rush this part! Once set, use the parchment handles to lift it out. Pro tip: run your knife under hot water and dry it before cutting for super clean squares.
See? Not complicated at all! Just remember – patience and constant stirring are your best friends when making fudge. Now let that beauty set while we talk about some pro tips…
Tips for Perfect Christmas Fudge
After making countless batches of this fudge (some more successful than others!), I’ve learned a few tricks that guarantee perfect results every time:
- Fresh marshmallow creme is non-negotiable – check that expiration date!
- If your kitchen is humid, your fudge might not set properly – pick a dry day if possible
- A candy thermometer removes all guesswork – aim for 234°F (soft ball stage)
- Don’t scrape the saucepan when pouring – those bits can make your fudge grainy
- Let it cool completely before cutting – I know it’s hard to wait!
Follow these simple tips, and you’ll be the fudge-making hero of your holiday gatherings!
Variations of Christmas Fudge
One of my favorite things about this recipe is how easily you can dress it up for different holiday moods! Here are some of my go-to twists:
- Peppermint Bliss: Swap semisweet chips for white chocolate and add 1/2 tsp peppermint extract + crushed candy canes
- Nutty Wonderland: Use dark chocolate and fold in toasted pecans with a pinch of sea salt
- Fruitcake Fudge: Mix in chopped dried cranberries and candied orange peel for a fruity kick
- Cookie Dough Dream: Stir in mini chocolate chips and crumbled graham crackers – kids go nuts for this one!
The possibilities are endless – have fun making it your own!
Storing and Serving Christmas Fudge
Here’s the best part – this fudge keeps like a dream! Store it in an airtight container at room temperature with parchment between layers (if you’ve made multiple batches). It’ll stay fresh and creamy for up to 2 weeks – if it lasts that long in your house!
For gifting, I love stacking squares in pretty holiday tins or clear cellophane bags tied with ribbon. Add a handwritten tag with the flavor – it makes such a personal touch. Pro tip: include reheating instructions if giving to neighbors (“20 seconds in the microwave for that just-made texture!”).
Fun fact: this fudge actually gets better after a day or two as the flavors meld. Just try not to eat it all before your guests arrive!
Christmas Fudge Nutritional Information
Now, I’m no nutritionist, but here’s the scoop on what’s in each delicious piece of this Christmas fudge (based on cutting into 36 squares):
- Calories: 120 per piece
- Sugar: 15g (hey, it’s a holiday treat!)
- Fat: 6g (that rich butter and chocolate goodness)
- Carbs: 18g
- Protein: Just 1g – we’re here for the sugar rush!
Remember, these are estimates – your exact numbers might vary depending on mix-ins and how big you cut those squares (no judgment if they’re generous!). Everything in moderation, right?
FAQs About Christmas Fudge
I’ve gotten so many questions about this fudge over the years – here are the ones that pop up most often:
Can I freeze Christmas fudge?
Absolutely! Wrap it tightly in plastic wrap, then pop it in a freezer bag. It’ll keep beautifully for up to 3 months. Thaw overnight in the fridge – it tastes just as creamy!
Why did my fudge turn out grainy?
Oh no! This usually happens if the sugar wasn’t fully dissolved. Next time, stir constantly while bringing to a boil and use a candy thermometer to hit exactly 234°F. And don’t scrape the pan when pouring!
Can I use regular milk instead of evaporated?
I wouldn’t recommend it – evaporated milk has less water content which helps create that perfect fudge texture. It’s worth the extra trip to the grocery store!
How do I get clean cuts?
My secret? Chill the fudge completely, then run your knife under hot water and dry it between each cut. Works like magic for those picture-perfect squares!
Try this recipe and share your festive creations! Tag me in your photos – I love seeing everyone’s holiday fudge masterpieces!
Print
30-Minute Christmas Fudge Recipe – Irresistibly Creamy & Festive
- Total Time: 25 mins
- Yield: 36 pieces 1x
- Diet: Vegetarian
Description
Easy homemade Christmas fudge made with simple ingredients for a festive treat.
Ingredients
- 3 cups granulated sugar
- 3/4 cup unsalted butter
- 2/3 cup evaporated milk
- 12 oz semisweet chocolate chips
- 7 oz marshmallow creme
- 1 tsp vanilla extract
- 1/2 cup chopped nuts (optional)
- 1/2 cup festive sprinkles (optional)
Instructions
- Line an 8×8-inch pan with parchment paper.
- Combine sugar, butter, and evaporated milk in a saucepan.
- Bring to a boil over medium heat, stirring constantly.
- Boil for 5 minutes while stirring.
- Remove from heat and stir in chocolate chips until melted.
- Add marshmallow creme and vanilla, mixing until smooth.
- Fold in nuts or sprinkles if using.
- Pour into the prepared pan and let cool completely.
- Cut into squares and serve.
Notes
- Store in an airtight container for up to 2 weeks.
- Use a candy thermometer for precise boiling.
- Adjust sweetness by using dark chocolate chips.
- Prep Time: 10 mins
- Cook Time: 15 mins
- Category: Dessert
- Method: Stovetop
- Cuisine: American
Nutrition
- Serving Size: 1 piece
- Calories: 120
- Sugar: 15g
- Sodium: 10mg
- Fat: 6g
- Saturated Fat: 3.5g
- Unsaturated Fat: 2g
- Trans Fat: 0g
- Carbohydrates: 18g
- Fiber: 1g
- Protein: 1g
- Cholesterol: 10mg
Keywords: christmas fudge, holiday dessert, easy candy recipe


