
You know that magical feeling when the house smells like cinnamon, sugar, and holiday cheer? That’s exactly what happens when I dive into my annual Christmas baking videos tradition. Every December, my kitchen transforms into a festive workshop where I test all the classics—gingerbread houses dusted with snow-like powdered sugar, buttery shortbread stars, and those melt-in-your-mouth sugar cookies my grandma used to make. These videos capture not just recipes, but the messy, joyful chaos of holiday baking—flour-dusted countertops and all. I’ve made it my mission to show how easy (and fun!) seasonal treats can be, whether you’re baking for a crowd or just craving that nostalgic holiday flavor. There’s something special about sharing these recipes through video—you get to see the exact moment butter and sugar become fluffy clouds, or how dough should look when it’s perfectly kneaded. Trust me, once you start watching these Christmas baking videos, you’ll be reaching for your mixing bowls before the credits roll!
Why You’ll Love These Christmas Baking Videos
There’s a reason I get giddy every year when I hit record on these Christmas baking videos—they make holiday magic feel totally doable, even if you’re secretly nervous about baking. Here’s why they’ve become my kitchen staples (and probably will be yours too!):
- No guesswork: Ever second-guessed if your dough looks right? My close-up shots show you exactly how batter should pour or when cookies are perfectly golden.
- Festive shortcuts: I spill all my cheats—like using store-bought dough for quick peppermint twists or turning muffin tins into mini pie makers.
- Kid-friendly magic: The videos capture the messy fun of decorating gingerbread houses (pro tip: royal icing fixes everything).
- Holiday mood boost: Crank up the volume! The sound of sprinkles hitting cookies or chocolate melting is pure December ASMR.
Seriously, these videos are like having a flour-dusted friend cheering you on—minus the cleanup in your kitchen!
Ingredients for Christmas Baking
Okay, let’s dig into the good stuff! These are the exact ingredients I use in my go-to Christmas baking videos – measured the way Grandma taught me (she was very particular about packing brown sugar just right). Here’s what you’ll need:
- 2 cups all-purpose flour (spooned and leveled – don’t pack it!)
- 1 cup granulated sugar
- 1/2 cup unsalted butter, softened (leave it out for 30 minutes – cold butter won’t cream properly)
- 2 large eggs, room temperature (this matters for texture!)
- 1 tsp pure vanilla extract (imitation vanilla? Not in my holiday kitchen!)
- 1 tsp baking powder
- 1/2 tsp fine sea salt (skip this and your treats will taste flat)
- 1/2 cup whole milk, slightly warmed (cold milk can make batter seize up)
See those notes? That’s years of trial and error right there. Now grab your favorite mixing bowl – we’re about to make some magic!
How to Make Christmas Baking Treats
Alright, let’s get baking! I’ve made this recipe dozens of times in my Christmas baking videos, and I’ll walk you through each step just like I would with my best friend standing next to me in the kitchen. The key is taking it slow and enjoying the process – after all, holiday baking should be as joyful as the treats themselves!
Step 1: Preheat and Prepare
First things first – turn that oven to 350°F (175°C) and let it heat up while you work. This isn’t just busy work – that preheat time makes all the difference for even baking. While it’s warming up, grab your favorite baking pan (I use a 9×13 for this recipe) and give it a good coating of butter or non-stick spray. Want a pro tip? Dust a light layer of flour over the grease – it creates a magical non-stick surface that’ll have your treats sliding right out!
Step 2: Mix Dry Ingredients
Now for the foundation! In a big mixing bowl, whisk together 2 cups all-purpose flour, 1 cup sugar, 1 tsp baking powder, and 1/2 tsp salt. Don’t just stir – really whisk those babies together for a good 30 seconds until they’re completely combined. I like to imagine I’m creating a little snowstorm in my bowl (festive, right?). This step ensures your baking powder gets evenly distributed so your treats rise perfectly.
Step 3: Add Wet Ingredients
Time to get creamy! Add your 1/2 cup softened butter, 2 eggs, 1 tsp vanilla, and 1/2 cup milk to the dry ingredients. Here’s where your arm muscles come in – mix it thoroughly until the batter is smooth with no floury streaks. The texture should be like thick pancake batter – if it looks too dry, add a tablespoon more milk. Too wet? A sprinkle of flour will fix it. Trust me, after making this in so many Christmas baking videos, I can tell just by the sound of the spoon scraping the bowl when it’s perfect!
Step 4: Bake and Cool
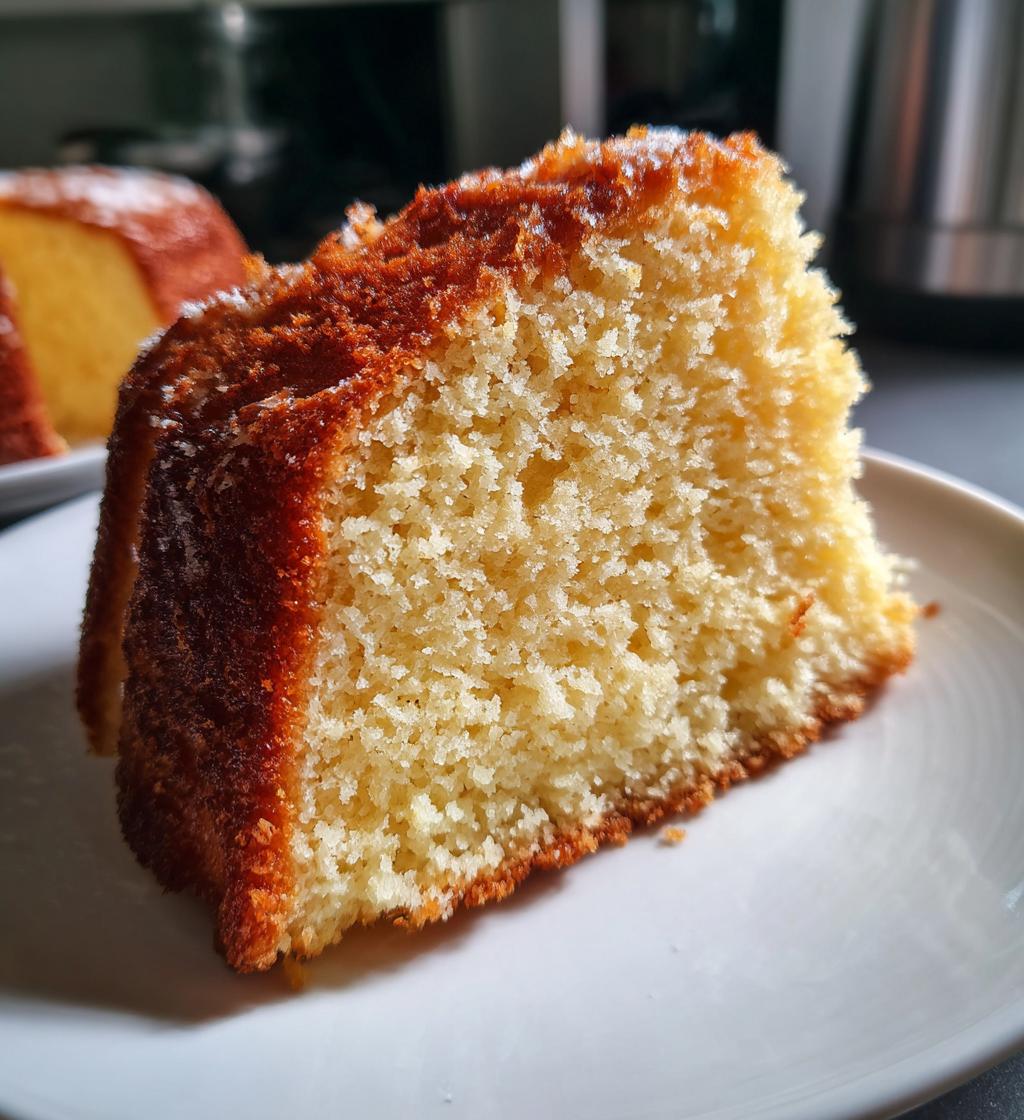
Pour that beautiful batter into your prepared pan and slide it into the oven. Set your timer for 30 minutes, but start checking at 25 – oven temperatures can vary. The magic moment? When a toothpick inserted in the center comes out with just a few moist crumbs (not wet batter!). Let it cool in the pan for 10 minutes – I know it’s tempting to dive right in, but this waiting time helps the texture set. Then transfer to a wire rack to cool completely before slicing. The hardest part? Resisting the smell of warm vanilla and butter filling your kitchen!
Tips for Perfect Christmas Baking
After years of filming Christmas baking videos (and eating my fair share of “test batches”), I’ve picked up some foolproof tricks that’ll make your holiday treats shine:
- Festive flair in seconds: Toss a handful of holiday sprinkles into the batter before baking – they’ll create colorful surprises in every slice!
- Double the joy: This recipe doubles beautifully for cookie exchanges or last-minute gifts. Just mix in two batches if your bowl gets too crowded.
- The cooling secret: Resist cutting warm treats – they’ll hold their shape better when completely cool. (I use this waiting time to tidy up my disastrous counters!)
- Storage smarts: Keep leftovers in an airtight container with a slice of bread – it absorbs excess moisture so your baked goods stay fresh for days.
- Baking SOS: If edges brown too fast, tent with foil. Burned bottoms? A microplane zester can gently remove the overdone layer.
These little hacks have saved many of my holiday baking sessions – now they’re all yours!
Christmas Baking Variations
One of my favorite things about these Christmas baking videos is how easily you can tweak the recipe to match your holiday mood! Try stirring in 1 tsp cinnamon with the dry ingredients for a cozy spice kick. For crunch lovers, fold in 1/2 cup chopped walnuts or pecans – they toast beautifully while baking. Chocolate fan? A handful of mini chocolate chips or crushed candy canes makes every bite festive. My wildcard? Swirling in 2 tbsp of orange zest for a bright, citrusy surprise that cuts through all that holiday richness!
Serving and Storing Christmas Baking Treats
Here’s the best part – serving these goodies warm with a dusting of powdered sugar makes them feel extra special, like they jumped straight out of my Christmas baking videos! For parties, I love cutting them into festive shapes with cookie cutters while they’re slightly warm – the clean edges make them look bakery-perfect. Leftovers? (As if!) Store them in an airtight container at room temperature for up to 5 days. Pro tip: Layer them between parchment paper so they don’t stick together. Want to get ahead? These freeze beautifully for up to 3 months – just thaw overnight and they’ll taste like they came fresh from the oven!
Nutritional Information
Just like I mention in my Christmas baking videos, these numbers are estimates—your exact results may vary depending on specific ingredients and portion sizes. Each serving (about one slice) contains roughly: 250 calories, 10g fat (6g saturated), 35g carbs, 4g protein, and 20g sugar. Not diet food, but hey—it’s the holidays!
Frequently Asked Questions
Over years of filming Christmas baking videos, I’ve gotten the same excited questions from viewers – so let me share what I’ve learned through all my holiday kitchen experiments!
Can I Use Gluten-Free Flour?
Absolutely! I’ve tested this with 1-to-1 gluten-free flour blends with great success. The texture comes out slightly more delicate, so I recommend adding an extra egg yolk for structure. Just be sure to mix gently – gluten-free batters can get gummy if overworked. My favorite trick? Let the batter rest for 10 minutes before baking – it helps the flour absorb moisture properly.
How Do I Make It More Festive?
Oh, this is my favorite part! Right before baking, press whole cranberries or halved pecans into the batter in holiday patterns. After cooling, drizzle with colored icing (mix powdered sugar + milk + food coloring) or dust with edible glitter. For next-level cheer, use cookie cutters to slice cooled treats into trees, stars, or snowmen – the kids go wild for these in my Christmas baking videos!
Can I Freeze These Treats?
You bet – freezer space is precious during the holidays! Cool completely, then wrap tightly in plastic wrap followed by foil. They’ll keep for 3 months frozen. Thaw overnight in the fridge, then bring to room temperature or warm briefly in the oven. Pro tip: Freeze slices individually on a tray first – this prevents them from sticking together later!
Share Your Christmas Baking Creations
Now I want to see your holiday magic! Snap a photo of your finished treats (flour-smudged countertops and all) and tell me how it went in the comments. Did you add a special twist? Need help troubleshooting? This is my favorite part of sharing Christmas baking videos—seeing your kitchens fill with the same joy mine does every December!
Print
2 Magical Christmas Baking Videos You Need
- Total Time: 45 minutes
- Yield: 12 servings 1x
- Diet: Vegetarian
Description
A collection of festive Christmas baking videos to inspire your holiday cooking.
Ingredients
- 2 cups all-purpose flour
- 1 cup sugar
- 1/2 cup butter
- 2 eggs
- 1 tsp vanilla extract
- 1 tsp baking powder
- 1/2 tsp salt
- 1/2 cup milk
Instructions
- Preheat your oven to 350°F (175°C).
- In a bowl, mix flour, sugar, baking powder, and salt.
- Add butter, eggs, vanilla extract, and milk to the dry ingredients.
- Stir until the batter is smooth.
- Pour the batter into a greased baking pan.
- Bake for 30 minutes or until a toothpick comes out clean.
- Let it cool before serving.
Notes
- You can add festive sprinkles on top before baking.
- Store leftovers in an airtight container.
- This recipe can be doubled for larger gatherings.
- Prep Time: 15 minutes
- Cook Time: 30 minutes
- Category: Dessert
- Method: Baking
- Cuisine: American
Nutrition
- Serving Size: 1 slice
- Calories: 250
- Sugar: 20g
- Sodium: 100mg
- Fat: 10g
- Saturated Fat: 6g
- Unsaturated Fat: 3g
- Trans Fat: 0g
- Carbohydrates: 35g
- Fiber: 1g
- Protein: 4g
- Cholesterol: 50mg
Keywords: Christmas baking, holiday recipes, festive desserts, easy baking, Christmas treats


