
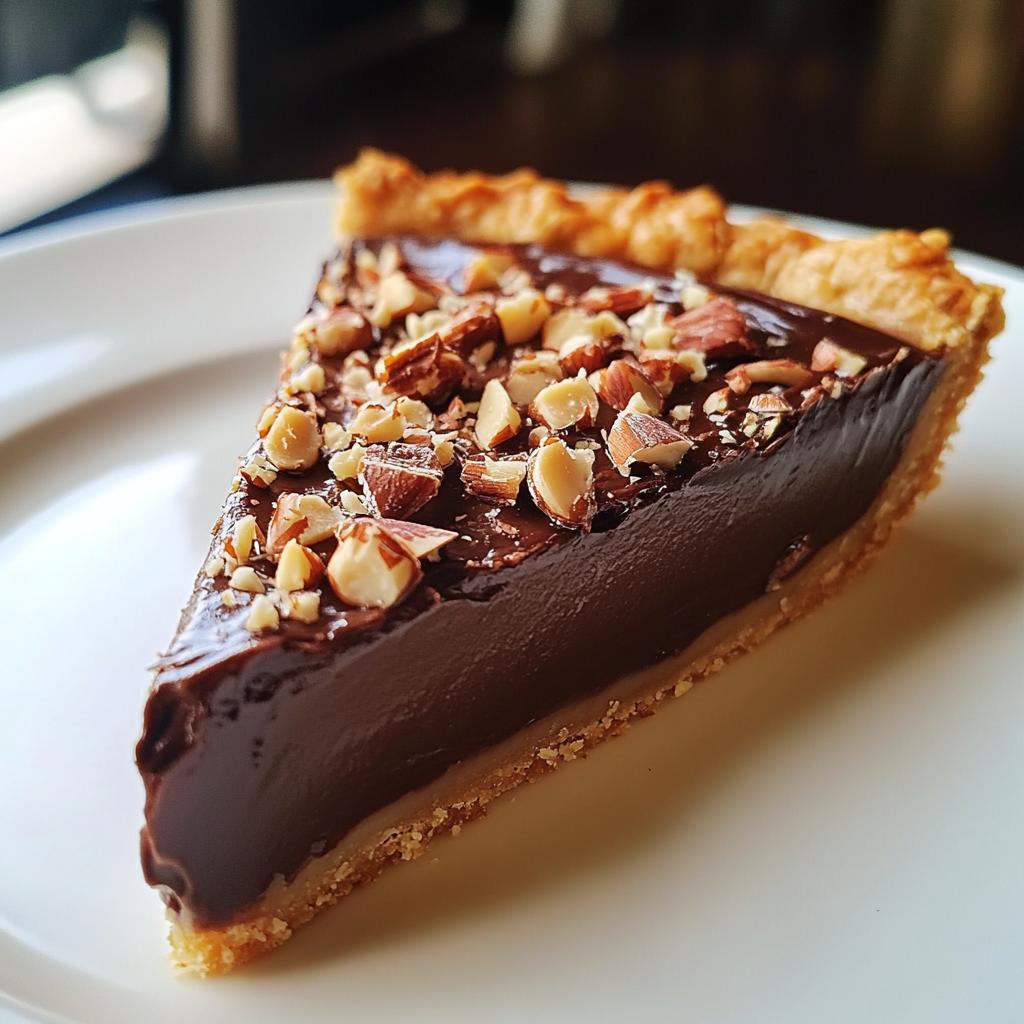
There’s something magical about a chocolate hazelnut tart with a crisp crust and silky, nutty filling. It’s the kind of dessert that feels indulgent but surprisingly simple to make. The first time I tried this recipe, I was hooked—the buttery crust crumbles just right, and the smooth chocolate hazelnut filling melts in your mouth. It’s become my go-to for dinner parties because it’s elegant yet fuss-free. Plus, that little sprinkle of toasted hazelnuts on top? It’s the perfect finishing touch. Trust me, one bite of this tart, and you’ll understand why it’s a favorite in my kitchen.
Why You’ll Love This Chocolate Hazelnut Tart
This isn’t just any dessert—it’s the one that’ll have everyone asking for seconds (and the recipe). Here’s why it’s a total game-changer:
- The crust shatters beautifully with each bite, giving way to that dreamy, velvety filling.
- It looks fancy but comes together with minimal effort (no pastry skills required!).
- The combo of rich chocolate and toasty hazelnuts feels luxe without being overly sweet.
Perfect for Special Occasions
I’ve lost count of how many birthdays and dinner parties this tart has saved me. It slices like a dream for neat portions, and that glossy chocolate surface sprinkled with golden nuts makes it look straight from a patisserie. Pro tip: Serve it with whipped cream or berries when you really want to impress.
Simple Yet Decadent
Don’t let the elegance fool you—this is a no-stress dessert. The crust presses right into the pan (no rolling pin battles!), and the filling? Just melt, pour, and chill. In under 2 hours, you’ve got something that tastes like you fussed all day. My kind of magic trick.
Ingredients for Chocolate Hazelnut Tart
Gather these simple ingredients – you might already have most in your pantry! I always measure everything before starting because once that butter gets soft, there’s no going back. Here’s what you’ll need:
- 200g all-purpose flour – spooned and leveled (trust me, this matters for the perfect crust texture)
- 100g unsalted butter – cold and cubed (I pop mine in the freezer for 10 minutes if my kitchen’s warm)
- 50g powdered sugar – sifted if it’s lumpy
- 1 egg yolk – save the white for an omelet!
- 200g chocolate hazelnut spread – use the good stuff – it makes all the difference
- 100ml heavy cream – cold is fine, we’re heating it anyway
- 50g chopped toasted hazelnuts – toast them yourself for maximum flavor (I’ll show you how in the steps)
- 1 tsp vanilla extract – the real stuff, not imitation
- Pinch of salt – just a tiny one to balance the sweetness
See? Nothing too crazy. The magic happens when these simple ingredients come together. Now let’s get baking!
How to Make Chocolate Hazelnut Tart
Alright, let’s dive into the fun part! This tart comes together in a few simple steps, but I’ll walk you through each one like we’re baking side by side in my kitchen. Don’t worry if you’re new to tarts – I’ve included all my little tricks to make sure yours turns out perfect.
Preparing the Crisp Crust
First things first – that buttery, crumbly crust that makes this tart so special. Here’s how we nail it every time:
- Preheat your oven to 180°C (350°F) and grab your tart tin (I love one with a removable bottom – lifesaver!).
- In a large bowl, whisk together the flour, powdered sugar, and pinch of salt. This is where I use my fingers to break up any sugar lumps if I didn’t sift it.
- Add those cold butter cubes (important – cold means flaky layers!) and start rubbing them into the flour with your fingertips. You’re looking for a texture like coarse breadcrumbs with some pea-sized butter bits remaining.
- Now, add the egg yolk and mix just until the dough comes together. It’ll seem dry at first, but keep working it gently – suddenly it’ll form a ball! Don’t overwork it though, or your crust will be tough.
- Press the dough evenly into your tart tin. I use the bottom of a measuring cup to smooth it nicely up the sides. Prick the base all over with a fork (this prevents bubbles).
- Chill for 20 minutes – non-negotiable! This prevents shrinkage and makes the crust extra crisp.
- Bake for 15 minutes until it’s lightly golden. Let it cool completely before filling – warm crust + chocolate = soggy disaster!
Making the Silky Nutty Filling
Now for the star of the show – that luscious chocolate hazelnut filling that makes this tart unforgettable:
- While the crust cools, toast your hazelnuts if they’re raw. Just spread them on a baking sheet and pop in the oven (same temperature) for 8-10 minutes until fragrant. Let them cool slightly, then chop roughly – some big pieces for texture are nice!
- In a small saucepan, warm the heavy cream over medium heat until it just starts steaming around the edges (don’t boil!). Remove from heat.
- Add the chocolate hazelnut spread and vanilla to the warm cream. Let it sit for a minute to soften, then whisk until perfectly smooth and glossy. The smell alone is heavenly!
- Pour the filling into your cooled crust, using a spatula to spread it evenly. Sprinkle those toasted hazelnuts over the top, pressing some in lightly so they stick.
- Chill for at least 1 hour – I know, waiting is hard! But this sets the filling to that perfect sliceable texture. Pro tip: If I’m impatient, I’ll pop it in the freezer for 30 minutes instead.
And there you have it – your very own chocolate hazelnut masterpiece! Now comes the best part – slicing and savoring every bite.
Tips for the Best Chocolate Hazelnut Tart
After making this tart more times than I can count (blame my chocolate cravings!), I’ve picked up some tricks that make all the difference between good and knock-your-socks-off amazing:
Chill that dough like you mean it
I know, I know – waiting is the worst part of baking. But trust me, that 20-minute chill for the crust isn’t just busywork. Cold dough holds its shape beautifully in the oven, giving you those crisp, clean edges we all love. If I’m really short on time, I’ll even pop the shaped crust in the freezer for 10 minutes – works like a charm!
Toast your nuts – no shortcuts!
Those raw hazelnuts in your pantry? They’re sleeping beauties waiting to be awakened! Just 8 minutes in the oven transforms them into golden, fragrant flavor bombs. I spread mine on a baking sheet while the crust bakes – two birds, one stone. The difference in taste is night and day. Pro tip: rub the warm toasted nuts in a clean kitchen towel – the skins come right off for a smoother texture.
Always use a removable-bottom tin
I learned this the hard way after trying to pry a delicate tart from a regular pan – crumbly disaster! A loose-bottom or springform tin is worth its weight in gold here. When it’s time to serve, just place the tin on a can and gently push the base up. Perfect slices every time, no casualties. Bonus: it makes you look like a pastry pro when the tart slides out effortlessly.
The chocolate matters more than you think
Not all chocolate hazelnut spreads are created equal. I splurge on the good stuff with actual hazelnuts listed first in the ingredients. The cheap versions can be too sweet or grainy. My secret? I’ll sometimes add a tablespoon of Nutella to my favorite artisan spread for the perfect balance of smoothness and deep nutty flavor. Your taste buds will thank you!
Ingredient Substitutions & Notes
Baking should be fun, not stressful – so here are my tried-and-true swaps and tips for when you’re missing something or need to tweak this recipe. I’ve tested these variations myself when pantry emergencies struck!
Flour alternatives that work
Ran out of all-purpose flour? No problem! Gluten-free flour blends (the 1:1 baking kinds) work surprisingly well here – just add an extra tablespoon since they tend to be thirstier. For a nuttier twist, I’ve used 50g almond flour + 150g regular flour with great results. Whole wheat flour makes the crust too dense though – learned that the hard way!
Dairy-free options
My lactose-intolerant friends love when I make this with coconut oil instead of butter (same amount, but freeze it first so it’s scoopable). For the cream, full-fat coconut milk (the canned kind) mimics the richness beautifully – just scrape off the thick cream part and warm that. Not quite the same, but still delicious!
Hazelnut hacks
No hazelnuts? Toasted almonds or pecans make great stand-ins for both the filling and topping. In a real pinch, I’ve even used crumbled biscotti for texture (don’t tell the pastry purists!). If you’re using pre-made spread without nuts, stir in 2 tablespoons of hazelnut meal to boost that nutty flavor.
Chocolate spread choices
The supermarket’s generic brand will work, but for truly magical results, look for spreads with at least 13% hazelnuts listed in ingredients. My Italian friend swears by adding a teaspoon of espresso powder to enhance the chocolate flavor – it’s genius! White chocolate spread makes a fun “blonde” version, but reduce the cream by 25ml since it’s thinner.
Remember – baking is part science, part art. Don’t stress about perfection. Some of my favorite kitchen accidents turned into permanent recipe tweaks! The most important ingredient is always the joy you put into making it.
Serving and Storing Chocolate Hazelnut Tart
Now for the best part – showing off your gorgeous tart! Here’s how I serve it to make everyone feel like they’re at a fancy Parisian café (without any of the stress).
Slicing Like a Pro
That first perfect slice is pure satisfaction. I run my sharp knife under hot water and wipe it dry between cuts – the heat glides right through the chocolate without cracking. Aim for 8-12 slices depending on how indulgent you’re feeling. My trick? I mark the top lightly with toothpicks first to space them evenly. No wonky pieces here!
Garnishes That Wow
While this tart is stunning on its own, a little extra flair never hurts. My go-to’s:
- A dusting of cocoa powder right before serving (use a fine mesh sieve for that bakery-perfect sprinkle)
- Fresh raspberries or strawberries arranged around the edges – the tart fruit cuts through the richness beautifully
- A dollop of whipped cream with a pinch of cinnamon mixed in (I pipe it using a zip-top bag with the corner snipped off)
- For holidays, I’ll drizzle melted white chocolate in zigzags – looks fancy but takes 30 seconds!
Storing Leftovers (If You Have Any!)
This tart keeps like a dream. Cover it loosely with foil or transfer slices to an airtight container. In the fridge, it stays perfect for 4-5 days – the crust might soften slightly but still tastes amazing. For longer storage, I freeze individual slices wrapped in parchment then foil – they’ll keep for 2 months. Thaw overnight in the fridge or 30 minutes at room temperature when the craving hits!
Pro tip: If your kitchen’s warm when serving, pop the whole tart in the freezer for 10 minutes before slicing – it gives you those crisp, clean edges every time. Now go enjoy your masterpiece – you’ve earned it!
Chocolate Hazelnut Tart Nutritional Information
Okay, let’s talk numbers—but don’t let them scare you! This tart is meant to be savored, not stressed over. These estimates are per slice (about 1/8th of the tart), and remember, actual values can vary based on your specific ingredients. Here’s the breakdown:
- Calories: 320 (worth every single one!)
- Fat: 20g (embrace the richness—it’s mostly from those good hazelnuts and butter)
- Saturated Fat: 8g (that’s the chocolate’s doing, and we’re not mad about it)
- Carbohydrates: 30g (including 18g sugar—balanced by that pinch of salt)
- Fiber: 2g (thanks, hazelnut skins!)
- Protein: 4g (surprise! Nuts and eggs pack a little punch)
- Sodium: 50mg (barely a whisper)
A few notes: Using dark chocolate spreads or reducing sugar slightly can tweak these numbers, but honestly? Life’s too short not to enjoy dessert fully. Pair a slice with fresh berries if you want brightness, or savor it slowly with coffee—it’s all about balance!
FAQs About Chocolate Hazelnut Tart
I get asked these questions all the time when I serve this tart—and hey, no judgment! We’ve all been there staring at ingredients wondering if we can take shortcuts. Here’s everything I’ve learned from my own kitchen experiments:
Can I use a store-bought crust?
Okay, confession time—I’ve done it when I was really pressed for time! A good-quality shortcrust pastry shell will work in a pinch, but honestly? The homemade crust makes ALL the difference in texture and flavor. If you must use store-bought, blind bake it first (even if the package says pre-baked) to get that essential crispness. And maybe sprinkle some extra chopped hazelnuts between the crust and filling—it helps bridge the gap!
How long does the tart keep?
In my house? Maybe 24 hours if I hide it well! But properly stored in the fridge under foil, it stays delicious for 4-5 days. The crust softens slightly after day two, but a quick 5-minute warm-up in a low oven brings back some crunch. For longer storage, freeze individual slices—they’ll keep their magic for 2 months. Pro tip: Write the date on the foil with a marker so future-you doesn’t play freezer roulette!
My filling cracked when slicing—what went wrong?
Oh honey, I’ve been there—nothing’s sadder than a beautiful tart with earthquake lines! Usually this means it chilled too quickly or too cold. Next time, let the tart set gradually in the fridge (not freezer) for at least 1 hour. If cracks still happen, dust with cocoa powder or arrange berries strategically—I call this “confident imperfections”!
Can I make this gluten-free?
Absolutely! Swap the all-purpose flour for a 1:1 gluten-free baking blend (I like the ones with xanthan gum already added). You might need an extra teaspoon of cold water when making the dough since GF flours absorb differently. The filling is naturally gluten-free—just double-check your chocolate spread’s label if you’re celiac. My gluten-free friends say this version tastes just as indulgent!
Why does my crust shrink?
Ah, the great tart mystery! Shrinking usually happens when the dough isn’t chilled enough before baking or if you stretched it while pressing into the pan. My foolproof method: After pressing in the dough, pop the whole tin in the freezer for 10 minutes—it firms up the butter so the crust holds its shape. And always press the dough upward against the sides rather than stretching it sideways. Little tricks make big differences!
Remember—even my “failed” tarts still got eaten happily. Baking’s supposed to be fun, not perfect. Got more questions? Throw them in the comments—I love troubleshooting together!
Ready to Bake Your Own Chocolate Hazelnut Masterpiece?
Now that you’ve got all my secrets, it’s your turn to create this showstopper! I can’t wait to hear how your chocolate hazelnut tart turns out. Did you add any fun twists? Maybe a sprinkle of sea salt on top or a dash of espresso powder in the filling? Snap a photo of your gorgeous creation and tell me all about it in the comments below. And hey – if you hit any snags, just ask! I’m always happy to help troubleshoot. Happy baking, friends – may your crust be crisp and your filling silky smooth!
Print
Irresistible Chocolate Hazelnut Tart – Decadent in Just 2 Hours
- Total Time: 1 hour 40 minutes (includes chilling)
- Yield: 8 servings 1x
- Diet: Vegetarian
Description
A rich chocolate hazelnut tart with a crisp crust and smooth, nutty filling.
Ingredients
- 200g all-purpose flour
- 100g unsalted butter, cold and cubed
- 50g powdered sugar
- 1 egg yolk
- 200g chocolate hazelnut spread
- 100ml heavy cream
- 50g chopped toasted hazelnuts
- 1 tsp vanilla extract
- Pinch of salt
Instructions
- Preheat oven to 180°C (350°F).
- Mix flour, powdered sugar, and salt in a bowl.
- Add cold butter and rub into the flour until crumbly.
- Stir in the egg yolk to form a dough.
- Press the dough into a tart tin and chill for 20 minutes.
- Bake the crust for 15 minutes until golden. Let cool.
- Warm the chocolate hazelnut spread with heavy cream and vanilla.
- Pour the filling into the crust and sprinkle chopped hazelnuts on top.
- Chill for at least 1 hour before serving.
Notes
- Chill the dough before baking to prevent shrinking.
- Toast hazelnuts for extra flavor.
- Use a tart tin with removable base for easy serving.
- Prep Time: 25 minutes
- Cook Time: 15 minutes
- Category: Dessert
- Method: Baking
- Cuisine: International
Nutrition
- Serving Size: 1 slice
- Calories: 320
- Sugar: 18g
- Sodium: 50mg
- Fat: 20g
- Saturated Fat: 8g
- Unsaturated Fat: 10g
- Trans Fat: 0g
- Carbohydrates: 30g
- Fiber: 2g
- Protein: 4g
- Cholesterol: 45mg
Keywords: chocolate hazelnut tart, dessert, easy tart recipe


