
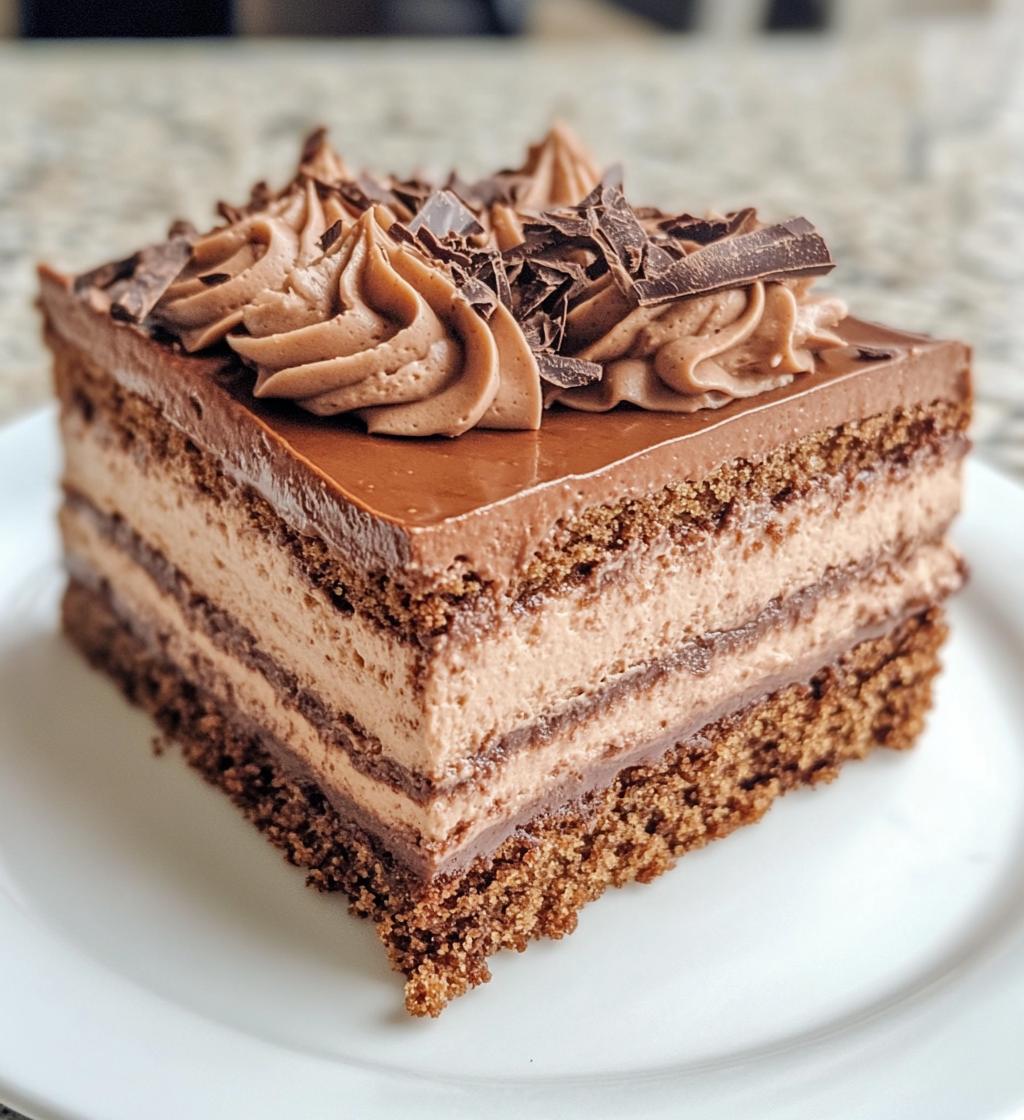
Oh, let me tell you about the first time I made this Chocolate Hazelnut Mousse Cake – it was love at first bite! I’d been craving something rich but not too fussy, and this no-bake wonder came to the rescue. The way the creamy chocolate hazelnut mousse melts on your tongue against that crisp biscuit base? Absolute magic. What I love most is how deceptively simple it is – just a handful of ingredients that transform into pure indulgence. Whether it’s a last-minute dinner party or just one of those “I need chocolate now” moments, this cake never lets me down. Trust me, once you try this recipe, you’ll understand why it’s become my go-to dessert for every occasion.
Why You’ll Love This Chocolate Hazelnut Mousse Cake
Let me count the ways this cake will steal your heart (and probably your diet resolutions):
- No oven required – Seriously, just mix, chill, and devour. Perfect for hot summer days when baking sounds like torture.
- Five-minute magic – The active prep is quicker than most TV commercial breaks. The hardest part is waiting for it to set!
- Crowd-pleaser charm – I’ve served this to chocolate skeptics who came back for seconds (and asked for the recipe).
- Foolproof elegance – Looks fancy enough for dinner parties but easy enough for weeknight cravings.
- Endless variations – Add espresso, berries, or sea salt to make it your signature dessert.
Honestly, the only downside? You might eat the entire thing yourself. Not that I’d know anything about that…
Ingredients for Chocolate Hazelnut Mousse Cake
Here’s everything you’ll need to make this dreamy dessert – and trust me, quality matters here:
- 200g chocolate hazelnut spread – Use the good stuff! The one you’d eat by the spoonful straight from the jar.
- 150g crushed digestive biscuits – Graham crackers work too, but I love how digestives give that perfect buttery crunch.
- 75g melted unsalted butter – Cooled slightly so it doesn’t make the biscuit crumbs soggy.
- 300ml heavy cream (minimum 35% fat) – Must be cold – I pop mine in the freezer for 10 minutes before whipping.
- 50g powdered sugar – Sifted to avoid lumps in your silky mousse.
- 1 tsp pure vanilla extract – The real deal, not that artificial stuff – it makes all the difference.
See? Told you it was simple. Now let’s turn these basics into something magical.
Equipment You’ll Need
Here’s what you’ll want to have ready before starting:
- 20cm springform tin – The removable sides make serving this beauty a breeze
- Electric mixer – A hand whisk works in a pinch, but your arms will thank you for using electric
- Mixing bowls – One large, one medium – chilled if possible
- Spatula – For that perfect fold-and-scrape action
- Measuring tools – Because eyeballing powdered sugar never ends well
That’s it! No fancy gadgets needed – just basics that most kitchens already have.
How to Make Chocolate Hazelnut Mousse Cake
Alright, let’s dive into the magic! This cake comes together in four simple steps, but I’ll walk you through each one so yours turns out perfect. The key? Don’t rush – good things come to those who wait (especially when chocolate’s involved).
Step 1: Prepare the Biscuit Base
First, grab your crushed biscuits and pour them into a bowl with the melted butter. Mix until every crumb is coated – it should look like wet sand. Now, dump this into your springform tin and press down firmly with the back of a spoon. I like to go around the edges first, then work my way to the center. Want a pro tip? Use a flat-bottomed glass to really compact it – this prevents crumbling when you slice later. Pop this in the fridge while you work on the mousse.
Step 2: Whip the Cream
Here’s where cold is your best friend. Make sure your bowl, whisk, and cream are chilled (I sometimes stick mine in the freezer for 10 minutes). Start whipping on low speed, gradually increasing as the cream thickens. When soft peaks form, add the powdered sugar and vanilla. Keep going until you get stiff peaks – the cream should hold its shape when you lift the whisk. But watch it! Overbeating turns cream into butter (trust me, I’ve cried over grainy mousse before).
Step 3: Fold in Chocolate Hazelnut Spread
Now for the fun part! Scoop about a third of your whipped cream into the chocolate hazelnut spread and stir to loosen it up. Then, gently fold this back into the remaining cream. Use a big spatula and make wide, sweeping motions from the bottom up – imagine you’re tucking a baby in, not mixing concrete. Stop when you stop seeing streaks. A few lumps are better than overmixing and losing all that air you worked so hard to whip in!
Step 4: Assemble and Chill
Take your biscuit base from the fridge and dollop the mousse on top. Spread it evenly with your spatula, then give the tin a few gentle taps on the counter to remove air bubbles. Now, the hardest part – waiting. Cover loosely with plastic wrap and chill for at least 4 hours (overnight is even better). Resist the urge to peek! The mousse needs this time to set properly. When ready, run a warm knife around the edges before releasing the springform sides. Slice, serve, and prepare for compliments!
Tips for the Perfect Chocolate Hazelnut Mousse Cake
After making this cake more times than I’d care to admit, here are my foolproof secrets:
- Chill everything – Bowl, whisk, even the chocolate spread jar for 10 minutes helps the mousse hold its shape beautifully.
- The spread matters – Splurge on premium chocolate hazelnut spread; the cheaper versions can make your mousse grainy.
- Toast those hazelnuts – If garnishing, toast chopped hazelnuts first for incredible depth of flavor.
- Slice cleanly – Dip your knife in hot water and wipe between cuts for picture-perfect slices.
- Patience pays – That 4-hour chill isn’t optional – rushing leads to sad, soupy mousse (been there!).
Follow these, and you’ll have guests begging for your “secret” recipe!
Variations for Your Chocolate Hazelnut Mousse Cake
Oh, the fun you can have with this recipe! Here are my favorite twists:
- Gluten-free? Swap the biscuits for your favorite gluten-free alternative – almond flour cookies work magic.
- Coffee kick: Stir 1 tsp espresso powder into the chocolate spread for a mocha vibe.
- Berry delight: Layer fresh raspberries between the base and mousse – that tart pop cuts through the richness.
- Nutty crunch: Mix chopped toasted hazelnuts into the biscuit base for extra texture.
- Adult version: Add 1 tbsp Frangelico when folding – just enough to make it interesting!
The beauty? You can reinvent this cake every time you make it!
Serving and Storing Chocolate Hazelnut Mousse Cake
Here’s how to make sure every slice of this beauty is perfect:
- Serve chilled – Straight from the fridge is best, when the mousse is firm and dreamy.
- Slice smart – Dip your knife in hot water and wipe between cuts for clean edges.
- Store covered – It’ll keep beautifully in the fridge for up to 3 days (if it lasts that long!).
- Freeze leftovers – Wrap slices tightly in plastic – they thaw perfectly for midnight cravings.
Pro tip? The flavors actually deepen overnight – if you can wait that long!
Nutritional Information
Here’s the scoop on what you’re enjoying (because knowledge is power, right?):
- Per serving (1 slice): About 380 calories
- Fat: 25g (12g saturated)
- Sugar: 28g
- Protein: 4g
Remember – these numbers can vary slightly depending on your specific brands of chocolate spread and biscuits. But let’s be honest – when chocolate hazelnut mousse cake’s involved, we’re not counting!
Common Questions About Chocolate Hazelnut Mousse Cake
Let me tackle those burning questions I get asked all the time about this irresistible dessert:
Can I freeze this cake?
Absolutely! Freeze whole or in slices for up to a month. Thaw overnight in the fridge – the texture stays perfect. I always keep emergency slices for… well, emergencies.
Will homemade hazelnut spread work?
Yes, if it’s thick enough. Store-bought spreads have stabilizers that help the mousse set. With homemade, you might need to reduce any added liquids and chill longer.
How do I prevent a soggy biscuit base?
Two tricks: 1) Make sure your melted butter has cooled slightly before mixing, and 2) Press the crumbs FIRMLY – I mean, really compact them. This creates a moisture barrier.
Can I make this dairy-free?
You bet! Use coconut cream instead of dairy cream and vegan butter. The chocolate spread’s the tricky part – check labels carefully or make your own.
Why did my mousse collapse?
Overmixing or not chilling long enough are the usual culprits. Remember – gentle folds and patience are key!
Share Your Chocolate Hazelnut Mousse Cake Experience
I’d love to hear how your cake turns out! Snap a photo, leave a rating, or share your favorite twist in the comments below. Nothing makes me happier than seeing your delicious creations – it’s like we’re baking together!
Print
Decadent Chocolate Hazelnut Mousse Cake Recipe
- Total Time: 4 hrs 20 mins
- Yield: 8 servings 1x
- Diet: Vegetarian
Description
A rich and creamy chocolate hazelnut mousse cake with a crunchy base.
Ingredients
- 200g chocolate hazelnut spread
- 150g crushed biscuits
- 75g melted butter
- 300ml heavy cream
- 50g powdered sugar
- 1 tsp vanilla extract
Instructions
- Mix crushed biscuits with melted butter and press into a cake tin.
- Whip heavy cream with powdered sugar and vanilla until stiff peaks form.
- Fold chocolate hazelnut spread into the whipped cream.
- Spread the mousse over the biscuit base and refrigerate for 4 hours.
- Serve chilled.
Notes
- Use a springform tin for easy removal.
- Chill the bowl and whisk before whipping cream.
- Garnish with chopped hazelnuts if desired.
- Prep Time: 20 mins
- Cook Time: 0 mins
- Category: Dessert
- Method: No-Bake
- Cuisine: International
Nutrition
- Serving Size: 1 slice
- Calories: 380
- Sugar: 28g
- Sodium: 120mg
- Fat: 25g
- Saturated Fat: 12g
- Unsaturated Fat: 10g
- Trans Fat: 0g
- Carbohydrates: 35g
- Fiber: 2g
- Protein: 4g
- Cholesterol: 45mg
Keywords: chocolate hazelnut mousse cake, no-bake dessert, easy cake recipe


