
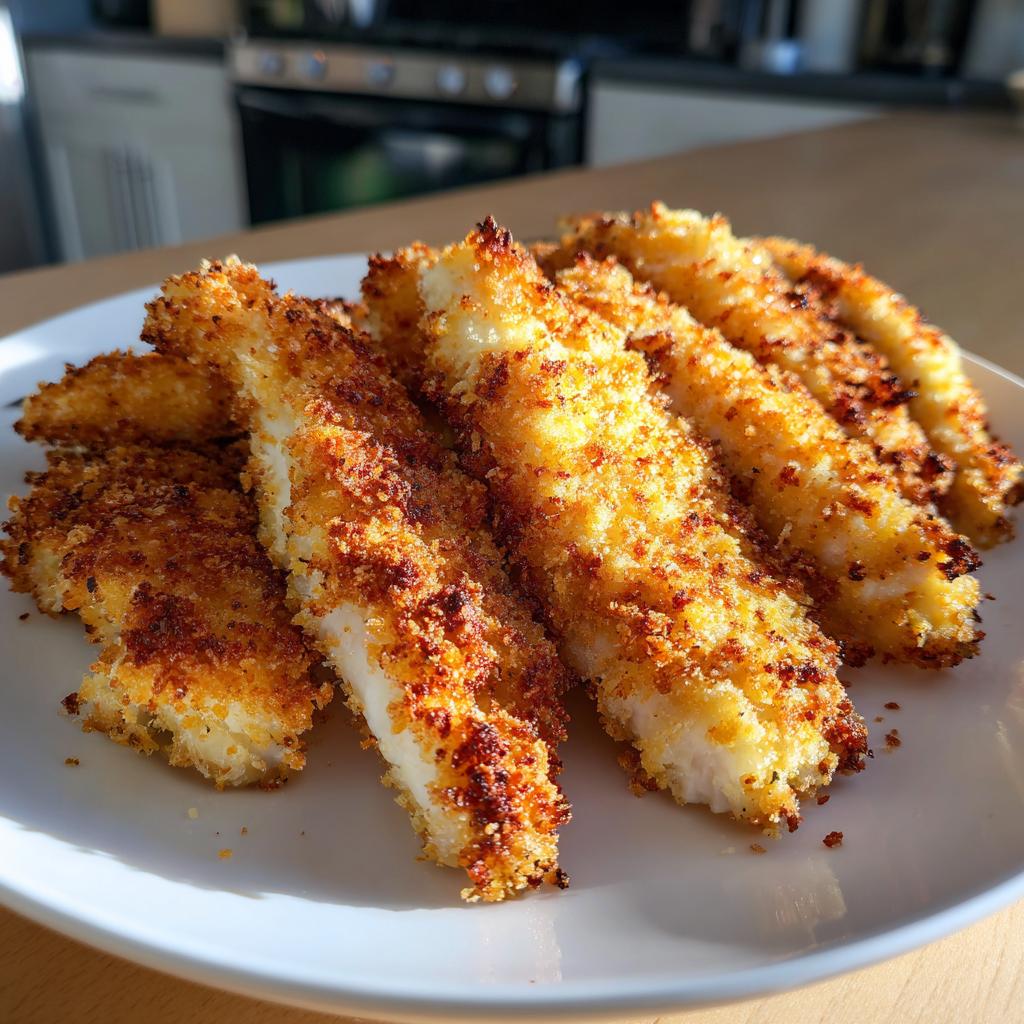
Ah, chicken tenders! They’re like the ultimate comfort food, aren’t they? Juicy, crispy, and oh-so-satisfying, they’ve got a special place in my heart. I remember the first time I made them at home; I was feeling adventurous one weekend and thought, “How hard could it be?” Spoiler alert: it was a delightful success! The aroma of freshly fried tenders wafting through my kitchen was enough to draw my family in like moths to a flame.
What I love about this homemade version is how ridiculously easy it is to whip up a batch. With just a handful of simple ingredients, you can create something that tastes way better than anything you’d get from a fast-food joint. Plus, you get to customize the flavors to your liking! Whether you’re dipping them in zesty ranch, sweet barbecue, or a spicy sriracha mayo, these chicken tenders are bound to be a hit. Seriously, once you try this recipe, you might just find yourself making them on repeat!
Ingredients List
Here’s what you’ll need to create these mouthwatering chicken tenders:
- 1 pound chicken tenders
- 1 cup breadcrumbs
- 1/2 cup flour
- 2 large eggs
- 1 teaspoon salt
- 1/2 teaspoon pepper
- 1 teaspoon garlic powder
- 1 teaspoon paprika
- Oil for frying
Don’t worry if you can’t find the exact ingredients; feel free to get creative! Just make sure to keep the chicken tenders as your star ingredient. Happy cooking!
How to Prepare Chicken Tender Recipes
Getting ready to make these chicken tenders is half the fun! First, you’ll want to create a cozy little workspace for yourself. I like to gather everything I need before diving in. It keeps things organized and makes the cooking process feel smoother. So, grab your chicken tenders, breadcrumbs, flour, eggs, and seasonings. You’ll also need a couple of bowls for the breading station and a frying pan for cooking.
Prepping Your Kitchen
To set up your kitchen, start by clearing a good countertop space. Trust me, you’ll want room to move! Place three bowls in a row: one for the flour, one for the beaten eggs, and one for the breadcrumbs mixed with salt, pepper, garlic powder, and paprika. This setup is super handy because it makes the breading process a breeze. You can also get your frying pan ready by putting it on the stove and adding some oil. Don’t forget to put your oven on to preheat at 400°F (200°C) so it’s hot and ready when your chicken tenders are done frying!
Step-by-Step Instructions
Let’s get to the good stuff! With your oven preheated, it’s time to coat those chicken tenders. First, take a chicken tender and dredge it in the flour, making sure it’s coated evenly. This step helps the egg stick later, so don’t skip it! Next, dip the floured tender into the beaten eggs, allowing any excess to drip off. Finally, roll it in the breadcrumb mixture, pressing gently to make sure the breadcrumbs adhere well. Repeat this for all the tenders—this part is like a little assembly line!
Now, heat your oil in the frying pan over medium heat. You want it hot enough that a breadcrumb sizzles when it hits the oil but not so hot that it burns. Gently place the breaded chicken tenders in the hot oil, cooking them for about 3-4 minutes on each side until they’re golden brown and crispy. Oh, the smell is divine! Once they’re perfect, transfer the cooked tenders to a baking sheet.
Now comes the final touch: pop that baking sheet in the oven for about 10 minutes. This step ensures the chicken is cooked through, and it keeps them nice and juicy. When the timer goes off, you’ll want to serve them hot with your favorite dipping sauces. Enjoy the crunchy goodness, and get ready for compliments!
Tips for Success with Chicken Tender Recipes
To make sure your chicken tenders turn out absolutely perfect, I’ve got a few tried-and-true tips that’ll elevate your cooking game! First off, don’t rush the breading process. Take your time to coat each tender thoroughly; it’s the secret to that satisfying crunch everyone loves. If you find the breadcrumbs aren’t sticking well, a light dusting of flour before dipping in the egg can help.
Another key to success is to keep the oil at the right temperature. If it’s too hot, your tenders will burn on the outside while remaining raw inside. Conversely, if it’s too cool, they’ll absorb too much oil and become greasy. A good rule of thumb is to test the oil by dropping in a few breadcrumbs; they should sizzle right away!
Lastly, consider seasoning your flour and breadcrumbs! A little extra garlic powder or even some Italian herbs can amp up the flavor significantly. And if you’re feeling adventurous, try adding some grated Parmesan cheese to the breadcrumb mixture for a delicious twist. With these tips in your back pocket, you’ll be making the best chicken tenders in no time!
Variations on Chicken Tender Recipes
One of the best things about chicken tender recipes is how versatile they are! You can easily switch up the flavors and make them your own. Here are some fun variations to keep things exciting in the kitchen:
Spice it Up!
If you love a little heat, consider adding some cayenne pepper or chili powder to your breadcrumb mixture. You can adjust the amount based on your spice tolerance—just a pinch can give those tenders a delightful kick! Alternatively, toss in some smoked paprika for a smoky flavor that pairs beautifully with the chicken.
Herbaceous Goodness
Fresh or dried herbs can transform your chicken tenders into something truly special. Try adding dried oregano, thyme, or rosemary to your breadcrumb mixture. If you have fresh herbs on hand, chop them finely and mix them in for a burst of freshness. Trust me, the flavor will be next level!
Cheesy Delight
Want to take your tenders to cheesy heaven? Mix in some grated Parmesan or cheddar cheese with your breadcrumbs. This not only adds flavor but also creates a lovely golden crust that’s hard to resist. You can even experiment with different cheese varieties, like mozzarella for a gooey twist!
Veggie Power
Looking to sneak in some veggies? You can finely chop or grate zucchini, carrots, or even spinach into the breadcrumb mixture. This not only boosts the nutritional value but also adds a subtle sweetness and moisture to your tenders. Just make sure to squeeze out excess moisture from the veggies before mixing them in!
Alternative Coatings
If you’re feeling adventurous, why not swap out the breadcrumbs entirely? Panko breadcrumbs create an extra crunch, or you can use crushed cornflakes for a cereal-like texture. For a gluten-free option, try using almond flour or crushed nuts! The nutty flavor pairs beautifully with chicken and adds a delightful crunch.
With these variations, you’ll never get bored with chicken tenders again! Feel free to mix and match different spices, herbs, and coatings to make each batch uniquely yours. Happy cooking!
Nutritional Information
Here’s a quick look at the estimated nutritional values for one serving of these delicious chicken tenders:
- Calories: 350
- Fat: 15g
- Saturated Fat: 3g
- Unsaturated Fat: 10g
- Trans Fat: 0g
- Cholesterol: 100mg
- Sodium: 600mg
- Carbohydrates: 30g
- Fiber: 1g
- Sugar: 1g
- Protein: 25g
Keep in mind that these values are estimates and can vary based on specific ingredients and preparation methods. If you’re watching your nutritional intake, feel free to tweak the recipe to better fit your dietary needs. Enjoy your chicken tenders guilt-free!
FAQ Section
Q1: What’s the best cooking method for chicken tenders?
You can either fry or bake chicken tenders, depending on your preference! Frying gives them that classic crispy texture, while baking is a healthier option. If you choose to bake, make sure to coat them lightly in oil to help them crisp up in the oven.
Q2: How can I achieve a crispy texture?
The secret to crispy chicken tenders lies in the breading! Make sure to coat each tender thoroughly in flour, egg, and breadcrumbs. Also, ensure your oil is hot enough before frying—if it’s too cool, your tenders will absorb too much oil and become soggy. A good sizzle when you add the tenders is what you want to hear!
Q3: Can I make chicken tenders ahead of time?
Absolutely! You can prepare the tenders in advance and store them in the refrigerator for up to 3 days. Just make sure to keep them in an airtight container. When you’re ready to eat, you can reheat them in the oven or air fryer to maintain that crunchy texture.
Q4: What’s the best way to store leftover chicken tenders?
To store leftovers, place them in an airtight container and keep them in the refrigerator. They’ll stay fresh for about 3 days. If you want to keep them longer, you can freeze them! Just make sure to wrap them tightly in plastic wrap or foil before placing them in a freezer-safe bag.
Q5: Can I use frozen chicken tenders?
Yes, you can use frozen chicken tenders! If they’re pre-breaded, just follow the package instructions for cooking. If you’re using raw frozen tenders, be sure to thaw them completely before breading and cooking to ensure even cooking. Just remember to adjust cooking times as needed!
Why You’ll Love This Recipe
- Quick Preparation: You can whip these up in just about 35 minutes, making them a perfect weeknight dinner option!
- Easy to Customize: Feel free to experiment with different spices and coatings to suit your taste buds. The possibilities are endless!
- Delicious Flavor: Each tender is packed with flavor, from the crispy coating to the juicy chicken inside. You won’t be able to stop at just one!
- Perfect for Meal Prep: These chicken tenders are great for making ahead of time. Cook a big batch, and you’ve got meals ready to go!
- Kid-Friendly: Kids love chicken tenders, and this homemade version is so much healthier than store-bought or fast food.
- Great for Dipping: Serve them with your favorite sauces, and watch them disappear! From ranch to honey mustard, they pair perfectly with so many dips.
Storage & Reheating Instructions
Storing your chicken tenders properly ensures they stay delicious for days to come! Once you’ve enjoyed your fresh batch, let any leftovers cool down to room temperature. Then, transfer them to an airtight container. I like to layer parchment paper between the tenders to prevent them from sticking together—it’s a little trick that goes a long way!
You can keep your chicken tenders in the refrigerator for up to 3 days. If you want to save them for a longer period, you can freeze them! Just wrap each tender in plastic wrap or aluminum foil, then place them in a freezer-safe bag. They’ll stay fresh in the freezer for about 2 months. When you’re ready to enjoy them, simply thaw them in the fridge overnight before reheating.
Now, let’s talk reheating! For the best quality, I recommend using the oven or an air fryer. Preheat your oven to 375°F (190°C), then place the tenders on a baking sheet. Bake them for about 10-15 minutes or until they’re heated through and crispy again. If you’re using an air fryer, set it to 375°F (190°C) and cook for about 5-7 minutes. This method helps them retain that satisfying crunch!
Microwaving? It’s convenient but can make them a bit soggy. If you must, place the tenders on a microwave-safe plate and cover them with a damp paper towel to retain some moisture. Heat in short bursts, checking frequently to avoid overheating. But trust me, oven or air fryer is the way to go for that crispy goodness!
Print
chicken tender recipes for crispy joy
- Total Time: 35 minutes
- Yield: 4 servings 1x
- Diet: Gluten Free
Description
A simple and delicious chicken tender recipe that you can easily prepare at home.
Ingredients
- 1 pound chicken tenders
- 1 cup breadcrumbs
- 1/2 cup flour
- 2 eggs
- 1 teaspoon salt
- 1/2 teaspoon pepper
- 1 teaspoon garlic powder
- 1 teaspoon paprika
- Oil for frying
Instructions
- Preheat your oven to 400°F (200°C).
- Set up a breading station with three bowls: one with flour, one with beaten eggs, and one with breadcrumbs mixed with salt, pepper, garlic powder, and paprika.
- Coat each chicken tender in flour, then dip into the egg, and finally coat with breadcrumbs.
- Heat oil in a pan over medium heat.
- Fry the chicken tenders for about 3-4 minutes on each side until golden brown.
- Transfer the cooked tenders to a baking sheet and bake for about 10 minutes to ensure they are cooked through.
- Serve hot with your favorite dipping sauce.
Notes
- For a healthier option, bake the tenders instead of frying.
- Feel free to add your favorite spices to the breadcrumb mixture.
- These tenders can be stored in the refrigerator for up to 3 days.
- Prep Time: 15 minutes
- Cook Time: 20 minutes
- Category: Main Course
- Method: Frying and Baking
- Cuisine: American
Nutrition
- Serving Size: 1 serving
- Calories: 350
- Sugar: 1g
- Sodium: 600mg
- Fat: 15g
- Saturated Fat: 3g
- Unsaturated Fat: 10g
- Trans Fat: 0g
- Carbohydrates: 30g
- Fiber: 1g
- Protein: 25g
- Cholesterol: 100mg
Keywords: chicken tender recipes, easy chicken tenders, homemade chicken tenders


