
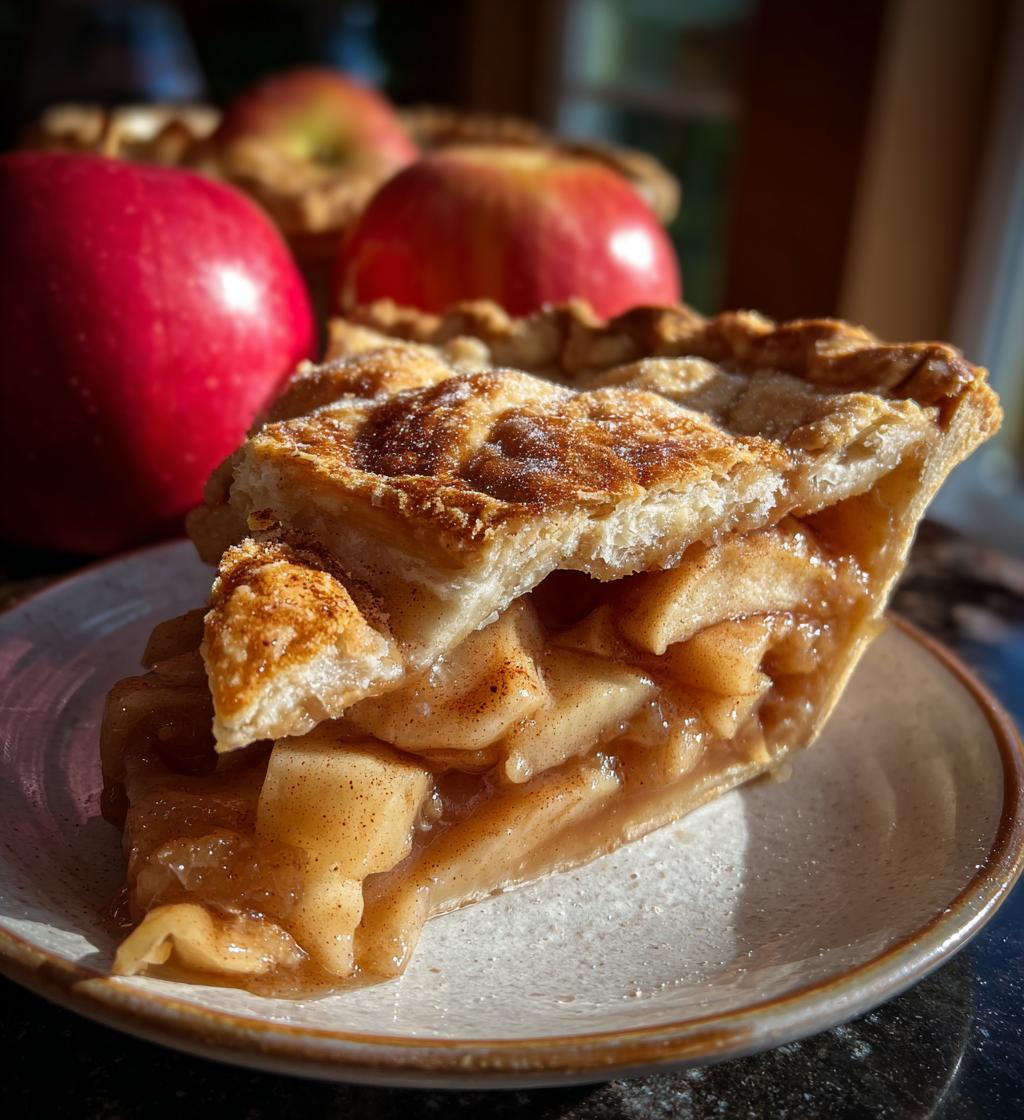
There’s something utterly magical about making homemade apple pie desserts. The aroma of sweet apples mingling with warm spices wafting through the kitchen is a nostalgic hug that wraps around you. I remember every Thanksgiving, my family would gather around the kitchen, and the highlight was always Grandma’s apple pie. Everyone had their role, from peeling apples to rolling out the dough, and I’d sneak spoonfuls of cinnamon-sugar filling when no one was watching. When you bake your own apple pie, it’s not just about the delicious treat; it’s about those moments and memories created in the process. This recipe is a labor of love, featuring a flaky, buttery crust and a sweet, spiced apple filling that’ll have your family coming back for seconds (and thirds!). Trust me, there’s nothing quite like sharing a slice of homemade apple pie with loved ones—it’s pure joy on a plate!
Ingredients for Apple Pie Desserts
- 2 cups all-purpose flour
- 1/2 cup unsalted butter, chilled and cut into cubes
- 1/4 cup granulated sugar
- 1/4 teaspoon salt
- 1/4 cup ice water
- 4 cups apples, peeled, cored, and sliced (I love using a mix of tart and sweet apples!)
- 1 teaspoon ground cinnamon
- 1/2 cup packed brown sugar
- 1 tablespoon fresh lemon juice
- 1 tablespoon cornstarch
How to Prepare Apple Pie Desserts
Alright, let’s dive into the fun part—making your apple pie! Follow these steps, and you’ll have a delicious dessert that’s sure to impress. Remember, patience is key, so don’t rush through any of these steps!
Preparing the Pie Crust
The crust is where the magic begins! First, grab a large mixing bowl and combine the flour, sugar, and salt. Now, here’s the secret: you want your butter to be chilled. Seriously, don’t skip this part! Cut your chilled butter into small cubes and add it to the flour mixture. Using a pastry cutter or your fingertips, mix until it resembles coarse crumbs—this is crucial for that flaky texture. Once that’s done, add in the ice water a little at a time, mixing gently until the dough just comes together. Be careful not to overwork it! Divide the dough in half, shape each half into a disk, wrap them in plastic, and pop them in the fridge for at least 30 minutes. This resting time is vital—it allows the gluten to relax, creating a tender crust.
Making the Apple Filling
While your crust is chilling, let’s focus on that heavenly apple filling! In a large bowl, toss together your sliced apples with the cinnamon, brown sugar, lemon juice, and cornstarch. The lemon juice not only adds a nice zing but also helps prevent the apples from browning. I always like to use a mix of tart Granny Smith and sweet Fuji apples for the best flavor balance. Make sure the apples are well-coated in the mixture; that’s where the flavor lives! Let this sit for about 10-15 minutes to allow the flavors to meld. Trust me, this step is worth it!
Assembling the Pie
Now it’s time to put everything together! Roll out one disk of dough on a floured surface until it’s about 1/8 inch thick. Carefully transfer it to your pie pan, pressing it into the edges. Don’t worry if it tears a bit—you can patch it up! Fill the crust with your apple mixture, making sure it’s piled high and looking scrumptious. Roll out the second disk of dough for the top crust. If you want to get creative, you can cut it into strips for a lattice design or just cover it whole. Whatever you choose, don’t forget to cut slits in the top so steam can escape; this prevents a soggy bottom!
Baking the Pie
Preheat your oven to 425°F (220°C) while you assemble the pie—it’s essential for that golden crust! Once assembled, bake your pie for 45-50 minutes, or until the apples are tender and the crust is beautifully golden brown. Keep an eye on it; if the edges brown too quickly, cover them with foil. When it’s done, let it cool for at least an hour before slicing—this helps the filling set up nicely. Trust me; the wait will be worth it!
Why You’ll Love This Recipe
- Quick and Easy: With just a little prep time, you can whip up this delicious apple pie in no time!
- Flavorful Filling: The combination of sweet and tart apples, warm spices, and a hint of lemon creates a filling that’s bursting with flavor.
- Flaky Crust: Thanks to the chilled butter and careful mixing, you’ll achieve a perfectly flaky crust that melts in your mouth.
- Family Tradition: This recipe not only makes a tasty dessert but also brings families together, just like it did for me!
- Customizable: Feel free to experiment with different apple varieties or add nuts and raisins for a personal touch.
Tips for Success with Apple Pie Desserts
To make your apple pie truly shine, here are some pro tips that’ve helped me over the years. First off, always use chilled butter for your crust—this is the golden rule! It’s what gives you that flaky, melt-in-your-mouth texture. And don’t forget to handle the dough as little as possible; overworking it can lead to a tough crust.
When it comes to the apple filling, mix different apple varieties for a depth of flavor. I like to use a blend of tart and sweet apples for a balanced taste. Make sure to season your filling well with cinnamon and sugar, and toss the apples just enough so they’re evenly coated without becoming mushy.
Lastly, let your pie cool before slicing into it. This step lets the filling set up perfectly and prevents a soupy mess on your plate. Trust me, patience is key for the best apple pie experience!
Nutritional Information for Apple Pie Desserts
Keep in mind that the nutritional values can vary based on the specific ingredients and brands you use. Here’s a general breakdown for one slice of my homemade apple pie:
- Calories: 250
- Sugar: 15g
- Sodium: 150mg
- Fat: 10g
- Saturated Fat: 5g
- Carbohydrates: 35g
- Fiber: 2g
- Protein: 2g
- Cholesterol: 15mg
FAQ About Apple Pie Desserts
Got questions about making the perfect apple pie? Don’t worry; I’ve got you covered! Here are some common queries I often encounter:
Q1: Can I use frozen apples for the filling?
While fresh apples are ideal for flavor and texture, you can use frozen apples if you’re in a pinch. Just make sure to thaw them completely and drain excess moisture before mixing with the other filling ingredients.
Q2: What’s the best way to store leftover apple pie?
To keep your apple pie fresh, store it in the refrigerator, covered loosely with foil or plastic wrap. It should stay good for about 3-4 days. You can also freeze it for longer storage—just wrap it tightly!
Q3: How do I know when my pie is done baking?
Your pie is ready when the apples are tender and the crust turns a lovely golden brown. You can also poke a knife into the filling; it should come out clean with just a few moist crumbs.
Q4: Can I make the crust ahead of time?
Absolutely! You can prepare the pie crust and store it in the refrigerator for up to 2 days or freeze it for up to a month. Just let it thaw in the fridge before rolling it out.
Serving Suggestions for Apple Pie Desserts
Now that you’ve baked up this delightful apple pie, let’s talk about how to serve it for maximum enjoyment! First and foremost, a generous scoop of vanilla ice cream is a must—it melts into the warm pie and creates an unforgettable combination of flavors and textures. If you want to elevate the experience, try a drizzle of caramel sauce or a sprinkle of toasted nuts on top for added crunch. You might also consider pairing it with a dollop of whipped cream or a scoop of maple-flavored ice cream for a seasonal twist. Trust me, these additions will take your homemade apple pie desserts to a whole new level!
Print
Apple Pie Desserts: 5 Memorable Moments in Every Slice
- Total Time: 1 hour 20 minutes
- Yield: 8 servings 1x
- Diet: Vegetarian
Description
Delicious homemade apple pie dessert with a flaky crust and sweet apple filling.
Ingredients
- 2 cups all-purpose flour
- 1/2 cup unsalted butter, chilled
- 1/4 cup granulated sugar
- 1/4 teaspoon salt
- 1/4 cup ice water
- 4 cups sliced apples
- 1 teaspoon cinnamon
- 1/2 cup brown sugar
- 1 tablespoon lemon juice
- 1 tablespoon cornstarch
Instructions
- Preheat your oven to 425°F (220°C).
- In a bowl, mix flour, sugar, and salt.
- Add chilled butter and mix until crumbly.
- Stir in ice water until dough forms.
- Roll out half the dough and place in a pie pan.
- In another bowl, combine apples, cinnamon, brown sugar, lemon juice, and cornstarch.
- Fill the pie crust with the apple mixture.
- Roll out the remaining dough and cover the pie.
- Cut slits for steam to escape.
- Bake for 45-50 minutes until apples are tender and crust is golden brown.
Notes
- Let the pie cool before serving.
- Serve with vanilla ice cream for added flavor.
- Prep Time: 30 minutes
- Cook Time: 50 minutes
- Category: Dessert
- Method: Baking
- Cuisine: American
Nutrition
- Serving Size: 1 slice
- Calories: 250
- Sugar: 15g
- Sodium: 150mg
- Fat: 10g
- Saturated Fat: 5g
- Unsaturated Fat: 5g
- Trans Fat: 0g
- Carbohydrates: 35g
- Fiber: 2g
- Protein: 2g
- Cholesterol: 15mg
Keywords: apple pie, desserts, homemade, baking


