
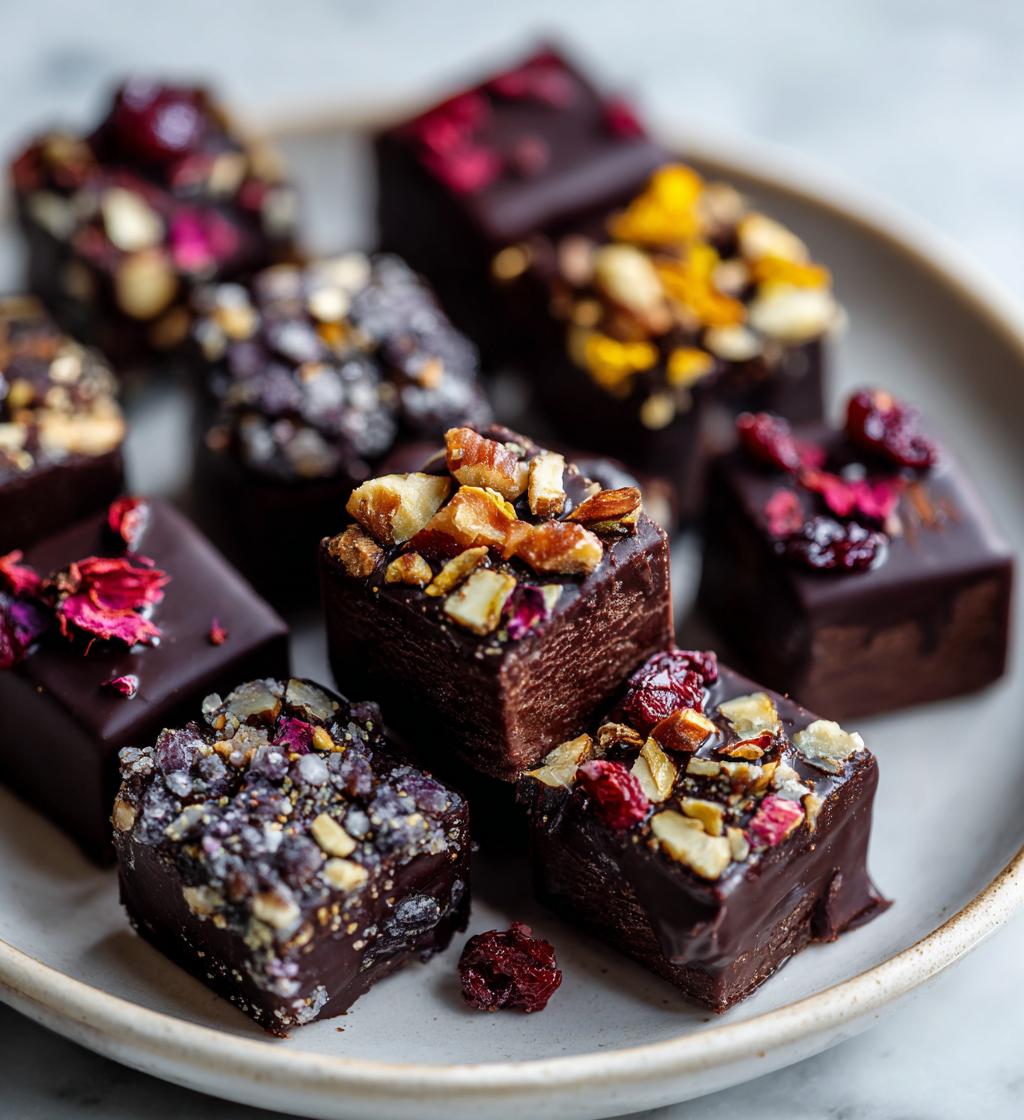
Ah, Valentine’s Day! It’s that time of year when love is in the air, and what better way to express your feelings than with homemade chocolates? Trust me, there’s something magical about crafting your own *valentines day chocolates*. They not only taste divine, but they also show that you’re willing to put in the effort for your loved ones. I remember the first time I made these chocolates; I was a nervous wreck, but the moment I saw my partner’s face light up with delight, I knew I’d struck gold!
This recipe is super easy and perfect for anyone, whether you’re a seasoned pro or a complete newbie in the kitchen. With just a few simple ingredients and no fancy equipment needed, you’ll whip up a batch of delicious chocolates that are bound to impress. Plus, the joy of customizing them with your favorite nuts and fruits makes each piece feel personal. So, let’s dive into this delightful adventure of chocolate-making!
Ah, Valentine’s Day! It’s that time of year when love is in the air, and what better way to express your feelings than with homemade chocolates? Trust me, there’s something magical about crafting your own valentines day chocolates. They not only taste divine, but they also show that you’re willing to put in the effort for your loved ones. I remember the first time I made these chocolates; I was a nervous wreck, but the moment I saw my partner’s face light up with delight, I knew I’d struck gold!
This recipe is super easy and perfect for anyone, whether you’re a seasoned pro or a complete newbie in the kitchen. With just a few simple ingredients and no fancy equipment needed, you’ll whip up a batch of delicious chocolates that are bound to impress. Plus, the joy of customizing them with your favorite nuts and fruits makes each piece feel personal. So, let’s dive into this delightful adventure of chocolate-making!
Ingredients List
To make these delightful valentines day chocolates, you’ll need the following ingredients. They’re simple, but trust me, they create magic!
- 1 cup dark chocolate chips
- 1/2 cup heavy cream
- 1 teaspoon vanilla extract
- 1/4 cup powdered sugar
- 1/4 cup crushed nuts (your choice, but I love walnuts or almonds!)
- 1/4 cup dried fruit (think cranberries or chopped apricots for a sweet touch)
Make sure to have everything ready before you start, as the process goes pretty quickly once you get going. You’ll love how these ingredients come together to create the perfect homemade chocolates!
How to Prepare Instructions
Now, let’s get down to the fun part: making your own delicious valentines day chocolates! Follow these steps carefully, and you’ll have a beautiful batch ready to impress in no time.
Step-by-Step Guide
- Heat the cream: Start by pouring the heavy cream into a saucepan. Heat it over medium heat until it just starts to boil. You’ll see tiny bubbles forming around the edges, and that’s your cue to move to the next step! Be careful not to let it boil over!
- Melt the chocolate: Once the cream is boiling, remove the saucepan from the heat. Add the dark chocolate chips right in and stir gently until they melt completely. This should only take a minute or so, and oh, the smell is heavenly!
- Add flavor: Now, stir in the vanilla extract and powdered sugar. Mix it all together until it’s nice and smooth. This is where the magic really happens, so make sure everything is well combined!
- Pour into molds: Carefully pour the chocolate mixture into your chosen molds. I love using heart-shaped molds for Valentine’s Day, but any shape will do! Just make sure to fill them evenly.
- Add toppings: While the chocolate is still warm, sprinkle your crushed nuts and dried fruit on top. This adds a lovely crunch and a burst of flavor that makes each piece special. Feel free to get creative here!
- Chill to set: Place your molds in the refrigerator and let them chill for about 2 hours. This is the hardest part—waiting! But trust me, it’s worth it when you pop them out of the molds.
- Enjoy: Once they’re set, gently remove the chocolates from the molds and serve them up! You might want to keep a few for yourself, though—I won’t tell if you sneak one (or two!).
And there you have it! Homemade valentines day chocolates that are sure to steal hearts. Just remember, the key to success here is patience and quality ingredients. Enjoy the sweet rewards of your hard work!
Why You’ll Love This Recipe
This recipe for homemade valentines day chocolates is a winner for so many reasons! Here are just a few things that make it special:
- Quick and Easy: With just 20 minutes of prep time, you can have chocolates ready to set in the fridge. Perfect for those last-minute gifts!
- Customizable: You can easily mix and match toppings like nuts, dried fruits, or even sprinkles. Make each chocolate uniquely yours!
- Delicious Taste: The combination of rich dark chocolate and creamy filling is simply irresistible. Each bite melts in your mouth!
- No-Bake Delight: No oven required! This no-bake recipe means less fuss and more fun.
- Perfect for Gifting: These chocolates are not only tasty but also look beautiful when presented in heart-shaped molds. They’re sure to impress!
Trust me, once you try making these chocolates, you’ll find yourself wanting to whip up batches for every occasion—Valentine’s Day or not!
Tips for Success
Getting your homemade valentines day chocolates just right can feel like a challenge, but don’t worry! I’ve got some tried-and-true tips that will help you avoid any hiccups along the way. Trust me, these little pointers can make a world of difference!
- Choose Quality Chocolate: The chocolate you use makes all the difference! Go for high-quality dark chocolate chips for a richer flavor. Don’t skimp here—it’s worth it!
- Watch the Cream Temperature: When heating the cream, keep a close eye on it. If it boils over, you’ll have a messy stovetop! Just let it reach that gentle simmer with bubbles around the edges.
- Stir Gently: When adding the chocolate chips to the hot cream, take your time. Stir gently to avoid splashing and to help the chocolate melt smoothly. A little patience goes a long way!
- Don’t Overfill Molds: When pouring the chocolate mixture into molds, remember not to overfill them. Leave a little space at the top to ensure your chocolates pop out easily without spilling over.
- Chill Properly: Make sure to let the chocolates chill in the refrigerator for the full 2 hours. Rushing this step might leave you with soft chocolates that don’t hold their shape!
- Use Parchment Paper: If you’re worried about the chocolates sticking, place a small piece of parchment paper in the bottom of your molds. This can help with easy removal and keep your chocolates looking pristine.
- Experiment with Flavors: Feel free to play around with flavorings! A pinch of sea salt on top or a dash of espresso powder in the chocolate can elevate your chocolates to a whole new level.
Following these tips will help you create beautiful and delicious valentines day chocolates that you can be proud of. So roll up your sleeves, and let your inner chocolatier shine!
Variations
The beauty of homemade valentines day chocolates is that you can let your creativity run wild! Here are some fun variations and topping ideas that you can experiment with to make each batch uniquely yours:
- Nutty Delight: Try using different types of nuts like pecans, hazelnuts, or macadamia nuts. You can even toast them lightly before sprinkling for added flavor!
- Fruit Explosion: Switch up the dried fruit by using mango, figs, or even candied ginger for a zesty twist. Each fruit brings its own unique sweetness that complements the chocolate beautifully.
- Minty Fresh: Add a drop of peppermint extract to the chocolate mixture for a refreshing mint flavor. Finish with crushed peppermint candies on top for a festive touch!
- Spiced Up: Incorporate spices like cinnamon or a pinch of chili powder into the chocolate for a warm, spicy kick. It’s a delightful surprise in each bite!
- Caramel Swirl: Drizzle some homemade caramel sauce or store-bought caramel over the top before chilling. The combination of chocolate and caramel is a classic favorite!
- Matcha Magic: For a unique twist, mix in some matcha powder into your chocolate for a beautiful green hue and a lovely earthy flavor. It’s not only tasty but also visually stunning!
- Dark and White Duo: Create a marbled effect by swirling in some melted white chocolate into the dark chocolate mixture. It’s a great way to add visual appeal and a sweet contrast in flavor.
Feel free to mix and match these ideas or come up with your own! Personalizing your valentines day chocolates makes them even more special, and who knows? You might just create the next big chocolate sensation!
Storage & Reheating Instructions
Once you’ve made your delicious homemade valentines day chocolates, you’ll want to store them properly to keep their delightful flavor and texture intact. Here’s how to do it!
First, make sure your chocolates are fully set and firm before storing them. If you’ve used molds, gently pop them out and place them in an airtight container. I like to line the container with parchment paper to prevent sticking—trust me, it makes a difference!
Store your chocolates in a cool, dry place away from direct sunlight. If your kitchen tends to get warm, it’s best to keep them in the refrigerator. Just keep in mind that chilled chocolates can lose some of their creamy texture when they come to room temperature, so let them sit out for a few minutes before enjoying.
These chocolates are best enjoyed within two weeks, but they’ll still be tasty beyond that—if they last that long! If you want to indulge later, simply take them out of the fridge and let them warm up slightly for that perfect melt-in-your-mouth experience.
Oh, and if you’re tempted to make a bigger batch, feel free! Just remember to keep them stored properly, and you’ll have sweet treats ready to share (or savor) anytime your heart desires!
Nutritional Information Section
Now, let’s chat about the nutritional side of these delightful valentines day chocolates. While we all know that chocolates are a treat, it’s nice to have an idea of what’s in them. Here’s an estimated breakdown per piece:
- Calories: 100
- Fat: 7g
- Saturated Fat: 4g
- Unsaturated Fat: 2g
- Trans Fat: 0g
- Carbohydrates: 10g
- Sugar: 10g
- Fiber: 1g
- Protein: 1g
- Cholesterol: 0mg
- Sodium: 5mg
Keep in mind that these values are estimates and can vary based on the specific ingredients you choose. If you swap out some ingredients or add in extra toppings, the nutritional content will change too! But hey, that’s part of the fun of making your own chocolates—customizing them just the way you like!
FAQ Section
Got questions about making your own valentines day chocolates? Don’t worry, I’ve got you covered! Here are some common queries that might pop up while you’re whipping up these delightful treats.
Q1: Can I use milk chocolate instead of dark chocolate?
Absolutely! While dark chocolate gives a rich flavor, you can use milk chocolate if that’s your preference. Just keep in mind that the sweetness level will increase, so you might want to adjust the amount of powdered sugar you add.
Q2: How can I make these chocolates dairy-free?
You can substitute the heavy cream with coconut cream or a dairy-free alternative like almond or oat milk. Look for dairy-free chocolate chips to keep everything in line with your dietary needs.
Q3: What if I don’t have molds for shaping the chocolates?
No molds? No problem! You can simply pour the chocolate mixture onto a parchment-lined baking sheet and spread it out to about 1/2 inch thick. Once it’s set, break it into pieces for a rustic chocolate bark!
Q4: How do I prevent the chocolates from sticking to the molds?
Using silicone molds can help with easy removal, but if you’re using traditional molds, a light coating of cooking spray or placing parchment paper in the bottom can help your chocolates pop out without a hitch!
Q5: Can I add flavor extracts to my chocolates?
Absolutely! Adding flavors like almond, orange, or even espresso can elevate your valentines day chocolates to new heights. Just a few drops will do; you don’t want to overpower that delicious chocolate flavor!
Feel free to reach out if you have more questions or need tips while making your chocolates. Enjoy the sweet adventure!
Print
valentines day chocolates: 7 Magical Recipes to Delight Hearts
- Total Time: 2 hours 25 minutes
- Yield: 12 pieces 1x
- Diet: Vegetarian
Description
Delicious homemade chocolates for Valentine’s Day.
Ingredients
- 1 cup dark chocolate chips
- 1/2 cup heavy cream
- 1 teaspoon vanilla extract
- 1/4 cup powdered sugar
- 1/4 cup crushed nuts
- 1/4 cup dried fruit
Instructions
- Heat the cream in a saucepan until just boiling.
- Remove from heat and add the chocolate chips, stirring until melted.
- Add vanilla extract and powdered sugar, mixing well.
- Pour the mixture into molds.
- Sprinkle crushed nuts and dried fruit on top.
- Refrigerate until set, about 2 hours.
- Remove from molds and serve.
Notes
- Store in a cool place.
- Use your favorite chocolate type.
- Customize with different toppings.
- Prep Time: 20 minutes
- Cook Time: 5 minutes
- Category: Dessert
- Method: No-bake
- Cuisine: American
Nutrition
- Serving Size: 1 piece
- Calories: 100
- Sugar: 10g
- Sodium: 5mg
- Fat: 7g
- Saturated Fat: 4g
- Unsaturated Fat: 2g
- Trans Fat: 0g
- Carbohydrates: 10g
- Fiber: 1g
- Protein: 1g
- Cholesterol: 0mg
Keywords: valentines day chocolates, homemade chocolates, chocolate recipe


