
Hey there, cookie lovers! If you’re looking to add a splash of sweetness and creativity to your baked goods, you’ve come to the right place. This *sugar cookie icing* recipe is my go-to for transforming plain cookies into masterpieces that taste as good as they look. Seriously, it’s so simple and delicious that you’ll want to keep a batch ready for all your cookie decorating adventures.
What I love most about this icing is its versatility – whether you’re crafting festive designs for the holidays or just want to jazz up a regular Tuesday afternoon treat, this icing has got your back! It dries to a beautiful finish without being overly stiff, making it easy to pipe and spread. Plus, you can customize it with any colors you desire, allowing your creativity to shine through. In just 10 minutes, you’ll have a smooth, sweet icing ready to elevate your sugar cookies to a whole new level. Trust me, once you try this out, you’ll never look at plain cookies the same way again!
Ingredients List
To whip up this delightful *sugar cookie icing*, you’ll need just a few simple ingredients. Here’s what you’ll gather:
- 2 cups powdered sugar: This is the base of your icing, providing that sweet, melt-in-your-mouth goodness.
- 2 tablespoons milk: Just enough to help achieve that perfect smooth consistency.
- 1 teaspoon vanilla extract: This adds a lovely depth of flavor that makes your icing irresistible.
- Food coloring (optional): For those who want to get creative, add any colors you fancy to make your cookies pop!
How to Prepare Sugar Cookie Icing Instructions
Ready to dive into making the best *sugar cookie icing* ever? Let’s get started! It’s super easy, and I promise you’ll be a pro in no time. Just follow these steps, and you’ll have a beautiful icing ready to adorn your cookies!
Step 1: Combine Ingredients
First things first, grab a mixing bowl. Add your 2 cups of powdered sugar to the bowl, and then pour in 2 tablespoons of milk. Using a whisk or a spatula, mix them together until it’s all combined. You’re looking for a smooth mixture that’s not too lumpy. If it feels a bit too thick, don’t worry! Just add a tiny splash more milk until you reach that perfect consistency. Easy peasy!
Step 2: Add Flavor
Now it’s time to add some flavor magic! Pour in 1 teaspoon of vanilla extract and give it another good mix. Keep stirring until everything is blended and the icing is silky smooth. This step is crucial because the vanilla gives your icing that lovely depth of flavor that’ll make your cookies sing!
Step 3: Color the Icing
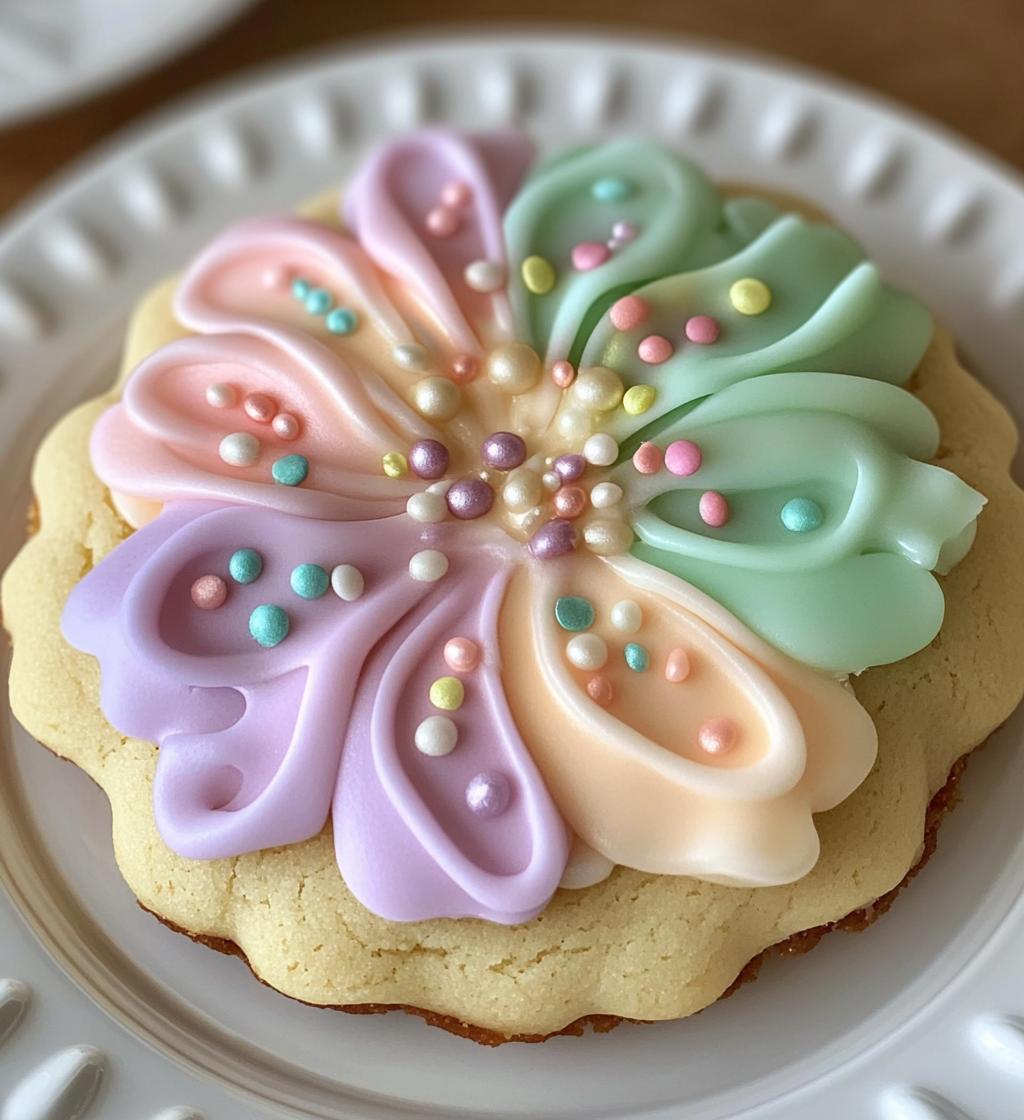
If you’re feeling colorful (and let’s be honest, who wouldn’t be?), it’s time to divide your icing into separate bowls. This way, you can create a rainbow of colors for your cookies! Just pour the icing into as many bowls as you like. Then, add a few drops of food coloring to each bowl. Mix well until you achieve your desired colors. Remember, a little goes a long way, so start with just a few drops and adjust as needed. Your cookies are going to look amazing!
Step 4: Decorate Cookies
Now for the fun part – decorating! Grab your cookies and your icing, and let your creativity run wild. Whether you’re using a piping bag or just a spoon, apply the icing to your cookies as you like. Don’t forget to use it immediately to get the best results! If you find your icing is drying out a bit while you work, just cover it with a damp cloth to keep it fresh. Enjoy the process and watch your cookies transform into little works of art!
Why You’ll Love This Recipe
This *sugar cookie icing* recipe is a total game changer! Here are just a few reasons why you’ll fall head over heels for it:
- Simplicity: With just four basic ingredients, you can whip up this icing in under 10 minutes. It’s perfect for both beginner bakers and seasoned pros.
- Delicious Flavor: The hint of vanilla adds a delightful taste that complements your sugar cookies beautifully. No bland icing here!
- Endless Customization: You can easily change it up by adding your favorite food coloring, making it a fun activity for kids or any festive occasion.
- Perfect Consistency: The icing dries just right – not too runny, not too stiff – making it easy to pipe and spread without any fuss.
- Great for Any Occasion: Whether you’re decorating cookies for a birthday party, holiday celebration, or just a sweet treat for yourself, this icing fits the bill every time!
Tips for Success
To ensure your *sugar cookie icing* turns out perfectly every time, here are some handy tips that I’ve learned along the way:
- Adjusting Consistency: If your icing feels too thick, don’t hesitate to add a splash more milk. Start with just a teaspoon at a time until you reach your desired smoothness. If it’s too runny, you can always mix in a bit more powdered sugar to thicken it back up.
- Covering Leftover Icing: If you have any icing left after decorating, be sure to cover it right away! I like to place a damp cloth over the bowl or transfer it to an airtight container. This keeps it from drying out and forming a crust.
- Storing Icing: You can store leftover icing in the fridge for up to a week. Just make sure to give it a good stir before using it again, as it may thicken in the fridge. If it’s too thick after chilling, add a tiny bit of milk to bring it back to life!
- Experimenting with Flavors: Feel free to mix things up! You can try different extracts like almond or lemon for a unique twist on the flavor. Just remember to keep the quantity the same as vanilla to maintain consistency.
- Timing is Key: Use the icing immediately after mixing for the best results. It’s at its perfect consistency right after making it, so don’t wait too long to get decorating!
Storage & Reheating Instructions
Storing leftover *sugar cookie icing* is super easy, and it’s a great way to save time for your next baking adventure! If you have any icing left after decorating, make sure to cover it right away to prevent it from drying out. I like to place a damp cloth over the bowl or transfer the icing into an airtight container. This keeps the icing nice and fresh!
You can store your icing in the fridge for up to a week. Just remember, when you’re ready to use it again, give it a good stir to bring it back to its smooth consistency. Sometimes it might thicken a bit while chilling, so if it feels too thick, just add a tiny splash of milk and mix until it’s perfect again. Easy peasy!
Oh, and if you’re in a hurry, you can also let it sit at room temperature for a little while before using it again. Just keep an eye on it, as you don’t want it to dry out. With these simple storage tips, you’ll always have delicious icing ready to go for your next batch of cookies!
Nutritional Information
Before we dive into the numbers, it’s important to remember that nutritional values can vary based on the specific ingredients and brands you use. So, while I can give you an estimate, please take these figures with a grain of salt!
For a serving size of 1 tablespoon of this delightful *sugar cookie icing*, you can expect approximately:
- Calories: 50
- Sugar: 12g
- Sodium: 0mg
- Fat: 0g
- Saturated Fat: 0g
- Unsaturated Fat: 0g
- Trans Fat: 0g
- Carbohydrates: 13g
- Fiber: 0g
- Protein: 0g
- Cholesterol: 0mg
These values can help you gauge how this icing fits into your diet, especially if you’re keeping an eye on sugar intake or calories. Enjoy your cookies and the icing that makes them shine!
FAQ Section
How long does sugar cookie icing last?
Your *sugar cookie icing* can last quite a while if stored properly! If you keep it in an airtight container in the fridge, it should be good for up to a week. Just give it a good stir before using again, as it may thicken a bit in the cold. If you notice any separation, that’s normal – just remix it until it’s smooth and ready to go!
Can I make sugar cookie icing in advance?
Absolutely! You can prepare this *sugar cookie icing* in advance, making your baking day a lot smoother. Just whip it up, cover it tightly, and store it in the fridge. When you’re ready to use it, let it sit at room temperature for a bit, then stir it well. If it’s a little too thick, just add a splash of milk to get it back to that perfect consistency!
What can I use if I don’t have food coloring?
If you’re out of food coloring, don’t fret! There are some fun alternatives you can try. You can use natural ingredients like juice from fruits, such as beet juice for pink or spinach juice for green. However, keep in mind that these natural options may slightly alter the flavor of your *sugar cookie icing*. You can also just leave the icing white for a classic look – it still tastes fantastic on its own!
Call to Action
Now that you’ve got this fabulous *sugar cookie icing* recipe in your baking arsenal, I’d love to hear from you! Have you tried it out? What creative designs did you come up with? Share your experiences in the comments below – I can’t wait to see your beautiful cookie creations!
And don’t forget to snap some photos of your decorated cookies! You can share them on social media and tag me. It’s always amazing to see how everyone puts their own twist on this icing. Let’s inspire each other with our baking adventures!
Print
Sugar Cookie Icing: 10-Minute Sweetness
- Total Time: 10 minutes
- Yield: 2 cups 1x
- Diet: Vegetarian
Description
A simple and sweet icing perfect for decorating sugar cookies.
Ingredients
- 2 cups powdered sugar
- 2 tablespoons milk
- 1 teaspoon vanilla extract
- Food coloring (optional)
Instructions
- In a bowl, combine powdered sugar and milk.
- Add vanilla extract and mix until smooth.
- If desired, divide icing into separate bowls for coloring.
- Add food coloring to each bowl and mix well.
- Use immediately to decorate cookies.
Notes
- Cover icing to prevent it from drying out.
- Adjust milk for desired consistency.
- Store leftover icing in the fridge.
- Prep Time: 10 minutes
- Cook Time: 0 minutes
- Category: Dessert
- Method: Mixing
- Cuisine: American
Nutrition
- Serving Size: 1 tablespoon
- Calories: 50
- Sugar: 12g
- Sodium: 0mg
- Fat: 0g
- Saturated Fat: 0g
- Unsaturated Fat: 0g
- Trans Fat: 0g
- Carbohydrates: 13g
- Fiber: 0g
- Protein: 0g
- Cholesterol: 0mg
Keywords: sugar cookie icing, icing recipe, cookie decoration


