
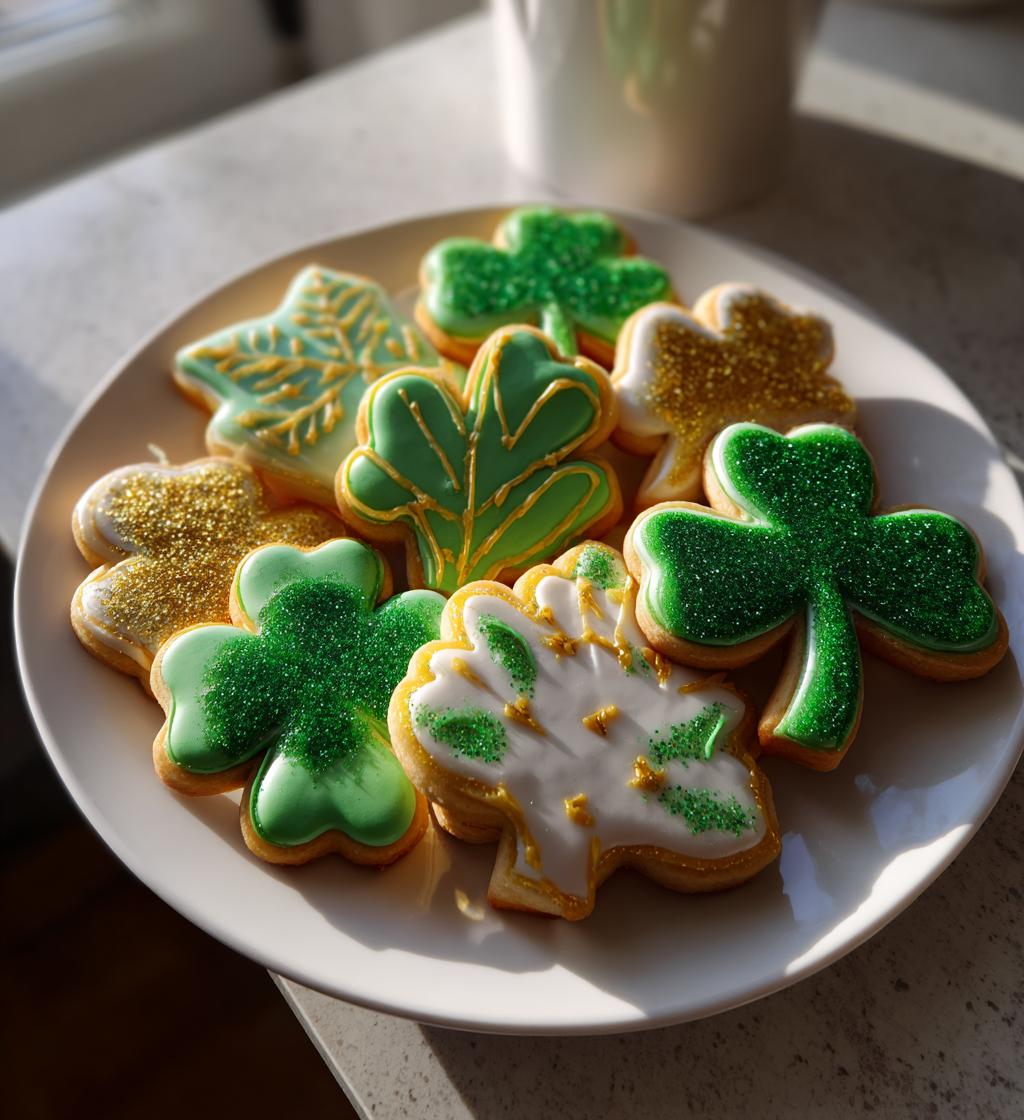
Ah, St. Patrick’s Day! It’s that magical time of year when everything feels lively and bright, and what better way to celebrate than with a batch of delicious *St. Patrick’s Day royal icing cookies*? I can still remember the first time I made these cookies with my kids. The kitchen was filled with laughter, the sweet smell of baking wafted through the air, and our countertops turned into a colorful canvas of icing and sprinkles. It was pure joy! Each cookie became a tiny masterpiece, decorated with vibrant greens and golden glitter that sparkled like the treasures of a leprechaun’s pot.
What I love most about these royal icing cookies is that they’re not just beautiful; they’re fun to make, too! You don’t need to be a professional baker to whip up a batch that will impress everyone at your St. Patrick’s Day gathering. Trust me, once you start decorating, you’ll find it’s hard to stop! Whether you’re crafting shamrocks, rainbows, or even little pots of gold, these cookies are bound to bring a smile to everyone’s face. So, let’s dive into this delightful recipe and get our baking hats on!
Ingredients List
To create these delightful *St. Patrick’s Day royal icing cookies*, you’ll need a few essential ingredients that come together to make magic happen. Here’s what you’ll need:
- 2 3/4 cups all-purpose flour: This is the base for your cookie dough, so make sure it’s properly measured for the best results.
- 1 teaspoon baking powder: This helps the cookies rise a bit, giving them that perfect texture.
- 1/2 teaspoon salt: Just a pinch to balance the sweetness and enhance the flavors!
- 1 cup unsalted butter, softened: Make sure it’s nice and soft, almost at room temperature, to help with creaming.
- 1 1/2 cups granulated sugar: This adds sweetness and helps create that lovely crispy edge.
- 1 large egg: The binding agent that holds everything together!
- 1 teaspoon vanilla extract: For that classic cookie flavor that everyone loves.
- 1 teaspoon almond extract: A little twist that gives your cookies a delightful depth of flavor.
- 4 cups powdered sugar: Essential for making the royal icing that will make your cookies shine.
- 4 tablespoons meringue powder: This helps stabilize the icing and gives it that wonderful glossy finish.
- 1/4 cup water: Just enough to mix into your icing for the perfect consistency.
- Green food coloring: To bring those festive St. Patrick’s Day vibes to your icing!
- Gold edible glitter: Because what’s a leprechaun’s treasure without a bit of sparkle?
Gather these ingredients, and you’re ready to create your own St. Patrick’s Day cookie masterpiece!
How to Prepare Instructions
Now that you’ve got your ingredients ready, let’s get baking those wonderful *St. Patrick’s Day royal icing cookies*! Follow these simple steps, and you’ll have a batch of cookies that are not just tasty but also a joy to decorate!
- Preheat your oven: Start by preheating your oven to 350°F (175°C). This step is crucial to ensure your cookies bake evenly and come out just right.
- Mix the dry ingredients: In a bowl, whisk together 2 3/4 cups of all-purpose flour, 1 teaspoon of baking powder, and 1/2 teaspoon of salt. This combination helps create the right texture and flavor in your cookies. Set it aside for later.
- Cream the butter and sugar: In another mixing bowl, cream together 1 cup of softened unsalted butter and 1 1/2 cups of granulated sugar until it’s light and fluffy. This usually takes about 3-5 minutes. You want it to look pale and airy, which helps give your cookies that perfect texture.
- Add the egg and extracts: Crack in 1 large egg, and add 1 teaspoon each of vanilla and almond extracts. Mix well until fully incorporated. This adds a lovely flavor to your dough!
- Combine dry and wet ingredients: Gradually add the flour mixture to the butter mixture. Mix until just combined, being careful not to overmix. You want a soft dough that holds together but isn’t sticky.
- Roll out the dough: On a floured surface, roll out your dough to about 1/4 inch thick. Use a rolling pin, and don’t forget to sprinkle a bit of flour on top to prevent sticking!
- Cut into shapes: Now, use your favorite cookie cutters to create festive shapes. Think shamrocks, pots of gold, or even leprechauns! Place the cut-out cookies on ungreased baking sheets, leaving a little space between them.
- Bake the cookies: Pop the baking sheets into your preheated oven and bake for 8-10 minutes. Keep an eye on them; you want them to be just lightly golden around the edges. Oops! Overbaking can lead to dry cookies, so take them out when they’re perfect!
- Cool completely: Let the cookies cool on the sheets for a few minutes, then transfer them to a wire rack. Make sure they’re completely cool before you start decorating – it’s tempting, but trust me, it’s worth the wait!
- Prepare the royal icing: While the cookies are cooling, in a mixing bowl, combine 4 cups of powdered sugar, 4 tablespoons of meringue powder, and 1/4 cup of water. Mix until you achieve a smooth icing consistency. It should hold its shape but still be pourable.
- Color your icing: Divide the icing into bowls and add green food coloring and any other colors you want for decorating. Stir until well blended, and get ready to let your creativity shine!
- Decorate your cookies: Use piping bags or squeeze bottles to decorate your cookies with the royal icing. Don’t forget to sprinkle on that gold edible glitter for a magical finish!
And there you have it! Follow these steps, and you’ll have scrumptious *St. Patrick’s Day royal icing cookies* that will impress everyone. Enjoy the process, and let your inner artist shine through!
Why You’ll Love This Recipe
Making these delightful *St. Patrick’s Day royal icing cookies* is a joy that’s hard to resist! Here are just a few reasons why this recipe will become a favorite in your home:
- Irresistible Taste: With a buttery cookie base and sweet royal icing, each bite is a perfect balance of flavors that will have you coming back for more!
- Easy to Prepare: Even if you’re a beginner, the step-by-step instructions make it simple to whip up a batch of cookies that look and taste amazing.
- Fun for All Ages: Baking and decorating cookies is a wonderful activity for families! Kids love getting creative with the icing and sprinkles, making it a memorable experience.
- Festive Appeal: These cookies are not just delicious; they’re a feast for the eyes! Their vibrant colors and glittery finishes will brighten up any St. Patrick’s Day celebration.
- Customizable Designs: You can easily change up the shapes, colors, and decorations to fit any theme or occasion, allowing for endless creativity in the kitchen!
- Perfect for Sharing: Whether it’s for a party, a bake sale, or just to share with friends, these cookies are sure to spread joy and smiles all around!
Trust me, once you start baking these cookies, you’ll find it hard to stop at just one batch. They’re truly a delight for both the taste buds and the spirit of celebration!
Tips for Success
To make sure your *St. Patrick’s Day royal icing cookies* turn out perfectly every time, I’ve got some tried-and-true tips to share! Trust me, these little details can make all the difference.
Rolling Out Dough
When rolling out your dough, make sure your surface is well-floured to prevent sticking. I like to roll it between two sheets of parchment paper; it keeps everything tidy and makes it easier to lift the dough without tearing. Aim for about 1/4 inch thickness for the perfect cookie that holds its shape while baking.
Icing Consistency
Getting the right icing consistency is key! When you mix your royal icing, it should be thick enough to hold its shape but smooth enough to flow slightly when piped. A good test is to lift your spoon out of the bowl – the icing should fall back into the bowl and smooth out within about 10 seconds. If it’s too thick, just add a tiny bit of water; if it’s too runny, add a bit more powdered sugar.
Decorating Tips
For decorating, work with one color at a time and let the first layer dry before adding details. I find that using piping bags gives you more control, but squeeze bottles can work well, too. Don’t forget to have fun with it! Mix different colors and use edible glitter to really make your cookies sparkle. And remember, it’s okay if they’re not perfect – that’s part of the charm!
With these tips, you’ll be on your way to creating stunning cookies that taste as great as they look!
Variations
One of the best parts about making *St. Patrick’s Day royal icing cookies* is the endless possibilities for creativity! Here are some fun ideas to mix things up:
- Color Schemes: While green is the classic choice, don’t shy away from using a rainbow palette! Think vibrant yellows, oranges, and blues to create a festive mix that can brighten up any celebration.
- Shapes Galore: Beyond shamrocks and pots of gold, why not try cookies shaped like rainbows, leprechauns, or even little barrels of beer? Use your imagination, and let the cookie cutters lead the way!
- Flavor Variations: Experiment with different extracts! Swap out the vanilla for coconut or mint extract to give your cookies a unique twist. You could even add a touch of citrus zest to the dough for a refreshing hint of lemon or lime.
- Textured Icing: Try adding different textures to your royal icing. Use sugar crystals, sprinkles, or nonpareils to give your cookies a delightful crunch and visual appeal.
- Themed Designs: For a fun twist, try adding themed decorations like edible markers to draw little faces on the leprechauns or use fondant to create 3D elements for extra flair!
With these variations, you can create a dazzling assortment of cookies that will definitely impress your friends and family. Enjoy the creative journey!
Storage & Reheating Instructions
Once you’ve baked and decorated your beautiful *St. Patrick’s Day royal icing cookies*, you’ll want to keep them fresh for as long as possible! Here’s how to store them properly:
- Airtight Containers: Allow your cookies to dry completely before storing them. Once they’re set, place them in an airtight container. I like to use layers of parchment paper to separate the cookies; this helps prevent them from sticking together and keeps the decorations intact.
- Room Temperature: Store the cookies at room temperature, away from direct sunlight. They’ll stay fresh for about 1-2 weeks. Just make sure to keep an eye on them; if you notice them starting to lose their crunch, it might be time to enjoy them!
- Freezing Cookies: If you want to make your cookies ahead of time, you can freeze them! Just make sure they’re fully dried and cooled. Place the cookies in a single layer on a baking sheet and freeze them for about an hour. Once they’re frozen, transfer them to an airtight container or a freezer bag, separating layers with parchment paper. They can last in the freezer for up to 3 months.
- Reheating Tips: Reheating isn’t usually necessary for decorated cookies, but if you want to enjoy them warm, preheat your oven to a low temperature (around 300°F or 150°C). Place the cookies on a baking sheet for just a few minutes until they’re warmed through. Be cautious not to overheat them, as you don’t want to melt the icing!
With these storage tips, you can savor your *St. Patrick’s Day royal icing cookies* days after baking, keeping that festive spirit alive!
Nutritional Information Section
When it comes to enjoying your *St. Patrick’s Day royal icing cookies*, it’s always nice to know what you’re indulging in! Here’s an estimated breakdown of the nutritional information for each cookie:
- Calories: Approximately 150
- Fat: 6g
- Saturated Fat: 4g
- Unsaturated Fat: 2g
- Trans Fat: 0g
- Cholesterol: 25mg
- Sodium: 50mg
- Carbohydrates: 22g
- Fiber: 0g
- Sugar: 10g
- Protein: 1g
Keep in mind that these values are estimates and can vary based on the specific ingredients you use and how generously you decorate your cookies. Enjoy baking and indulging, knowing that these treats bring a bit of joy to your St. Patrick’s Day celebrations!
FAQ Section
Got questions about making these delightful *St. Patrick’s Day royal icing cookies*? You’re not alone! Here are some common queries that often come up, along with my answers to help you out:
Can I use different extracts in the cookie dough?
Absolutely! While vanilla and almond extracts are classic choices, feel free to experiment with other flavors like lemon or coconut. Just remember, a little goes a long way!
How can I achieve the perfect royal icing consistency?
The key to great royal icing is finding the right consistency. It should be thick enough to hold its shape but smooth enough to pipe easily. A good test is to lift your spoon – the icing should fall back into the bowl and smooth out within about 10 seconds. If it’s too thick, add a few drops of water; if too runny, mix in more powdered sugar.
What if my cookies spread while baking?
Oops! If your cookies spread, it might be due to the butter being too warm or not chilling the dough long enough. Always ensure your butter is softened but not melted, and chilling the dough for at least 30 minutes can help maintain their shape during baking.
Can I decorate the cookies the day before serving?
Definitely! In fact, letting the icing dry overnight can help the decorations set properly. Just make sure to store the cookies in an airtight container to keep them fresh.
What’s the best way to clean up after decorating?
Royal icing can be a bit sticky, so I recommend using warm, soapy water to soak your tools right after use. For surfaces, a quick wipe with a damp cloth will usually do the trick. Happy decorating!
Call to Action
I hope you’re as excited to bake and decorate these *St. Patrick’s Day royal icing cookies* as I am! If you try out this recipe, I’d love to hear how it goes. Did you come up with any fun designs or flavor variations? Please leave a comment below to share your thoughts, tips, or even your own unique twists on this recipe! Your creativity could inspire others in our baking community.
If you enjoyed making these cookies, consider rating the recipe too! Your feedback means the world to me and helps fellow bakers find this delightful treat. Remember, the joy of baking is best when shared—so snap a photo of your colorful creations and share them with your friends and family. Let’s spread the St. Patrick’s Day cheer together!
Happy baking, and may your cookies be as sweet as the memories you create while making them!
Print
St. Patrick’s Day Royal Icing Cookies to Brighten Your Festivities
- Total Time: 40 minutes
- Yield: 24 cookies 1x
- Diet: Vegetarian
Description
Delicious royal icing cookies decorated for St. Patrick’s Day.
Ingredients
- 2 3/4 cups all-purpose flour
- 1 teaspoon baking powder
- 1/2 teaspoon salt
- 1 cup unsalted butter, softened
- 1 1/2 cups granulated sugar
- 1 large egg
- 1 teaspoon vanilla extract
- 1 teaspoon almond extract
- 4 cups powdered sugar
- 4 tablespoons meringue powder
- 1/4 cup water
- Green food coloring
- Gold edible glitter
Instructions
- Preheat oven to 350°F (175°C).
- In a bowl, mix flour, baking powder, and salt.
- In another bowl, cream butter and sugar until fluffy.
- Add egg and extracts, mix well.
- Gradually add dry ingredients, mix until combined.
- Roll out dough on a floured surface and cut into shapes.
- Place cookies on baking sheets and bake for 8-10 minutes.
- Let cookies cool completely.
- In a bowl, mix powdered sugar, meringue powder, and water for icing.
- Divide icing into bowls and color with food coloring.
- Decorate cookies with icing and sprinkle with edible glitter.
Notes
- Store cookies in an airtight container.
- Use different colors for various designs.
- Allow icing to dry completely before stacking.
- Prep Time: 30 minutes
- Cook Time: 10 minutes
- Category: Dessert
- Method: Baking
- Cuisine: Irish
Nutrition
- Serving Size: 1 cookie
- Calories: 150
- Sugar: 10g
- Sodium: 50mg
- Fat: 6g
- Saturated Fat: 4g
- Unsaturated Fat: 2g
- Trans Fat: 0g
- Carbohydrates: 22g
- Fiber: 0g
- Protein: 1g
- Cholesterol: 25mg
Keywords: st patricks day royal icing cookies


