
Spring is a time of renewal and celebration, and what better way to embrace the season than with colorful, vibrant cookies? I can’t tell you how much joy it brings me to gather with friends and family, decorating these delightful spring decorated cookies together. The laughter, the chatter, and the sweet aroma filling the kitchen create memories that linger long after the last crumb is gone.
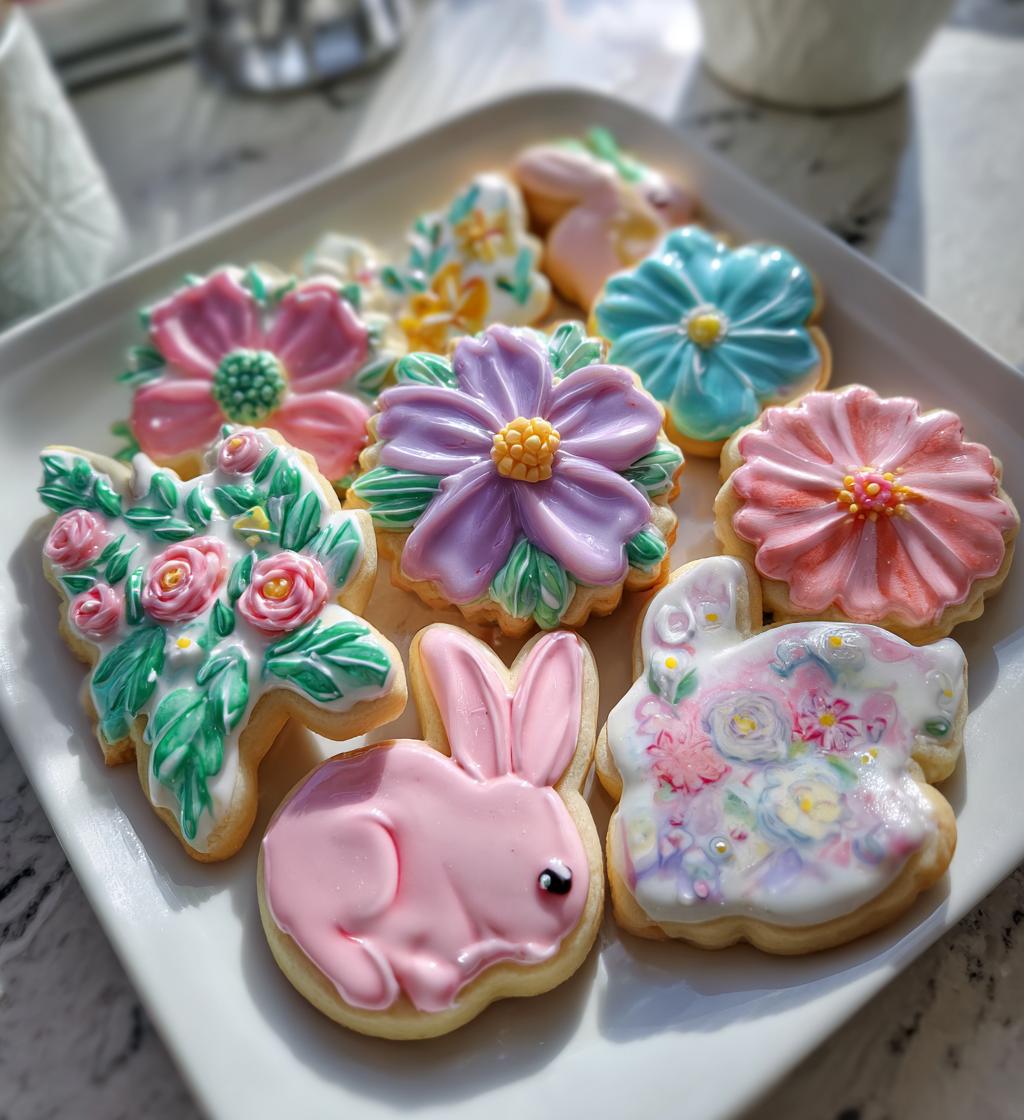
These cookies are not just a treat for the taste buds; they’re a feast for the eyes too! With their festive colors and playful designs, they instantly brighten any occasion, whether it’s an Easter gathering, a birthday party, or simply a sunny afternoon snack. I love letting my creativity shine through the icing, using all sorts of colors that reflect the blooming flowers outside. Trust me, once you start decorating, it’s hard to stop! So, roll up your sleeves and get ready to spread some springtime cheer with these deliciously decorated cookies that will surely impress everyone at the table.
Ingredients for Spring Decorated Cookies
Gathering the right ingredients is the first step to creating these colorful spring decorated cookies! Here’s what you’ll need:
- 2 3/4 cups all-purpose flour: This is the base of your cookies, so make sure it’s fresh and fluffed up before measuring.
- 1 teaspoon baking powder: This helps the cookies rise, giving them that lovely, soft texture.
- 1/2 teaspoon salt: Just a pinch to balance out the sweetness!
- 1 cup unsalted butter, softened: Make sure it’s at room temperature so it creams beautifully with the sugar.
- 1 1/2 cups granulated sugar: This is where the sweetness comes from, giving your cookies that delightful flavor.
- 1 egg: A large egg, at room temperature, helps bind everything together.
- 1 teaspoon vanilla extract: For that warm, comforting flavor that makes cookies so irresistible!
- 2 cups royal icing: This will be your canvas for decorating, so get ready to make it pretty!
- Food coloring (various colors): Choose your favorite spring hues to make those cookies pop with color!
With these ingredients in hand, you’re all set to create some delightful spring treats that are sure to brighten anyone’s day!
How to Prepare Spring Decorated Cookies
Now that you’ve gathered all your ingredients, let’s get into the fun part—making these delicious spring decorated cookies! Follow these steps, and you’ll have a batch of colorful cookies ready for decorating in no time.
Step 1: Preheat and Prepare
First things first, you’ll want to preheat your oven to 350°F (175°C). This step is crucial because starting with a hot oven ensures that your cookies rise beautifully and bake evenly. While that’s heating up, line your baking sheets with parchment paper or silicone baking mats. This little trick prevents sticking and makes cleanup a breeze! I always have a few sheets ready, so I can keep the cookie production line flowing.
Step 2: Make the Dough
Let’s get mixing! In a large bowl, whisk together the flour, baking powder, and salt until well combined. This helps distribute the leavening agent evenly. In another bowl, cream together the softened butter and granulated sugar until it’s smooth and fluffy—about 2-3 minutes should do the trick. You want it to look light in color and feel airy. Then, add in the egg and vanilla extract, mixing until everything is incorporated. Next, gradually add your dry ingredients to the wet mixture, stirring gently until just combined. You don’t want to overmix; a few flour streaks are perfectly fine!
Step 3: Shape and Bake
Once your dough is ready, it’s time to shape those cookies! Roll the dough into balls about the size of a tablespoon and place them on your prepared baking sheets, leaving some space in between (about 2 inches) because they will spread as they bake. Pop the sheets into the preheated oven and bake for 10-12 minutes, or until the edges are golden brown. Keep an eye on them—overbaking can lead to dry cookies! A light golden edge with a soft center is what you’re aiming for.
Step 4: Cool and Decorate
After baking, remove the cookies from the oven and let them cool on the baking sheet for about 5 minutes before transferring them to a wire rack to cool completely. This cooling time is essential because it allows the cookies to firm up a bit more. While they’re cooling, prepare your royal icing! Divide the icing into several bowls and add your chosen food coloring to create a rainbow of hues. Once the cookies are completely cool, grab a piping bag or a simple zip-top bag with the corner snipped off, and let your creativity flow! Whether it’s flowers, bunnies, or just fun swirls, the decorating is where the real magic happens!
Tips for Success with Spring Decorated Cookies
Ready to make your spring decorated cookies the best they can be? I’ve got some pro tips that’ll help you achieve cookie perfection! These little nuggets of wisdom have been tried and tested in my kitchen, and I can’t wait to share them with you.
Get the Dough Consistency Just Right
The texture of your dough is super important! You want it to be soft but not sticky. If it feels too wet, just add a bit more flour—sometimes, the humidity can play tricks on us! A good rule of thumb is to chill the dough for about 30 minutes before rolling it out. This helps the flavors meld together and makes it easier to handle. Trust me, you’ll thank yourself later when you’re rolling those perfect little balls!
Use Room Temperature Ingredients
Make sure your butter and egg are at room temperature. This is key for that fluffy, creamy mixture when you’re creaming the butter and sugar together. Cold butter can lead to a dense cookie, and nobody wants that! If you forget to take out your butter, just cut it into small cubes and let it sit for about 10-15 minutes. It’ll soften up pretty quickly!
Don’t Rush the Cooling Process
Cooling your cookies completely before decorating is non-negotiable. If you jump the gun and ice them while they’re still warm, the icing will melt right off! I usually pop them on a wire rack and pour myself a cup of tea while I wait. It’s the perfect time to admire your handiwork and get excited about decorating!
Mastering Royal Icing
When it comes to royal icing, the consistency is everything. You want it to be thick enough to hold its shape but thin enough to spread smoothly. A good test is to drizzle some icing back into the bowl; it should take about 10 seconds to disappear. If it’s too runny, add more powdered sugar, and if it’s too thick, a few drops of water will do the trick. Also, be sure to cover any icing you’re not using immediately with a damp cloth to prevent it from drying out.
Experiment with Techniques
Don’t be afraid to get creative with your decorating techniques! Try out different piping tips for varied designs, or use a toothpick to create fun swirls and patterns. You can even sprinkle edible glitter or use nonpareils to add some extra pizzazz to your cookies. The possibilities are endless!
With these tips in hand, you’re well on your way to creating stunning and delicious spring decorated cookies that will impress everyone. Happy baking!
Variations on Spring Decorated Cookies
Now that you’ve mastered the basics of making spring decorated cookies, why not shake things up a bit? There are so many fun variations you can try that will keep your cookie game fresh and exciting! Here are some creative ideas to inspire your next baking adventure:
Shape It Up!
While traditional rounds are lovely, consider using cookie cutters to create different shapes that celebrate the season. Think about bunnies, flowers, or even colorful eggs for Easter festivities! The fun part is decorating each shape to match its theme. A little creativity goes a long way in making your cookies visually stunning.
Flavor Infusions
Why stick with plain vanilla when you can jazz things up? Try adding different flavors to your dough! A teaspoon of almond extract gives a lovely twist, while lemon zest can add a refreshing zing. If you’re feeling adventurous, consider mixing in some cocoa powder for a chocolate base. The contrast of colors with the icing will be delightful!
Colorful Themes
Spring is all about color, so why not create themed cookie sets? You can do a pastel palette for Easter or vibrant hues to celebrate a spring garden. Pair your colors with fun decorations like edible flowers, sprinkles, or even chocolate drizzles. Each theme can tell a different story!
Seasonal Add-Ins
Mixing in seasonal ingredients can elevate your cookies. Try adding chopped dried fruits like apricots or cranberries for a chewy texture. You can also throw in some nuts for a delightful crunch! Just be sure to adjust the sweetness accordingly, as these add-ins can enhance the flavor profile.
Creative Toppings
Don’t limit yourself to just icing! Consider using melted chocolate, candy melts, or even yogurt coating for a different finish. You can dip half the cookie in chocolate and then sprinkle with crushed nuts or coconut for a deliciously textured treat. The options are endless!
With these variations, you can keep your spring decorated cookies exciting and new every time you bake. So grab your cookie cutters, gather those colorful sprinkles, and let your imagination run wild! Happy baking!
Nutritional Information
Before you dive into these delightful spring decorated cookies, it’s good to know what you’re indulging in! Just remember, nutritional values can vary based on the specific ingredients and brands you choose. The numbers below are estimates based on a standard recipe, so keep that in mind as you enjoy your creations!
- Serving Size: 1 cookie
- Calories: 150
- Total Fat: 7g
- Saturated Fat: 4g
- Unsaturated Fat: 2g
- Trans Fat: 0g
- Cholesterol: 20mg
- Sodium: 60mg
- Total Carbohydrates: 20g
- Dietary Fiber: 0g
- Sugars: 10g
- Protein: 1g
These cookies are a sweet treat, perfect for sharing during spring celebrations! Just remember to enjoy them in moderation as part of a balanced diet. Happy baking and snacking!
FAQ About Spring Decorated Cookies
Got questions about making these delightful spring decorated cookies? Don’t worry, I’ve got you covered! Here are some common inquiries that come up, along with my best tips to help you succeed.
How should I store my cookies?
To keep your spring decorated cookies fresh and delicious, store them in an airtight container at room temperature. They’ll stay good for about a week, but trust me, they probably won’t last that long! If you need to keep them longer, you can freeze them. Just make sure they’re completely cooled and decorated before placing them in a freezer-safe container. They’ll be great for up to three months!
Can I substitute ingredients?
Absolutely! If you’re low on all-purpose flour, you can use a gluten-free blend, but keep in mind it might change the texture slightly. For a dairy-free option, try using coconut oil or a vegan butter substitute instead of unsalted butter. You can also swap out granulated sugar for coconut sugar or use a sugar alternative, just be sure to check the conversion ratios!
What’s the secret to perfect royal icing?
Ah, royal icing—the colorful star of your decorated cookies! The key to achieving the right consistency is to start with fresh egg whites or meringue powder. Mix it with powdered sugar until it holds stiff peaks for outlining and a slightly thinner version for flooding your cookies. If you want to color the icing, add gel food coloring, which won’t alter the consistency as much as liquid coloring. And remember, cover any unused icing with a damp cloth to prevent it from drying out!
Can I make these cookies ahead of time?
You sure can! You can bake the cookies a few days in advance and store them as mentioned above. Just wait to decorate until you’re ready to serve them. This way, the icing will be fresh and vibrant when it’s time to impress your guests!
These tips should help you navigate any cookie-making challenges. Enjoy the process, and happy baking! Your colorful spring decorated cookies are going to be a hit!
Why You’ll Love This Recipe
- Bright and Colorful: These spring decorated cookies are a visual delight, bringing a splash of color to any gathering and instantly lifting spirits.
- Perfect for Any Occasion: Whether it’s Easter, a birthday party, or just a sunny afternoon, these cookies fit right in and are sure to impress your guests.
- Fun and Creative Decorating: The decorating process is a joy! You can unleash your creativity with various colors and designs, making each cookie unique.
- Simple Ingredients: With straightforward ingredients and easy-to-follow steps, this recipe is perfect for bakers of all levels. You don’t need to be a pro to create something amazing!
- Great for Quality Time: Making and decorating these cookies is a wonderful way to bond with family and friends, creating sweet memories along the way.
- Versatile Recipe: Feel free to experiment with different shapes, flavors, and themes, keeping your cookie game fresh and exciting every time!

Spring Decorated Cookies That Spark Joy in Every Bite
- Total Time: 1 hour
- Yield: 24 cookies 1x
- Diet: Vegetarian
Description
Colorful cookies decorated for spring celebrations.
Ingredients
- 2 3/4 cups all-purpose flour
- 1 teaspoon baking powder
- 1/2 teaspoon salt
- 1 cup unsalted butter, softened
- 1 1/2 cups granulated sugar
- 1 egg
- 1 teaspoon vanilla extract
- 2 cups royal icing
- Food coloring (various colors)
Instructions
- Preheat your oven to 350°F (175°C).
- In a bowl, whisk together flour, baking powder, and salt.
- In a separate bowl, cream butter and sugar until smooth.
- Add egg and vanilla, mixing well.
- Gradually add dry ingredients, mixing until combined.
- Roll dough into balls and place on a baking sheet.
- Bake for 10-12 minutes until edges are golden.
- Let cookies cool completely on a wire rack.
- Prepare royal icing and divide into bowls for coloring.
- Decorate cooled cookies with icing as desired.
Notes
- Store cookies in an airtight container.
- Use different shapes for various spring themes.
- Allow icing to set completely before stacking cookies.
- Prep Time: 30 minutes
- Cook Time: 12 minutes
- Category: Dessert
- Method: Baking
- Cuisine: American
Nutrition
- Serving Size: 1 cookie
- Calories: 150
- Sugar: 10g
- Sodium: 60mg
- Fat: 7g
- Saturated Fat: 4g
- Unsaturated Fat: 2g
- Trans Fat: 0g
- Carbohydrates: 20g
- Fiber: 0g
- Protein: 1g
- Cholesterol: 20mg
Keywords: spring decorated cookies, spring cookies, decorated cookies, cookie recipes


