
Spring is here, and that means it’s time for vibrant, colorful creations in the kitchen! I absolutely adore making spring cupcakes, not just for their delightful flavors, but for the sheer joy they bring to any gathering. Picture this: a sunny afternoon, flowers blooming, and a plate of beautifully frosted cupcakes that look like a garden in full bloom. That was the scene at my niece’s birthday party last year, where these little treats stole the show!
There’s something so special about the light, fluffy texture of these cupcakes, paired with a swirl of bright frosting that screams “celebrate!” Whether you’re hosting a spring picnic, a baby shower, or just looking to brighten someone’s day, these cupcakes are the perfect way to welcome the season. Trust me, once you bite into one, you’ll be hooked on their charm and deliciousness!
Ingredients List
Let’s gather everything we need to whip up these delightful spring cupcakes! Here’s what you’ll need:
- 1 1/2 cups all-purpose flour: This is the base for our cupcakes, giving them that lovely structure. Make sure to spoon the flour into your measuring cup and level it off for the best results!
- 1 cup granulated sugar: This adds sweetness and helps create that tender crumb we’re after. It’s the perfect partner for our other ingredients!
- 1/2 cup unsalted butter: Softened to room temperature, this is where the richness comes from. It’s crucial for that moist texture, so don’t skip this step!
- 2 large eggs: These not only provide moisture but also help bind everything together. Make sure they’re at room temperature for easier mixing!
- 1/2 cup milk: This helps keep our cupcakes moist. You can use whole, 2%, or even almond milk if you prefer a dairy-free option!
- 2 teaspoons baking powder: This is our rising agent, making sure our cupcakes are fluffy and light. Fresh baking powder works best, so check the expiration date!
- 1 teaspoon vanilla extract: A must for adding that warm, comforting flavor. Always opt for pure vanilla if you can—it makes a huge difference!
- 1/2 teaspoon salt: Don’t skip the salt! It enhances all the flavors, balancing the sweetness perfectly.
- Food coloring (optional): If you want to make your cupcakes even more festive, a few drops of food coloring can transform your frosting into a rainbow of joy!
- Frosting of your choice: Whether it’s classic buttercream, cream cheese frosting, or something fruity, the topping is where you can really get creative!
Gather these ingredients, and let’s get ready to bring some springtime magic into our kitchens!
How to Prepare Spring Cupcakes
Now that we have all our ingredients lined up, it’s time to dive into the fun part—baking these delightful spring cupcakes! Follow these simple steps, and you’ll have a batch of fluffy, colorful treats in no time.
Step-by-Step Instructions
- Preheat the oven: First things first, preheat your oven to 350°F (175°C). This step is crucial because starting with a hot oven helps your cupcakes rise beautifully!
- Cream the butter and sugar: In a large mixing bowl, cream together the softened butter and granulated sugar. Use a hand mixer or stand mixer on medium speed for about 2-3 minutes until the mixture is light and fluffy. You want it to look pale and airy—this is where your cupcakes get their lovely texture!
- Add the eggs: Crack in the eggs, one at a time, mixing well after each addition. Don’t rush this part—taking your time helps incorporate air into the batter, making it fluffy. You’ll see the mixture come together beautifully!
- Incorporate the milk and vanilla: Now, pour in the milk and add the vanilla extract. Mix on low speed until just combined. You don’t want to overmix—just enough to blend everything together!
- Combine dry ingredients: In a separate bowl, whisk together the flour, baking powder, and salt. This step ensures even distribution of the leavening agent and helps prevent clumps.
- Mix dry and wet ingredients: Gradually add the dry mixture to the wet ingredients, mixing on low speed. Alternate between adding a little flour mixture, then a little wet mixture until everything is combined. Remember, don’t overmix—stop as soon as you see no more flour streaks!
- Add food coloring (if desired): If you’re feeling creative, now’s the time to add a few drops of food coloring! Gently fold it into the batter until you achieve your desired shade. This is where the fun begins!
- Prepare cupcake liners: Line a 12-cup muffin pan with cupcake liners. This makes cleanup a breeze and gives your cupcakes that lovely, polished look!
- Fill the liners: Pour or scoop the batter into the prepared cupcake liners. Fill each about two-thirds full for the best rise. This is important—too full, and they’ll overflow; too little, and they won’t rise enough!
- Bake: Place the pan in the preheated oven and bake for 18-20 minutes. You’ll know they’re done when a toothpick inserted into the center comes out clean or with a few moist crumbs. Oh, and don’t forget to set a timer!
- Cool: Once baked, remove the cupcakes from the oven and let them cool in the pan for about 5 minutes. Then, carefully transfer them to a wire rack to cool completely before frosting. This step is key—frosting warm cupcakes can make a mess!
And there you have it—your spring cupcakes are all set to be frosted and decorated! These steps are straightforward, but if you take your time and enjoy the process, you’ll end up with a batch that’s not only delicious but also full of love and springtime cheer!
Why You’ll Love This Recipe
- Quick and Easy: These spring cupcakes come together in just about 40 minutes! Perfect for when you need a sweet treat in a hurry.
- Flavorful: With a light and fluffy texture, these cupcakes are bursting with sweetness and a hint of vanilla—just the way a cupcake should be!
- Customizable: You can get as creative as you like with the frosting and decorations. Whether you go for classic buttercream or something fruity, it’s all up to you!
- Perfect for Any Occasion: Whether it’s a spring picnic, birthday party, or just a fun afternoon treat, these cupcakes fit right in with any celebration!
- Seasonal Appeal: The vibrant colors and festive frosting make these cupcakes a delightful addition to your spring gatherings, bringing joy and cheer to your table!
Tips for Success
Getting those spring cupcakes just right is all about a few key tips that I’ve learned through trial and error. Trust me, these little tricks can make a huge difference!
- Use Room Temperature Ingredients: Make sure your butter, eggs, and milk are at room temperature before you start baking. This helps them mix together smoothly, creating a uniform batter that results in fluffy cupcakes!
- Don’t Overmix: When combining wet and dry ingredients, mix just until everything is combined. Overmixing can lead to dense cupcakes—yuck! You want them light and airy, so stop mixing as soon as you don’t see any flour streaks.
- Frosting Tips: When it comes to frosting, wait until your cupcakes are completely cool. If you frost them while they’re warm, the frosting will melt and slide right off. For a clean look, use a piping bag to swirl your frosting on top—it’s like giving your cupcakes a little hat!
- Experiment with Flavors: Don’t be afraid to switch things up! Try adding lemon zest to the batter for a zesty twist or infuse your frosting with a bit of almond extract. The possibilities are endless, and it keeps things exciting!
- Decorate with Fresh Fruits or Edible Flowers: To really embrace the spring theme, top your cupcakes with fresh berries or edible flowers. Not only do they look gorgeous, but they add a delightful burst of flavor!
With these tips in your baking arsenal, you’re all set to create the most scrumptious and visually stunning spring cupcakes! Enjoy the process and don’t forget to have fun while you’re at it!
Variations on Spring Cupcakes
The beauty of spring cupcakes lies not just in their delightful base but also in the endless possibilities for customization! Here are some fun ideas to elevate your cupcakes and make them even more special for any spring occasion:
- Different Frosting Flavors: While classic buttercream is always a hit, why not try something different? Lemon or strawberry buttercream can add a refreshing zing, or whipped cream cheese frosting for a tangy twist!
- Fruit Add-Ins: For a little surprise in each bite, fold in some fresh blueberries or raspberries into the batter. They add a pop of color and a burst of natural sweetness that pairs beautifully with the cupcake texture!
- Chocolate Delight: If you’re a chocolate lover, consider swapping out 1/4 cup of flour for cocoa powder for a chocolate version of your spring cupcakes. Top with chocolate ganache or a rich chocolate frosting for a decadent twist!
- Nutty Flavor: Add a handful of chopped nuts, such as walnuts or pecans, to the batter for a delightful crunch. Just make sure to chop them finely so they blend well with the cupcake’s soft texture!
- Seasonal Decorations: Dress up your cupcakes with seasonal decorations! Use pastel-colored sprinkles, edible flowers, or even themed toppers that reflect the occasion. They not only look adorable but also add a festive touch!
With these variations, you can turn your basic spring cupcakes into a unique treat that reflects your personality and style. Get creative, and let your imagination run wild—after all, spring is all about blossoming and trying new things!
Storage & Reheating Instructions
Once you’ve baked and frosted your delightful spring cupcakes, you’ll want to make sure they stay fresh and tasty for as long as possible! Here’s how to store them and even how to warm them up if you prefer a cozy treat.
Storing Your Spring Cupcakes
To keep your cupcakes at their best, follow these simple storage tips:
- Airtight Container: Place your leftover cupcakes in an airtight container. This helps maintain their moisture and keeps them from drying out. If you have frosted cupcakes, you might want to place a piece of wax paper between layers to avoid smudging the frosting!
- Room Temperature vs. Refrigeration: If you plan to eat them within a couple of days, storing them at room temperature is perfectly fine. However, if you want to keep them longer (more than 3 days), pop them in the fridge. Just be aware that refrigeration can sometimes dry them out a bit.
- Freezing for Later: If you want to save some for a later date, freezing is a fantastic option! Wrap each cupcake tightly in plastic wrap, then place them in a freezer-safe bag or container. They’ll stay fresh for about 2-3 months. When you’re ready to enjoy them, let them thaw in the fridge overnight before bringing them to room temperature.
Reheating Your Cupcakes
If you prefer your spring cupcakes warm, here’s how to reheat them without losing that lovely texture:
- Microwave Method: Place a cupcake on a microwave-safe plate and cover it with a damp paper towel to retain moisture. Heat it for about 10-15 seconds. Check to see if it’s warm enough—if not, give it a few more seconds. Be careful not to overheat, or you’ll end up with a rubbery treat!
- Oven Method: For a more evenly warmed cupcake, preheat your oven to 350°F (175°C). Place the cupcakes on a baking sheet and heat for about 5-7 minutes. This method helps revive the fluffy texture and makes them taste freshly baked!
With these storage and reheating tips, you can enjoy your spring cupcakes at their best, whether you’re indulging right away or saving them for a sweet treat later on. Happy baking and savoring!
Nutritional Information
As you indulge in these delightful spring cupcakes, it’s nice to know what you’re treating yourself to! Here are the typical nutritional values for one cupcake. Keep in mind that these are estimates and can vary based on specific ingredients and portion sizes:
- Calories: 200
- Fat: 8g
- Saturated Fat: 5g
- Unsaturated Fat: 2g
- Trans Fat: 0g
- Carbohydrates: 30g
- Fiber: 1g
- Sugar: 15g
- Protein: 2g
- Cholesterol: 30mg
- Sodium: 150mg
These numbers are a great starting point if you’re keeping an eye on your dietary intake, but don’t forget to enjoy every sweet moment of your baking adventure! Happy spring baking!
FAQ Section
Got questions about making the perfect spring cupcakes? You’re not alone! Here are some common queries I’ve come across, along with my answers to help you out on your baking journey.
- Q1: Can I use whole wheat flour instead of all-purpose flour?
Absolutely! You can substitute whole wheat flour for a healthier option. Just keep in mind that it may result in a denser texture, so you might want to use a mix of both for the best of both worlds! - Q2: How can I make my frosting really colorful?
To achieve vibrant frosting, use gel food coloring instead of liquid dyes. Gel coloring gives you more control and intensity, so just a little goes a long way. Mix it in gradually until you reach your desired shade! - Q3: What’s the best way to store leftover cupcakes?
The best way to store your leftover spring cupcakes is in an airtight container at room temperature for up to three days. If you plan to keep them longer, pop them in the fridge or freeze them. Just remember to wrap them well to maintain their moisture! - Q4: Can I make these cupcakes ahead of time?
Definitely! You can bake and cool the cupcakes a day in advance. Just store them in an airtight container until you’re ready to frost them. They actually taste great the next day, allowing the flavors to meld! - Q5: What are some great flavor combinations for spring cupcakes?
Oh, there are so many! You can try lemon and raspberry, strawberry and cream cheese, or even coconut and pineapple for a tropical twist. The sky’s the limit, so feel free to get creative!
Hopefully, these answers clear up some of your questions and inspire you to dive into your cupcake-making adventure with confidence. Happy baking!
Print
spring cupcakes: 5 Joyful Recipes for a Sweet Celebration
- Total Time: 40 minutes
- Yield: 12 cupcakes 1x
- Diet: Vegetarian
Description
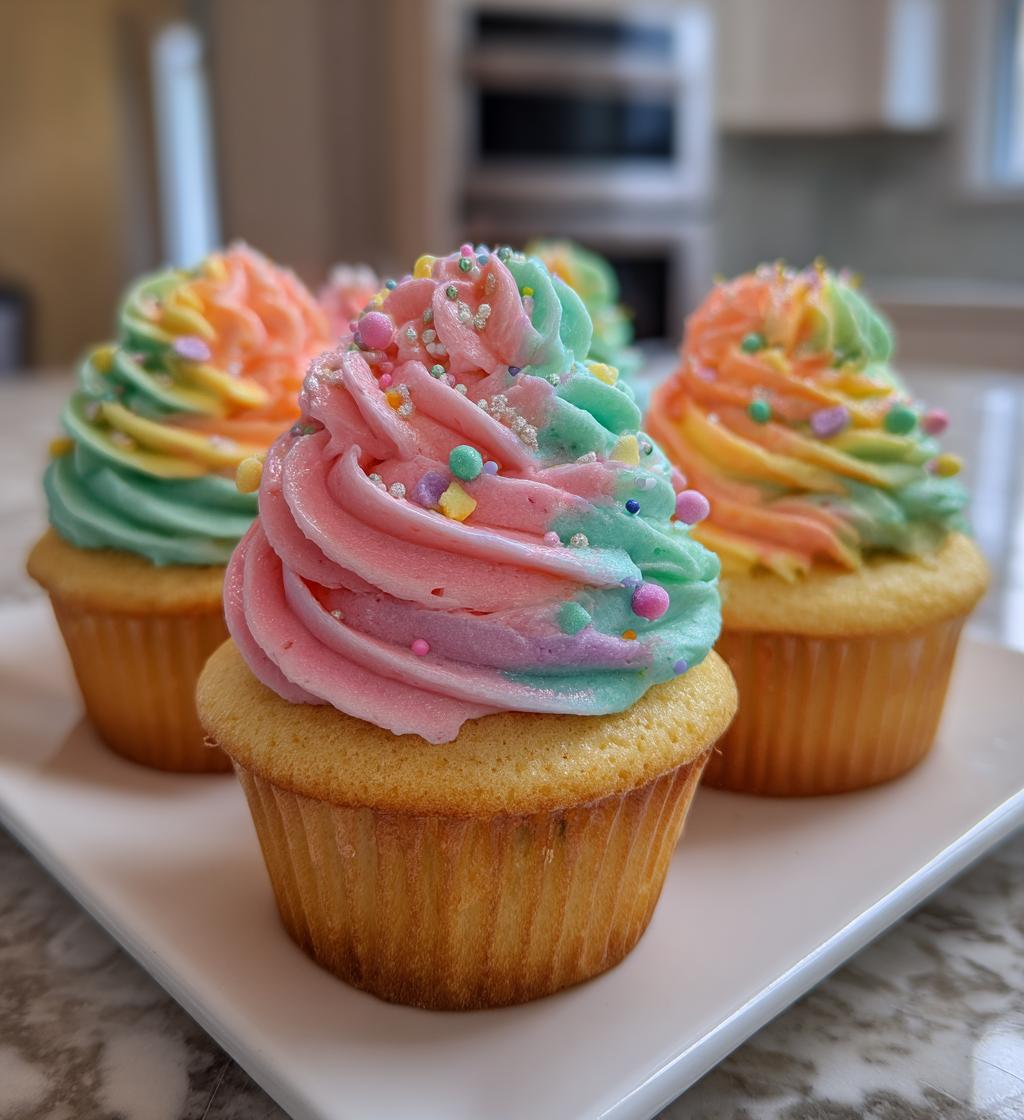
Delicious spring-themed cupcakes topped with colorful frosting.
Ingredients
- 1 1/2 cups all-purpose flour
- 1 cup granulated sugar
- 1/2 cup unsalted butter
- 2 large eggs
- 1/2 cup milk
- 2 teaspoons baking powder
- 1 teaspoon vanilla extract
- 1/2 teaspoon salt
- Food coloring (optional)
- Frosting of your choice
Instructions
- Preheat the oven to 350°F (175°C).
- In a bowl, cream the butter and sugar together.
- Add eggs one at a time, mixing well after each.
- Stir in milk and vanilla extract.
- In another bowl, combine flour, baking powder, and salt.
- Gradually add the dry ingredients to the wet mixture.
- If desired, add food coloring and mix until combined.
- Pour the batter into cupcake liners.
- Bake for 18-20 minutes or until a toothpick comes out clean.
- Let cool and frost as desired.
Notes
- Store cupcakes in an airtight container.
- Use seasonal decorations for a festive touch.
- Experiment with different flavors of frosting.
- Prep Time: 20 minutes
- Cook Time: 20 minutes
- Category: Dessert
- Method: Baking
- Cuisine: American
Nutrition
- Serving Size: 1 cupcake
- Calories: 200
- Sugar: 15g
- Sodium: 150mg
- Fat: 8g
- Saturated Fat: 5g
- Unsaturated Fat: 2g
- Trans Fat: 0g
- Carbohydrates: 30g
- Fiber: 1g
- Protein: 2g
- Cholesterol: 30mg
Keywords: spring cupcakes, dessert, baking


