
Ah, spring! It’s that magical time of year when everything seems to bloom, and the world feels a bit brighter. I remember my first spring baking session – the sun was shining, birds were chirping, and I had the urge to create something joyful. That’s when I discovered the delight of making spring cookies. Every bite of these colorful, sprinkle-filled treats brings a smile to my face, reminding me of those festive gatherings with family and friends. I’d set up the kitchen with bowls of flour, butter, and a rainbow of sprinkles, ready to whip up a batch that would make everyone cheer!
Baking these spring cookies isn’t just about the final product; it’s about the joy of mixing and creating something beautiful. The sweet aroma wafting through the air as they bake is simply irresistible. These cookies are perfect for any occasion, whether you’re celebrating Easter, a spring birthday, or just the arrival of warmer weather. Trust me; once you take a bite of these delightful spring cookies, you’ll understand why they hold such a special place in my heart. Let’s dive into the fun of baking them together!
Ingredients for Spring Cookies
To whip up these delightful spring cookies, you’ll need a few simple ingredients that come together beautifully. Here’s what you’ll need:
- 2 cups all-purpose flour
- 1 cup granulated sugar
- 1/2 cup unsalted butter, softened
- 1 large egg
- 1 teaspoon vanilla extract
- 1/2 teaspoon baking powder
- 1/4 teaspoon salt
- 1 cup colorful sprinkles
These ingredients blend perfectly to create cookies that are not only delicious but also a feast for the eyes! The colorful sprinkles are like tiny confetti, bringing that festive spirit straight to your cookie platter. So gather these goodies, and let’s get ready to bake some joy!
How to Prepare Spring Cookies
Getting ready to bake these spring cookies is half the fun, and I can’t wait to guide you through the process! Trust me, you’ll be amazed at how quickly these delightful treats come together. Let’s get started!
Step-by-Step Instructions
First things first, you’ll want to preheat your oven to 350°F (175°C). This step is crucial because it ensures your cookies bake evenly and come out perfectly golden. While the oven warms up, you can start mixing your ingredients!
In a large mixing bowl, cream together the softened unsalted butter and granulated sugar. I love using a wooden spoon for this part; it just feels more personal, don’t you think? Mix until the mixture is light and fluffy, which usually takes about 2-3 minutes. This step is important because it creates air pockets that will give your cookies that lovely texture.
Next, add in the large egg and vanilla extract. Mix it well until everything is nicely combined. The smell of vanilla will start to fill your kitchen, and honestly, it’s one of my favorite parts of baking!
In another bowl, sift together the all-purpose flour, baking powder, and salt. Sifting helps to aerate the flour and mix the dry ingredients evenly. Then, gradually add this dry mixture into your wet ingredients. I like to do this in three parts, mixing gently after each addition. This keeps the dough from becoming too dense; you want it to stay light and fluffy!
Once everything is mixed together nicely, it’s time for the fun part: folding in the colorful sprinkles! Just be gentle as you fold them in; you want to keep that lovely texture while making sure each cookie is bursting with color.
Now, it’s time to drop those tablespoon-sized balls of dough onto a baking sheet lined with parchment paper. Make sure to leave some space between each ball because they will spread a bit while baking. I usually get about 24 cookies from this recipe, but it can vary based on how big you scoop them!
Pop the baking sheet into your preheated oven and bake for 10-12 minutes, or until the edges are lightly golden. Keep an eye on them – you want that perfect balance of chewy and crispy! Once they’re done, let them cool on the baking sheet for a few minutes before transferring them to a wire rack. This will help them set properly.
And that’s it! Once they’re cool, you’ll have a batch of beautiful spring cookies ready to share (or not, no judgment here!). Enjoy the fruits of your labor, and watch everyone’s faces light up when they take that first bite!
Why You’ll Love These Spring Cookies
- Quick and Easy to Make: With just 15 minutes of prep time, you’ll be on your way to cookie bliss in no time!
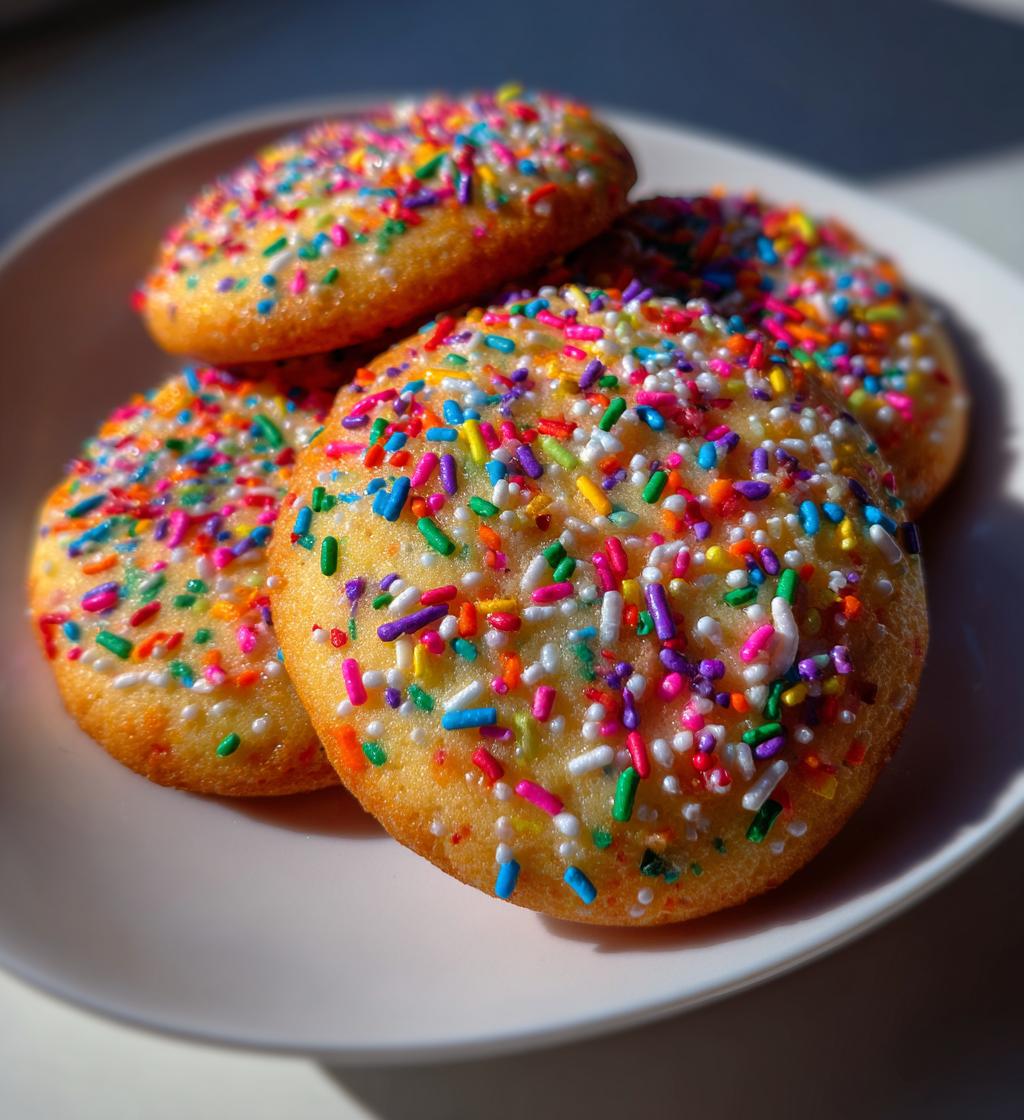
- Visually Stunning: Those colorful sprinkles make every cookie a little work of art, perfect for brightening up any gathering.
- Perfect for Any Occasion: Whether it’s a spring birthday, Easter celebration, or simply a sunny afternoon, these cookies fit right in.
- Fun to Customize: You can switch up the sprinkles or add icing to make them uniquely yours. Get creative!
- Deliciously Irresistible: The delightful taste and texture will have everyone reaching for seconds (or thirds!).
Trust me, once you make these spring cookies, they’ll become a beloved treat in your home. They’re not just cookies; they’re a little slice of joy that brings people together!
Tips for Success with Spring Cookies
Now that you’re ready to dive into making these delightful spring cookies, let’s chat about some tips to ensure they turn out perfectly every time! I’ve learned a few tricks along the way that will help you achieve that ideal cookie consistency and flavor. Here’s what I recommend:
- Check Your Butter: Make sure your unsalted butter is softened but not melted. It should be at room temperature, which means it’s easy to cream with the sugar but still holds its shape. A good finger press should leave an indent without the butter being greasy.
- Don’t Overmix: When combining your dry and wet ingredients, mix just until they’re combined. Overmixing can lead to tough cookies because it develops the gluten in the flour. You want a light and fluffy dough, so be gentle!
- Watch the Baking Time: Every oven is a bit different, so keep an eye on your cookies as they bake. Start checking them at the 10-minute mark. You’re looking for lightly golden edges and a soft center. They’ll continue to firm up as they cool, so don’t worry if they seem a tad underbaked when you take them out!
- Experiment with Sprinkles: While colorful sprinkles are perfect for that spring flair, consider trying different types like chocolate sprinkles, or even edible glitter for a fun twist! Just make sure they’re all safe for baking. Some sprinkles may lose their color or shape in the oven, so test a few to see what you like best!
- Cool Properly: Allow your cookies to cool on the baking sheet for a few minutes before transferring them to a wire rack. This step helps them set and prevents them from breaking apart. If you try to move them too soon, you might end up with a messy situation!
With these tips in mind, you’ll be well on your way to baking the most delightful spring cookies! Remember, baking is all about having fun, so don’t stress too much. Enjoy the process and the delicious results!
Nutritional Information Disclaimer
When it comes to the nutritional information for these delightful spring cookies, it’s essential to note that values can vary based on the specific ingredients and brands you use. The calorie count and nutritional breakdown I’ve provided are estimates, but your homemade cookies might differ slightly. Factors like the type of butter or sugar can influence the final outcome. So, while you can enjoy these treats guilt-free, remember that nutrition is not an exact science, and it’s always a good idea to check your ingredient labels for the most accurate information!
FAQ About Spring Cookies
Got questions about making these delightful spring cookies? No worries, I’m here to help! Here are some common queries I’ve encountered, along with my tips for success:
Q1: Can I make these cookies ahead of time?
Absolutely! You can prepare the dough a day in advance. Just wrap it tightly in plastic wrap and store it in the fridge. When you’re ready to bake, let it sit at room temperature for about 10-15 minutes before scooping and baking. This way, you can enjoy fresh cookies whenever the craving strikes!
Q2: How should I store leftover spring cookies?
To keep your cookies fresh and tasty, store them in an airtight container at room temperature. They should stay delicious for about a week. If you want to keep them longer, consider freezing them! Just layer them with parchment paper in a freezer-safe container, and they’ll be good for up to three months. Thaw them at room temperature before enjoying!
Q3: Can I use different types of flour for this recipe?
While I recommend all-purpose flour for the best texture, you can experiment with other types, like whole wheat or gluten-free blends. Just keep in mind that different flours may affect the texture and taste, so results can vary. You might need to adjust the liquid slightly, depending on the flour you choose!
Q4: What if I want to add more flavors to my spring cookies?
Get creative! You can add in some lemon zest or almond extract for a lovely twist. Chocolate chips or nuts are also fantastic additions. Just remember to keep the overall balance of wet and dry ingredients in check. Adding too much can change the dough consistency.
Q5: Can I decorate these cookies with icing?
Oh, definitely! A simple glaze or royal icing can take your spring cookies to the next level. Just make sure the cookies are completely cooled before decorating. You can use colorful icing to match the sprinkles for a fun, festive look that’s perfect for any occasion!
With these FAQs covered, you’re all set to bake the best spring cookies ever! If you have more questions, feel free to reach out – I love sharing the joy of baking!
Storage & Reheating Instructions
Once you’ve baked your delightful spring cookies, you’ll want to enjoy them at their best! To store any leftovers, simply place them in an airtight container at room temperature. They’ll stay fresh and tasty for about a week, which is perfect for snacking throughout the week. If you want to keep them longer, you can freeze the cookies! Just layer them with parchment paper in a freezer-safe container, and they’ll be good for up to three months. When you’re ready to enjoy, let them thaw at room temperature for about 30 minutes.
If you prefer your cookies warm, you can pop them in the microwave for about 10-15 seconds or warm them in the oven at 350°F (175°C) for a few minutes. This will revive that delicious, fresh-baked taste, making each bite feel like a special treat!
Call to Action
I’d love to hear about your adventures in baking these delightful spring cookies! Have you tried any fun variations or decorations? Maybe you’ve got a story to share about how they brightened a gathering. Please leave a comment below and let me know how your cookies turned out! If you enjoyed this recipe, consider giving it a rating – it really helps others discover this little slice of joy. Happy baking, and let’s spread the love of spring cookies together!
Print
Spring Cookies That Will Brighten Your Day: 5 Simple Steps
- Total Time: 27 minutes
- Yield: 24 cookies 1x
- Diet: Vegetarian
Description
Delicious spring-themed cookies perfect for any occasion.
Ingredients
- 2 cups all-purpose flour
- 1 cup granulated sugar
- 1/2 cup unsalted butter, softened
- 1 large egg
- 1 teaspoon vanilla extract
- 1/2 teaspoon baking powder
- 1/4 teaspoon salt
- 1 cup colorful sprinkles
Instructions
- Preheat your oven to 350°F (175°C).
- In a bowl, cream together the butter and sugar.
- Add in the egg and vanilla extract, mixing well.
- In another bowl, mix flour, baking powder, and salt.
- Gradually add the dry ingredients to the wet mixture.
- Fold in the sprinkles.
- Drop tablespoon-sized balls of dough onto a baking sheet.
- Bake for 10-12 minutes or until edges are lightly golden.
- Let cool before serving.
Notes
- Store cookies in an airtight container.
- Try using different types of sprinkles for variety.
- These cookies can be decorated with icing for more fun.
- Prep Time: 15 minutes
- Cook Time: 12 minutes
- Category: Dessert
- Method: Baking
- Cuisine: American
Nutrition
- Serving Size: 1 cookie
- Calories: 120
- Sugar: 8g
- Sodium: 50mg
- Fat: 5g
- Saturated Fat: 3g
- Unsaturated Fat: 1g
- Trans Fat: 0g
- Carbohydrates: 17g
- Fiber: 0g
- Protein: 1g
- Cholesterol: 15mg
Keywords: spring cookies, cookies, dessert, baking


