
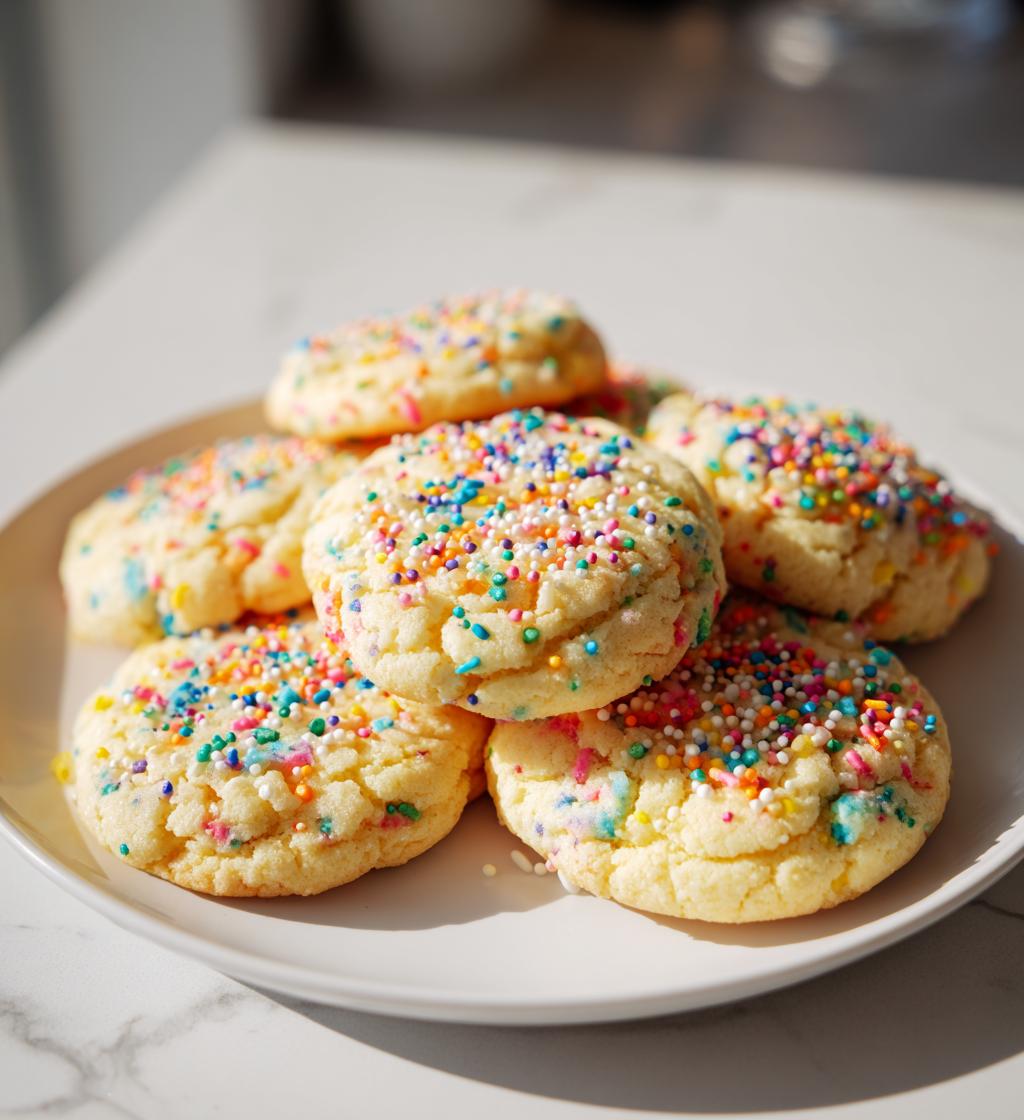
Oh, spring cookies! These little bites of happiness are the ultimate way to celebrate the vibrant season. Picture this: the sun is shining, flowers are blooming, and you’ve got a plate of colorful cookies that look just as cheerful as the day outside. They’re not just any cookies; they’re festive, fun, and packed with joy! I love making these cookies because they bring everyone together. Whether it’s a family gathering, a picnic in the park, or just a cozy afternoon at home, these delightful treats brighten up any occasion.
What’s really special about spring cookies is their lively colors—they’re like a sprinkle of sunshine in your mouth! Each bite is soft and chewy, bursting with sweetness and just enough crunch from the sprinkles. Plus, they’re super easy to whip up, which means you can spend less time in the kitchen and more time enjoying the sunshine with your loved ones. Trust me, once you bake a batch, you’ll find yourself making them again and again as the season rolls on. Let’s dive into the deliciousness!
Ingredients for Spring Cookies
Here’s everything you’ll need to make these delightful spring cookies! Gather these simple ingredients, and let’s get baking:
- 1 cup unsalted butter, softened: Make sure it’s at room temperature so it creams nicely with the sugar.
- 1 cup granulated sugar: This is what gives our cookies that sweet, delightful flavor.
- 2 large eggs: They should also be at room temperature for best results.
- 2 teaspoons vanilla extract: Pure vanilla is always the best choice for that lovely aroma and taste!
- 3 cups all-purpose flour: This is the base of our cookie dough, so measure carefully!
- 1 teaspoon baking soda: This will help our cookies rise just right.
- 1/2 teaspoon salt: A touch of salt enhances all the flavors beautifully.
- 1 cup colorful sprinkles: These add that festive touch! Feel free to use any variety you love.
With these ingredients ready, you’re just a few steps away from baking up a batch of springtime joy!
How to Prepare Spring Cookies
Now that you have your ingredients ready, let’s get to the fun part—baking these delightful spring cookies! Follow my step-by-step instructions, and you’ll have a batch of cheerful cookies in no time.
Preheat the Oven
First things first: preheat your oven to 350°F (175°C). This step is crucial because it ensures that your cookies bake evenly and develop that lovely golden edge we all adore. Trust me, starting with a hot oven makes all the difference!
Cream Butter and Sugar
In a large bowl, cream together the softened butter and granulated sugar until the mixture is smooth and fluffy. I like to use a hand mixer for this part, but a sturdy wooden spoon works just as well if you’re feeling old-school! This step is super important because it creates tiny air pockets in the batter, which help give your cookies that perfect soft texture. Aim for about 2-3 minutes of mixing until it looks light and airy.
Add Eggs and Vanilla
Next, it’s time to add the eggs—but do it one at a time. This helps the mixture emulsify properly, which means your cookies will have a much better texture. After each egg, mix until fully combined and then add the vanilla extract. The aroma is just heavenly, and it really elevates the flavor of your cookies!
Combine Dry Ingredients
In another bowl, whisk together the flour, baking soda, and salt. This step ensures that the baking soda is evenly distributed, which is key for those perfect, puffy cookies. Plus, mixing the dry ingredients separately helps prevent any clumps from forming in your dough.
Mix Dry and Wet Ingredients
Now comes the fun part! Gradually add the dry ingredients to the wet mixture, mixing gently after each addition. I like to do this in three parts—starting with the dry, then a bit of the wet, and so on. This technique prevents overmixing, which can lead to tough cookies. Just mix until you see no more flour streaks, and you’re good to go!
Fold in the Sprinkles
Time to add the stars of the show—those colorful sprinkles! Gently fold them into the dough with a spatula. Be careful not to overmix here; we want those sprinkles to stay vibrant and not get crushed. Just a few folds until they’re evenly distributed, and you’ll have a cheerful batter ready for baking!
Shape and Bake Cookies
Using a tablespoon, drop rounded mounds of dough onto ungreased baking sheets, making sure to leave some space between each cookie to allow for spreading. Bake in your preheated oven for about 10-12 minutes, or until the edges are golden but the centers still look a bit soft. They’ll firm up as they cool!
Cooling the Cookies
Once baked, remove the cookies from the oven and let them sit on the baking sheets for a couple of minutes before transferring them to wire racks to cool completely. This step is essential because it allows the cookies to set without becoming too hard. Plus, the smell wafting through your kitchen? Absolutely irresistible!
Tips for Success
Before you dive into baking, here are some of my top tips to ensure your spring cookies turn out absolutely perfect every time!
- Storage Secrets: Keep your cookies fresh by storing them in an airtight container at room temperature. They’ll stay soft and chewy for about a week—if they last that long!
- Decorating Ideas: Want to take your cookies to the next level? Try drizzling some icing on top or adding a sprinkle of extra colorful sprinkles right after baking. It’s a simple way to make them even more festive!
- Experiment with Flavors: Don’t be afraid to switch things up! Add a bit of almond extract instead of vanilla, or toss in some mini chocolate chips for a fun twist. The possibilities are endless!
- Chilling the Dough: If you have time, consider chilling the dough for about 30 minutes before baking. This helps the flavors develop and can result in thicker cookies that hold their shape better.
- Watch the Baking Time: Keep an eye on your cookies as they bake. Ovens can vary, and you want to catch them just as they start to turn golden at the edges but still look soft in the center.
With these tips in your back pocket, you’ll be well on your way to creating the most delightful spring cookies that everyone will love. Happy baking!
Nutritional Information
Here’s the estimated nutritional breakdown for one of these delightful spring cookies. Keep in mind that these values can vary slightly depending on your specific ingredients and portion sizes, but this will give you a good idea of what to expect:
- Calories: 150
- Fat: 6g
- Saturated Fat: 4g
- Unsaturated Fat: 2g
- Trans Fat: 0g
- Sodium: 100mg
- Sugar: 10g
- Carbohydrates: 22g
- Fiber: 0g
- Protein: 2g
- Cholesterol: 30mg
These cookies are a sweet treat for any spring celebration, but don’t worry if you indulge a little—after all, life is all about balance and enjoying those special moments with loved ones!
FAQ About Spring Cookies
Got questions about spring cookies? Don’t worry, I’ve got you covered! Here are some common inquiries I often hear, along with my trusty answers to help you bake with confidence.
Can I Use Different Types of Sprinkles?
Absolutely! The beauty of these spring cookies is their versatility, especially when it comes to sprinkles. You can use classic rainbow sprinkles for that vibrant, festive look, or switch it up with pastel-colored sprinkles for a more subtle touch. Feel free to experiment with themed sprinkles, like flowers or bunnies, for holidays or special occasions. Just remember, the key is to choose sprinkles that you love—they’re what make these cookies so cheerful!
How Should I Store Leftover Cookies?
Storing your leftover cookies properly is essential to keeping them fresh and delicious. I recommend placing them in an airtight container at room temperature. They should stay soft and chewy for about a week. If you want to keep them for a longer time, consider layering them with parchment paper to avoid sticking. Just be warned, they might not last that long if everyone gets a whiff of the sweet aroma!
Can I Freeze These Cookies?
Yes, you can definitely freeze these spring cookies! If you want to make a batch ahead of time, simply let the cookies cool completely, then place them in a single layer on a baking sheet and pop them in the freezer for about an hour. Once they’re frozen, transfer them to an airtight container or a zip-top bag for longer storage. They can last up to three months in the freezer! When you’re ready to enjoy, just let them thaw at room temperature, and they’ll taste just as delightful as the day you baked them!
Why You’ll Love This Recipe
- Quick Preparation: With just 15 minutes of prep time, you can have these delicious cookies baking in no time. Perfect for when you need a sweet treat in a hurry!
- Festive Colors: These cookies are a feast for the eyes! The colorful sprinkles make them the ideal treat for any spring celebration, adding a vibrant touch to your dessert table.
- Delicious Taste: Each bite is a delightful combination of soft, chewy cookie and sweet bursts of flavor from the sprinkles. They’re sure to satisfy any sweet tooth!
- Versatile and Customizable: You can easily swap out the sprinkles for your favorite flavors or add in extras like chocolate chips or nuts. The possibilities are endless!
- Perfect for Sharing: With a yield of 24 cookies, there’s plenty to share with family and friends—ideal for gatherings, picnics, or just a cozy afternoon at home.

Spring Cookies: 7 Joyful Treats for Every Celebration
- Total Time: 27 minutes
- Yield: 24 cookies 1x
- Diet: Vegetarian
Description
Delicious cookies perfect for springtime celebrations.
Ingredients
- 1 cup unsalted butter, softened
- 1 cup granulated sugar
- 2 large eggs
- 2 teaspoons vanilla extract
- 3 cups all-purpose flour
- 1 teaspoon baking soda
- 1/2 teaspoon salt
- 1 cup colorful sprinkles
Instructions
- Preheat your oven to 350°F (175°C).
- In a large bowl, cream together the butter and sugar until smooth.
- Beat in the eggs one at a time, then stir in the vanilla.
- In another bowl, whisk together the flour, baking soda, and salt.
- Gradually add the dry ingredients to the wet mixture.
- Fold in the sprinkles.
- Drop rounded tablespoons of dough onto ungreased baking sheets.
- Bake for 10-12 minutes or until the edges are golden.
- Cool on wire racks.
Notes
- Store cookies in an airtight container.
- These cookies can be decorated with icing.
- Try using different types of sprinkles for variety.
- Prep Time: 15 minutes
- Cook Time: 12 minutes
- Category: Dessert
- Method: Baking
- Cuisine: American
Nutrition
- Serving Size: 1 cookie
- Calories: 150
- Sugar: 10g
- Sodium: 100mg
- Fat: 6g
- Saturated Fat: 4g
- Unsaturated Fat: 2g
- Trans Fat: 0g
- Carbohydrates: 22g
- Fiber: 0g
- Protein: 2g
- Cholesterol: 30mg
Keywords: spring cookies, festive cookies, colorful cookies


