
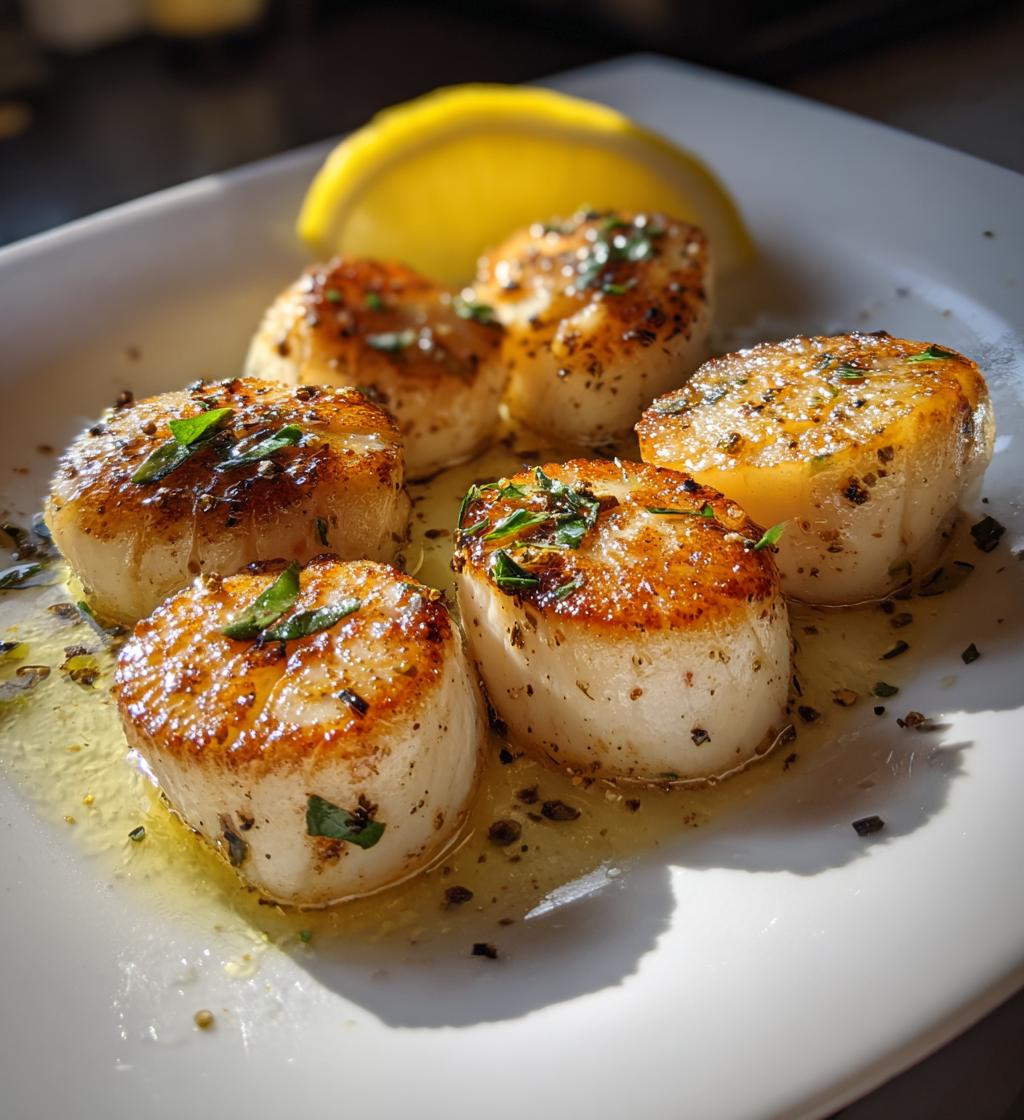
Oh, let me tell you about seared scallops! They’re like little treasures from the sea that transform any meal into a fancy feast, yet they’re incredibly quick to whip up. I remember the first time I made them for a cozy dinner with friends. The moment those golden-brown scallops hit the plate, everyone’s eyes lit up! And the aroma? Wow! It’s like the ocean came dancing into my kitchen. Honestly, seared scallops are one of my go-to dishes when I want to impress without spending hours slaving away. With just a handful of ingredients and only a few minutes in the pan, you’ll achieve that elegant presentation that makes it look like you’ve been cooking all day. Trust me, once you try this dish, you’ll be dreaming about it for days! So let’s dive into how to make these delicious gems shine on your dinner table.
Ingredients List
Here’s what you’ll need to make those stunning seared scallops. I promise, it’s a simple lineup that packs a punch of flavor!
- 1 pound sea scallops: Look for fresh, plump scallops. If you can, get them from a reputable fishmonger. Trust me, fresh makes all the difference!
- 2 tablespoons olive oil: Extra virgin olive oil is best for its rich flavor. It’ll help create that beautiful golden crust on your scallops.
- Salt to taste: I love using coarse sea salt, as it adds a lovely crunch and enhances the natural sweetness of the scallops.
- Pepper to taste: Freshly cracked black pepper gives a delightful kick that balances the sweetness.
- 1 tablespoon butter: This is what really takes your dish to the next level! It adds richness and flavor that’s simply irresistible.
- 1 tablespoon lemon juice: Freshly squeezed is a must! It brightens up the dish and complements the scallops’ natural sweetness perfectly.
How to Prepare Seared Scallops
Now, let’s get cooking! Making seared scallops is easier than you might think, and I’m here to guide you through each step. Follow along, and you’ll have a stunning dish ready in no time!
- Pat the scallops dry: First things first, make sure your scallops are really dry! Use paper towels to gently pat them. This step is super important because moisture will keep your scallops from getting that gorgeous sear we want.
- Season them: Sprinkle both sides generously with salt and freshly cracked black pepper. Don’t be shy! This helps enhance their natural sweetness.
- Heat the skillet: Grab a skillet and heat 2 tablespoons of olive oil over medium-high heat. Let it get nice and hot – you want it shimmering but not smoking. This is where the magic begins!
- Add the scallops: Carefully place the scallops in the skillet in a single layer. You want to hear that satisfying sizzle! If you overcrowd the pan, they won’t sear properly, so work in batches if needed.
- Sear for 2-3 minutes: Let them cook undisturbed for about 2-3 minutes. You’re looking for a lovely golden-brown crust to form. Resist the urge to flip them too soon – patience is key!
- Flip the scallops: Once golden, gently flip each scallop over with tongs.
- Add butter: Right after flipping, add 1 tablespoon of butter to the pan. As it melts, tilt the pan slightly and use a spoon to baste the scallops with the buttery goodness. This adds incredible flavor!
- Finish cooking: Cook for another 2-3 minutes until the scallops are opaque and cooked through. They should feel firm to the touch but still spring back slightly.
- Drizzle with lemon juice: Just before serving, squeeze 1 tablespoon of fresh lemon juice over the scallops. It brightens the dish and enhances that sweet, ocean-fresh flavor.
And that’s it! You’ve just made beautiful seared scallops that are sure to impress. Serve them up immediately for the best texture and taste. Enjoy!
Why You’ll Love This Recipe
Seared scallops are not just a dish; they’re an experience! Here’s why you’re going to fall head over heels for this recipe:
- Quick to Prepare: You can have these gorgeous scallops on the table in just 16 minutes! Perfect for those busy weeknights or last-minute guests.
- Elegant Presentation: With that beautiful golden crust, seared scallops bring a touch of sophistication to any meal. They’re perfect for impressing friends or a romantic dinner!
- Healthy Option: Packed with protein and low in carbs, seared scallops are a fantastic choice for a nutritious meal without sacrificing flavor.
- Versatile Pairing: These beauties go wonderfully with a variety of sides, from creamy risottos to fresh salads, making them adaptable for any occasion.
- Fresh Flavors: The natural sweetness of the scallops shines through, especially when paired with a squeeze of lemon juice, creating a light and refreshing dish.
Trust me, once you make these seared scallops, they’ll become a staple in your home-cooking repertoire!
Tips for Success
To get those perfectly seared scallops that will have everyone raving, I’ve got a few pro tips that will make all the difference. Trust me, these little tricks will elevate your dish from good to absolutely amazing!
- Dry, Dry, Dry: Seriously, moisture is the enemy! The drier your scallops, the better the sear. Take the time to pat them dry with paper towels before seasoning. This is the key to achieving that gorgeous golden crust.
- High Heat is Your Friend: Don’t be afraid to crank up the heat! A hot skillet is essential for that quick sear. Just make sure the oil is shimmering but not smoking. If it’s too low, you’ll just end up steaming your scallops instead of searing them.
- Don’t Overcrowd the Pan: Give those scallops some breathing room! If you cram too many in at once, they’ll steam instead of sear. Cook in batches if needed; it’s worth the wait for that lovely crust.
- Use a Timer: Timing is everything! Set a timer for 2-3 minutes while they’re searing. This helps keep you from peeking too soon. Remember, patience is key to letting those beautiful scallops develop that rich color.
- Baste with Butter: When you flip the scallops, don’t forget to add that tablespoon of butter. Basting them with melted butter not only adds flavor but also keeps them moist. Just tilt the pan and spoon that buttery goodness over the top!
- Trust Your Senses: The scallops will tell you when they’re ready. Look for that golden-brown color and feel for a firm yet slightly springy texture. They’ll continue cooking a bit after you take them off the heat, so don’t overdo it!
- Serve Immediately: Seared scallops are best enjoyed right away. The texture is at its peak when they’re fresh off the skillet, so plate them up and dig in before they lose that delightful crispness!
With these tips in your back pocket, you’ll be well on your way to impressing everyone with your seared scallops! Happy cooking!
Variations on Seared Scallops
Now that you’ve got the basics down, let’s have some fun with variations! Seared scallops are incredibly versatile and can take on a whole new personality with just a few tweaks. Here are some delightful ideas to switch things up:
- Garlic and Herb Butter: Instead of just plain butter, try adding minced garlic and fresh herbs like thyme or parsley to the pan as you baste the scallops. The aroma will be heavenly, and the extra flavor? Wow!
- Spicy Kick: If you love a little heat, sprinkle some red pepper flakes or chili powder on the scallops before searing. You’ll get a nice balance of sweet and spicy that really elevates the dish!
- Citrus Twist: Mix it up with different citrus juices! Instead of just lemon, try using lime or orange juice for a fresh, zesty flavor. You can even add some zest for extra brightness!
- Asian-Inspired Glaze: Drizzle a bit of soy sauce or teriyaki sauce over the scallops just before serving. Pair it with a sprinkle of sesame seeds and sliced green onions for an Asian flair that’s simply divine.
- Herbed Pesto: Top your seared scallops with a dollop of basil or arugula pesto. The vibrant green color and fresh flavor will not only look stunning but also add an amazing layer of taste!
- Creamy Sauce: For something rich and luxurious, make a quick cream sauce by adding a splash of heavy cream and some grated Parmesan to the pan right after cooking the scallops. Just let it simmer for a minute until it thickens, and you’ll have a dreamy sauce to drizzle over.
With these variations, you can keep your seared scallops exciting and fresh every time you make them. Don’t be afraid to experiment and find your favorite flavor combinations! Happy cooking!
Serving Suggestions
Now that you’ve mastered the art of searing scallops, let’s talk about how to make your meal truly shine with some perfect pairings! These delicate, flavorful gems deserve sides that complement their taste and keep the dining experience delightful. Here are some of my favorite ideas:
- Garlic Mashed Potatoes: Creamy, buttery mashed potatoes with a hint of garlic create a luscious base for your scallops. The richness pairs beautifully with their light, sweet flavor.
- Fresh Green Salad: A crisp salad with mixed greens, cherry tomatoes, and a light vinaigrette adds a refreshing contrast. The acidity of the dressing brightens up the dish and balances the scallops’ richness.
- Risotto: A creamy lemon risotto or a herbed risotto makes for an elegant side. The creaminess and flavors meld perfectly with the scallops, making every bite a heavenly experience.
- Roasted Asparagus: Tossed in olive oil and roasted until tender, asparagus offers a lovely crunch and a pop of color on the plate. Plus, it’s a simple and nutritious side!
- Quinoa Salad: A light quinoa salad with cucumbers, bell peppers, and a citrus dressing provides a nutritious and hearty option. It’s a fantastic way to add some texture and flavor variety to your meal!
- Creamy Polenta: Soft, creamy polenta serves as a cozy base for your scallops. Its mild flavor lets the scallops shine while adding a comforting element to the dish.
Don’t be afraid to mix and match! The beauty of seared scallops is their versatility, so feel free to get creative with your sides. Each pairing adds its own flair, transforming your meal into a stunning culinary experience. Enjoy your delicious creation!
Storage & Reheating Instructions
So, you’ve made these delicious seared scallops and have some leftovers? Lucky you! But let’s make sure you store them properly so they stay just as tasty. Here’s how to keep your scallops fresh and guide you through reheating them without losing that fabulous texture.
Storing Leftover Scallops: First things first, let your scallops cool to room temperature before storing. Once they’ve cooled, transfer them to an airtight container. If you have multiple layers, it’s a good idea to place a piece of parchment paper between the layers to prevent sticking. They’ll keep well in the fridge for about 1-2 days. Just remember, the sooner you eat them, the better they’ll taste!
Freezing Scallops: If you want to keep them longer, you can also freeze them! Wrap the scallops tightly in plastic wrap and then place them in a freezer-safe bag or container. They can last up to 2 months in the freezer. When you’re ready to enjoy them again, just thaw them overnight in the fridge.
Reheating Scallops: For the best results, I recommend reheating your scallops in a skillet over medium heat. Add a tiny bit of olive oil or butter to the pan to prevent sticking and to bring back that lovely sear. Gently heat them for about 2-3 minutes on each side until they’re warmed through. Be careful not to overcook them, as they can become rubbery if heated too long!
If you’re in a hurry, you can also pop them in the microwave, but use a low power setting and heat them in short bursts of about 30 seconds. Just keep an eye on them to avoid overcooking.
With these simple storage and reheating tips, you’ll be able to enjoy your seared scallops even after the initial feast. Happy eating!
Nutritional Information Section
When it comes to enjoying seared scallops, it’s always good to keep an eye on the nutritional side of things! Just remember, the nutritional values can vary based on the ingredients and brands you use, so these numbers are just estimates. But here’s a general idea of what you can expect in a serving of seared scallops (which is about 4 scallops):
- Calories: Approximately 200
- Fat: 10g
- Saturated Fat: 2g
- Unsaturated Fat: 8g
- Trans Fat: 0g
- Cholesterol: 60mg
- Sodium: 400mg
- Carbohydrates: 0g
- Fiber: 0g
- Sugar: 0g
- Protein: 28g
So, as you can see, seared scallops are not just a delicious treat, but they’re also a great source of lean protein! Enjoy these little gems guilt-free, knowing they’re a lovely addition to a balanced meal!
FAQ Section
Got questions about seared scallops? No worries, I’ve got you covered! Here are some common queries that many home cooks have when diving into the world of these delicious seafood gems:
- Q: Can I use frozen scallops for this recipe?
A: Yes, you can! Just make sure to thaw them completely in the fridge overnight before cooking. It’s essential to pat them dry well to ensure a good sear. - Q: How do I know when scallops are cooked?
A: Perfectly cooked scallops should be opaque and firm to the touch but still slightly bouncy. They’ll also have a beautiful golden crust on the outside. Don’t overcook them, or they can turn rubbery! - Q: What should I serve with seared scallops?
A: You can pair seared scallops with a variety of sides! Creamy risotto, fresh salads, or garlic mashed potatoes are all fantastic choices that complement the scallops’ sweetness. - Q: Can I make a sauce to go with seared scallops?
A: Absolutely! A simple lemon butter sauce or a creamy garlic sauce can enhance the flavors beautifully. Just make sure it’s light to let the scallops shine! - Q: How do I store leftover scallops?
A: Let them cool to room temperature, then store in an airtight container in the fridge for 1-2 days. For longer storage, freeze them wrapped tightly. Just remember, they’re best enjoyed fresh!
I hope these answers help you feel more confident with your seared scallops! Happy cooking!
Print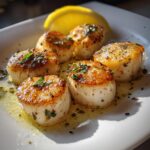
Seared Scallops: 5 Tips for a Flawless, Delicious Dish
- Total Time: 16 minutes
- Yield: 4 servings 1x
- Diet: Low Fat
Description
Seared scallops are a quick and elegant seafood dish that highlights the natural sweetness of scallops.
Ingredients
- 1 pound sea scallops
- 2 tablespoons olive oil
- Salt to taste
- Pepper to taste
- 1 tablespoon butter
- 1 tablespoon lemon juice
Instructions
- Pat the scallops dry with paper towels.
- Season both sides with salt and pepper.
- Heat olive oil in a skillet over medium-high heat.
- Add scallops to the skillet in a single layer.
- Sear for about 2-3 minutes until golden brown.
- Flip the scallops and add butter to the pan.
- Cook for another 2-3 minutes until cooked through.
- Drizzle with lemon juice before serving.
Notes
- Use fresh scallops for best results.
- Do not overcrowd the pan for even cooking.
- Serve immediately for the best texture.
- Prep Time: 10 minutes
- Cook Time: 6 minutes
- Category: Main Course
- Method: Searing
- Cuisine: Seafood
Nutrition
- Serving Size: 4 scallops
- Calories: 200
- Sugar: 0g
- Sodium: 400mg
- Fat: 10g
- Saturated Fat: 2g
- Unsaturated Fat: 8g
- Trans Fat: 0g
- Carbohydrates: 0g
- Fiber: 0g
- Protein: 28g
- Cholesterol: 60mg
Keywords: seared scallops, seafood, quick meal, elegant dish


