
There’s nothing quite like the smell of buttery vanilla cookies wafting through the house during the holidays, is there? These round Christmas cookies decorated with colorful icing and festive sprinkles have been my go-to holiday treat since I was old enough to reach the kitchen counter. I still remember standing on a stepstool next to Grandma, flour everywhere, as we pressed cookie cutters into soft dough. My version skips the fancy shapes – just simple rounds that let the decorations shine. What I love most is how easy they are to make (even for beginner bakers!) while looking absolutely magical on cookie platters. The dough comes together in minutes, and then the real fun begins – turning these golden rounds into edible holiday cheer with icing and sprinkles galore!
Why You’ll Love These Round Christmas Cookies Decorated
Oh, where do I even start? These cookies aren’t just delicious—they’re pure holiday magic in every bite. Here’s why they’ve been my December staple for years:
- So simple even Santa could make them: No fancy skills needed. Just roll, bake, and unleash your inner artist with icing!
- Instant holiday spirit: That moment when you pull the golden rounds from the oven? The whole house smells like Christmas morning.
- Kid (and adult!) friendly fun: My nieces go wild decorating these. Pro tip: put down wax paper first—you’ll thank me when the sprinkles start flying!
- Customizable chaos: Red and green icing? Classic. Blue snowflakes? Why not! I once did a whole batch in neon colors for our “ugly sweater” party.
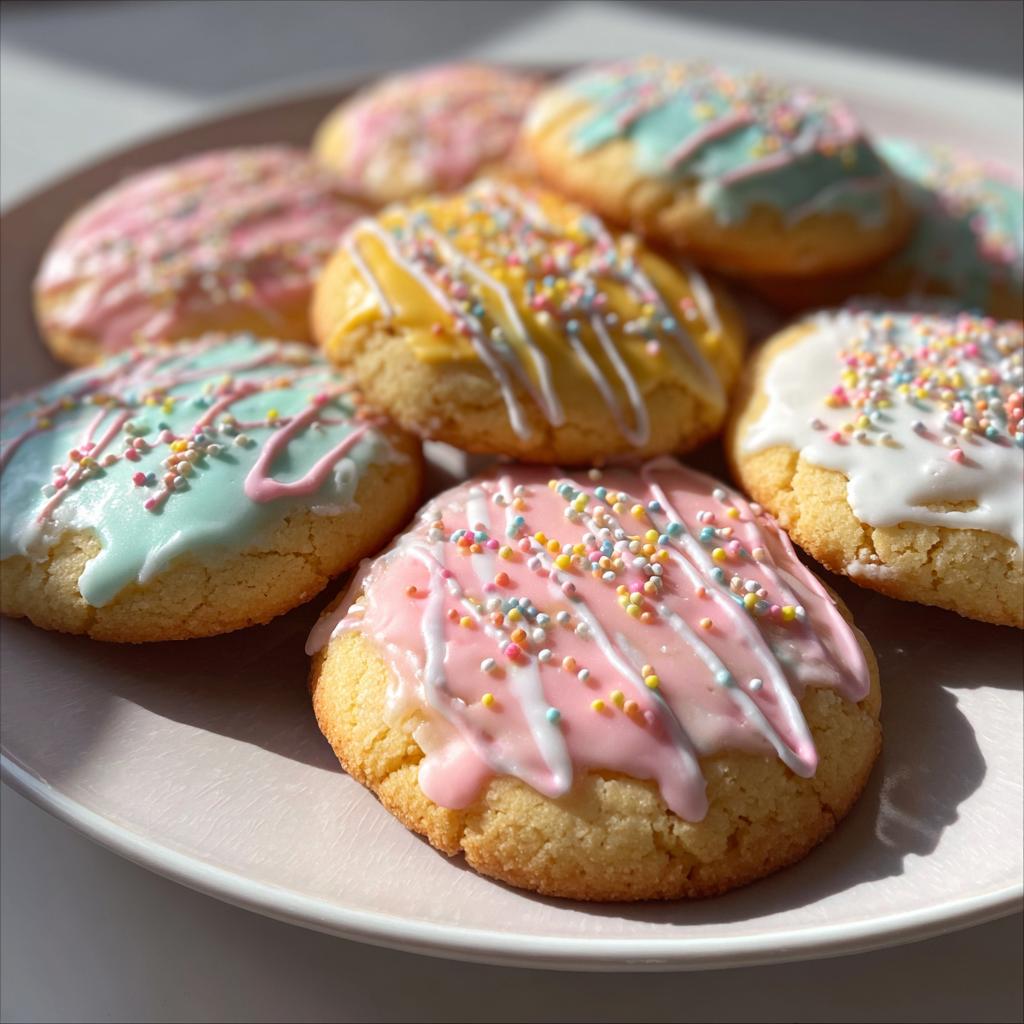
The best part? They taste as joyful as they look—buttery, just sweet enough, with that satisfying crunch under smooth icing. Pure nostalgia on a plate.
Ingredients for Round Christmas Cookies Decorated
Gather these simple ingredients – you probably have most in your pantry already! Precision matters here, so I’ll share exactly how I measure everything:
- 2 1/4 cups all-purpose flour (spoon and level – don’t scoop!)
- 1/2 teaspoon baking powder (fresh is best)
- 1/4 teaspoon salt (I use fine sea salt)
- 3/4 cup unsalted butter, softened (leave out for 30 minutes – finger should leave a slight dent)
- 3/4 cup granulated sugar
- 1 large egg (room temperature cracks less)
- 1 teaspoon vanilla extract (the good stuff – no imitation!)
Ingredient Notes & Substitutions
Baking is science, but I’ve tested these swaps successfully when needed:
- Flour: Gluten-free 1:1 blends work if you add 1/2 teaspoon xanthan gum
- Butter: Vegan butter substitutes work (stick form, not tubs)
- Egg: 1 flax egg (1 tbsp ground flax + 3 tbsp water) for egg-free
- Food coloring: Gel gives vibrant colors without thinning icing (I like Americana brand)
- Sprinkles: Any festive mix works – jimmies hold better than nonpareils!
Pro tip: If your kitchen is warm, chill the butter 5 minutes after softening – we want pliable, not melted!
How to Make Round Christmas Cookies Decorated
Grab your favorite mixing bowl – let’s turn these simple ingredients into holiday magic! Follow my tested steps (and learn from my past cookie disasters):
- Prep: Preheat oven to 350°F (175°C). Line baking sheets with parchment – no sticking and easy cleanup!
- Dry team: Whisk flour, baking powder, and salt in a bowl. I sift if my flour’s clumpy.
- Cream dream: Beat softened butter and sugar for 2 full minutes until fluffy. Scrape bowl halfway!
- Wet ingredients: Beat in egg and vanilla until fully incorporated.
- Merge carefully: Gradually add dry ingredients on low speed. Dough should pull from bowl sides.
- Chill time: Wrap dough and refrigerate 30 minutes (trust me, this prevents puffy cookies).
- Shape: Roll dough into 1-inch balls, place 2 inches apart. Flatten slightly with your palm.
- Bake: 10-12 minutes until edges are just golden. They’ll firm up while cooling!
- Cool completely on wire racks before decorating – warm cookies melt icing.
Decorating Your Round Christmas Cookies
This is where the holiday spirit comes alive! My tried-and-true decorating system:
- Icing consistency: Mix powdered sugar and milk until it ribbons off spoon (add milk drop by drop). Thicker than pancake batter!
- Piping hacks: Use zip-top bags with tiny corner cut (no fancy tips needed). Outline first, then flood.
- Sprinkle strategy: Add sprinkles IMMEDIATELY after icing – they stick better when wet. Hold cookie over bowl to catch extras.
- Color mixing: Gel colors give bold hues. Start with toothpick amounts – a little goes far!
- Drying time: Let iced cookies dry 1 hour before stacking (or they’ll stick together).
Pro tip: Decorate in batches – half with icing, then add sprinkles before moving to next cookies!
Tips for Perfect Round Christmas Cookies Decorated
After years of holiday baking disasters (who knew burnt sprinkles could smoke so much?), I’ve learned these foolproof tricks:
- Watch the clock: Cookies keep baking on hot pans! Pull them at 10 minutes when edges just barely tan – they’ll firm up perfectly.
- Icing storage: Keep unused icing covered with a damp towel so it doesn’t crust over between batches.
- Cold dough magic: If dough gets sticky while rolling, pop it back in the fridge for 10 minutes. Cold dough = perfect rounds!
- Even baking: Rotate pans halfway through – my oven’s back corner is a cookie scorcher!
Remember – slightly underbaked beats overbaked every time with these gems!
Storing and Freezing Round Christmas Cookies Decorated
Here’s how I keep my cookies fresh (and sneakily stash some for last-minute guests!):
- Airtight is key: Store decorated cookies in a sealed container with parchment between layers (so your snowflakes don’t smudge!). They’ll stay fresh for up to 5 days.
- Freeze for later: Undecorated dough balls freeze beautifully for 3 months—just thaw overnight in the fridge before baking. I always have a batch ready for holiday emergencies!
- Icing tips: Already decorated? Freeze them single-layer first, then stack once firm. Thaw at room temp—no microwave unless you want melty Santas!
Round Christmas Cookies Decorated: Nutritional Information
Okay, let’s be real – we’re not eating Christmas cookies for their health benefits! But since you asked, here’s the scoop per cookie (based on my exact recipe): about 120 calories, 5g fat, and 8g sugar. Remember, these are estimates – your sprinkles or icing thickness changes things! Grandma always said “Holiday calories don’t count,” and I’m sticking to that story.
FAQs About Round Christmas Cookies Decorated
Can I use margarine instead of butter?
Oh honey, I’ve tried – and while margarine works in a pinch, real butter gives that rich flavor we love. If you must substitute, use stick margarine (not tub spreads) and add an extra pinch of salt to compensate.
How long do the decorations last?
The icing hardens beautifully overnight! Decorated cookies stay picture-perfect for about 5 days in an airtight container. Pro tip: Nonpareil sprinkles tend to bleed color faster than jimmies – I learned that the messy way!
Why did my cookies spread?
Been there! Usually it’s butter that was too soft or dough that needed more chilling time. Next batch, try popping the shaped cookies in the fridge for 10 minutes before baking – works like magic!
Can kids help decorate?
Absolutely! My nieces go wild with sprinkles. Just put down wax paper first (trust me) and let them decorate cooled cookies with plastic knives or popsicle sticks instead of piping bags.
Share Your Round Christmas Cookies Decorated
Nothing makes me happier than seeing your cookie creations! Tag me on Instagram @BakingWithJoy so I can admire your decorating skills – I still get giddy seeing all the colorful variations people come up with. Last year someone made cookie “ornaments” with ribbon loops, and I may have stolen that brilliant idea!
Print
3-Ingredient Round Christmas Cookies Decorated for Holiday Bliss
- Total Time: 32 minutes
- Yield: 24 cookies 1x
- Diet: Vegetarian
Description
Easy-to-make round Christmas cookies decorated with festive icing and sprinkles.
Ingredients
- 2 1/4 cups all-purpose flour
- 1/2 teaspoon baking powder
- 1/4 teaspoon salt
- 3/4 cup unsalted butter, softened
- 3/4 cup granulated sugar
- 1 large egg
- 1 teaspoon vanilla extract
- 1 cup powdered sugar (for icing)
- 2 tablespoons milk (for icing)
- Food coloring (optional)
- Sprinkles (for decoration)
Instructions
- Preheat oven to 350°F (175°C). Line baking sheets with parchment paper.
- In a bowl, whisk flour, baking powder, and salt. Set aside.
- Cream butter and sugar until light and fluffy. Beat in egg and vanilla.
- Gradually mix in dry ingredients until dough forms.
- Roll dough into 1-inch balls and place on baking sheets. Flatten slightly.
- Bake for 10–12 minutes until edges are lightly golden.
- Cool cookies completely before decorating.
- Mix powdered sugar and milk for icing. Add food coloring if desired.
- Decorate cookies with icing and sprinkles.
Notes
- Chill dough for 30 minutes for easier handling.
- Store decorated cookies in an airtight container.
- Use gel food coloring for vibrant icing.
- Prep Time: 20 minutes
- Cook Time: 12 minutes
- Category: Dessert
- Method: Baking
- Cuisine: American
Nutrition
- Serving Size: 1 cookie
- Calories: 120
- Sugar: 8g
- Sodium: 35mg
- Fat: 5g
- Saturated Fat: 3g
- Unsaturated Fat: 2g
- Trans Fat: 0g
- Carbohydrates: 17g
- Fiber: 0.5g
- Protein: 1.5g
- Cholesterol: 20mg
Keywords: Christmas cookies, holiday baking, decorated cookies, festive treats


