
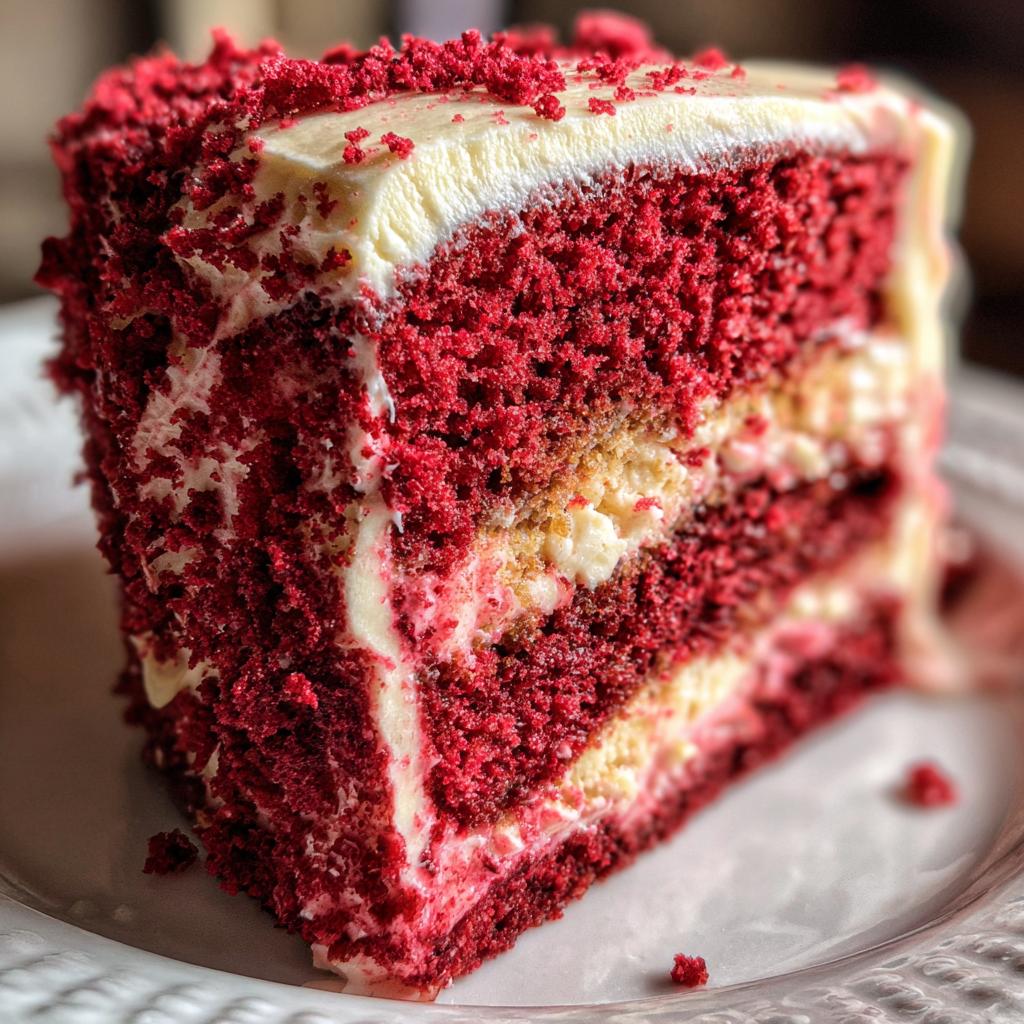
There’s something magical about a Red Velvet Celebration Cake that makes it the star of any gathering. That deep, rich red paired with the creamy, tangy frosting is pure perfection. I’ll never forget the first time I made this cake for my sister’s birthday – it was such a hit that it’s now our family’s go-to for every special occasion. The vibrant color just screams celebration, and the moist, velvety crumb is downright irresistible.
What makes this recipe stand out? It’s all about balance. The hint of cocoa powder adds depth without overpowering, and the buttermilk keeps it tender and moist. Plus, that cream cheese frosting? It’s the perfect finishing touch. Trust me, once you try this Red Velvet Celebration Cake, you’ll understand why it’s a must-have in your baking repertoire. Whether it’s a birthday, anniversary, or just a Tuesday that needs a little sparkle, this cake delivers every time.
Ingredients for Red Velvet Celebration Cake
Here’s everything you’ll need to make this showstopper. Measure carefully—this cake is all about precision, but don’t stress! I’ve included little notes from my own trial-and-error baking adventures to guide you.
- 2 ½ cups all-purpose flour – Spoon and level it, don’t scoop! Packed flour leads to a dense cake.
- 1 ½ cups granulated sugar – The sweetness balances the tang from the buttermilk.
- 1 tsp baking soda + 1 tsp salt – Yes, both! They’re the unsung heroes for that perfect rise.
- 1 tsp cocoa powder – Just enough to deepen the flavor without making it taste chocolatey.
- 1 ½ cups vegetable oil – My grandma swore by oil (not butter) for ultra-moist crumb.
- 1 cup buttermilk, room temp – Cold buttermilk = sad, flat cake. Plan ahead!
- 2 large eggs – Crack ’em into a separate bowl first—no shell surprises.
- 2 tbsp red gel food coloring – Gel gives that iconic bold red. Liquid makes it pink (lesson learned the hard way).
- 1 tsp vanilla extract + 1 tsp white vinegar – The vinegar’s magic—activates the baking soda for a light texture.
See? Simple pantry staples, but when they come together? Pure. Magic.
How to Make Red Velvet Celebration Cake
Okay, let’s get baking! This cake comes together so easily once you know the rhythm. I’ve made this dozens of times (my neighbors keep requesting it!), and I’ll walk you through every step so yours turns out perfect.
Preparing the Batter
First things first – grab two bowls. In the bigger one, whisk together your dry ingredients: flour, sugar, baking soda, salt, and cocoa powder. Get them really well combined – you want no cocoa powder lumps hiding in there!
Now for the wet team: in the second bowl, whisk together oil, buttermilk, eggs, food coloring, vanilla, and vinegar. The vinegar might smell strong, but trust me, you won’t taste it – it just helps the cake rise beautifully.
Here’s the key moment: pour the wet ingredients into the dry and gently fold them together. I use a rubber spatula and make big, slow circles – stop when you just barely see no flour streaks. Overmixing is the enemy of tender cake!
Baking and Cooling
While you were mixing, your oven should have been preheating to 350°F. Divide that gorgeous red batter evenly between your prepared pans. A kitchen scale helps, but eyeballing works too – just try to get them close.
Bake for 25-30 minutes. At 25 minutes, do the toothpick test – poke it near the center. You want moist crumbs clinging to it, not wet batter. If it’s clean, you’ve gone too far!
Let the cakes cool in their pans for exactly 10 minutes – this helps them firm up. Then run a knife around the edges and flip them onto wire racks to cool completely. No cheating on this step – frosting a warm cake is a disaster waiting to happen!
Frosting the Cake
Once those cakes are completely cool (I wait at least an hour), it’s frosting time! Place the first layer on your cake stand and dollop about 1 cup of cream cheese frosting on top. Spread it evenly with an offset spatula – don’t press too hard.
Add the second layer and frost the top and sides. Pro tip: do a thin “crumb coat” first, chill for 15 minutes, then add the final layer of frosting for super smooth sides. But honestly? Rustic swoops taste just as delicious!
Why You’ll Love This Red Velvet Celebration Cake
This cake isn’t just pretty—it’s downright addictive! Here’s why it’s become my signature dessert:
- Stunning visual impact: That rich red hue (thanks to gel food coloring!) makes jaws drop at parties. It’s an instant mood-lifter.
- Unbelievably moist: The oil and buttermilk combo keeps every bite tender for days—no sad, dry slices here.
- Foolproof method: No fancy techniques needed. Just two bowls and some gentle mixing—even first-timers nail it.
- Perfect balance: Subtle cocoa notes play with tangy cream cheese frosting in a flavor waltz you’ll crave.
Birthdays, anniversaries, “just because” days—this cake turns any moment into a celebration. And trust me, you’ll be asked for the recipe every time!
Tips for Perfect Red Velvet Celebration Cake
Want to nail this cake every single time? Here’s what I’ve learned through years of baking (and a few mishaps!):
- Use gel food coloring: Liquid makes it pink—gel gives that iconic, bold red. A little goes a long way!
- Room temp buttermilk is key: Cold buttermilk = flat cake. Let it sit out for 30 minutes before baking.
- Don’t overmix: Gently fold wet and dry ingredients until just combined. Overmixing = tough cake.
- Check doneness early: Start checking at 25 minutes. A toothpick should have moist crumbs—not wet batter.
- Cool completely before frosting: Warm cake + cream cheese frosting = melty mess. Patience pays off!
Follow these, and you’ll have a showstopper that’s as beautiful as it is delicious!
Ingredient Notes and Substitutions for Red Velvet Celebration Cake
Ran out of something? Don’t panic! I’ve tested all the swaps so you don’t have to. For buttermilk, mix 1 cup milk with 1 tbsp lemon juice or vinegar – let it sit for 5 minutes until curdled. Plain yogurt or sour cream thinned with milk works too. No gel food coloring? Use 3-4 tbsp beet powder for natural color (add it to the dry ingredients).
Now, the non-negotiables: that white vinegar is crucial for activating the baking soda – don’t skip it! And oil gives moisture butter just can’t match. Trust me, I learned that the hard way with a dry cake disaster back in ’09!
Serving Suggestions for Red Velvet Celebration Cake
Oh, let’s talk presentation! This cake shines bright enough on its own, but here’s how I love to serve it: thick slices with hot coffee (that tangy frosting pairs perfectly!) or Earl Grey tea. For summer parties, I arrange fresh raspberries around each plate—the tart pop complements the sweetness. Feeling fancy? Top slices with edible gold flakes or fresh mint sprigs before serving. For birthdays, I pipe extra frosting rosettes and sprinkle with red sugar crystals—instant wow factor!
Storage and Reheating Instructions for Red Velvet Celebration Cake
Here’s how to keep your cake tasting fresh! Store it in an airtight container in the fridge for up to 5 days – the cream cheese frosting needs to stay chilled. Want to enjoy it at room temp? Let slices sit out for 20 minutes before serving. Pro tip: Never microwave it! The frosting will melt into a puddle (yes, I learned this the messy way). If you must warm it, 10 seconds in the toaster oven works for the cake alone – but honestly, it’s dreamiest at cool room temperature.
Nutritional Information for Red Velvet Celebration Cake
Each slice of this decadent cake (based on 10 servings) packs about 450 calories, with 25g fat (4g saturated), 50g carbs, and 5g protein. Keep in mind – these values can shift slightly depending on your specific ingredients and frosting thickness. My nutritionist sister always reminds me: celebration cakes are for savoring, not stressing over numbers!
Frequently Asked Questions About Red Velvet Celebration Cake
Over the years, I’ve gotten the same great questions about this cake – let me save you some trouble with my hard-earned answers!
Can I use natural food coloring instead of red gel?
Absolutely! I’ve had success with beet powder (3-4 tbsp mixed into dry ingredients) or boiled beet juice reduction. The color won’t be as vibrant as gel, but it’ll give a lovely reddish hue. Just add it slowly – natural colors deepen as they bake.
Why did my cake turn out dry?
Oh no! Usually this means either overbaking (set a timer for 25 minutes!) or cold buttermilk. Room temp buttermilk blends better and keeps the cake moist. Also – measure your flour correctly! Scooping packs it down, leading to dryness.
Can I make cupcakes instead?
You bet! This batter makes about 24 perfect red velvet cupcakes. Bake at 350°F for 18-20 minutes. They’re adorable with a little frosting swirl and red sprinkles on top!
How do I get super smooth frosting?
Two secrets: 1) Make sure your cake is COMPLETELY cool (I wait 2 hours to be safe). 2) Do a thin “crumb coat” layer first, chill for 15 minutes, then add your final frosting. Hot tip – run your spatula under hot water for ultra-smooth finishes!
Share Your Red Velvet Celebration Cake Experience
I’d love to hear how your Red Velvet Celebration Cake turns out! Did you add a special twist? Snap a photo and tag me on social media—I’m always excited to see your creations. Don’t forget to leave a comment or rate the recipe below. Your feedback makes my day and helps other bakers too. Happy baking!
Print
Bold Red Velvet Cake Recipe: A 10/10 Showstopper
- Total Time: 50 minutes
- Yield: 1 cake (8-10 servings) 1x
- Diet: Vegetarian
Description
A rich and moist red velvet cake perfect for celebrations. Its vibrant color and creamy frosting make it a crowd-pleaser.
Ingredients
- 2 1/2 cups all-purpose flour
- 1 1/2 cups granulated sugar
- 1 tsp baking soda
- 1 tsp salt
- 1 tsp cocoa powder
- 1 1/2 cups vegetable oil
- 1 cup buttermilk
- 2 large eggs
- 2 tbsp red food coloring
- 1 tsp vanilla extract
- 1 tsp white vinegar
Instructions
- Preheat oven to 350°F. Grease and flour two 9-inch cake pans.
- Whisk together flour, sugar, baking soda, salt, and cocoa powder in a bowl.
- In another bowl, mix oil, buttermilk, eggs, food coloring, vanilla, and vinegar.
- Combine wet and dry ingredients. Mix until smooth.
- Divide batter evenly between pans. Bake for 25-30 minutes or until a toothpick comes out clean.
- Cool cakes in pans for 10 minutes, then transfer to a wire rack.
- Frost with cream cheese frosting once completely cooled.
Notes
- Use gel food coloring for a deeper red color.
- Ensure buttermilk is at room temperature.
- Do not overmix the batter.
- Prep Time: 20 minutes
- Cook Time: 30 minutes
- Category: Dessert
- Method: Baking
- Cuisine: American
Nutrition
- Serving Size: 1 slice
- Calories: 450
- Sugar: 30g
- Sodium: 300mg
- Fat: 25g
- Saturated Fat: 4g
- Unsaturated Fat: 18g
- Trans Fat: 0g
- Carbohydrates: 50g
- Fiber: 1g
- Protein: 5g
- Cholesterol: 50mg
Keywords: red velvet cake, celebration cake, dessert, baking, homemade cake


