
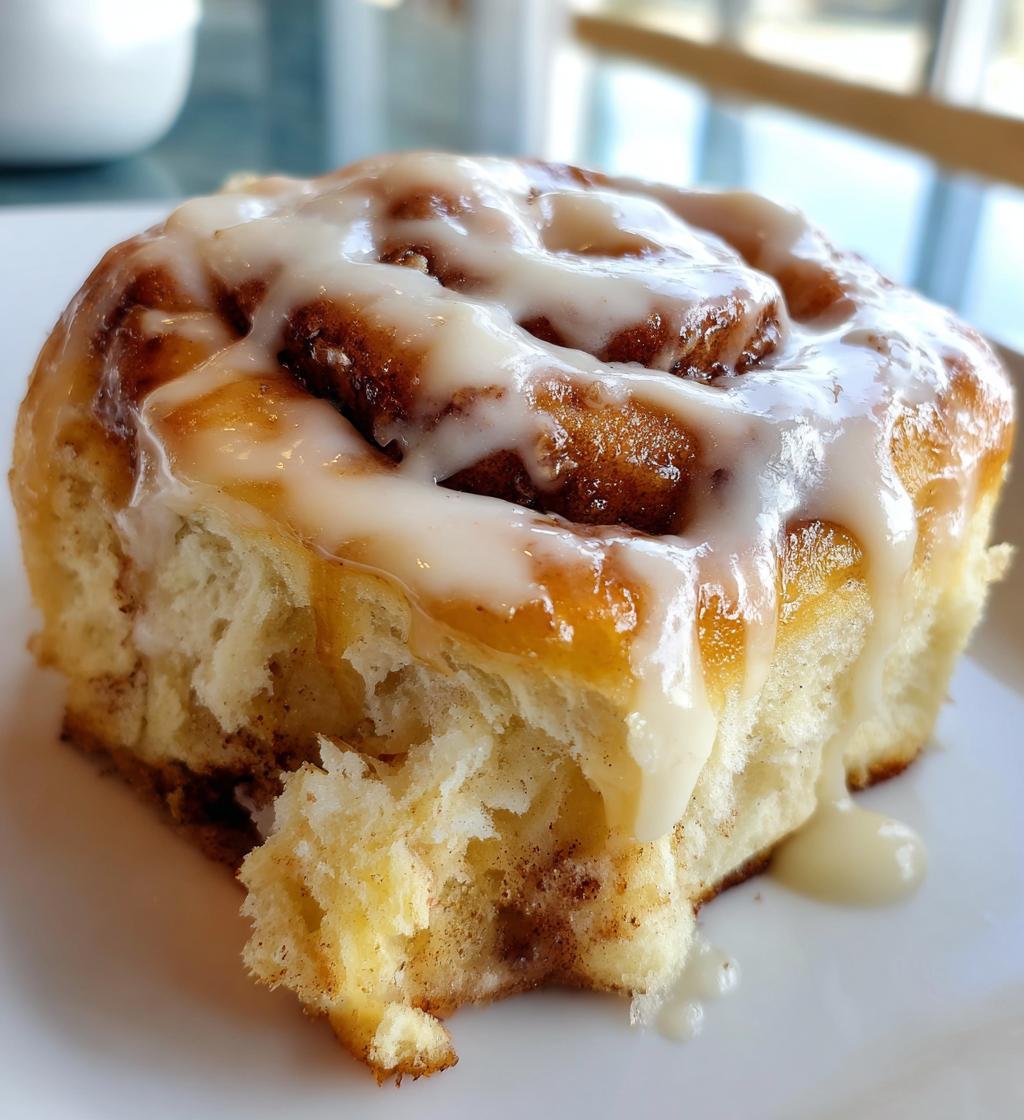
There’s nothing quite like waking up to the warm, sweet aroma of freshly baked cinnamon rolls wafting through the house, is there? It’s like a cozy hug to start your day! My absolute favorite way to enjoy this delightful treat is with *Overnight Cinnamon Rolls*. The beauty of this recipe lies in the fact that you can prepare everything the night before. Just imagine: after a long day, you mix up the dough, let it rise, and then pop it in the fridge. When morning comes, all you have to do is bake them! It’s a game-changer for busy mornings or lazy weekends. Trust me, your family will adore you for it. Plus, there’s something so satisfying about knowing you’ve got a delicious breakfast waiting for you, all thanks to a little bit of night-time prep. So, let’s dive right into making these blissful rolls together!
Ingredients for Overnight Cinnamon Rolls
To whip up these scrumptious *Overnight Cinnamon Rolls*, you’ll need a handful of simple ingredients. Here’s what you’ll need:
- 4 cups all-purpose flour
- 1/2 cup sugar
- 1 packet (2 1/4 tsp) active dry yeast
- 1 cup milk
- 1/3 cup melted butter
- 2 large eggs
- 1 tsp salt
- 1/4 cup brown sugar
- 2 tbsp ground cinnamon
- 1/2 cup raisins (optional)
Make sure you have everything ready before you start, as this will make the preparation smoother and more enjoyable. Trust me, it’s worth it for those heavenly rolls!
How to Prepare Overnight Cinnamon Rolls
Now that you have your ingredients ready, let’s get started on making these *Overnight Cinnamon Rolls*. I promise you’ll be amazed at how simple and satisfying this process is! Just follow these steps, and you’ll have soft, sweet rolls waiting for you in the morning.
Step 1: Combine Dry Ingredients
First things first, grab a large bowl and mix together the 4 cups of all-purpose flour, 1/2 cup of sugar, 1 packet (that’s 2 1/4 teaspoons) of active dry yeast, and 1 teaspoon of salt. I like to whisk everything together to make sure it’s well combined. This is the foundation of your dough, so let’s get it off to a great start!
Step 2: Heat Milk and Butter
Next, in a saucepan, warm up 1 cup of milk and 1/3 cup of melted butter over low heat. You want it to be warm, but not too hot – think baby-bottle warm. You wouldn’t want to scald the yeast! Once it’s ready, take it off the heat and set it aside for a moment.
Step 3: Mix Wet and Dry Ingredients
Now for the fun part! Pour that warm milk and butter mixture into your bowl of dry ingredients. Then, crack in 2 large eggs. Mix everything together until it forms a shaggy dough. Don’t worry about getting it perfect at this stage; just make sure everything is combined.
Step 4: Knead the Dough
Time to roll up your sleeves! Transfer the dough onto a floured surface and knead it for about 5-7 minutes. You’re aiming for a smooth and elastic dough. If it’s too sticky, sprinkle a little more flour as needed. Trust me, this is where the magic begins!
Step 5: Let the Dough Rise
Once your dough is smooth, place it in a greased bowl and cover it with a clean kitchen towel. Now, let it rise in a warm spot for about 1 hour, or until it has doubled in size. This is where all that lovely yeast work kicks in. It’s so exciting to see it grow!
Step 6: Roll Out the Dough
After the dough has risen, gently punch it down to release the air. Then, turn it out onto a floured surface and roll it out into a rectangle, about 1/4 inch thick. Aim for something like 12 by 18 inches – doesn’t have to be perfect, just close enough!
Step 7: Spread Filling
Now, spread a generous amount of melted butter over the rolled-out dough. Mix together 1/4 cup of brown sugar and 2 tablespoons of cinnamon, and sprinkle that delicious mixture evenly across the buttered surface. If you’re feeling adventurous, toss in 1/2 cup of raisins for a sweet surprise!
Step 8: Roll and Cut the Dough
Starting from one long edge, carefully roll the dough up into a tight log. Once it’s rolled, use a sharp knife to slice it into 12 equal pieces. I like to use a serrated knife for this, as it makes cutting through the soft dough easier!
Step 9: Prepare for Overnight Refrigeration
Next, place the rolls in a greased baking dish, making sure to leave a bit of space between them. Cover them with plastic wrap or a clean kitchen towel, and then pop them in the fridge overnight. This will allow the flavors to meld beautifully while you sleep!
Step 10: Bake in the Morning
The next morning, preheat your oven to 350°F (175°C). While it’s heating, take those rolls out of the fridge and let them sit for about 30 minutes to come to room temperature. Bake them for about 25 minutes or until they’re golden brown and your kitchen is filled with that irresistible smell! Wow, the wait will be worth it!
Tips for Success with Overnight Cinnamon Rolls
To ensure your *Overnight Cinnamon Rolls* turn out perfectly every time, I’ve got a few pro tips that I swear by. Trust me, these little pointers can make all the difference!
First off, always use fresh yeast. It’s like the secret ingredient for a fluffy texture. If your yeast is expired, those rolls might not rise as beautifully. A simple test is to mix a bit of yeast with warm water and sugar; if it bubbles, you’re good to go!
Next, don’t skip the kneading step. This is where the gluten develops, giving your rolls that delightful chewiness. Aim for a smooth, elastic dough – if it’s sticky, add just a touch more flour, but be careful not to overdo it!
When you let the dough rise, find a warm spot free from drafts. If your kitchen is chilly, you can place the covered bowl in the oven (turned off) with the light on. This provides a cozy environment for your dough.
Finally, when baking, keep an eye on those rolls! Ovens can vary, so start checking a few minutes before the timer goes off. You want them golden brown and puffed up. Enjoy the sweet aroma that fills your kitchen—it’s pure happiness!
Nutritional Information
Here’s the estimated nutritional information for each delicious roll of these *Overnight Cinnamon Rolls*:
- Serving Size: 1 roll
- Calories: 250
- Fat: 9g
- Saturated Fat: 5g
- Unsaturated Fat: 3g
- Trans Fat: 0g
- Cholesterol: 30mg
- Sodium: 150mg
- Carbohydrates: 37g
- Sugar: 10g
- Fiber: 1g
- Protein: 4g
Keep in mind that these values are estimates and can vary based on specific ingredients used and portion sizes. Enjoy these rolls knowing they’re a delightful treat to start your day!
FAQ about Overnight Cinnamon Rolls
Can I use whole wheat flour?
Absolutely, you can use whole wheat flour! Just keep in mind that it will give your *Overnight Cinnamon Rolls* a slightly denser texture and a nuttier flavor. If you decide to substitute, I recommend using half whole wheat flour and half all-purpose flour. This way, you’ll still achieve that soft, fluffy roll while enjoying the added health benefits of whole grains. Plus, it’s a great way to sneak in some extra nutrition!
How do I store leftovers?
Storing leftovers is super easy! Just place any uneaten rolls in an airtight container to keep them fresh. They can be stored at room temperature for about 2 days. If you want to keep them longer, pop them in the fridge where they’ll last about a week. Just make sure they’re sealed well to prevent drying out. You can even warm them up in the microwave for a few seconds to bring back that fresh-baked goodness!
Can I freeze the rolls?
Yes, freezing the rolls is a fantastic option! After they’ve cooled completely, place them in a freezer-safe bag or container. They’ll stay good in the freezer for about 2-3 months. When you’re ready to enjoy them, simply take them out and let them thaw in the fridge overnight. Then, pop them in the oven at 350°F (175°C) for about 10-15 minutes to warm them through. You’ll be amazed at how fresh they taste!
Why You’ll Love This Recipe
- Quick Preparation: You can mix everything together in just about 20 minutes the night before!
- Ease of Making Ahead: Prepare the rolls in advance and let them chill overnight—perfect for busy mornings!
- Soft Texture: These rolls come out incredibly soft and fluffy, making every bite a heavenly experience.
- Delightful Flavor: The combination of cinnamon, sugar, and butter creates an irresistible aroma and taste that will delight your taste buds.
- Vegetarian-Friendly: Enjoy these rolls knowing they fit perfectly into a vegetarian diet, making them great for everyone at the table!
Serving Suggestions for Overnight Cinnamon Rolls
Now that you’ve got those gorgeous *Overnight Cinnamon Rolls* fresh out of the oven, let’s talk about how to elevate your breakfast experience even more! These rolls are delicious on their own, but pairing them with a few delightful accompaniments can take your morning to the next level.
First up, you can’t go wrong with a steaming cup of coffee. The rich, bold flavor complements the sweetness of the cinnamon rolls perfectly. Whether you prefer a classic black coffee or a creamy latte, it’s the ultimate morning match!
If tea is more your style, a nice chai tea would be a fantastic choice too. The warm spices will harmonize beautifully with the cinnamon in your rolls, creating a cozy vibe that’s hard to resist.
For a refreshing contrast, consider serving some fresh fruit on the side. Slices of juicy oranges or a handful of berries can add a burst of brightness to your plate. They’re not only tasty but also add a pop of color that makes your breakfast spread look even more inviting!
And if you want to indulge a little further, drizzle some extra cream cheese glaze over your rolls—or even serve a side of yogurt. The creamy texture and tangy flavor will balance the sweetness of the rolls beautifully.
So, whether it’s coffee, tea, fruit, or a bit of yogurt, these serving suggestions will enhance your *Overnight Cinnamon Rolls* experience and make your breakfast feel like a special occasion. Enjoy every bite!
Print
Overnight Cinnamon Rolls: 10 Steps to Morning Bliss
- Total Time: 1 hour 45 minutes
- Yield: 12 rolls 1x
- Diet: Vegetarian
Description
Deliciously soft and sweet cinnamon rolls that you prepare the night before.
Ingredients
- 4 cups all-purpose flour
- 1/2 cup sugar
- 1 packet (2 1/4 tsp) active dry yeast
- 1 cup milk
- 1/3 cup butter, melted
- 2 large eggs
- 1 tsp salt
- 1/4 cup brown sugar
- 2 tbsp ground cinnamon
- 1/2 cup raisins (optional)
Instructions
- In a bowl, mix flour, sugar, yeast, and salt.
- In a saucepan, heat milk and butter until warm.
- Add warm milk mixture to dry ingredients along with eggs.
- Knead the dough until smooth.
- Let the dough rise for 1 hour or until doubled.
- Roll out the dough into a rectangle.
- Spread melted butter, brown sugar, and cinnamon on the dough.
- Roll the dough and cut into slices.
- Place rolls in a greased baking dish.
- Cover and refrigerate overnight.
- In the morning, preheat the oven and bake for 25 minutes.
Notes
- Use fresh yeast for best results.
- Store leftovers in an airtight container.
- Try adding nuts for extra texture.
- Prep Time: 20 minutes
- Cook Time: 25 minutes
- Category: Breakfast
- Method: Baking
- Cuisine: American
Nutrition
- Serving Size: 1 roll
- Calories: 250
- Sugar: 10g
- Sodium: 150mg
- Fat: 9g
- Saturated Fat: 5g
- Unsaturated Fat: 3g
- Trans Fat: 0g
- Carbohydrates: 37g
- Fiber: 1g
- Protein: 4g
- Cholesterol: 30mg
Keywords: Overnight Cinnamon Rolls


