
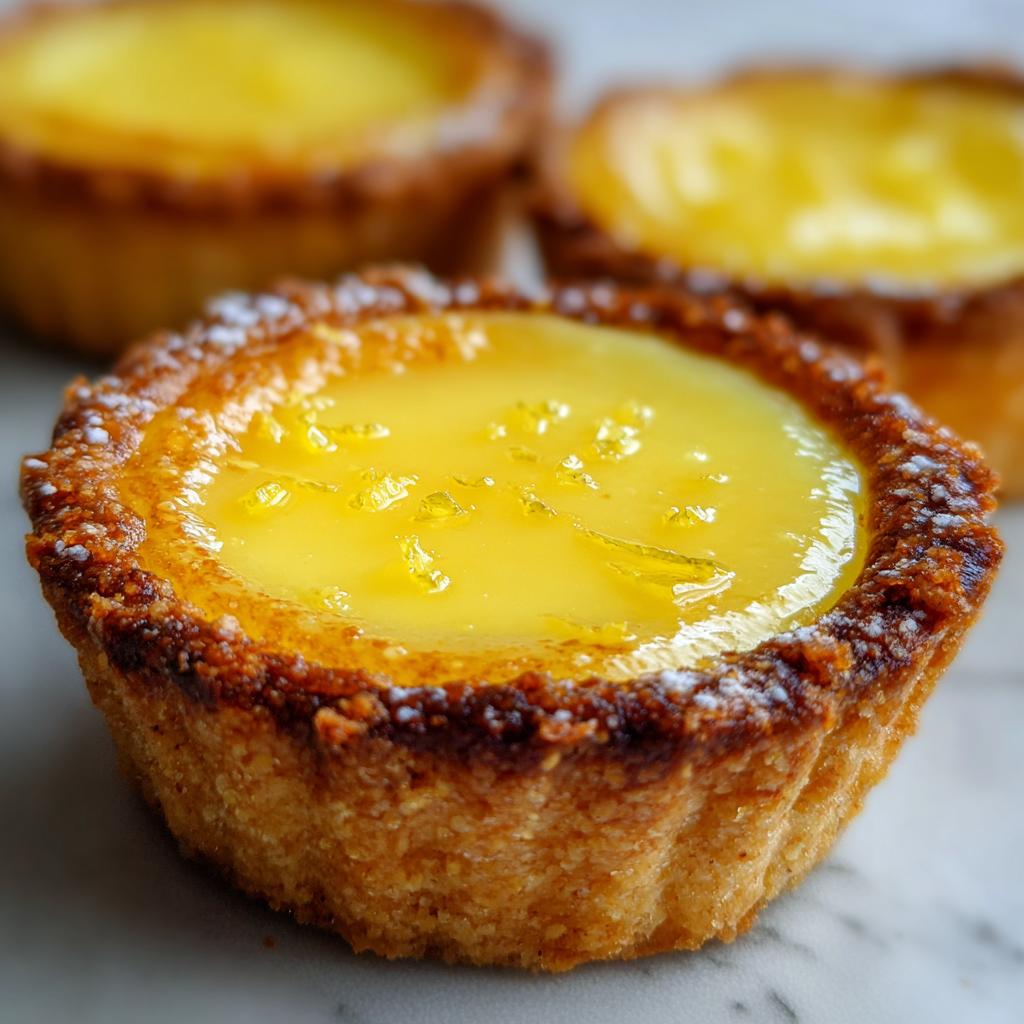
I’ll never forget the first time I bit into a mini lemon tart—that crisp, buttery shell giving way to the brightest, tangiest curd I’d ever tasted. It was at a tiny Parisian patisserie, and I swear I heard angels sing. Right then, I knew I had to recreate that magic at home. After years of tweaking (and a few curd disasters), I finally nailed it: mini lemon tarts with a smooth, tangy curd that makes your lips pucker just right, all cradled in a shell so crisp it shatters delicately with every bite. These little gems are my go-to when I need a dessert that wows without being fussy—perfect for bridal showers, tea parties, or just a Tuesday pick-me-up.
Ingredients for Mini Lemon Tarts with a Smooth, Tangy Curd and Crisp Shell
Let’s start with the basics—trust me, using the right ingredients makes all the difference here. You’ll need:
- 1 cup all-purpose flour (for that perfect, crumbly shell)
- 1/2 cup unsalted butter, cold and cubed (keep it cold—it’s the secret to a flaky crust!)
- 2 tbsp sugar (just a hint of sweetness for the shell)
- 2-3 tbsp ice water (adds just enough moisture to bring the dough together)
- 1/2 cup fresh lemon juice (please, no bottled stuff—it’s all about that zesty punch!)
- 1 tbsp lemon zest (for that extra citrusy kick)
- 1/2 cup sugar (balances the tartness of the curd)
- 3 large eggs (they’ll give the curd its smooth, custardy texture)
- 1/4 cup unsalted butter, softened (this adds richness to the curd)
Grab these, and you’re ready to make magic happen!
How to Make Mini Lemon Tarts with a Smooth, Tangy Curd and Crisp Shell
Okay, here’s where the fun begins! Making these little tarts is easier than you think—just follow these steps, and you’ll have perfect mini lemon tarts in no time. The key is patience (especially when it comes to chilling!), but trust me, the payoff is so worth it.
Preparing the Tart Shells
First, preheat your oven to 350°F (175°C). While that’s heating up, let’s tackle the dough. In a food processor, pulse together the flour, cold butter, and sugar until it looks like coarse crumbs. Now, here’s the trick: add the ice water one tablespoon at a time, pulsing just until the dough comes together. Don’t overmix—you want it to just hold its shape when pressed. Overworking the dough will make the shells tough instead of gloriously crisp.
Next, press the dough evenly into your mini tart pans. I use the back of a spoon to get into all the nooks and crannies. Pop them in the oven for 10-12 minutes, until they’re golden and smell buttery. Let them cool completely before filling—no cheating here, or your curd will melt right through!
Making the Lemon Curd
While the shells cool, let’s make that dreamy curd. In a saucepan, whisk together the lemon juice, zest, sugar, and eggs. Now, here’s the part where you’ve got to stay vigilant: cook this over medium heat, stirring constantly with a wooden spoon. I mean it—no walking away to check your phone! You’re looking for the mixture to thicken enough to coat the back of the spoon, about 5-7 minutes. When you drag your finger through it, it should leave a clean line.
Once it’s thick, take it off the heat and stir in the softened butter until it’s completely melted and smooth. The butter not only adds richness but also gives the curd that gorgeous silky texture. If you see any little lumps (it happens to the best of us), just strain the curd through a fine-mesh sieve for absolute perfection.
Assembling and Chilling
Now for the best part—spoon that luscious curd into your cooled tart shells. Smooth the tops with a little offset spatula or the back of a spoon. Then, and this is crucial, pop them in the fridge for at least 2 hours to set. I know, the waiting is torture, but this step is non-negotiable if you want that perfect, sliceable texture. The curd will firm up beautifully, and that crisp shell will stay crisp under all that tangy goodness.
When they’re finally ready, take one bite, and I promise—you’ll understand why I’m so obsessed with these little tarts.
Tips for Perfect Mini Lemon Tarts with a Smooth, Tangy Curd and Crisp Shell
After making countless batches of these tarts (and learning from all my mistakes), here are my golden rules for foolproof perfection:
- Chill your dough – If the butter gets too warm, your shells won’t stay crisp. I pop the shaped shells in the freezer for 10 minutes before baking for extra insurance.
- Fresh lemons or bust – Bottled juice just doesn’t have that bright, zingy flavor. And zest those lemons first—it’s easier before juicing!
- Watch those shells like a hawk – They go from golden to burnt FAST. At 10 minutes, start checking every 60 seconds.
- Strain that curd – Even if it looks smooth, passing it through a sieve guarantees silky texture without any sneaky cooked egg bits.
- Patience is key – Rushing the chilling time means runny curd. Set a timer for those 2 hours—it’s worth the wait.
Ingredient Substitutions
Ran out of lemons? No problem—here’s how to adapt without losing that signature flavor:
- Lime juice works beautifully for a tropical twist (use slightly less—it’s more potent than lemon).
- Gluten-free flour blend can replace all-purpose, though shells may be more crumbly.
- Coconut oil substitutes for butter in the crust (expect a slightly nuttier taste).
- Honey or maple syrup can replace sugar in the curd—reduce other liquids slightly since they’re sweeter.
Remember: swaps change texture slightly, but the tarts will still be delicious!
Serving Suggestions
These mini lemon tarts are lovely all on their own, but oh—how they shine with a little extra love! For tea parties, I love topping each with a dollop of lightly sweetened whipped cream and a single raspberry. Fresh mint leaves make them look extra fancy, while a dusting of powdered sugar gives that classic Parisian café vibe. They’re also heavenly with a scoop of vanilla bean ice cream when you want to go all out. Honestly, though? My favorite way is straight from the fridge, standing at the counter—no garnish needed.
Storing Mini Lemon Tarts with a Smooth, Tangy Curd and Crisp Shell
Here’s the good news—these little beauties keep beautifully in the fridge! Just tuck them into an airtight container (I layer them between parchment paper so they don’t stick), and they’ll stay fresh for up to 3 days. The shells might soften slightly by day 3, but that curd? Still gloriously tangy. One warning: don’t freeze them. The curd weeps when thawed, and nobody wants a soggy tart. Trust me—they disappear way before storage becomes an issue anyway!
Nutritional Information
Just a heads up—these numbers are estimates, but here’s the scoop per mini tart: about 150 calories, 8g fat (5g saturated), and 10g sugar. Not too shabby for a bite of sunshine! Remember, portion sizes and ingredient brands can tweak these numbers slightly.
FAQs About Mini Lemon Tarts with a Smooth, Tangy Curd and Crisp Shell
Can I use bottled lemon juice?
Oh honey, I don’t recommend it—fresh lemons give that bright, zesty punch bottled stuff just can’t match. If you must use bottled, add an extra teaspoon of zest to boost the flavor.
Why is my curd lumpy?
You probably stopped stirring! Keep that wooden spoon moving constantly over medium heat. If lumps happen, don’t panic—just strain the curd through a fine mesh sieve before filling your shells.
How do I prevent soggy shells?
Three words: cool completely. Let those baked shells sit until they’re no longer warm to the touch before adding curd. And never skip the chilling step—that 2-hour fridge time sets everything perfectly!
I’d love to hear how your mini lemon tarts turn out! Did you add any fun twists? Maybe a sprinkle of lavender or a dash of vanilla in the curd? Drop a note in the comments—I read every one. And if you snapped a photo of your golden little beauties (we all know that perfect crumb shot is hard to resist!), tag me on Instagram! There’s nothing I love more than seeing your kitchen creations. Happy baking, friends—may your shells stay crisp and your curd stay perfectly puckery!
Print
Mini Lemon Tarts with a 2-Hour Chill & Perfect Tangy Curd
- Total Time: 35 minutes
- Yield: 12 mini tarts 1x
- Diet: Vegetarian
Description
Mini lemon tarts with a smooth, tangy curd and crisp shell, perfect for a refreshing dessert or snack.
Ingredients
- 1 cup all-purpose flour
- 1/2 cup unsalted butter, cold and cubed
- 2 tbsp sugar
- 2–3 tbsp ice water
- 1/2 cup fresh lemon juice
- 1 tbsp lemon zest
- 1/2 cup sugar
- 3 large eggs
- 1/4 cup unsalted butter, softened
Instructions
- Preheat your oven to 350°F (175°C).
- In a food processor, combine flour, cold butter, and sugar. Pulse until the mixture resembles coarse crumbs.
- Add ice water, one tablespoon at a time, pulsing until the dough comes together.
- Press the dough into mini tart pans and bake for 10-12 minutes until golden. Let cool.
- In a saucepan, whisk together lemon juice, lemon zest, sugar, and eggs. Cook over medium heat, stirring constantly, until thickened.
- Remove from heat and stir in softened butter until smooth.
- Pour the lemon curd into the cooled tart shells and refrigerate for at least 2 hours before serving.
Notes
- Use fresh lemon juice for the best flavor.
- Chill the dough before baking for easier handling.
- Store tarts in the refrigerator for up to 3 days.
- Prep Time: 20 minutes
- Cook Time: 15 minutes
- Category: Dessert
- Method: Baking
- Cuisine: French
Nutrition
- Serving Size: 1 mini tart
- Calories: 150
- Sugar: 10g
- Sodium: 20mg
- Fat: 8g
- Saturated Fat: 5g
- Unsaturated Fat: 2g
- Trans Fat: 0g
- Carbohydrates: 18g
- Fiber: 0.5g
- Protein: 2g
- Cholesterol: 50mg
Keywords: mini lemon tarts, lemon curd, crisp shell, dessert, snack


