
There’s something magical about curling up with a rich, chocolatey dessert that feels like a hug in a cup. These hot chocolate mousse cups with whipped cream hit that perfect spot – decadent enough to satisfy your sweet tooth, yet light enough that you won’t feel guilty going back for seconds (trust me, you will).
I first fell in love with this dessert during a cozy winter getaway years ago. The bakery down the street served theirs in little espresso cups, topped with clouds of barely-sweetened whipped cream that melted into the chocolate like snowflakes. I’ve been chasing that perfect texture ever since – and after dozens of experiments (and happy taste-testers), this version nails it.
What makes it special? Imagine your favorite mug of hot cocoa transformed into a spoonable cloud. The mousse stays luxuriously thick but dissolves on your tongue, while the whipped cream topping adds that dreamy contrast. It’s fancy enough for dinner parties but simple enough for a Tuesday night treat when you need chocolate therapy.
Why You’ll Love These Hot Chocolate Mousse Cups with Whipped Cream
This recipe is my go-to when I need something special without the fuss. It’s the kind of dessert that makes people think you spent hours in the kitchen, when really? You barely broke a sweat. Here’s why it’s always a winner:
- No oven required – just a saucepan and a whisk
- Ready in under 30 minutes (plus chilling time, but who’s counting?)
- Fancy enough for guests, easy enough for a midnight snack
- That whipped cream topping? Pure happiness in every bite
Key Benefits of This Recipe
Let me tell you what makes these mousse cups truly stand out:
- Cloud-like texture: The way the mousse melts on your tongue is pure magic
- Pantry staples: You probably have everything you need right now
- Foolproof steps: If you can whip cream, you can make this
- Instant crowd-pleaser: Serve these at any gathering and watch them disappear
Ingredients for Hot Chocolate Mousse Cups with Whipped Cream
Here’s what you’ll need to create this little cup of chocolate heaven. I promise it’s nothing fancy – just simple ingredients that work magic together. Pro tip: measure everything before you start. There’s nothing worse than realizing you’re short on cream when your chocolate mixture is already waiting!
- 1 cup heavy cream (cold) – This is your mousse’s fluffy foundation
- 1/2 cup milk – Whole milk makes it extra creamy, but 2% works
- 1/4 cup cocoa powder – The better the cocoa, the richer the flavor
- 1/4 cup sugar – Adjust to your sweet tooth’s demands
- 1 tsp vanilla extract – Pure vanilla makes all the difference
- 1/2 cup whipped cream – For that dreamy cloud on top
- Chocolate shavings (optional) – Because pretty food tastes better
Ingredient Notes & Substitutions
I’ve learned a few kitchen truths through trial and error with this recipe. Here’s what really matters:
- Cream is king: Full-fat heavy cream (at least 36% fat) whips best. Light cream? It’ll break your heart (and your mousse).
- Cocoa choices: Dutch-process gives deeper flavor, but natural works too. Just sift it – lumpy cocoa is nobody’s friend.
- Milk swaps: Dairy-free? Almond or oat milk work beautifully here. Just avoid anything too watery like rice milk.
- Sweet talk: Brown sugar adds caramel notes if you’re feeling fancy. Want it darker? Try reducing sugar to 3 tbsp.
- Vanilla bonus: For special occasions, swap half the vanilla for orange extract or a splash of bourbon. Trust me on this.
Remember – ingredients should be cold or room temp, never warm (except the milk you’re heating, obviously). Cold cream whips better, and cold bowls help too. I sometimes chill my mixing bowl in the freezer for 10 minutes before starting. Little tricks make big differences!
How to Make Hot Chocolate Mousse Cups with Whipped Cream
Now for the fun part! Making these mousse cups is like creating edible magic – a little patience and the right technique will give you that dreamy texture everyone raves about. Don’t worry, I’ll walk you through each step like I’m right there in the kitchen with you.
- Warm the milk gently: Pour your milk into a small saucepan over medium-low heat. We want it warm enough to dissolve the cocoa and sugar – about 2-3 minutes – but never boiling. (Watch for tiny bubbles around the edges!) Remove it from heat the moment you see steam rising.
- Whisk in chocolatey goodness: Add your cocoa powder and sugar all at once. Now whisk like you mean it for a full minute – no lazy stirring here! You’re looking for a smooth, lump-free chocolate syrup. Still grainy? Keep whisking. It’ll come together, I promise.
- Cool it down: Stir in the vanilla, then let this mixture cool to room temp (about 15 minutes). Too hot? It’ll deflate your whipped cream later. I sometimes speed this up by setting the pan in a bowl of ice water while stirring occasionally.
- Whip it good: In a chilled bowl, beat the cold heavy cream until stiff peaks form – about 2-3 minutes with an electric mixer. Stop when the cream holds its shape when you lift the beaters. Overwhipped cream looks grainy; if this happens, stir in 1 tbsp fresh cream to save it.
- The magic fold: Add half the cooled chocolate mixture to the whipped cream. Use a rubber spatula and cut through the center, then sweep up the sides in a “J” motion. Rotate the bowl and repeat until just combined. Add remaining chocolate and fold gently – some streaks are fine! Overmixing deflates our fluffy dreams.
- Chill out: Spoon the mousse into cups (I use 4 oz ramekins) and refrigerate for at least 2 hours. The wait is torture, I know, but it lets the flavors deepen and texture set properly. Cover loosely with plastic if chilling longer.
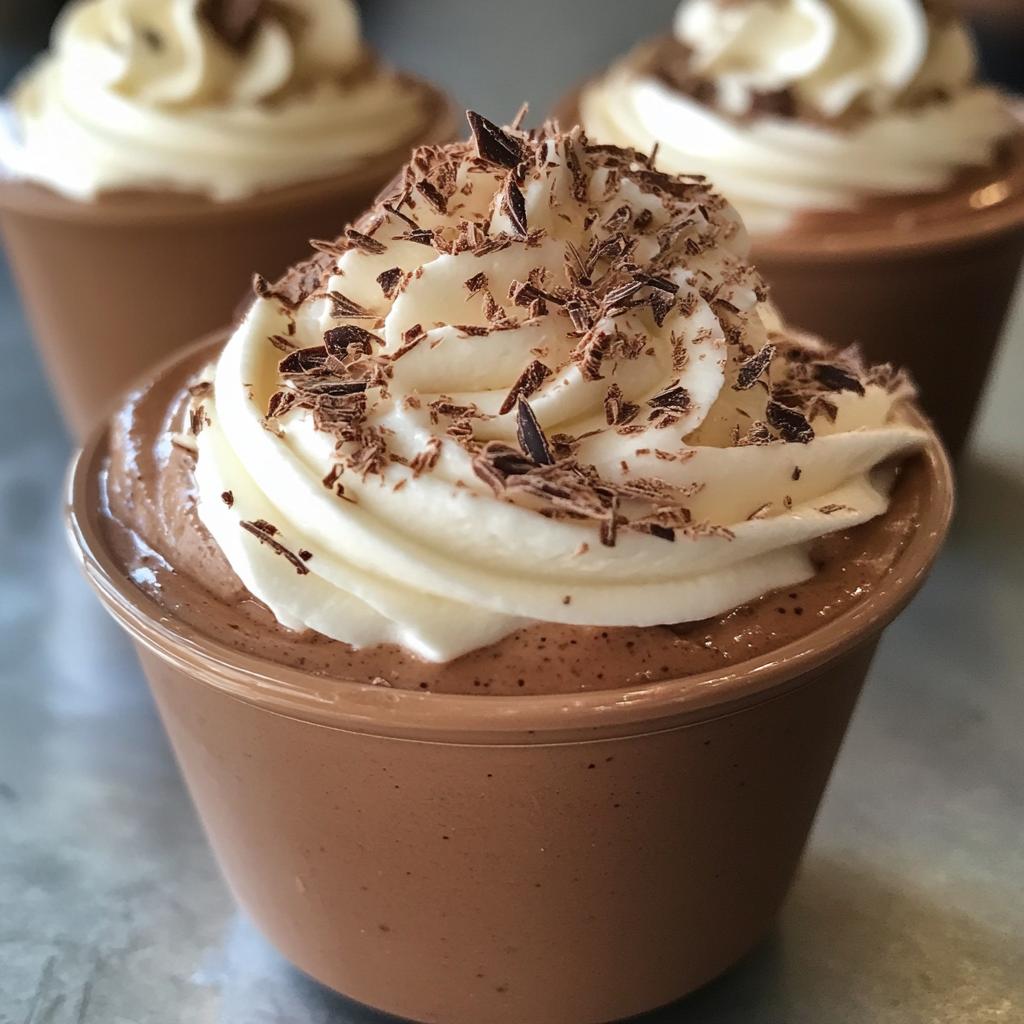
- Top it off: Right before serving, dollop with fresh whipped cream and chocolate shavings if you’re feeling fancy. The contrast of cold mousse with lightly sweetened cream? Absolute perfection.
Pro Tips for Perfect Mousse
After making dozens (okay, maybe hundreds) of these, here’s what I’ve learned the hard way so you don’t have to:
- Temperature matters: If your chocolate mixture is even slightly warm when folding, it’ll melt the whipped cream. Press your finger to the bottom of the pan – it should feel completely cool.
- Fold with care: Think of gently turning a page in a book, not stirring batter. About 15 folds total is usually perfect. Too many and your mousse loses its lift.
- Chill your cups: For faster setting, pop your serving cups in the freezer 10 minutes before filling. This helps the mousse firm up quicker at the edges.
- The peak test: When whipping cream, stop when peaks stand straight up but the tip curls slightly when you lift the beater. Keep going past this and you’ll make butter (ask me how I know).
- Timing tweak: In a hurry? Divide the mousse into smaller containers – shot glasses set in about 1 hour, while deeper bowls may need 3 hours.
Remember – the mousse will look too soft when you first spoon it in. Have faith! That chill time works wonders. When done right, it should hold its shape but practically dissolve on your tongue. That’s when you know you’ve nailed it.
Serving Suggestions for Hot Chocolate Mousse Cups
Here’s where you can really have fun and make these mousse cups your own! I love playing with different ways to serve them depending on the occasion. Whether it’s a fancy dinner party or a cozy night in, a few simple touches can turn this dessert into something truly special.
My go-to pairings:
- Espresso or coffee: The bitterness cuts through the sweetness perfectly. I sometimes serve these in actual coffee cups with tiny spoons for that café vibe.
- Fresh berries: Raspberries or strawberries add a bright pop of color and tartness. In winter, a spoonful of orange segments works wonders.
- Crunchy toppings: A sprinkle of crushed amaretti cookies or toffee bits gives amazing texture contrast.
- Mint garnish: Just one small leaf makes it look professionally plated – and the flavor combo is classic.
Presentation tricks I swear by:
- Use a piping bag with a star tip for that whipped cream topping – it takes 30 seconds but looks like you spent hours.
- Dust with cocoa powder through a fine mesh sieve for that fancy coffeehouse look.
- For parties, serve in clear glasses so guests can see the layers – the chocolate mousse against white cream is gorgeous.
- Kids love it when I add rainbow sprinkles or mini marshmallows on top.
Last Christmas, I made a big batch in mini mason jars with crushed candy canes on top – they doubled as edible favors! The beauty of this recipe is how adaptable it is. One of my favorite lazy versions? Spoon the mousse straight from the mixing bowl into my favorite mug, add a mountain of whipped cream, and curl up on the couch. Sometimes simple is best.
Pro tip: If you’re serving these at a gathering, prep everything ahead but wait to add the whipped cream topping until right before serving. That way it stays picture-perfect and doesn’t start to weep. And don’t forget the tiny spoons – half the fun is slowly savoring every luxurious bite!
Storage & Reheating Instructions
Here’s the beautiful thing about these mousse cups – they actually get better after a night in the fridge! But there are a few storage tricks you’ll want to know to keep that perfect texture. I learned these the hard way after a few sad, weepy mousse disasters (we don’t talk about The Great Freezer Incident of 2020).
Fridge storage:
Cover the cups tightly with plastic wrap or transfer to an airtight container. They’ll keep beautifully for up to 3 days, though the texture starts changing after 48 hours. The whipped cream topping is best added fresh, but if you must store it topped, press plastic directly onto the cream’s surface to prevent crusting.
The freezing dilemma:
I know it’s tempting to freeze leftovers (I’ve been there!), but trust me – this mousse doesn’t take kindly to freezing. The whipped cream breaks down when thawed, leaving you with a grainy texture that’s just not the same. If you absolutely must freeze, skip the topping and expect to lose some fluffiness. Thaw overnight in the fridge and re-whip briefly before serving.
Reheating? Don’t!
These are meant to be served chilled straight from the fridge. Microwaving will melt your masterpiece into soup (again, learned the hard way). If your mousse seems too firm after refrigeration, let it sit at room temperature for 5-10 minutes to soften slightly. Pro tip: The colder your serving dishes, the longer the mousse holds its shape at room temperature during parties.
One last storage secret: If you need to make these more than a day ahead, prepare the mousse base but wait to fold in the whipped cream until 4 hours before serving. The chocolate mixture keeps beautifully for up to 5 days in the fridge – just give it a good stir and proceed with the recipe from the whipping step. It’s my go-to trick for stress-free entertaining!
Hot Chocolate Mousse Cups with Whipped Cream FAQs
I get so many questions about this recipe from friends and readers – turns out we all want our mousse to be perfect! Here are answers to the most common questions that pop up. Trust me, I’ve made every possible mistake so you don’t have to.
Can I make these mousse cups ahead of time?
Absolutely! The mousse base (without topping) keeps beautifully for up to 3 days in the fridge. In fact, letting it chill overnight deepens the chocolate flavor. Just hold off on adding the whipped cream until right before serving – it stays prettier that way.
Help! My mousse turned out grainy – what went wrong?
Usually this means either the cocoa didn’t fully dissolve in the warm milk (keep whisking until perfectly smooth!) or the whipped cream got overbeaten. For salvage mode, gently fold in 1-2 tbsp of fresh, unwhipped cream to smooth it out. Next time, watch for those stiff-but-still-soft peaks when whipping.
Can I turn this into a dairy-free chocolate mousse?
You bet! Swap the heavy cream for full-fat coconut cream (chill the can first) and use your favorite plant-based milk. The texture will be slightly different but still delicious. Just avoid low-fat alternatives – we need that fat for the right mouthfeel.
Why is my mousse too runny after chilling?
Three likely culprits: 1) Didn’t chill long enough (patience is key!), 2) Overmixed when folding, or 3) The chocolate mixture was too warm when combined with cream. If it’s already in cups, pop them in the freezer for 30 minutes to firm up. Next time, make sure everything is properly cooled before combining.
What’s the best cocoa powder for this no-bake chocolate dessert?
I prefer Dutch-process cocoa for its deeper flavor, but regular unsweetened cocoa works too. Just sift it first to avoid lumps. Fancy chocolate lovers can substitute 2 tbsp cocoa powder with 1 oz melted dark chocolate for extra richness – just let it cool slightly before mixing.
Nutritional Information
Let’s be real – we’re not eating chocolate mousse for our health, but it’s good to know what you’re enjoying! These estimates are based on standard ingredients, but your exact numbers may vary depending on brands and substitutions. As my grandmother used to say, “Good food feeds the soul first – the rest is just details!”
- Serving size: 1 cup (about 4 oz)
- Calories: 280
- Total fat: 20g (12g saturated)
- Sugar: 18g
- Protein: 3g
- Fiber: 2g
A few quick notes from my kitchen experiments: Using low-fat milk instead of whole will save you about 20 calories per serving, but you’ll sacrifice some creaminess. That whipped cream topping adds about 50 calories, but honestly? Worth every single one. For a slightly lighter version, you could reduce the sugar to 3 tbsp – the chocolate flavor still shines through beautifully.
Remember, nutritional info is just a guideline. What really matters is that moment when the rich chocolate melts on your tongue and makes everything else fade away. That’s the kind of nourishment no label can measure!
Share Your Creations!
Nothing makes me happier than seeing your versions of these hot chocolate mousse cups! Whether yours turn out picture-perfect or happily imperfect (my first attempts certainly were), I want to celebrate your kitchen adventures with you.
Snap a photo of your mousse masterpiece and tag me @[YourHandle] on Instagram – I’ll be your biggest cheerleader! Seeing your creative twists (hello, peppermint topping in December!) always inspires me. Plus, we can swap tips when things don’t go quite as planned (been there!).
Pro tip for food photos: Natural light near a window makes that whipped cream look extra dreamy. And if you’re extra proud? Use the hashtag #HotChocolateMousseMagic so we can all admire your work. Nothing beats a community of chocolate lovers sharing the joy!
Now go forth and create – then show off those gorgeous mousse cups. I can’t wait to see what you whip up!
Print
Indulge in Dreamy 30-Minute Hot Chocolate Mousse Cups
- Total Time: 2 hours 20 minutes
- Yield: 4 servings 1x
- Diet: Vegetarian
Description
A rich and creamy hot chocolate mousse served in cups, topped with whipped cream for a decadent dessert.
Ingredients
- 1 cup heavy cream
- 1/2 cup milk
- 1/4 cup cocoa powder
- 1/4 cup sugar
- 1 tsp vanilla extract
- 1/2 cup whipped cream for topping
- Chocolate shavings (optional)
Instructions
- Heat the milk in a saucepan over medium heat until warm.
- Whisk in cocoa powder and sugar until fully dissolved.
- Remove from heat and stir in vanilla extract.
- Whip the heavy cream until stiff peaks form.
- Fold the whipped cream into the chocolate mixture gently.
- Spoon the mousse into serving cups.
- Chill for at least 2 hours.
- Top with whipped cream and chocolate shavings before serving.
Notes
- Use high-quality cocoa powder for best flavor.
- Chill the mixing bowl and beaters before whipping cream.
- Serve immediately after adding toppings.
- Prep Time: 15 minutes
- Cook Time: 5 minutes
- Category: Dessert
- Method: No-Bake
- Cuisine: International
Nutrition
- Serving Size: 1 cup
- Calories: 280
- Sugar: 18g
- Sodium: 30mg
- Fat: 20g
- Saturated Fat: 12g
- Unsaturated Fat: 6g
- Trans Fat: 0g
- Carbohydrates: 22g
- Fiber: 2g
- Protein: 3g
- Cholesterol: 60mg
Keywords: hot chocolate mousse, whipped cream, dessert, chocolate dessert


