
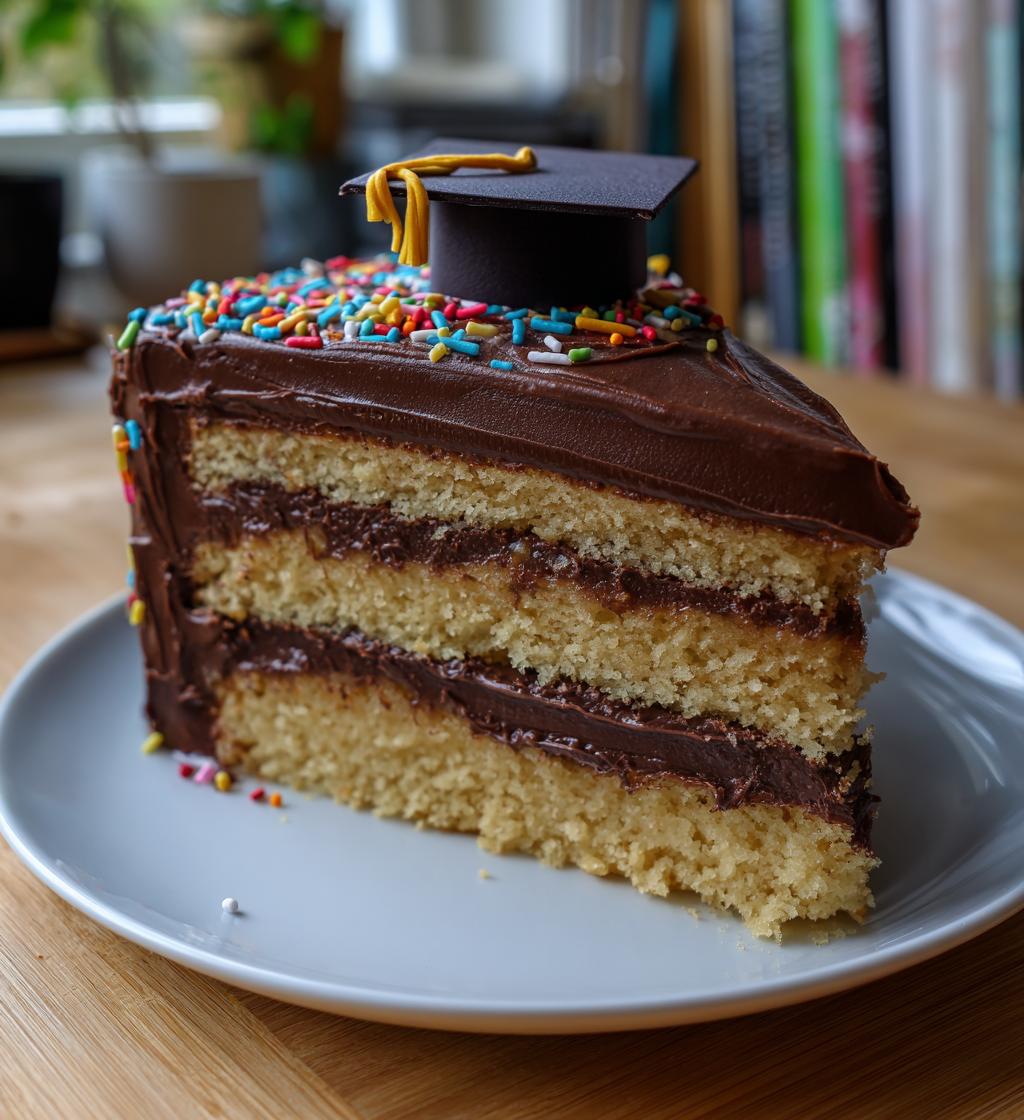
Graduation is such a monumental occasion, isn’t it? It’s that time when all those late-night study sessions and caffeine-fueled mornings finally pay off. Whether it’s high school or college, celebrating this milestone deserves something truly special, and what better way to do that than with a delicious cake? When I think of graduation cake ideas for boys, I immediately envision something simple yet striking—something that speaks to their personality while being easy to make. I remember the first graduation cake I made for my little brother. It was a whirlwind of flour and excitement, and the look on his face when he saw it was priceless! This cake is not just about taste; it’s about creating memories. You can whip this up quickly, decorate it with graduation-themed items like caps and diplomas, and personalize it to make it feel even more special. So, let’s dive into this easy yet delightful cake recipe that’s perfect for making your graduate feel celebrated!
Ingredients List
Here’s everything you’ll need to create this delightful graduation cake. Trust me, it’s simple to gather these ingredients, and they work together beautifully!
- 2 cups all-purpose flour
- 1 ½ cups granulated sugar
- ½ cup unsalted butter, softened
- 1 cup milk
- 3 large eggs
- 2 teaspoons baking powder
- 1 teaspoon vanilla extract
- Food coloring (optional, for a fun twist!)
- Decorative items like a graduation cap and diploma to bring it all together
Having these ingredients on hand makes the baking process smooth and enjoyable. You’ll see how each component contributes to that lovely, moist cake that everyone will rave about!
How to Prepare Instructions
Now that you’ve got your ingredients ready, let’s get down to business! Making this graduation cake is straightforward, and I promise, it’ll be a breeze if you follow these steps. Grab your favorite mixing bowl, and let’s get started!
Prepping the Oven and Pans
First things first, we need to preheat that oven! Set it to 350°F (175°C) and let it warm up while you prepare your pans. This step is super important because a hot oven helps the cake rise beautifully. Now, take two 9-inch round cake pans and grease them with a little unsalted butter or non-stick spray. Then, dust them with flour to prevent sticking. Don’t skip this part! Trust me, there’s nothing worse than a delicious cake that won’t come out of the pan.
Making the Batter
In your mixing bowl, cream together the softened butter and sugar until the mixture turns light and fluffy. This typically takes about 3-4 minutes. Next, crack in the eggs one at a time, mixing well after each addition. This helps to incorporate air into the batter! After that, stir in the milk and vanilla extract. Just wait until you smell that vanilla; it’s heavenly!
Combining Dry Ingredients
Now, let’s mix our dry ingredients. In a separate bowl, whisk together the flour and baking powder. This step ensures that the baking powder is evenly distributed throughout the flour. Gradually add this dry mixture to your wet ingredients, mixing gently. Don’t overdo it; just mix until there are no dry streaks left. If you’re feeling adventurous, this is the time to add a splash of food coloring for that extra flair!
Baking the Cakes
Once your batter is ready, pour it evenly into the prepared cake pans. Give them a little shake to smooth out the top. Pop them into the oven and bake for about 30-35 minutes. Here’s a handy tip: when your cakes are done, they’ll start pulling away from the edges of the pan, and a toothpick inserted in the center should come out clean. These little signs mean your cakes are perfectly baked!
Decorating the Cake
After the cakes are baked, let them cool in the pans for about 10 minutes before transferring them to a wire rack. It’s crucial to let them cool completely before decorating; otherwise, your frosting will melt into a gooey mess! Once cooled, you can frost with chocolate or vanilla frosting and adorn it with those fun graduation-themed decorations. A cap and diploma on top will make it look festive and ready for the celebration! Enjoy the process and don’t forget to snap a few photos for those memory books!
Nutritional Information
Now, let’s talk about the nutritional information for this delightful graduation cake. While it’s important to enjoy these celebrations, knowing what’s in the cake can help you serve it with confidence. Here’s a breakdown of the typical values per slice, keeping in mind that these estimates can vary based on the specific ingredients you choose:
- Calories: 250
- Fat: 10g
- Saturated Fat: 6g
- Unsaturated Fat: 3g
- Trans Fat: 0g
- Cholesterol: 50mg
- Sodium: 200mg
- Carbohydrates: 35g
- Fiber: 1g
- Sugar: 18g
- Protein: 3g
Remember, these values are just estimates, so feel free to adjust them based on your ingredient choices, especially if you decide to use different types of frosting or add more decorations. Enjoy your baking and the deliciousness that follows!
FAQ Section
Got questions about this graduation cake? Don’t worry, I’ve got you covered! Here are some common inquiries I hear, along with my best tips to help you out.
Can I substitute the butter for something else?
Absolutely! If you’re looking for a lighter option, you can use vegetable oil or even applesauce in place of the butter. Just remember that the texture may be a bit different, but it’ll still taste great!
What’s the best way to store leftover cake?
To keep your cake fresh, store it in an airtight container at room temperature for up to three days. You can also refrigerate it if you want it to last a bit longer. Just be sure to let it come to room temperature before serving again, as it’ll be much tastier that way!
How can I personalize the cake for my graduate?
Personalizing is where the fun really begins! You can add your graduate’s name with frosting, or even create a themed cake based on their interests. Think sports, hobbies, or favorite colors. The sky’s the limit—make it special for them!
Can I make this cake ahead of time?
Sure thing! You can bake the cakes a day or two in advance. Just let them cool completely, wrap them tightly in plastic wrap, and store them in the fridge. When you’re ready to decorate, take them out and let them come to room temperature first!
What if I want to change the flavor of the cake?
If you’re feeling adventurous, you can easily switch things up! Try using chocolate cake mix instead of vanilla or add some citrus zest for a refreshing twist. You can even fold in chocolate chips or nuts for added texture. Just have fun with it!
Why You’ll Love This Recipe
- Quick Preparation: With just 20 minutes of prep time, you can have this cake in the oven and ready to bake before you know it!
- Simple to Decorate: This cake is a blank canvas! You can easily add graduation-themed decorations, making it perfect for personal touches.
- Perfect for Celebrations: It’s designed specifically with boys’ graduations in mind, making it a fitting centerpiece for their big day.
- Moist and Delicious: Thanks to the combination of butter, eggs, and milk, this cake stays moist and flavorful, ensuring everyone will want a second slice.
- Customizable Options: Whether you want to add color to the cake or change the flavor, the recipe is flexible enough to cater to different tastes.
- Feeds a Crowd: With 12 servings, it’s perfect for sharing with friends and family during graduation parties!
Tips for Success
Want to ensure your graduation cake turns out perfectly? I’ve got some fantastic tips to help you achieve the best results! Trust me, these little nuggets of wisdom can make all the difference in your baking experience.
Choosing the Right Frosting
When it comes to frosting, you really can’t go wrong! For a classic touch, I recommend using either chocolate or vanilla frosting. They complement the cake’s flavor wonderfully. If you’re feeling adventurous, consider cream cheese frosting for a tangy twist or whipped cream for a lighter option. Just make sure whatever you choose pairs well with your decorations!
Experiment with Decoration Techniques
Don’t shy away from getting creative with decorations! You can use store-bought graduation-themed items like caps and diplomas, or go the extra mile with homemade decorations. Try piping colorful frosting around the edges for a fun border or use edible glitter for a little sparkle. A simple cake topper with your graduate’s name or graduation year can add a personal touch that makes it even more special!
Keep It Level
To achieve that perfect layered cake look, invest in a cake leveler or a serrated knife. Leveling the tops of your cakes ensures they stack evenly and look professional. Plus, it makes for easier frosting and decorating!
Let Your Cake Cool Completely
This one’s crucial! Allow your cakes to cool completely before you start frosting. Otherwise, you’ll end up with a melty mess that’s not fun for anyone. I usually let mine cool in the pans for about 10 minutes and then transfer them to a wire rack. It makes a world of difference!
Practice Patience
Baking is an art that requires a bit of patience. Don’t rush through the steps, especially when mixing your batter. Take your time to cream the butter and sugar until fluffy and incorporate the ingredients gently. Trust me, it pays off in the texture of the cake!
Have Fun with It!
Lastly, remember to enjoy the process! Baking is about creating memories, so don’t stress too much about perfection. Embrace any little quirks that come up along the way. Your graduate will appreciate the love and effort you put into making their special day even sweeter!
Variations
One of the best things about this graduation cake recipe is how versatile it is! You can easily customize it to match your graduate’s personality or interests. Here are some fun ideas that’ll make your cake stand out even more:
Flavor Twists
If your graduate has a favorite flavor, why not switch things up? Instead of vanilla, try using chocolate cake for a rich, decadent treat. You can also experiment with lemon or orange zest for a refreshing citrus flavor, or even add some cocoa powder to create a chocolate marble cake. The possibilities are endless, and it’s a great way to make the cake uniquely theirs!
Colorful Cake
Want to add a pop of color? Use food coloring to dye the batter before baking. You can create a fun tie-dye effect by swirling different colors together or make layers of different shades in each cake pan. This is especially fun if you know the school colors or if your graduate has a favorite team. Just imagine slicing into a vibrant cake—what a fun surprise!
Themed Decorations
Personalize the cake even further by choosing decorations that reflect your graduate’s hobbies or interests. If they love sports, consider using small cake toppers of their favorite team or even making little edible sports equipment from fondant. For the budding artist, you could create a paint palette and brush with colorful frosting. The key is to let their personality shine through!
Layered Delight
If you want to elevate the cake, think about making it a layered masterpiece! Bake an extra layer or two and stack them high with frosting in between. You can alternate flavors or colors for a stunning visual effect. Just remember to level each layer for that professional look!
Fun Add-Ins
Mix in some goodies for added texture and flavor! Chocolate chips, nuts, or sprinkles are great options. If your graduate loves cookies, crumble some Oreo cookies into the batter for a cookies-and-cream cake. This not only makes it fun but also allows for little surprises in each bite!
These variations can make the cake truly special, reflecting your graduate’s achievements and personality. So, get creative and have fun with it! Your cake will be the highlight of the celebration, and I can’t wait for you to see the joy on their face when they see what you’ve created!
Storage & Reheating Instructions
So, you’ve made this delicious graduation cake, and now you have some leftovers. No worries—proper storage will keep it fresh and tasty for days to come! Here’s how to store your cake correctly and some tips for reheating if you want to enjoy it again warm.
Storing Leftover Cake
To keep your cake fresh, first, let it cool completely if you haven’t already. Once cool, wrap it tightly in plastic wrap or place it in an airtight container. This helps prevent it from drying out. You can keep it at room temperature for up to three days. If you want it to last longer, pop it in the fridge, where it can stay fresh for about a week.
If you’ve frosted the cake, it’s best to store it in the refrigerator to prevent the frosting from melting. Just be sure to cover it well to avoid any fridge odors seeping in. And if you’re planning to keep it for more than a week, consider freezing it!
Freezing for Later
Freezing is a great option if you want to save some cake for later. Just slice the cake into individual portions, wrap each slice tightly in plastic wrap, and then place them in a freezer-safe bag or container. This way, you can easily grab a slice whenever you’re craving a sweet treat! The cake can be frozen for up to three months.
Reheating Instructions
When you’re ready to enjoy those leftover slices, you can reheat them for a warm, comforting treat. If your cake is frozen, let it thaw in the fridge overnight before reheating. For a quick option, you can use the microwave—just pop a slice on a microwave-safe plate and heat it for about 10-15 seconds. Keep an eye on it so it doesn’t get too hot!
If you prefer a slightly crispier edge, you can warm it up in the oven. Preheat your oven to 350°F (175°C), place the slice on a baking sheet, and warm it for about 5-10 minutes. This method brings back that fresh-baked flavor!
With these storage and reheating tips, you can savor every bite of your graduation cake well beyond the big day. Enjoy the memories as you indulge in this delicious creation!
Print
Graduation Cake Ideas for Boys Simple Yet Memorable Treats
- Total Time: 55 minutes
- Yield: 12 servings 1x
- Diet: Vegetarian
Description
A simple graduation cake design for boys that is easy to make and decorate.
Ingredients
- 2 cups all-purpose flour
- 1 ½ cups sugar
- ½ cup unsalted butter
- 1 cup milk
- 3 eggs
- 2 teaspoons baking powder
- 1 teaspoon vanilla extract
- Food coloring (optional)
- Decorative items (graduation cap, diploma)
Instructions
- Preheat the oven to 350°F (175°C).
- Grease and flour two 9-inch round cake pans.
- In a bowl, cream together the butter and sugar.
- Add eggs one at a time, mixing well after each addition.
- Stir in the milk and vanilla.
- In a separate bowl, combine flour and baking powder.
- Gradually add the dry ingredients to the wet mixture.
- If desired, add food coloring to the batter.
- Pour the batter into the prepared pans.
- Bake for 30-35 minutes or until a toothpick comes out clean.
- Let the cakes cool before removing from pans.
- Decorate with graduation-themed items once cooled.
Notes
- Use chocolate or vanilla frosting for a simple finish.
- Consider personalizing with the graduate’s name.
- Use a cake leveler for even layers.
- Prep Time: 20 minutes
- Cook Time: 35 minutes
- Category: Dessert
- Method: Baking
- Cuisine: American
Nutrition
- Serving Size: 1 slice
- Calories: 250
- Sugar: 18g
- Sodium: 200mg
- Fat: 10g
- Saturated Fat: 6g
- Unsaturated Fat: 3g
- Trans Fat: 0g
- Carbohydrates: 35g
- Fiber: 1g
- Protein: 3g
- Cholesterol: 50mg
Keywords: graduation cake ideas for boys simple


