
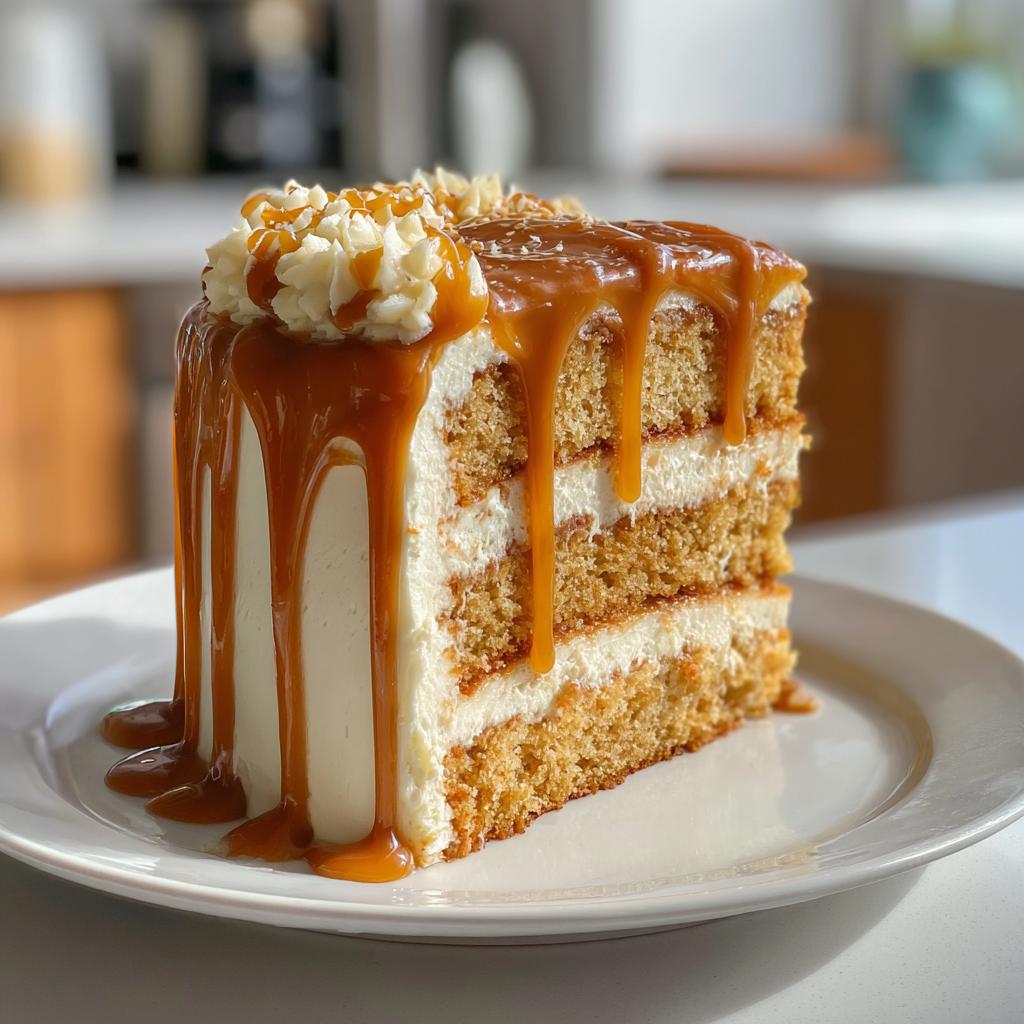
Oh, just wait until you try this golden caramel drip cake with buttercream—it’s pure magic! The first time I made it, my family practically licked their plates clean. There’s something about that rich, velvety caramel dripping down the sides of fluffy cake layers that makes everyone’s eyes light up. And that smooth buttercream? It’s like hugging your taste buds. Trust me, this isn’t just another cake—it’s the kind of dessert that turns ordinary days into celebrations. When you pull it out at parties, people will think you spent hours on it (our little secret: it’s way easier than it looks!).
Ingredients for Golden Caramel Drip Cake with Buttercream
Okay, let’s gather our golden caramel drip cake ingredients – this is where the magic starts! I’ve made this cake more times than I can count, and I’ve learned that quality ingredients make all the difference.
The Cake:
- 2 cups all-purpose flour (sifted – trust me, it makes the cake lighter)
- 1 1/2 cups granulated sugar (regular white sugar works perfectly)
- 1/2 cup unsalted butter (must be room temperature – leave it out for at least an hour)
- 3 large eggs (also room temp – cold eggs can make your batter curdle)
- 1 cup whole milk (the higher fat content gives better texture)
- 1 tsp vanilla extract (use pure vanilla if you can)
- 1 tsp baking powder (make sure it’s fresh!)
- 1/2 tsp salt (just regular table salt)
For Decorating:
- 2 cups buttercream frosting (homemade or store-bought both work)
- 1/2 cup caramel sauce (thicker sauces drip better – I’ll explain why later)
See? Simple ingredients you probably already have! Just remember – room temperature is KEY for butter and eggs. I’ve rushed this before and ended up with dense cake – learn from my mistakes!
How to Make Golden Caramel Drip Cake with Buttercream
Alright, let’s dive into making this showstopper! I’ll walk you through each step like I’m right there in the kitchen with you. Don’t worry if you’re not a pro – my first attempt at this wasn’t perfect either, but it still tasted amazing!
Preparing the Cake Batter
First things first – preheat that oven to 350°F (175°C). While it heats up, let’s make magic happen. Grab your room-temperature butter and sugar (told you that was important!) and cream them together until they’re light and fluffy. This takes about 3 minutes with a mixer – you’ll see the color turn almost white. That’s when you know it’s ready!
Now add your eggs one at a time, mixing well after each. Here’s my tip: crack them into a separate bowl first in case you get shell bits. Mix in the vanilla – that heavenly smell means we’re on the right track!
In another bowl, whisk together your dry ingredients. Then comes the dance – alternate adding the flour mixture and milk to the butter mixture, starting and ending with flour. I do this in about 3 additions of each. The batter should be smooth but don’t overmix – a few small lumps are just fine!
Baking and Cooling
Divide that beautiful batter evenly between your prepared pans. Pro tip: I use a kitchen scale to make sure each layer is exactly the same. Bake for 25-30 minutes – but set a timer for 20 minutes to check. Ovens can be sneaky!
The cake is done when it pulls slightly from the pan edges and a toothpick comes out with a few moist crumbs (not wet batter). Now here’s the hardest part – let them cool completely! I know, the smell is torture, but frosting a warm cake is a recipe for sliding disaster. About 2 hours should do it.
Assembling with Buttercream and Caramel Drip
Time for the fun part! Place your first layer on a plate or cake stand. Spread about ¾ cup of buttercream evenly – I like using an offset spatula for this. Add the second layer and do a “crumb coat” – a thin layer of frosting over the whole cake to catch any crumbs. Pop it in the fridge for 15 minutes, then do your final frosting layer.
For the grand finale – the caramel drip! Use a spoon to drizzle around the edges first, letting it naturally drip down. Then fill in the top. If your caramel is too thick, warm it slightly. Too thin? Chill it briefly. I like to do this part with the cake on a turntable for even drips all around. Step back and admire your masterpiece!
Why You’ll Love This Golden Caramel Drip Cake
Oh honey, let me count the ways this cake will steal your heart (and probably your diet resolutions)!
- That first bite – The rich caramel and velvety buttercream combo is pure bliss. It’s like your favorite candy and dessert had a baby!
- Looks like a bakery masterpiece – Those golden caramel drips make it look professionally decorated, even if you’re all thumbs with frosting.
- Surprisingly simple – No fancy techniques here! Just good old-fashioned mixing and baking with a wow-factor finish.
- Always a crowd-pleaser – I’ve brought this to everything from baby showers to work potlucks, and it disappears every time.
- Better the next day – The flavors meld beautifully overnight (if you can resist eating it all immediately!).
Trust me, this cake will become your new secret weapon for making people feel special!
Tips for the Perfect Golden Caramel Drip Cake
After making this cake more times than I can count (and yes, eating my fair share of “test batches”), I’ve picked up some foolproof tricks to guarantee success every time!
Temperature is everything: I can’t stress this enough – room-temperature butter and eggs make all the difference. Cold ingredients just don’t incorporate the same way. If you forget to take them out early, here’s my quick fix: place eggs in warm water for 5 minutes, and microwave butter in 5-second bursts until slightly soft but not melted.
Caramel control: The perfect drip consistency should be like warm honey. Too thick? Microwave for 5 seconds. Too runny? Chill for 2 minutes. Test a drip on a glass first – it should slowly flow down without being watery. And always use a spoon, not a squeeze bottle, for that artisanal handmade look!
Storage smarts: This cake keeps beautifully at room temperature in an airtight container for 3 days (if it lasts that long!). The buttercream actually protects the cake from drying out. Just avoid the fridge – it makes the cake dense and dulls the caramel flavor.
Ingredient Substitutions and Notes
Don’t stress if you’re missing something – I’ve made this golden caramel drip cake with all sorts of swaps and it still turns out delicious! Here are my tried-and-true substitutions:
Butter: Out of unsalted? Use salted butter but skip the extra salt in the recipe. The difference is barely noticeable in the final cake.
Milk: Whole milk makes the richest cake, but any milk works – even almond or oat milk for a dairy-free version. The texture might be slightly different, but the flavor’s still amazing.
Caramel sauce: The thickness is key for perfect drips! If using store-bought, pick a thick sauce or reduce it slightly by simmering for 2-3 minutes. Too thin? Chill it first. Homemade caramel works beautifully too – just let it cool to room temperature before drizzling.
Remember, baking is about joy, not perfection. Some of my best cakes came from improvisation!
Serving and Storing Golden Caramel Drip Cake
Oh, the joy of slicing into this beauty! I always serve my golden caramel drip cake at room temperature – that’s when the buttercream is perfectly soft and the caramel flows just right. For an extra special touch, pair it with strong coffee or a glass of cold milk. The bitterness balances the sweetness beautifully!
Now, about leftovers (if you’re lucky enough to have any!) – store them in an airtight container at room temperature for up to 3 days. The buttercream acts like a protective shield, keeping the cake moist. Whatever you do, don’t refrigerate it – that just dries out the cake and makes the caramel harden. Trust me, I learned that the hard way after ruining half a cake!
Nutritional Information
Okay, let’s be real – we’re not eating cake for the health benefits, but I know some folks like to keep track. Here’s the scoop on what’s in each slice of this golden caramel drip cake. Just remember – these are estimates based on my specific ingredients, and your numbers might vary slightly depending on brands and exact measurements.
Per serving (1 slice, about 1/10th of the cake):
- Calories: Around 450 – consider it a treat worth savoring!
- Total Fat: 20g (12g saturated) – that rich buttercream does its job
- Carbohydrates: 60g (35g sugars) – hello, sweet caramel goodness
- Protein: 5g – a little bonus from the eggs
- Sodium: 200mg – not bad for such a flavorful dessert
Now, here’s my personal philosophy – life’s too short to stress over dessert nutrition. Enjoy your slice mindfully, share it with loved ones, and save the calorie counting for less delicious moments. After all, some things (like this cake) are worth every bite!
Frequently Asked Questions
Q1. Can I use store-bought caramel sauce for the drip?
Absolutely! Store-bought caramel works just fine, but make sure it’s thick enough for those perfect drips. If it’s too thin, simmer it for a couple of minutes to reduce it slightly. Too thick? Warm it gently until it’s pourable but not runny. I’ve used both homemade and store-bought, and honestly, no one can tell the difference!
Q2. How do I prevent my cake from turning out dense?
The secret is in the mixing! Overmixing the batter develops too much gluten, which leads to a dense cake. Mix just until the ingredients are combined – a few small lumps are okay. Also, make sure your butter and eggs are at room temperature. Cold ingredients don’t incorporate as well, which can affect the texture. Trust me, I’ve learned this the hard way!
Q3. Can I make this cake ahead of time?
Yes! The flavors actually deepen if you make it a day ahead. Bake and cool the layers, then wrap them tightly in plastic wrap and store at room temperature. Frost and add the caramel drip the day you’re serving it. The buttercream keeps the cake moist, and the caramel stays glossy and perfect!
Q4. What’s the best way to get even caramel drips?
Practice makes perfect! Start by drizzling a small amount around the edge of the cake and let it naturally drip down. If it’s too fast, your caramel might be too thin – chill it slightly. If it’s too slow, warm it gently. I like to use a spoon for more control, and I always do a test drip on a glass first. You’ve got this!
Q5. Can I freeze this cake?
You can! Freeze the unfrosted cake layers wrapped in plastic and foil for up to 2 months. Thaw them at room temperature before frosting. I don’t recommend freezing the frosted cake with the caramel drip, though – the texture of the buttercream and caramel can change. Fresh is always best for that wow factor!

The 2-Ingredient Golden Caramel Drip Cake Hack
- Total Time: 50 minutes
- Yield: 1 cake (8-10 servings) 1x
- Diet: Vegetarian
Description
A delicious golden caramel drip cake with buttercream and a smooth, rich finish.
Ingredients
- 2 cups all-purpose flour
- 1 1/2 cups granulated sugar
- 1/2 cup unsalted butter, softened
- 3 large eggs
- 1 cup whole milk
- 1 tsp vanilla extract
- 1 tsp baking powder
- 1/2 tsp salt
- 1/2 cup caramel sauce
- 2 cups buttercream frosting
Instructions
- Preheat oven to 350°F (175°C). Grease and flour two 9-inch cake pans.
- In a bowl, cream butter and sugar until light and fluffy.
- Add eggs one at a time, mixing well after each addition.
- Mix in vanilla extract.
- In another bowl, whisk flour, baking powder, and salt.
- Alternately add dry ingredients and milk to the butter mixture, starting and ending with flour.
- Divide batter evenly between pans and bake for 25-30 minutes, or until a toothpick comes out clean.
- Let cakes cool completely before frosting.
- Spread buttercream between layers and over the top and sides of the cake.
- Drizzle caramel sauce over the top, letting it drip down the sides.
Notes
- Use room-temperature ingredients for best results.
- Let cakes cool completely before frosting to prevent melting.
- Store cake in an airtight container at room temperature for up to 3 days.
- Prep Time: 20 minutes
- Cook Time: 30 minutes
- Category: Dessert
- Method: Baking
- Cuisine: American
Nutrition
- Serving Size: 1 slice
- Calories: 450
- Sugar: 35g
- Sodium: 200mg
- Fat: 20g
- Saturated Fat: 12g
- Unsaturated Fat: 6g
- Trans Fat: 0g
- Carbohydrates: 60g
- Fiber: 1g
- Protein: 5g
- Cholesterol: 90mg
Keywords: caramel cake, buttercream cake, golden caramel drip cake, dessert recipe


