
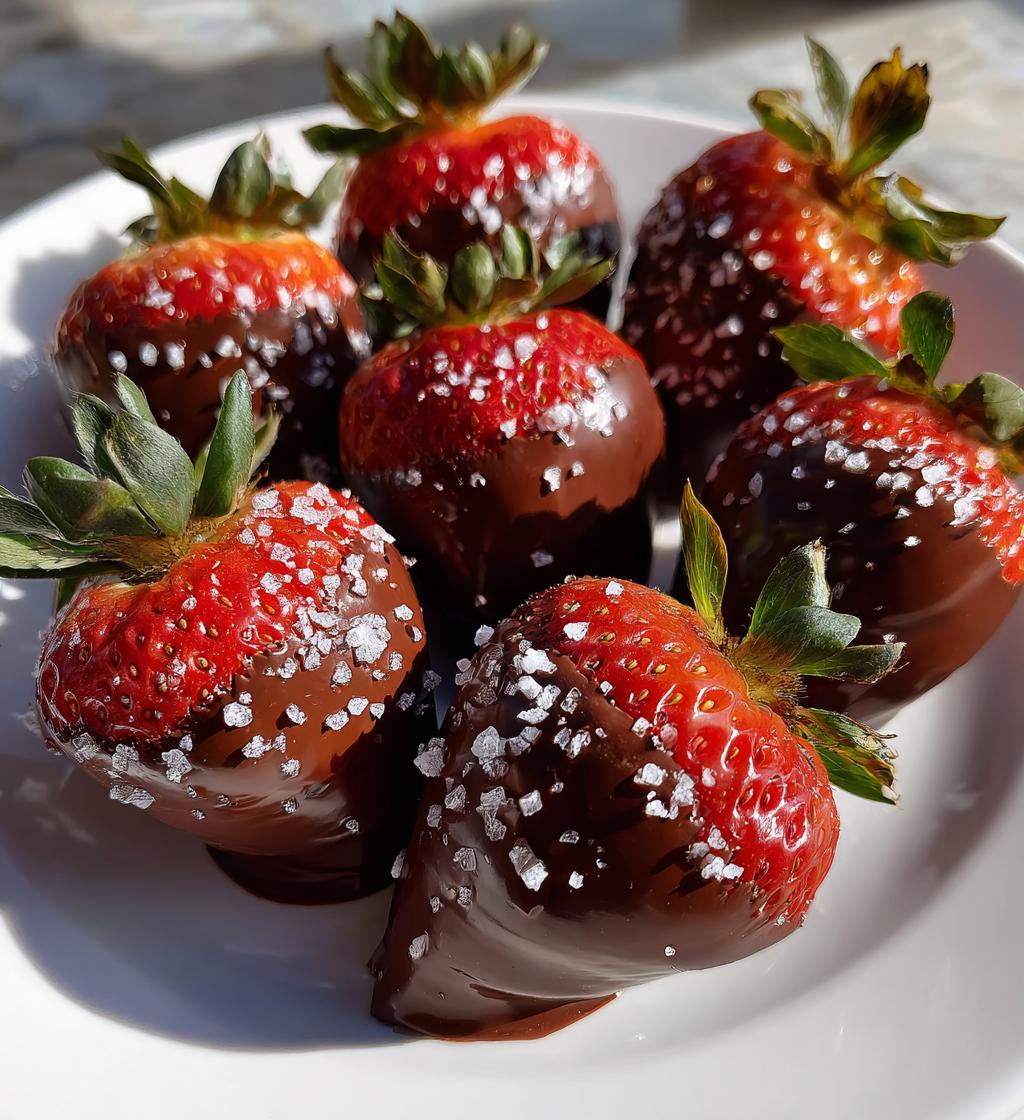
There’s something truly magical about DIY chocolate covered strawberries. These delightful treats are not only a feast for the eyes but also a burst of flavor that brings joy to any occasion. Imagine biting into a juicy, fresh strawberry encased in a luscious layer of rich chocolate—yum! What I love most is how simple they are to make. You don’t need to be a pastry chef to impress your friends and family with these beauties. With just a few ingredients and minimal time, you can whip up a batch that looks like it came from a fancy dessert shop. Plus, they’re perfect for everything from birthday parties to romantic evenings in! Trust me, once you start making your own chocolate covered strawberries, you’ll never want to go back to store-bought. So, let’s dive into this fun and delicious adventure together!
Ingredients List
- 12 fresh strawberries – Look for ripe, firm strawberries with vibrant red color and green leaves. They should be free from blemishes for the best flavor.
- 1 cup chocolate chips – Use high-quality semi-sweet or dark chocolate chips for a rich taste. If you prefer a lighter flavor, milk chocolate works beautifully too!
- 1 tablespoon coconut oil – This helps the chocolate melt smoothly and adds a lovely sheen. You can also use vegetable oil if you’re in a pinch.
How to Prepare DIY Chocolate Covered Strawberries
Making DIY chocolate covered strawberries is simpler than you might think! Just follow these steps, and you’ll be on your way to creating these decadent treats in no time. Remember, patience is key, especially during the cooling process, so let’s get started!
Step 1: Wash and Dry the Strawberries
First things first, you want to wash those beautiful strawberries! Rinse them gently under cool water to remove any dirt or pesticides. This step is crucial because clean strawberries allow the chocolate to adhere beautifully. After washing, pat them dry thoroughly with a paper towel. Trust me, if they’re wet, the chocolate won’t stick well, and you’ll end up with a gooey mess. I like to let them air dry for a few minutes to ensure they’re completely moisture-free.
Step 2: Melt Chocolate and Coconut Oil
Now, let’s melt that chocolate! Grab a microwave-safe bowl and toss in your chocolate chips and the tablespoon of coconut oil. Microwave them in 30-second intervals, stirring in between until the mixture is smooth—this usually takes about 1 to 1.5 minutes total. Be careful, though! The bowl can get hot, so use a towel or oven mitt when you take it out. You don’t want any surprises when you’re whipping up these delicious strawberries!
Step 3: Dip the Strawberries
Once your chocolate is melted and glossy, it’s dipping time! Hold each strawberry by the green leaves and dip it into the chocolate, making sure to coat it evenly. Don’t submerge it too deep; you just want the chocolate to hug the strawberry, not drown it! Allow any excess chocolate to drip off by gently shaking it or tapping it against the bowl. This will help avoid those chocolate puddles on your baking sheet!
Step 4: Place on Baking Sheet
Next, line a baking sheet with parchment paper—this is key for easy removal later. Carefully place the dipped strawberries on the parchment, leaving a little space between each one. This way, they won’t stick together as they cool. I like to arrange them in a nice pattern because presentation matters, right?
Step 5: Cool and Harden
Finally, it’s time for the hardest part: waiting! Pop the baking sheet into the refrigerator for about 30 minutes. This cooling period is essential because it allows the chocolate to harden up nicely, giving you that delightful snap when you bite into each strawberry. Trust me, the wait is worth it!
Why You’ll Love This Recipe
- Quick and Easy: You can whip up these chocolate covered strawberries in just about 50 minutes, perfect for when you need a last-minute treat!
- Simple Ingredients: With just three main ingredients, you likely already have everything you need in your kitchen.
- Delicious Flavor: The combination of fresh strawberries and rich chocolate creates a mouthwatering treat that’s hard to resist.
- Customizable: You can easily add your favorite toppings like nuts or sprinkles to make them even more special!
- Perfect for Any Occasion: Whether it’s a party, date night, or just a sweet snack, these strawberries are sure to impress!
Tips for Success
To ensure your DIY chocolate covered strawberries turn out perfectly every time, here are some pro tips that I swear by:
- Choose high-quality chocolate: The chocolate’s flavor makes a huge difference. Go for semi-sweet or dark chocolate chips for that rich taste!
- Dry strawberries thoroughly: Make sure they’re completely dry before dipping. Any moisture will cause the chocolate to slide right off!
- Store leftovers properly: If you have any strawberries left (which is rare!), keep them in an airtight container in the fridge to maintain freshness.
- Experiment with toppings: Don’t hesitate to get creative! Try adding chopped nuts, coconut flakes, or colorful sprinkles for extra flair.
Variations on DIY Chocolate Covered Strawberries
Once you’ve mastered the basic DIY chocolate covered strawberries, the fun really begins! Here are some delicious variations you can try:
- Chocolate Types: Switch things up by using white chocolate, milk chocolate, or even flavored chocolate like raspberry or mint for a unique twist.
- Toppings Galore: Sprinkle on chopped nuts, crushed graham crackers, or colorful sprinkles right after dipping for extra texture and flavor.
- Flavor Extracts: Add a drop of vanilla or almond extract to the melted chocolate for an extra layer of flavor that’ll wow your taste buds.
- Dipped in More: For a decadent treat, drizzle some melted chocolate over the hardened strawberries in a contrasting color for a beautiful finish!
These variations make it easy to personalize your chocolate covered strawberries for any occasion!
Nutritional Information
As with any recipe, the nutritional values may vary based on the specific ingredients and brands you choose. However, here’s a typical breakdown per serving (1 chocolate covered strawberry):
- Calories: 70
- Sugar: 6g
- Sodium: 1mg
- Fat: 4g
- Saturated Fat: 2.5g
- Unsaturated Fat: 1.5g
- Carbohydrates: 8g
- Fiber: 1g
- Protein: 1g
- Cholesterol: 0mg
These delightful treats are not only a tasty indulgence but also a relatively guilt-free dessert option, especially if you choose your ingredients wisely!
FAQ Section
Q1: How should I store my DIY chocolate covered strawberries?
To keep your delicious chocolate covered strawberries fresh, store them in an airtight container in the refrigerator. They’re best enjoyed within a couple of days, as the strawberries can start to release moisture and soften.
Q2: Can I use different types of chocolate for dipping?
Absolutely! Feel free to experiment with milk chocolate, dark chocolate, or white chocolate. Each type brings a different flavor profile, so choose what you love most!
Q3: What if my chocolate isn’t melting smoothly?
If your chocolate is clumping or not melting evenly, it might be overheated. Try adding a tiny bit of coconut oil or vegetable oil to help smooth it out. Just remember to melt in small intervals and stir often!
Q4: Can I make these ahead of time?
Yes! You can prepare your chocolate covered strawberries a day in advance. Just be sure to store them in the fridge, and take them out about 15 minutes before serving for the best taste.
Q5: What can I substitute for coconut oil?
If you don’t have coconut oil on hand, vegetable oil or even butter works well too. They’ll help achieve that glossy finish and smooth texture you want!

DIY Chocolate Covered Strawberries: 5 Simple Steps to Bliss
- Total Time: 50 minutes
- Yield: 12 strawberries 1x
- Diet: Vegetarian
Description
Learn how to make delicious DIY chocolate covered strawberries.
Ingredients
- 12 fresh strawberries
- 1 cup chocolate chips
- 1 tablespoon coconut oil
Instructions
- Wash and dry the strawberries thoroughly.
- Melt chocolate chips and coconut oil together in a microwave-safe bowl.
- Dip each strawberry into the melted chocolate.
- Place the chocolate covered strawberries on a baking sheet lined with parchment paper.
- Let them cool and harden in the refrigerator for 30 minutes.
Notes
- Use high-quality chocolate for the best flavor.
- Make sure strawberries are dry before dipping.
- Store leftovers in the refrigerator.
- Prep Time: 15 minutes
- Cook Time: 5 minutes
- Category: Dessert
- Method: Dipping
- Cuisine: American
Nutrition
- Serving Size: 1 strawberry
- Calories: 70
- Sugar: 6g
- Sodium: 1mg
- Fat: 4g
- Saturated Fat: 2.5g
- Unsaturated Fat: 1.5g
- Trans Fat: 0g
- Carbohydrates: 8g
- Fiber: 1g
- Protein: 1g
- Cholesterol: 0mg
Keywords: chocolate covered strawberries, DIY strawberries, dessert, easy recipe


