
There’s nothing like the smell of homemade fried chicken filling your kitchen. My grandma used to make it every Sunday, and trust me, hers was legendary—crispy on the outside, juicy on the inside, with just the right amount of spice. The secret? Keeping things simple. No fancy ingredients, no complicated steps—just good old-fashioned fried chicken done right.
I’ve spent years tweaking her recipe, but the basics never change. That perfect crunch comes from a well-seasoned flour coating and hot oil that seals in all the flavor. Whether it’s a family gathering or just a craving that needs satisfying, this fried chicken never disappoints. And guess what? You probably have most of the ingredients in your pantry already.
Ingredients for Perfect Fried Chicken
Let me tell you – great fried chicken starts with great ingredients. And by “great,” I mean simple, fresh, and measured just right. No need for fancy stuff here – just the basics done well. Here’s what you’ll need to make magic happen:
- 1 whole chicken (cut into 8-10 pieces)
- 2 cups all-purpose flour
- 1 tablespoon salt (trust me, you’ll want every bit of this)
- 1 tablespoon freshly ground black pepper
- 1 tablespoon paprika (this gives that beautiful color!)
- 1 teaspoon garlic powder
- 1 teaspoon onion powder
- 2 large eggs
- 1 cup buttermilk (the secret to tender chicken!)
- Vegetable oil for frying (about 4 cups)
Essential Spices and Seasonings
Now, don’t you dare skip any of these spices! That tablespoon of paprika isn’t just for color – it adds this smoky depth that makes people ask “What’s in this?” And the garlic and onion powder? They’re the quiet heroes that build flavor in every bite. I know exactly one teaspoon of each seems small, but they pack a punch when combined with everything else.
Wet and Dry Coating Components
Here’s where the crunch happens! The egg-buttermilk mixture (just whisk ’em together – easy!) makes the flour stick like glue. And speaking of flour – that two cups gets mixed with all our spices to create the crispiest, most flavorful coating you’ll ever taste. Pro tip: keep one hand for wet ingredients and one for dry – saves you from ending up with breaded fingers!
How to Make Crispy Fried Chicken
Alright, let’s get to the fun part—making that golden, crispy fried chicken! I’ll walk you through every step, so don’t worry if you’re new to frying. Trust me, once you get the hang of it, you’ll be a pro in no time. Just follow these instructions, and you’ll have fried chicken that’s crunchy on the outside and juicy on the inside.
Preparing the Chicken
First things first—let’s get that chicken ready. If you bought a whole chicken, cut it into 8-10 pieces (or just grab pre-cut pieces to save time). Now, here’s the key to that perfect crunch: double-dipping! Start by dipping each piece into the egg-buttermilk mixture, making sure it’s fully coated. Then, toss it into the flour-spice blend. Press the flour into the chicken firmly—this is what gives you that thick, crispy crust. Don’t be shy here; really make sure every nook and cranny is covered.
Frying to Golden Perfection
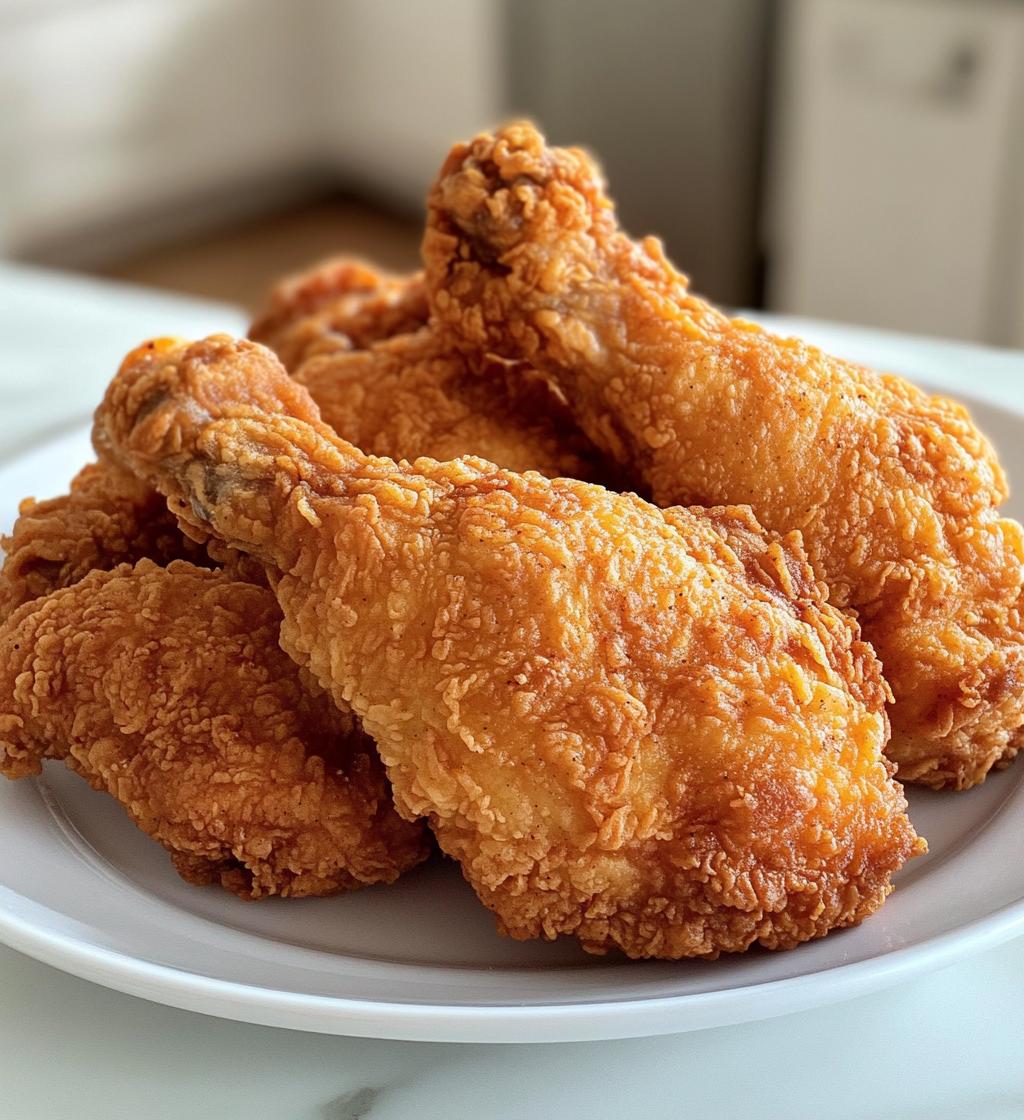
Now comes the magic: the fry! Heat your oil in a deep pan or Dutch oven to 350°F. Use a thermometer—it’s the only way to know for sure. Too hot, and your chicken will burn; too cool, and it’ll soak up oil like a sponge. Once it’s ready, carefully place 3-4 pieces in the oil (don’t crowd the pan—seriously, it’s a game-changer). Fry for 12-15 minutes, flipping halfway through, until the chicken is golden brown and the internal temperature hits 165°F. Oh, and that sizzle? That’s the sound of success. Let the chicken drain on a wire rack or paper towels for a couple of minutes before serving. And there you have it—crispy fried chicken that’ll make you the star of the dinner table!
Pro Tips for the Best Fried Chicken
Listen, I’ve made more batches of fried chicken than I can count—some great, some… well, let’s just say they taught me valuable lessons. Here are the secrets I’ve learned to make sure your fried chicken turns out perfect every single time.
Thermometer is your best friend
I can’t stress this enough—get yourself a good kitchen thermometer. Guessing the oil temperature is a recipe for disaster. That magic 350°F mark? It’s the sweet spot where the chicken cooks through without burning the coating. If the oil’s too cool, you’ll end up with greasy chicken. Too hot, and you’ll have blackened crust with raw insides. Trust me, I’ve made both mistakes so you don’t have to!
Give your chicken some breathing room
I know it’s tempting to fry all the pieces at once, but resist! Overcrowding the pan drops the oil temperature fast, and suddenly you’re boiling chicken instead of frying it. I stick to 3-4 pieces at a time in my 12-inch skillet—they should have at least an inch of space between them. This way, each piece gets that perfect, even crispiness we’re after.
Let it rest (twice!)
Here’s my double-rest trick: after coating the chicken, let it sit for 5 minutes before frying—this helps the coating stick better. Then, after frying, let it rest again for another 5 minutes before biting in. I know it’s hard to wait when your kitchen smells this good, but this little pause lets the juices redistribute so every bite stays moist.
Season your flour like you mean it
Don’t be shy with those seasonings! I taste my flour mixture before coating—it should be slightly saltier than you’d think, because most of it stays on the outside. And here’s a little trick I picked up from my grandma: add a pinch of sugar to your flour mix. It’s not enough to make it sweet, but it gives the crust that beautiful golden color we all love.
Serving Suggestions for Fried Chicken
Now that you’ve got this gorgeous golden fried chicken, let’s talk about what to serve with it! I mean, sure, you could eat it straight from the paper towels (no judgment here), but pairing it right takes your meal from good to “oh-my-goodness-I-need-seconds” amazing.
The Classic Combo
You can’t go wrong with the classics – creamy mashed potatoes and buttery corn on the cob. That fluffy mashed potato? Perfect for soaking up any extra crispy bits from your plate. And corn? It’s like fried chicken’s best friend – sweet, crunchy, and just messy enough to feel like a proper Southern meal.
Cool & Crunchy Sides
When it’s hot outside, I love balancing the richness with something fresh. My grandma’s creamy coleslaw is my go-to – that tangy crunch cuts right through the fried goodness. Or try a simple cucumber salad with vinegar and dill. And if you really want to impress? Whip up some quick-pickled veggies – they add such a nice bright contrast!
Biscuits & Honey Butter
Okay, hear me out – warm, flaky biscuits with homemade honey butter might just steal the show. There’s something magical about tearing open a biscuit, slathering it with that sweet-salty butter, and taking a bite right after some crispy chicken. It’s comfort food heaven, I tell you!
Don’t Forget the Sauce!
While this chicken is delicious plain, I always set out a few dipping options. My family fights over my spicy honey (just mix hot sauce with honey – so easy!) and classic ranch. For something different, try mixing mayo with a little barbecue sauce and pickle juice – sounds weird, tastes amazing!
Really though? The best pairing is good company and plenty of napkins. Fried chicken tastes better when shared with people you love – just be ready to hand out the recipe when everyone asks for it!
Storing and Reheating Fried Chicken
Let’s be real—fried chicken is best fresh, but let’s say you’ve got leftovers (a rare occurrence in my house!). Here’s how to keep that crispy goodness tasting almost like it just came out of the oil.
The Right Way to Store Leftovers
First rule: don’t cover it while it’s still hot! That steam will turn your beautiful crisp crust into a sad, soggy mess. Let it cool completely on a wire rack—about 30 minutes—before storing. Then, place it in a single layer in an airtight container with parchment paper between pieces if stacking. It’ll keep in the fridge for 3-4 days this way.
Reheating for Maximum Crispiness
Microwave? Absolutely not! That’s how you end up with rubbery chicken. Here’s my foolproof method: preheat your oven to 375°F and place the chicken on a wire rack over a baking sheet. This lets hot air circulate all around each piece. Bake for about 15 minutes—you’ll hear that satisfying sizzle as the crust crisps back up. For extra crunch, I sometimes give it a quick 2-minute broil at the end—just watch it like a hawk!
Freezing? Here’s the Trick
Yes, you can freeze fried chicken! Wrap each piece individually in foil, then place in a freezer bag. When you’re ready, bake straight from frozen at 350°F for 25-30 minutes. The foil keeps it from drying out while it heats through. Just know that while it’ll still taste great, the crust won’t be quite as crisp as fresh—but it beats takeout any day!
Pro tip: If you know you’ll have leftovers, undercook a few pieces by about 2 minutes when frying. They’ll finish cooking during reheating and stay juicier. My grandma taught me that one—she was always thinking ahead!
Nutritional Information
Let’s talk numbers—because sometimes you just want to know what you’re eating! Here’s the breakdown for one piece of this crispy fried chicken. Keep in mind, these are estimates and can vary based on the exact ingredients and portion sizes you use. But hey, it’s good to have a ballpark idea, right?
- Serving Size: 1 piece (about 4 oz)
- Calories: 320
- Total Fat: 18g
- Saturated Fat: 5g
- Trans Fat: 0g
- Cholesterol: 95mg
- Sodium: 450mg
- Total Carbohydrates: 15g
- Fiber: 1g
- Sugar: 1g
- Protein: 25g
Now, I’m not saying this is health food—it’s fried chicken, after all! But it’s comforting, satisfying, and made with real ingredients you can pronounce. Plus, those 25 grams of protein? That’s what I call a win. Just balance it out with some fresh sides, and you’re golden. And remember, these numbers are estimates—your results might vary depending on how much oil your chicken absorbs or the exact size of your pieces. But hey, life’s too short to stress over every calorie, right? Enjoy your chicken!
Common Questions About Fried Chicken
I’ve gotten so many questions about this recipe over the years—let me answer the ones I hear most often. These are the fried chicken mysteries solved!
Can I make this in an air fryer?
You bet! Spray your air fryer basket with oil and cook at 375°F for about 20 minutes, flipping halfway. But here’s the thing—it won’t be quite the same as deep-fried. The crust won’t get as shatteringly crisp, but it’s a great lighter option. My trick? Spritz the chicken with oil before cooking to help it brown better.
How do I keep the breading from falling off?
Oh, I’ve been there! The key is patting your chicken dry before dipping—moisture is the enemy of a good crust. And don’t rush the coating process. Let each dipped piece sit for 5 minutes before frying so the flour really sticks. If you’re still having trouble, try a double dip—egg mixture, then flour, then egg again, then flour one more time.
How long does fried chicken stay crispy?
Eaten right away? Heavenly crispness. After an hour? Still pretty good. Next day? Here’s my trick—reheat it in the oven at 375°F for 15 minutes to bring back some crunch. But honestly, fried chicken is one of those magical foods that’s still delicious even when it’s not perfectly crispy anymore. The flavors meld and deepen—some people actually prefer it that way!
Can I use boneless chicken?
Absolutely! Thighs work best—they stay juicy. Just reduce cooking time to about 8-10 minutes since there’s no bone. Chicken tenders? Even faster—5-6 minutes tops. Watch them closely! The smaller the piece, the quicker it cooks, and nobody likes dry chicken.
What’s the best oil for frying?
I swear by vegetable or peanut oil—they have high smoke points and neutral flavors. Grandma used lard (and wow, was that good), but it’s not always practical. Whatever you use, make sure you’ve got enough to fully submerge the chicken pieces—about 2 inches deep in your pan. And never, ever reuse oil more than 2-3 times—it breaks down and starts tasting funky.
Got more questions? Ask away in the comments—I love talking fried chicken almost as much as I love eating it!
Share Your Fried Chicken Experience
Alright, now it’s your turn! Did you try this fried chicken recipe? I’d love to hear how it turned out in your kitchen. Was the crust as crispy as you hoped? Did your family go crazy for it? Drop me a comment below—tell me about your experience, any tweaks you made (no judgment here!), or even share your favorite fried chicken memories.
And hey, if you snapped a photo of your golden masterpiece, I’d be thrilled if you shared it! There’s nothing better than seeing everyone’s versions of this classic recipe. Happy frying, friends—now go enjoy that chicken!
Print
Crispy Fried Chicken Recipe with 5 Star Tips
- Total Time: 35 mins
- Yield: 4 servings 1x
- Diet: Low Lactose
Description
Crispy fried chicken made with simple ingredients.
Ingredients
- 1 whole chicken (cut into pieces)
- 2 cups flour
- 1 tbsp salt
- 1 tbsp black pepper
- 1 tbsp paprika
- 1 tsp garlic powder
- 1 tsp onion powder
- 2 eggs
- 1 cup buttermilk
- Vegetable oil (for frying)
Instructions
- Mix flour, salt, pepper, paprika, garlic powder, and onion powder in a bowl.
- Whisk eggs and buttermilk in another bowl.
- Dip chicken pieces in egg mixture, then coat with flour mixture.
- Heat oil in a deep pan to 350°F.
- Fry chicken in batches for 12-15 minutes until golden brown.
- Drain on paper towels before serving.
Notes
- Use a thermometer to check oil temperature.
- Do not overcrowd the pan.
- Let chicken rest for 5 minutes after frying.
- Prep Time: 20 mins
- Cook Time: 15 mins
- Category: Main Dish
- Method: Frying
- Cuisine: American
Nutrition
- Serving Size: 1 piece
- Calories: 320
- Sugar: 1g
- Sodium: 450mg
- Fat: 18g
- Saturated Fat: 5g
- Unsaturated Fat: 10g
- Trans Fat: 0g
- Carbohydrates: 15g
- Fiber: 1g
- Protein: 25g
- Cholesterol: 95mg
Keywords: fried chicken, crispy chicken, homemade fried chicken


