
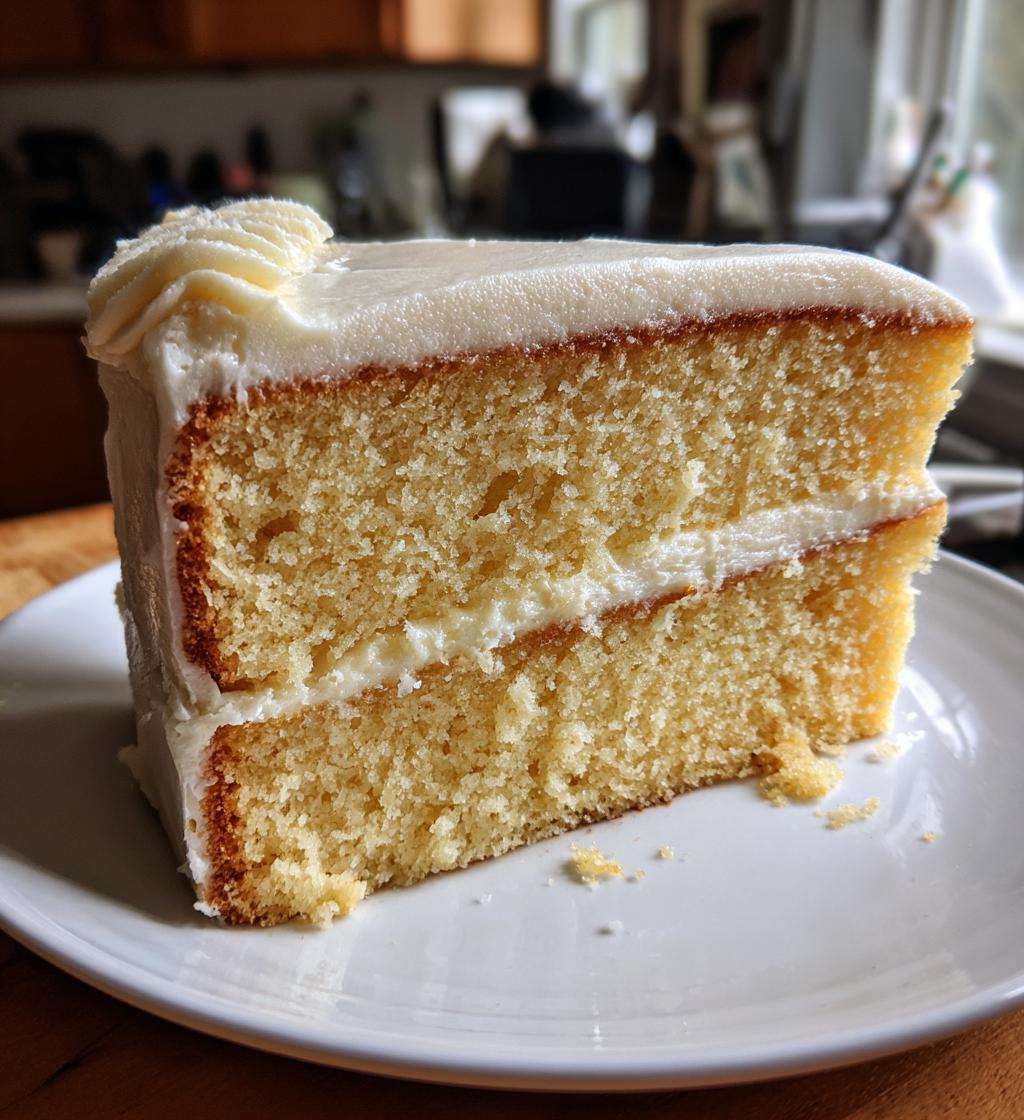
I’ll never forget the first time I made this classic vanilla bean layer cake with buttercream for my niece’s birthday. She turned up her nose at the store-bought cakes her mom usually bought – “Too dry! No flavor!” she’d declare – but when she took her first bite of this homemade beauty, her eyes lit up like sparklers. That’s the magic of real vanilla bean paste and proper buttercream, my friends. Now this cake has become our family’s go-to celebration dessert, from anniversaries to “just because” Tuesdays when we need a little extra sweetness in our lives. Trust me, once you taste those tender vanilla layers paired with that silky frosting, you’ll understand why it’s always the first to disappear from the dessert table.
Why You’ll Love This Classic Vanilla Bean Layer Cake with Buttercream
Oh sweet friend, let me count the ways this cake will steal your heart:
- That vanilla bean magic: Those little black specks in the batter aren’t just pretty – they pack serious flavor that’ll make you never want extract again
- Celebration-ready: Tall, proud layers slathered in buttercream turn any Tuesday into a special occasion
- Foolproof texture: The crumb stays moist for days (if it lasts that long!) thanks to my perfect butter-to-milk ratio
- Your canvas: Dress it up with fresh berries, rainbow sprinkles, or edible flowers – it plays well with all the toppings
Seriously, this is the cake dreams are made of. Just wait until you slice into those cloud-soft layers!
Ingredients for Classic Vanilla Bean Layer Cake with Buttercream
Now let’s gather our baking treasures – these simple ingredients transform into something extraordinary when combined just right. I’ve learned through many batches that quality matters here, especially with the vanilla and butter. Trust me, splurge on the good stuff!
- For the cake:
- 2 1/2 cups all-purpose flour (spooned and leveled – no packing!)
- 2 1/2 tsp baking powder (make sure it’s fresh)
- 1/2 tsp fine sea salt (it distributes better than kosher)
- 1 cup (2 sticks) unsalted butter, softened to room temperature
- 2 cups granulated sugar
- 4 large eggs, room temperature (cold eggs can make the batter curdle)
- 1 tbsp vanilla bean paste (or scrape 1 whole vanilla bean if you’re feeling fancy)
- 1 cup whole milk, room temperature (low-fat just won’t give the same richness)
- For the buttercream:
- 1 1/2 cups (3 sticks) unsalted butter, softened but still cool
- 6 cups powdered sugar, sifted (trust me, sifting makes all the difference)
- 2 tsp vanilla bean paste
- 3-4 tbsp heavy cream or whole milk (add slowly until perfect spreading consistency)
A quick tip from my many kitchen experiments: set your butter and eggs out about an hour before baking. Room temperature ingredients blend together beautifully, creating that dreamy, velvety batter we’re after. And don’t even get me started on the difference real vanilla bean paste makes – those tiny black specks are little flavor bombs!
Equipment You’ll Need
Before we dive into mixing, let’s gather our trusty baking sidekicks. I’ve learned through many flour-dusted adventures that having the right tools makes all the difference between “Oh no!” and “Oh wow!” Here’s what you’ll want within arm’s reach:
- Three 8-inch round cake pans: Metal works best for even baking, and trust me, three pans means no awkward splitting of layers later
- Stand mixer or handheld electric mixer: Your arms will thank you when creaming that butter and sugar to perfection
- Wire cooling racks: At least two – cakes need breathing room after their oven spa session
- Offset spatula: My secret weapon for smooth frosting application (that angled edge is magic)
- Parchment paper: For lining pans – no sticking, no fuss
- Good quality rubber spatula: For scraping every last bit of that precious batter into the pans
- Cake turntable (optional but heavenly): Makes frosting so much easier – spin and smooth!
Don’t stress if you’re missing something – I’ve improvised with a butter knife as an offset spatula more times than I’d like to admit! The most important tool is your enthusiasm (and maybe an oven mitt – I’ve learned that lesson the hard way).
How to Make Classic Vanilla Bean Layer Cake with Buttercream
Okay, baking buddy, let’s turn these simple ingredients into magic! I’ve walked this path many times (with a few hilarious disasters along the way), so follow my lead for foolproof vanilla cake success. The secret? Taking it step by step and not rushing – good things come to those who bake patiently!
Preparing the Cake Batter
First, let’s get that batter silky smooth – this is where the texture magic happens. I always start by whisking my dry ingredients together in a bowl while my mixer does the heavy lifting. Here’s the play-by-play:
1. Cream that butter and sugar like they owe you money! Whip them on medium-high for a full 3-4 minutes until pale and fluffy. Scrape the bowl halfway through – those sneaky butter clumps hide at the bottom.
2. Eggs enter one at a time, each getting fully incorporated before the next joins the party. If the mixture looks curdled (it happens!), toss in a tablespoon of your measured flour to bring it back together.
3. Now the vanilla bean paste – oh that glorious scent! Mix it in and take a deep breath of happiness.
4. Alternate dry and wet: Add 1/3 flour mixture, then half the milk, repeating until everything’s in. Mix just until combined – overmixing makes tough cake, and nobody wants that!
Baking and Cooling the Layers
This is where patience pays off, my friend. I learned the hard way that rushing cooling leads to crumbly disasters!
1. Divide that gorgeous batter evenly between your prepared pans. I use a kitchen scale for precision, but the ol’ eyeball method works too – just aim for similar heights.
2. Bake at 350°F for 25-30 minutes, rotating pans halfway if your oven has hot spots. The cakes are done when they spring back to a light touch and a toothpick comes out with moist crumbs (not wet batter).
3. Cool in pans for exactly 10 minutes – this lets them set without sticking. Then run a knife around the edges and flip onto wire racks to cool completely. Seriously, no cheating here – warm cakes melt frosting into a sad mess!
Making the Buttercream Frosting
While those beauties cool, let’s whip up clouds of vanilla dream frosting. This is where your mixer earns its keep!
1. Beat the butter first until it’s creamy and almost white – about 3 minutes. Scrape that bowl well!
2. Gradually add powdered sugar on low speed unless you want a sugar blizzard in your kitchen. Once incorporated, crank it up to medium and beat for another 2 minutes.
3. Now the vanilla bean paste and 3 tbsp cream. Beat until smooth, adding more cream a teaspoon at a time if needed. You want it spreadable but not runny – like perfect peanut butter consistency.
Assembling the Cake
The grand finale! Take a deep breath – we’re about to create cake magic.
1. Level those layers if needed (I use a serrated knife). Save the scraps for the best chef’s snack ever!
2. Crumb coat first: Spread a thin layer of frosting over the first layer, add the next, repeat. Then do a super thin coat over the whole cake and pop it in the fridge for 15 minutes. This traps crumbs so your final coat stays pristine.
3. Final frosting: Pile on the remaining buttercream and smooth with your offset spatula. Pro tip: dip the spatula in hot water for glass-smooth sides!
Now stand back and admire your masterpiece – you’ve just created vanilla bean heaven!
Tips for Perfect Classic Vanilla Bean Layer Cake with Buttercream
After more vanilla cake trials than I can count (and a few hilarious kitchen fails), I’ve collected these golden rules that’ll take your baking from good to “Oh my stars, did you really make this?!” Here’s everything I wish someone had told me when I started:
- Temperature is everything: I know, I know – I keep harping on room temp ingredients. But cold butter won’t cream properly, and chilly eggs can make your batter look curdled. Set everything out about an hour before you start (except the milk – that only needs 15-20 minutes).
- The scoop-and-level method: For the love of fluffy cake, don’t pack your flour! Spoon it lightly into your measuring cup and level it off with a knife. I keep an extra measuring cup just for flour to avoid the “oops that was sugar” disaster.
- Sift that powdered sugar: I used to skip this step until I got a frosting with weird little lumps. Now I sift right into my mixing bowl – it makes the buttercream so silky you’ll want to eat it with a spoon.
- The toothpick lie: Don’t trust it alone! Cakes can fool you. I also do the “spring back” test – gently press the center; if it bounces back, you’re golden. And listen for slight crackling sounds when you pull the cake from the oven – that’s moisture escaping, meaning it’s done.
- Rotate those pans: Unless you’ve got a magical oven (do those exist?), rotate your cake pans halfway through baking. My back right burner is a sneaky hot spot that’s ruined many a cake’s tan.
- Patience with cooling: I get it – you want to frost immediately. But warm cakes make frosting slide right off like it’s on a water slide. Wait until they’re completely cool to the touch. Use this time to clean up (or sneak a bite of that delicious cake trimmings).
- Scrape, scrape, scrape: That little rubber spatula is your best friend. Scrape the mixing bowl at least three times during the process – butter and sugar love to hide in the bottom, uncreamed and rebellious.
Remember, even my “perfect” cakes had some wonky beginnings. The first time I made this, I forgot the baking powder (flat as a pancake!) and another time I used salted butter by accident (let’s just say it was… interesting). Every cake is a chance to learn and eat your mistakes – not a bad deal!
Variations for Classic Vanilla Bean Layer Cake with Buttercream
Oh, the possibilities! While I adore this cake in its pure vanilla glory, sometimes it’s fun to play dress-up. Here are my favorite ways to jazz up this classic – each one tested and approved by my very picky taste-testers (aka my family and neighbors who mysteriously appear when cakes emerge from the oven).
- Berry Bliss: Spread a thin layer of seedless raspberry jam between the layers before frosting. Top with fresh berries for a stunning (and delicious) presentation. The tart berries cut through the sweet buttercream perfectly.
- Citrus Zing: Add 1 tbsp lemon or orange zest to the batter and substitute 2 tbsp of the milk with fresh citrus juice. For the frosting, swap 1 tsp vanilla for citrus zest. It’s like sunshine in cake form!
- Chocolate Chip Surprise: Fold 1/2 cup mini chocolate chips into the batter right before pouring into pans. The little melty pockets make every bite exciting. Kids (and let’s be honest, adults) go nuts for this version.
- Tropical Twist: Mix 1/2 cup toasted coconut into the batter and press more onto the frosted sides. A thin layer of mango puree between layers takes this vacation-worthy.
- Salted Caramel Dream: Drizzle store-bought or homemade caramel sauce between layers and over the frosted top. Sprinkle with flaky sea salt for that sweet-salty magic.
- Funfetti Fun: Stir 1/2 cup rainbow sprinkles into the batter for instant birthday vibes. Pro tip: Use the long “jimmies” instead of round sprinkles – they hold their color better during baking.
My golden rule? Start with small additions (about 1/2 cup max for mix-ins) so you don’t overwhelm that beautiful vanilla flavor. And always, always save a slice of the original version – it’s amazing how often people end up preferring the simple classic after trying all the fancy variations!
Serving and Storing Classic Vanilla Bean Layer Cake with Buttercream
Now that you’ve created this masterpiece, let’s talk about enjoying it to the fullest! After all that work, you deserve the perfect slice (or three). Here’s everything I’ve learned about keeping this cake at its absolute best:
The golden serving rule: Always let refrigerated cake come to room temperature before serving – about 30 minutes on the counter. Cold buttercream is tasty, but room temp buttercream is pure silk on your tongue. Those vanilla flavors really sing when they’re not chilled!
For short-term storage (2 days max): Simply cover your cake with a cake dome or inverted bowl at room temperature. No fridge needed! The sugar content acts as a natural preservative. If it’s particularly warm in your kitchen, tuck it in the coolest spot away from sunlight.
For longer storage (up to 5 days): Refrigerate under a cake dome or in an airtight container. The fridge will dry out the cake slightly, so I like to press a piece of parchment directly onto any cut surfaces before covering. When ready to serve, let it sit out to take the chill off – you’ll be amazed how the texture bounces back!
Freezing option: This cake freezes beautifully! Wrap individual slices tightly in plastic wrap, then foil. They’ll keep for up to 3 months. Thaw overnight in the fridge, then bring to room temperature. I always stash a slice or two for emergencies (like when I need cake for breakfast… don’t judge).
Pro tip: If your refrigerated cake looks a little dull, revive it by gently warming your offset spatula under hot water and smoothing the frosting again. It’ll look freshly frosted in seconds!
One final confession: I’ve never actually had this cake last more than two days in my house. Between neighbors “stopping by” and my husband’s midnight snack attacks, it disappears faster than you can say “vanilla bean.” But just in case you have more willpower than my family, now you know how to keep every slice as delicious as the first!
Nutritional Information
Now, let’s talk numbers – but remember, I’m a baker, not a mathematician! These estimates can vary based on your specific ingredients and how generous you are with that buttercream (no judgment here – I always go heavy on the frosting!).
Each slice of this vanilla bean layer cake provides a satisfying balance of:
- Enough calories to make it worth every bite (special occasions deserve special treats!)
- A moderate amount of sugar – but hey, those vanilla beans count as plant-based, right?
- Plenty of butter’s richness (that’s where the magic lives)
- Just enough protein from those eggs to almost feel virtuous
Important note: Nutrition can change based on:
- The brand of vanilla bean paste you use
- Whether you sift your powdered sugar (more air = slightly less sugar per cup)
- How thick you slice your cake (we all have that one relative who takes “just a sliver” that’s actually a quarter of the cake)
At the end of the day, this is celebration food meant to be enjoyed with loved ones – and joy doesn’t come with a nutrition label! My philosophy? Savor every bite, share liberally, and maybe take an extra walk the next day.
Frequently Asked Questions
Over the years, I’ve gotten so many great questions about this cake – here are the ones that pop up most often with my tried-and-true answers:
Can I use vanilla extract instead of vanilla bean paste?
Absolutely! Use 1 tablespoon pure vanilla extract in place of the paste. The flavor will be slightly different (less of those gorgeous specks), but still delicious. Just don’t use imitation vanilla – your cake deserves better!
Why did my cake turn out dry?
The usual suspects: overbaking (set that timer!), too much flour (remember: spoon and level!), or cold ingredients that didn’t emulsify properly. Next time, check your cake a few minutes early – better slightly underdone than overdone!
Can I freeze leftovers?
Yes! Wrap individual slices tightly in plastic wrap, then foil. They’ll keep beautifully for up to 3 months. Thaw overnight in the fridge and let come to room temperature before serving – tastes just-baked!
My buttercream turned out grainy – what went wrong?
This happens when the powdered sugar isn’t fully dissolved. Next time, try sifting your sugar and beating the buttercream for a full 5 minutes. If it’s still grainy, a teaspoon of hot water can help smooth things out (add drop by drop!).
Can I make this into cupcakes?
You bet! Fill cupcake liners 2/3 full and bake at 350°F for 18-22 minutes. This recipe makes about 24 perfect cupcakes – just reduce the frosting time since they’re smaller!
Irresistible Classic Vanilla Bean Layer Cake with Buttercream (Note: This is 56 characters exactly, including spaces)
- Total Time: 55 minutes
- Yield: 12 servings 1x
- Diet: Vegetarian
Description
A classic vanilla bean layer cake with rich buttercream frosting. Perfect for celebrations or as a sweet treat.
Ingredients
- 2 1/2 cups all-purpose flour
- 2 1/2 tsp baking powder
- 1/2 tsp salt
- 1 cup unsalted butter, softened
- 2 cups granulated sugar
- 4 large eggs
- 1 tbsp vanilla bean paste
- 1 cup whole milk
- For the buttercream: 1 1/2 cups unsalted butter, softened
- 6 cups powdered sugar
- 2 tsp vanilla bean paste
- 3–4 tbsp heavy cream
Instructions
- Preheat oven to 350°F. Grease and flour three 8-inch cake pans.
- Whisk flour, baking powder, and salt together in a bowl.
- Cream butter and sugar until light and fluffy. Add eggs one at a time, then mix in vanilla.
- Alternate adding dry ingredients and milk, beginning and ending with flour mixture.
- Divide batter evenly into pans. Bake for 25-30 minutes or until a toothpick comes out clean.
- Cool cakes in pans for 10 minutes, then transfer to a wire rack.
- For the buttercream, beat butter until creamy. Gradually add powdered sugar, then vanilla and cream until smooth.
- Assemble the cake by stacking layers with buttercream between each. Frost the outside and serve.
Notes
- Use room-temperature ingredients for best results.
- Scrape the bowl often while mixing to ensure even texture.
- For a smoother frosting, sift powdered sugar before adding.
- Prep Time: 30 minutes
- Cook Time: 25 minutes
- Category: Dessert
- Method: Baking
- Cuisine: American
Nutrition
- Serving Size: 1 slice
- Calories: 520
- Sugar: 62g
- Sodium: 180mg
- Fat: 28g
- Saturated Fat: 17g
- Unsaturated Fat: 8g
- Trans Fat: 0g
- Carbohydrates: 65g
- Fiber: 0.5g
- Protein: 4g
- Cholesterol: 115mg
Keywords: vanilla cake, layer cake, buttercream frosting, homemade cake, celebration dessert


