
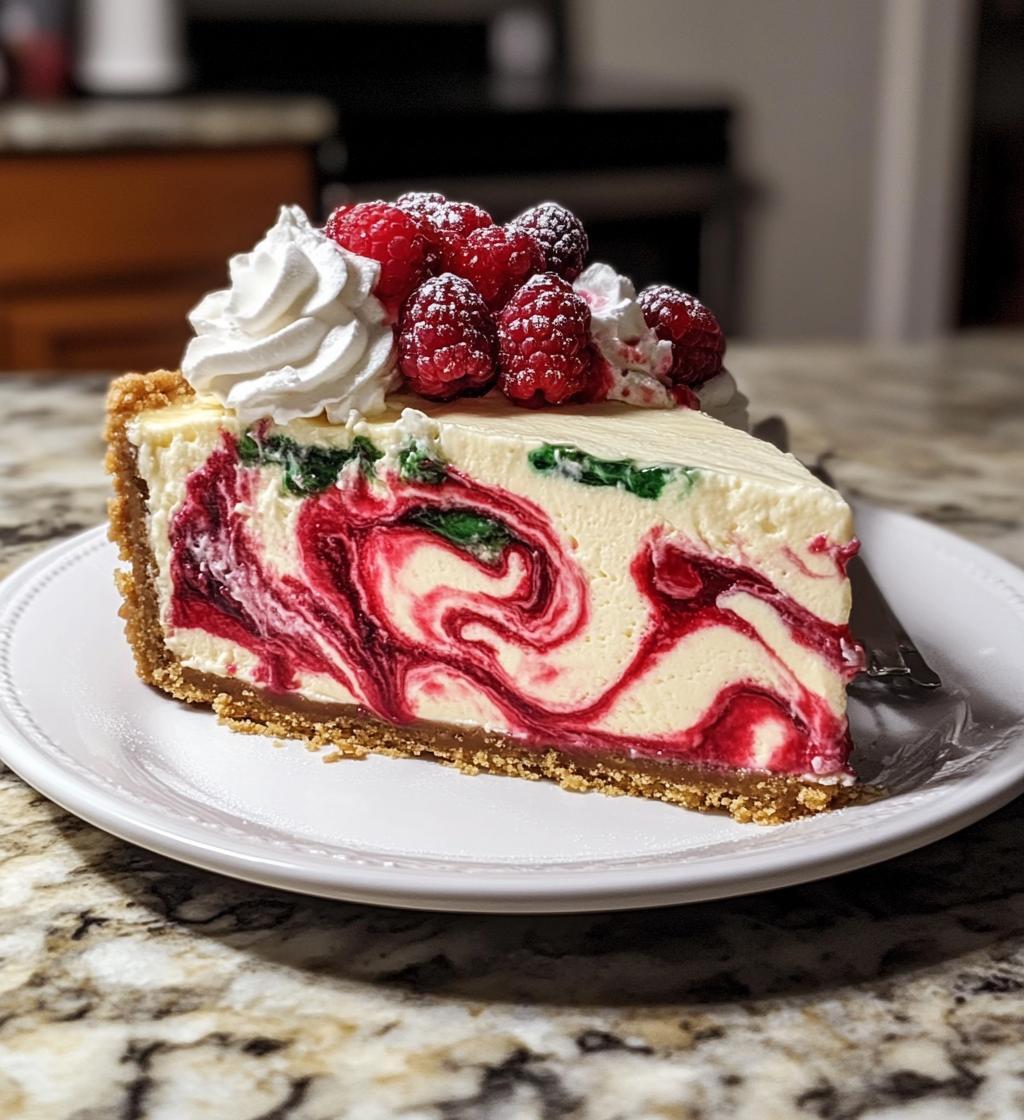
Oh, the magic of a Christmas cheesecake decoration—it’s the showstopper of our holiday dessert table! Every December, my kitchen turns into a whirlwind of whipped cream, berries, and festive colors as I recreate this family favorite. My grandma started the tradition when I was little, and now my kids beg me to make it the moment the first snowflake falls. What I love most? It’s deceptively easy—just a swirl of red and green batter, a snowy topping of whipped cream, and a crown of berries. Simple, stunning, and packed with holiday cheer. Trust me, one bite and you’ll hear sleigh bells!
Why You’ll Love This Christmas Cheesecake Decoration
This isn’t just any cheesecake—it’s a holiday masterpiece that’ll have everyone reaching for seconds (and snapping photos!). Here’s why it’s become my go-to Christmas dessert:
Quick and Festive
No fancy piping skills needed! The magic happens with just a few drops of food coloring and a quick swirl of the spoon. I love how the red and green layers peek through when sliced—instant holiday wow factor with minimal effort.
Customizable for Any Occasion
Switch up the colors for different holidays (pink and red for Valentine’s Day, pastels for Easter) or use whatever berries look best at the market. Last year I did cranberries and mint leaves for a winter wonderland look—the kids went wild for it!
- Takes less than 30 minutes active time
- Uses simple pantry staples
- Makes a gorgeous centerpiece
- Leftovers (ha!) keep beautifully
Ingredients for Christmas Cheesecake Decoration
Gather these simple ingredients – most are probably already in your pantry! The magic happens when they all come together. Just promise me you’ll use room-temperature cream cheese (I learned that lesson the hard way with lumpy filling back in ’09).
Crust Ingredients
The foundation of every great cheesecake! You’ll need:
- 2 cups graham cracker crumbs – about 15 full sheets, crushed (I use a zip-top bag and rolling pin when I need stress relief)
- 1/2 cup melted butter – unsalted, please! And melted means MELTED, not softened (another hard-learned lesson)
Cheesecake Filling
This is where the creamy magic happens. Pro tip: set these out 2 hours before baking:
- 24 oz cream cheese – that’s 3 standard blocks, SOFTENED (poke it – it should dent easily)
1 cup sugar – regular granulated works perfectly here
1 tsp vanilla extract – the real stuff, not imitation
3 eggs – large, room temp (cold eggs = cracked cheesecake = sad baker)
1 cup sour cream – full-fat for that luxurious texture
Decoration Essentials
Now for the holiday fun! I always buy extra berries because someone (usually me) eats half while decorating:
- Red and green food coloring – gel works best for vibrant colors without thinning the batter
- 2 cups whipped cream – homemade or store-bought, no judgment here
- Fresh berries – strawberries, raspberries, and mint leaves make the prettiest wreath
Equipment You’ll Need
Don’t worry—you don’t need fancy gadgets for this Christmas cheesecake! Here’s my short-and-sweet toolkit:
- 9-inch springform pan – the hero that lets you release the cheesecake without tears
- Electric mixer – stand or handheld, just something to beat that filling silky smooth
- Mixing bowls – one for crust, two for dividing the colored batter
- Rubber spatula – for scraping every last bit of deliciousness into the pan
How to Make Christmas Cheesecake Decoration
Okay, let’s dive into the fun part! I promise this is easier than wrapping presents (and way more delicious). Follow these steps, and you’ll have a showstopping Christmas cheesecake that’ll make your holiday table sparkle.
Preparing the Crust
First things first – that buttery, crunchy foundation! I always make extra crumbs because someone (usually me) ends up eating half the mixture straight from the bowl.
- Mix your graham cracker crumbs and melted butter until it looks like wet sand. When you squeeze a handful, it should hold its shape – that’s how you know it’s perfect.
- Press the mixture FIRMLY into your springform pan. I mean it – really pack it down with the back of a measuring cup or glass. No wimpy crusts here!
- Pop it in the fridge for 15 minutes. This chill time helps prevent crust crumbles later. Trust me, it’s worth the wait.
Mixing the Cheesecake Filling
Now for the creamy dreamy part! This is where your room-temperature ingredients really shine.
- Beat the cream cheese until it’s completely smooth – about 2 minutes. Scrape down the bowl well (those sneaky lumps hide in the corners!).
- Add sugar and vanilla, mixing until fluffy. It should look like clouds at this point.
- Add eggs one at a time, mixing just until combined after each. Overmixing = too much air = cracks, and we don’t want that!
- Gently fold in the sour cream with a spatula. The batter should be velvety smooth – if it’s lumpy, keep mixing (but don’t go crazy).
Coloring and Swirling
Time for the holiday magic! My kids fight over who gets to do this part.
- Divide the batter evenly between two bowls. I use a kitchen scale for precision, but eyeballing works fine too.
- Tint one bowl red and one green. Gel food coloring gives the richest colors – start with a toothpick dip and add more until you get that perfect holiday hue.
- Alternate dollops of colored batter over the chilled crust. Then take a butter knife and make just 2-3 gentle figure-eight swirls through the batter – too much mixing muddies the colors!
Baking and Cooling
Here’s where patience pays off. Don’t rush this part – a properly cooled cheesecake is a happy cheesecake.
- Bake at 325°F for about 50 minutes. The edges should be set but the center will still jiggle slightly when you nudge the pan – that’s perfect!
- Turn off the oven and crack the door open with a wooden spoon. Let the cheesecake cool gradually for 1 hour inside. This prevents sudden temperature changes that cause cracks.
- Remove from oven and cool completely at room temperature (about 2 more hours) before refrigerating for at least 4 hours – overnight is even better!
Decorating Your Cheesecake
The grand finale! I always do this step right before serving for maximum wow factor.
- Run a thin knife around the edge of the pan before releasing the springform. Wipe the knife between cuts for clean slices.
- Pipe or spread whipped cream over the top. I like to make little rosettes around the edge with a star tip – so festive!
- Arrange berries in a wreath pattern. Strawberry “bows” with raspberry “berries” look adorable, or go wild with pomegranate seeds for extra holiday sparkle.
- Add mint leaves for a fresh pop of green. They make the whole thing look like a Christmas present!
Tips for Perfect Christmas Cheesecake Decoration
After years of holiday cheesecake triumphs (and a few hilarious disasters), here are my can’t-live-without tips:
- Room temp is non-negotiable – Cold cream cheese equals lumpy filling. I leave mine out overnight in winter (don’t tell the food safety police!)
- Mix like you mean it – But stop before overmixing! Too much air causes cracks. When the batter looks like satin pajamas, you’re done.
- Swirl with restraint – Three knife strokes max! More than that and your pretty ribbons turn into mud.
- Chill out – Rushing the cooling process is the #1 reason for weeping whipped cream. Ask me how I know.
Oh! And always make two – one to impress the guests, one to eat straight from the fridge at midnight. Holiday calories don’t count!
Ingredient Substitutions and Notes
Life happens, and sometimes you need to swap ingredients—no shame in that! Here are my tried-and-true substitutions that still deliver that holiday magic. (P.S. I’ve tested every single one of these during various kitchen emergencies—the Christmas of 2017 when I ran out of graham crackers was particularly… creative.)
For the Crust
- Gluten-free? Use gluten-free graham crackers or 2 cups crushed gingersnaps (bonus festive flavor!).
- No graham crackers? Digestive biscuits or vanilla wafers work beautifully—just reduce the sugar slightly since they’re sweeter.
- Dairy-free butter? Coconut oil works, but reduce by 1 tablespoon since it’s more liquid when melted.
For the Filling
- Varian cream cheese? Use equal parts coconut cream (the thick part from canned coconut milk) blended with 1 tbsp lemon juice per 8 oz—it won’t set as firmly but tastes amazing.
- Out of sour cream? Plain Greek yogurt (full-fat!) or buttermilk (reduce by 2 tbsp) saves the day.
- Egg-free? For each egg, mix 1 tbsp ground flaxseed with 3 tbsp water, let sit 5 minutes. The texture will be denser but still delicious.
For Decorating
- No gel food coloring? Use 1 tsp matcha powder for green and beet juice (reduced to syrup consistency) for red—just add extra sugar to balance.
- Whipped cream alternatives? Coconut whipped cream or stabilized mascarpone (beat 8 oz mascarpone with 1 cup heavy cream and 2 tbsp sugar).
- Berry-free December? Candied citrus slices, crushed peppermints, or even rosemary sprigs dipped in white chocolate make stunning wintery toppers.
One golden rule: whatever substitutions you make, keep all ingredients at the same temperature as the original recipe. My “let’s use cold coconut cream because I’m impatient” experiment of 2019 resulted in what my family still calls “The Polka-Dot Cheesecake Incident.” Learn from my mistakes!
Serving and Storage
Here’s the beautiful thing about this Christmas cheesecake—it actually gets better as it sits (if you can resist eating it all at once!). I always make mine the night before our big holiday dinner because that extra chilling time makes the flavors meld perfectly. But let me share all my storage secrets so your masterpiece stays as fresh as the moment you decorated it.
Keeping It Fresh
After decorating, your cheesecake will keep beautifully in the fridge for 3-4 days. The trick? Loosely tent it with foil—don’t seal it airtight or the whipped cream will get soggy. I use toothpicks to create a little “tent frame” so the foil doesn’t touch the topping. For the berries, a light brush of warmed apricot jam keeps them shiny and fresh-looking for days (my Nana’s secret trick!).
Slicing Like a Pro
For picture-perfect slices every time:
- Run your knife under HOT water and wipe dry between each cut
- Use a gentle sawing motion—no downward pressure!
- Slide a cake server underneath to lift each piece
The chilled cheesecake holds its shape beautifully this way. Bonus: Cold cheesecake means cleaner berry decorations on every slice!
Freezing for Later
Need to make this ahead? Freeze it naked (without toppings) for up to 1 month:
- Cool completely after baking
- Wrap tightly in 2 layers of plastic wrap
- Add a layer of heavy-duty foil
- Thaw overnight in fridge before decorating
I always stash an extra undecorated one in December—it’s saved me more than once when unexpected guests arrived!
One last tip: If your whipped cream starts to weep (it happens to the best of us), just pat it gently with a paper towel and add fresh berries. Nobody will know—it’ll be our little secret!
Christmas Cheesecake Decoration FAQs
I get asked these questions every holiday season—let me save you from making the same mistakes I did in my early cheesecake days! Here are the answers to all your burning Christmas cheesecake questions.
Can I Make This Ahead?
Absolutely! In fact, I recommend it. The cheesecake itself can be baked up to 3 days in advance—just wrap it tightly and store it naked (without toppings) in the fridge. The flavors actually improve with time! But here’s my golden rule: always decorate within 2 hours of serving. Whipped cream deflates and berries get weepy if they sit too long. I learned this the hard way at my 2015 Christmas party when my “snowy” topping turned into a sad puddle by dessert time.
How Do I Prevent Cracks?
Oh honey, I’ve battled the Great Cheesecake Crack Epidemic of 2012—so listen close! First, avoid overbaking like the plague. When the edges are set but the center still jiggles like Santa’s belly when he laughs, it’s done. Second, cool it sloooowly—that 1-hour oven crack is your best friend. And third (this is the game-changer), run a knife around the edge IMMEDIATELY after baking to prevent pulling as it cools. My cheesecakes haven’t cracked since I started doing this religiously!
Can I Freeze This Cheesecake?
You bet! Just skip the toppings. Bake and cool completely, then wrap tighter than presents on Christmas Eve—I do plastic wrap, then foil, then a freezer bag. It’ll keep for a month. Thaw overnight in the fridge, then decorate. Pro tip: Slice it before freezing and you can pull out individual portions when holiday cravings strike (not that I’ve ever eaten frozen cheesecake straight from the freezer at 2am… ahem).
What If My Colors Bleed Together?
Been there! The secret is gel food coloring (liquid makes batter too thin) and minimal swirling. I make exactly three figure-eight motions with my knife—any more and you’ll get muddy brown instead of pretty ribbons. Also, chill your colored batters for 10 minutes before swirling—the slightly thicker consistency helps colors stay put. Last December’s “Christmas Mud Pie” taught me this lesson well!
Can I Use Different Fruits?
Please do! Some of my favorite variations: kiwi stars with raspberries, sugared cranberries and rosemary sprigs, or even dried orange slices dusted with powdered “snow.” Just avoid super juicy fruits like watermelon—they’ll make your whipped cream slide right off. Frozen berries work in a pinch too; thaw and pat them super dry with paper towels first.
Nutritional Information
Okay, let’s talk numbers—but remember, these are just ballpark figures because let’s be real, who actually measures their whipped cream with scientific precision? (Not me, that’s for sure!) Here’s the general nutritional breakdown per slice, but keep in mind these will vary based on your exact ingredients and how generous you are with those berry toppings.
- Calories: About 380 per slice (unless you go back for seconds… no judgment!)
- Fat: 27g – it’s cheesecake, people, embrace the richness!
- Saturated Fat: 15g – that’s what makes it so gloriously creamy
- Carbs: 30g – mostly from that delicious graham cracker crust
- Sugar: 25g – holiday sweetness at its finest
- Protein: 6g – consider it your breakfast protein boost
- Cholesterol: 110mg – worth every single milligram
Important note: These values are estimates based on standard ingredients. Your actual nutrition facts may vary depending on brand choices (full-fat vs. reduced-fat dairy), exact measurements (I know you’re sneaking extra berries!), and decoration variations. For precise dietary needs, I recommend using a nutrition calculator with your specific ingredients. But honestly? At Christmas, I say enjoy every delicious bite—we’ll start the salads in January!
Print
Festive Christmas Cheesecake Decoration Magic
- Total Time: 5 hours 10 minutes
- Yield: 12 servings 1x
- Diet: Vegetarian
Description
A festive cheesecake decorated for Christmas with simple ingredients and easy steps.
Ingredients
- 2 cups graham cracker crumbs
- 1/2 cup melted butter
- 24 oz cream cheese, softened
- 1 cup sugar
- 1 tsp vanilla extract
- 3 eggs
- 1 cup sour cream
- Red and green food coloring
- Whipped cream for topping
- Fresh berries for garnish
Instructions
- Preheat oven to 325°F.
- Mix graham cracker crumbs and melted butter, press into a springform pan.
- Beat cream cheese and sugar until smooth.
- Add vanilla and eggs one at a time, mixing well.
- Stir in sour cream.
- Divide batter into two bowls, tint one red and one green.
- Pour batters into the crust, swirl lightly.
- Bake for 50 minutes, then let cool.
- Chill for 4 hours before decorating.
- Top with whipped cream and berries.
Notes
- Use room temperature cream cheese for smoother filling.
- Chill the crust for 15 minutes before adding filling.
- Decorate just before serving for best appearance.
- Prep Time: 20 minutes
- Cook Time: 50 minutes
- Category: Dessert
- Method: Baked
- Cuisine: American
Nutrition
- Serving Size: 1 slice
- Calories: 380
- Sugar: 25g
- Sodium: 280mg
- Fat: 27g
- Saturated Fat: 15g
- Unsaturated Fat: 9g
- Trans Fat: 0g
- Carbohydrates: 30g
- Fiber: 1g
- Protein: 6g
- Cholesterol: 110mg
Keywords: christmas cheesecake, holiday dessert, festive cheesecake


