
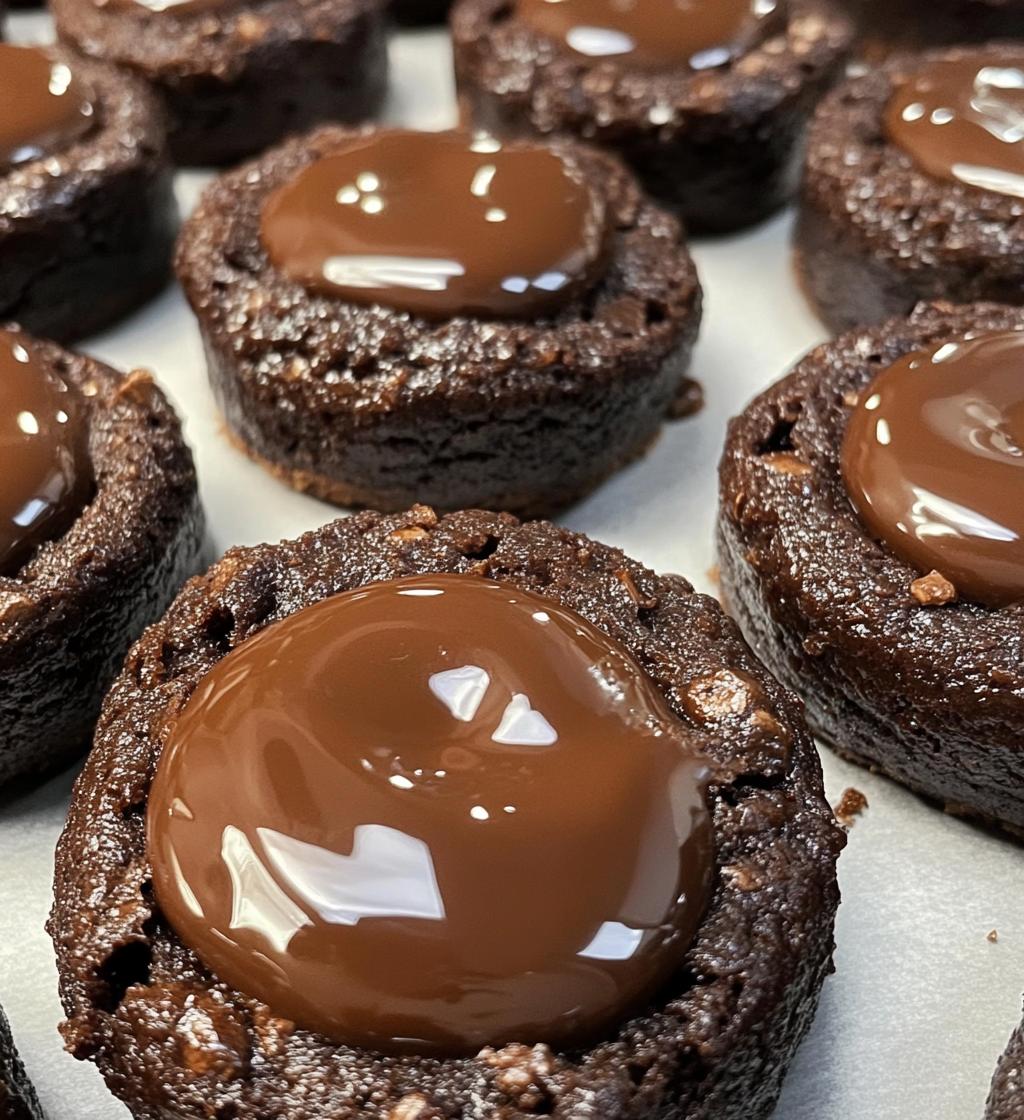
You know those cookies that make your heart skip a beat? That’s exactly what chocolate thumbprint cookies do! Imagine biting into a soft, rich chocolate cookie with a sweet, melty chocolate filling right in the center. Oh, it’s pure bliss! These cookies are the perfect blend of fudgy goodness and a delightful texture that just melts in your mouth. What makes them even more special is that little thumbprint, just waiting to hold a treasure of chocolate chips or any filling your heart desires. Trust me, once you start making these, they’ll quickly become your go-to treat for any occasion. Whether you’re whipping them up for a cozy night in or a gathering with friends, these chocolate thumbprint cookies are sure to impress and satisfy every chocolate lover. So, let’s dive in and create some magic together in the kitchen!
Ingredients
To whip up these delightful chocolate thumbprint cookies, you’ll need the following ingredients. Each one plays a crucial role in creating those rich, chocolatey flavors and that irresistible texture. Here’s what you’ll need:
- 1 cup all-purpose flour: This is the base of your cookies, providing structure and a tender crumb.
- 1/4 cup unsweetened cocoa powder: This adds that deep chocolate flavor that makes these cookies truly special.
- 1/2 cup butter, softened: Make sure it’s softened to room temperature; this helps in creaming it nicely with the sugars for a light texture.
- 1/2 cup granulated sugar: This will sweeten the dough and give it a lovely crispness.
- 1/4 cup brown sugar: The molasses in brown sugar adds moisture and a rich flavor that complements the cocoa.
- 1/2 teaspoon vanilla extract: A splash of vanilla brings all the flavors together beautifully!
- 1/4 teaspoon salt: A pinch of salt enhances all the sweetness and chocolate goodness.
- 1/2 cup chocolate chips for filling: These are your sweet little surprises nestled in the thumbprints, melting into gooey perfection.
Gather these ingredients, and you’ll be all set to bake up a batch of chocolatey joy!
How to Prepare Chocolate Thumbprint Cookies
Preparing chocolate thumbprint cookies is a delightful journey that’s as fun as it is rewarding! Follow these steps closely, and you’ll have a batch of cookies that will have everyone raving. Let’s get started!
Step-by-Step Instructions
- Preheat your oven: Start by preheating your oven to 350°F (175°C). This is crucial for ensuring that your cookies bake evenly and achieve that perfect texture.
- Mix your dry ingredients: In a medium bowl, whisk together the 1 cup of all-purpose flour, 1/4 cup of unsweetened cocoa powder, and 1/4 teaspoon of salt. This step helps to combine the ingredients and aerate them, which will give your cookies a nice lift.
- Cream the butter and sugars: In a separate large bowl, cream together the softened 1/2 cup of butter, 1/2 cup of granulated sugar, and 1/4 cup of brown sugar until the mixture is light and fluffy. This usually takes about 2-3 minutes. You want it to look pale and creamy!
- Add vanilla: Mix in 1/2 teaspoon of vanilla extract until well combined. The aroma will be heavenly!
- Combine wet and dry ingredients: Gradually add your dry mixture to the creamed butter and sugar. Mix just until combined, being careful not to overmix. You want a nice, soft dough that holds together.
- Form the cookies: Scoop out small amounts of dough and roll them into balls about 1 inch in diameter. Place them on a baking sheet lined with parchment paper, leaving space between each ball since they will spread a little.
- Create the thumbprint: Gently press your thumb into the center of each ball to create an indentation. This is where the chocolate filling will go, so make sure it’s deep enough to hold it!
- Fill with chocolate chips: Carefully fill each thumbprint with about 1/2 teaspoon of chocolate chips. Don’t worry if they look a bit messy; the magic happens in the oven!
- Bake: Pop your baking sheet into the preheated oven and bake for 10-12 minutes. Keep an eye on them, and you’ll know they’re done when the edges look set but the center is still soft.
- Cooling: Once baked, remove them from the oven and let the cookies cool on the baking sheet for about 5 minutes. Then, transfer them to a wire rack to cool completely. This cooling time helps them firm up and makes them easier to handle.
And there you have it! Follow these steps, and you’ll create chocolate thumbprint cookies that are soft, sweet, and utterly irresistible. Happy baking!
Why You’ll Love This Recipe
There are so many reasons to fall head over heels for chocolate thumbprint cookies! Once you whip up a batch, you’ll discover how delightful they are in both taste and texture. Here are a few reasons why this recipe is a must-try:
- Quick preparation: With just 20 minutes of prep time, you can have these cookies ready to bake in no time. Perfect for those last-minute sweet cravings!
- Delightful taste: Each bite is a heavenly combination of rich chocolate and a gooey filling that melts in your mouth. It’s an indulgence that feels special every time.
- Versatile fillings: While chocolate chips are a classic choice, you can easily switch things up! Try using jam, nuts, or even peanut butter for a fun twist.
- Perfect for sharing: These cookies make a lovely addition to any gathering or celebration. They’re not just delicious; they also look adorable on a dessert platter!
- Kid-friendly fun: Making these cookies is a fantastic activity to do with kids. They’ll love rolling the dough and creating their own thumbprints!
Once you taste these chocolate thumbprint cookies, you’ll understand why they quickly become a favorite in my kitchen. They’re simply irresistible!
Tips for Success
To make sure your chocolate thumbprint cookies turn out absolutely perfect, here are some tried-and-true tips that I swear by. These little nuggets of wisdom will help you navigate your baking adventure and create cookies that are sure to impress!
- Chill the dough: If you find the dough a bit too sticky to handle, don’t hesitate to pop it in the fridge for about 30 minutes. Chilling makes it easier to roll into balls and helps the cookies maintain their shape while baking.
- Watch your baking time: Every oven is a bit different, so keep an eye on your cookies as they bake. If you prefer a softer center, take them out closer to the 10-minute mark. For a firmer cookie, let them go a little longer. Trust your instincts!
- Use parchment paper: Lining your baking sheet with parchment paper not only prevents sticking but also makes cleanup a breeze. Plus, it helps your cookies bake evenly.
- Store with care: To keep your cookies fresh and delicious, store them in an airtight container at room temperature. They’ll stay tasty for up to a week, if they last that long!
- Experiment with fillings: Don’t be afraid to get creative with your thumbprints! While chocolate chips are divine, consider filling them with caramel, fruit preserves, or even a dollop of nut butter for a fun variation.
- Let them cool completely: I know it’s hard to resist the smell of freshly baked cookies, but letting them cool completely on a wire rack ensures they’ll firm up nicely and won’t fall apart when you bite into them.
With these tips in your back pocket, you’ll be well on your way to baking chocolate thumbprint cookies that are not only beautiful but also melt-in-your-mouth delicious. Enjoy the process and happy baking!
Variations on Chocolate Thumbprint Cookies
One of the best things about chocolate thumbprint cookies is their versatility! Once you master the basic recipe, the world of delicious variations opens up. Here are some fun ideas to switch things up and make each batch a little different:
- Fruit preserves: Instead of chocolate chips, fill the thumbprints with your favorite jam or fruit preserves. Raspberry or apricot adds a lovely tartness that pairs beautifully with the rich chocolate.
- Nuts: For a delightful crunch, try adding finely chopped nuts like walnuts, pecans, or hazelnuts as your filling. They add a lovely texture and a nutty flavor that complements the chocolate perfectly!
- Peanut butter or almond butter: Add a spoonful of creamy peanut butter or almond butter in the thumbprint for a nutty twist. The combination of chocolate and nut butter is pure heaven!
- Spiced variations: Want to warm things up? Add a pinch of cinnamon or nutmeg to your dough for a cozy touch. You can even experiment with a dash of cayenne pepper for a surprising kick!
- Extracts: Try swapping out the vanilla extract for different flavors like almond or orange extract. Each will give the cookies a unique and delightful aroma that will have everyone guessing your secret!
- Chocolate varieties: Use different types of chocolate chips for filling. Dark chocolate, milk chocolate, or even white chocolate can bring new flavors to your thumbprints. You could also mix them together for a fun combination!
These variations are just the beginning! Feel free to get creative and come up with your own unique fillings and flavor combinations. Each batch of chocolate thumbprint cookies can become a new favorite in your home. Enjoy experimenting!
Storage & Reheating Instructions
Storing your chocolate thumbprint cookies properly is key to keeping them fresh and delicious! Here’s how you can do it:
- Airtight container: Once your cookies are completely cool, place them in an airtight container. This prevents them from drying out and keeps them soft and chewy. You can layer them between sheets of parchment paper to avoid sticking.
- Room temperature: These cookies are best stored at room temperature. They’ll stay fresh for up to a week, but I bet they won’t last that long once you start sharing (or sneaking a few!).
- Freezing for later: If you want to save some for a later date, you can freeze the cookies! Just place them in a single layer on a baking sheet until frozen, then transfer them to a freezer-safe container or zip-top bag. They can last for up to three months in the freezer.
When you’re ready to enjoy your frozen cookies, simply take out the desired amount and let them thaw at room temperature for about 30 minutes. If you want that fresh-baked taste, pop them in a preheated oven at 350°F (175°C) for 5-7 minutes. They’ll be warm, melty, and absolutely irresistible!
Following these storage and reheating tips will ensure your chocolate thumbprint cookies remain a delightful treat, no matter when you decide to indulge. Happy snacking!
Nutritional Information
Understanding the nutritional content of your chocolate thumbprint cookies can help you enjoy them even more! Just keep in mind that the nutrition values can vary based on the specific ingredients and brands you use. Here’s an estimated breakdown per cookie:
- Calories: 120
- Fat: 7g
- Saturated Fat: 4g
- Trans Fat: 0g
- Cholesterol: 15mg
- Sodium: 50mg
- Carbohydrates: 14g
- Fiber: 1g
- Sugar: 8g
- Protein: 2g
These values are just estimates, so feel free to adjust them according to your ingredients! Enjoy these delightful cookies knowing they’re a sweet treat that you can savor in moderation.
FAQ Section
Got questions about chocolate thumbprint cookies? Don’t worry, I’ve got you covered! Here are some common queries I’ve heard, along with my best advice to help you bake the perfect batch:
- Can I use gluten-free flour for this recipe? Absolutely! You can substitute the all-purpose flour with a gluten-free blend. Just make sure it’s a one-to-one replacement to achieve similar results. Your cookies will still be delicious!
- What can I use instead of chocolate chips? If you’re looking for alternatives, feel free to fill the thumbprints with caramel, peanut butter, or even fruit preserves. Each option brings a unique twist to the classic chocolate thumbprint cookies!
- How should I store leftover cookies? Store your chocolate thumbprint cookies in an airtight container at room temperature. They’ll stay fresh for up to a week, but let’s be real – they probably won’t last that long!
- Can I freeze the dough? Yes, you can! Shape the dough into balls and freeze them on a baking sheet. Once frozen, transfer them to a zip-top bag. When you’re ready to bake, just pop them in the oven straight from the freezer, adding a couple of extra minutes to the baking time.
- What’s the best way to ensure my cookies are soft? Keep an eye on your baking time! If you prefer softer cookies, take them out of the oven when the edges are set but the centers still look slightly soft. They’ll firm up as they cool, giving you that delightful melt-in-your-mouth texture.
With these tips and answers, you’re all set to tackle any chocolate thumbprint cookie challenge that comes your way! Happy baking!
Print
Chocolate Thumbprint Cookies: 5 Irresistible Tips
- Total Time: 32 minutes
- Yield: 24 cookies 1x
- Diet: Vegetarian
Description
Delicious chocolate cookies with a sweet filling.
Ingredients
- 1 cup all-purpose flour
- 1/4 cup unsweetened cocoa powder
- 1/2 cup butter, softened
- 1/2 cup granulated sugar
- 1/4 cup brown sugar
- 1/2 teaspoon vanilla extract
- 1/4 teaspoon salt
- 1/2 cup chocolate chips for filling
Instructions
- Preheat the oven to 350°F (175°C).
- In a bowl, combine flour, cocoa powder, and salt.
- In another bowl, cream butter and sugars until light.
- Add vanilla and mix well.
- Gradually add dry ingredients to the wet mixture.
- Form dough into small balls and place on a baking sheet.
- Press your thumb in the center of each ball.
- Fill the thumbprint with chocolate chips.
- Bake for 10-12 minutes.
- Let cool before serving.
Notes
- Store cookies in an airtight container.
- Use different fillings like jam if desired.
- Chill dough for easier handling.
- Prep Time: 20 minutes
- Cook Time: 12 minutes
- Category: Dessert
- Method: Baking
- Cuisine: American
Nutrition
- Serving Size: 1 cookie
- Calories: 120
- Sugar: 8g
- Sodium: 50mg
- Fat: 7g
- Saturated Fat: 4g
- Unsaturated Fat: 2g
- Trans Fat: 0g
- Carbohydrates: 14g
- Fiber: 1g
- Protein: 2g
- Cholesterol: 15mg
Keywords: chocolate thumbprint cookies, chocolate cookies, dessert cookies


