
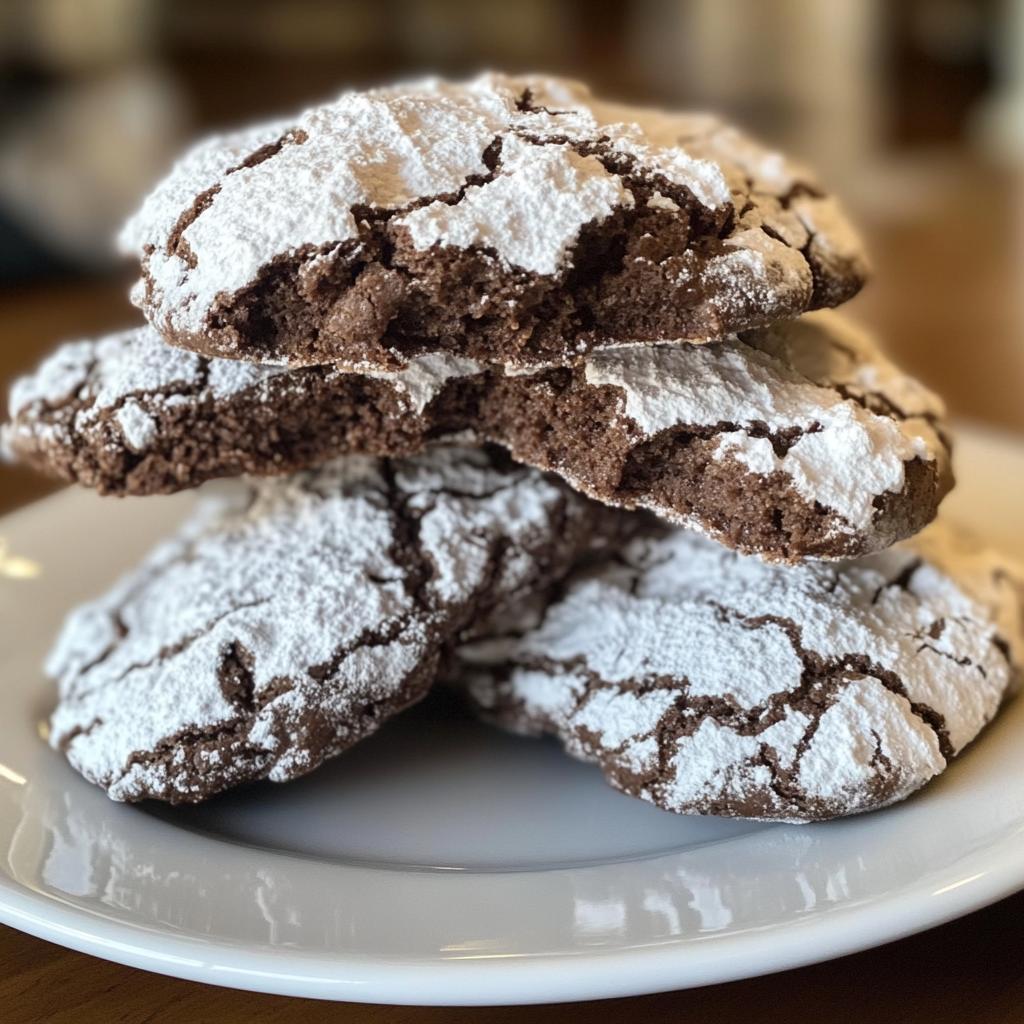
There’s something magical about pulling a tray of chocolate crinkle cookies from the oven – that moment when you see those snowy cracks form on rich, fudgy centers gets me every time. I’ve been baking these beauties since I was tall enough to reach the counter, standing on a step stool to help my mom roll the dough balls in powdered sugar. These cookies aren’t just treats; they’re edible memories wrapped in crackled perfection. Perfect for holiday cookie swaps or when you need a chocolate fix, chocolate crinkle cookies deliver that perfect balance of chewy centers and crisp edges that’ll have everyone reaching for seconds.
Why You’ll Love These Chocolate Crinkle Cookies
Listen, these aren’t just any cookies – they’re little bites of joy that check ALL the boxes. First off, they’re ridiculously easy to make (no fancy equipment needed!). That gorgeous crackled sugar coating? Pure edible artwork that makes them perfect for holiday gifting. But the real magic happens when you bite into them – that fudgy, almost brownie-like center will have you swooning. Plus, they’re basically Christmas in cookie form (though I bake them year-round because, well, chocolate emergencies happen). Trust me, one batch and you’ll be hooked!
Chocolate Crinkle Cookies Ingredients
Okay, let’s talk ingredients – because with chocolate crinkle cookies, every little detail matters! I’ve learned through many messy (but delicious) trials that the right measurements and prep make all the difference between good cookies and oh-my-goodness cookies. Here’s what you’ll need:
- 1 cup all-purpose flour (spooned gently into the cup and leveled off – no packing it down!)
- 1/2 cup unsweetened cocoa powder (I use natural cocoa for that classic flavor)
- 1 teaspoon baking powder (fresh is best – test it if yours has been sitting awhile)
- 1/4 teaspoon fine sea salt (it brings out all that chocolatey goodness)
- 3/4 cup granulated sugar (trust me, this amount creates the perfect chew)
- 1/4 cup vegetable oil (makes them wonderfully moist without being greasy)
- 2 large eggs (room temperature – I leave them out about 30 minutes before baking)
- 1 teaspoon pure vanilla extract (the good stuff makes all the difference)
- 1/2 cup powdered sugar (for rolling – you’ll want extra for when your hands get messy!)
Pro tip from my many powdered-sugar-covered mistakes: measure your powdered sugar into a shallow bowl before you start rolling the dough balls. It’ll save you from frantic sugar spills when your hands are full of sticky chocolate dough!
How to Make Chocolate Crinkle Cookies
Alright, let’s get to the fun part – turning these simple ingredients into those gorgeous crackled cookies that’ll make you look like a baking pro! I’ve made these so many times I could probably do it in my sleep (though I don’t recommend that – hot ovens and sleepy bakers don’t mix well). Follow these steps, and you’ll have perfect chocolate crinkle cookies every single time.
Step 1: Mix the Dry Ingredients
First things first – grab that whisk! In a medium bowl, I whisk together the flour, cocoa powder, baking powder, and salt until they’re completely combined. You’ll know it’s ready when you don’t see any streaks of white flour left. This step ensures all those dry ingredients are evenly distributed so every bite is perfectly balanced. No one wants a bite that’s all salt or all baking powder, right?
Step 2: Combine Wet Ingredients
Now for the good stuff! In a larger bowl, I mix the sugar and vegetable oil until they’re best friends. Then I add the eggs one at a time, mixing well after each. The vanilla goes in last – that sweet aroma is my favorite part! The mixture should look smooth and slightly shiny. If it seems too thick, don’t worry – the dry ingredients will balance it out.
Step 3: Chill the Dough
Here’s where patience comes in (the hardest part for me!). Cover the bowl with plastic wrap and chill for at least 1 hour. I know, I know – waiting is tough when you want cookies NOW, but trust me, this step is crucial. Chilled dough won’t stick to your hands as much when rolling, and it prevents those sad, flat cookies. Pro tip: If you’re really in a hurry, 30 minutes in the freezer works in a pinch!
Step 4: Bake to Perfection
Time for the magic! Preheat your oven to 350°F and line baking sheets with parchment paper. Roll tablespoon-sized portions of dough into balls, then roll them generously in powdered sugar – I mean really coat them! Place them about 2 inches apart on the baking sheet. Bake for 10-12 minutes until the edges are set but the centers are still soft. The cookies will develop those beautiful cracks as they bake – it’s like watching edible art form in your oven!
Expert Tips for Perfect Chocolate Crinkle Cookies
After more batches than I can count (and plenty of learning-from-my-mistakes moments), I’ve nailed down the secrets to absolute chocolate crinkle cookie perfection. These aren’t just suggestions – they’re the difference between “pretty good” cookies and “holy cow, give me the whole plate” cookies!
Chill that dough like your cookies depend on it (because they do!)
I know I already mentioned chilling, but let me tell you why it’s non-negotiable. That hour in the fridge lets the flour hydrate properly and firms up the fat. Translation? Your cookies won’t spread into sad little pancakes in the oven. If I’m really organized, I’ll make the dough the night before – the flavor actually improves!
Cookie scoop = your new best friend
After years of eyeballing dough balls (and ending up with cookies of all different sizes), I finally invested in a tablespoon-sized cookie scoop. Game. Changer. Not only does it give you perfectly uniform cookies that bake evenly, but it keeps your hands cleaner too. Bonus tip: lightly spray your scoop with cooking spray to prevent sticky dough situations.
The powdered sugar double-dip trick
Here’s my little secret for that picture-perfect snowy coating: roll your dough balls once in powdered sugar, let them sit for a minute, then roll them again. The first layer melts slightly into the dough, creating a sticky surface that grabs the second coating beautifully. The result? Those stunning white cracks against dark chocolate that make these cookies so special.
Underbake them (yes, really!)
The biggest mistake I see people make? Baking these until they look “done.” Take them out when the edges are set but the centers still look slightly underbaked – about 10 minutes in my oven. They’ll continue cooking on the hot baking sheet as they cool. This gives you that dreamy fudgy center instead of a dry cookie. Trust me on this one!
One last thing – don’t stress if your first batch isn’t perfect. Even my grandma’s legendary cookies took practice (and she’d never admit to any early failures). The beauty of baking is that even the “mistakes” are usually delicious!
Chocolate Crinkle Cookies Variations
Once you’ve mastered the classic, try these fun twists! Swap vanilla for peppermint extract during the holidays – just 1/4 teaspoon gives that perfect candy cane kick. For coffee lovers, mix in 1 teaspoon espresso powder to deepen the chocolate flavor (my personal favorite!). Feeling fancy? Fold in 1/2 cup chopped toasted nuts after chilling the dough. The possibilities are endless!
How to Store Chocolate Crinkle Cookies
Here’s the good news – these cookies actually get better after a day or two! The flavors meld together beautifully, making them even more irresistible. But only if you store them right. After countless experiments (some more successful than others), here’s what I’ve learned about keeping chocolate crinkle cookies perfect.
First rule: let them cool completely before storing. I know it’s tempting to pile them up while they’re still warm, but that steam will turn your beautiful powdered sugar coating into a sad, sticky mess. I usually leave mine on the cooling rack for at least an hour – it’s torture, but worth it!
An airtight container is your best friend here. I use a cookie tin with a tight-fitting lid or a glass container with a rubber seal. Layer them between sheets of parchment paper if you’re stacking – this keeps them from sticking together or rubbing off that gorgeous powdered sugar coating. Pro tip: toss in a slice of bread to keep them soft! The cookies will absorb moisture from the bread instead of drying out.
Room temperature storage is key – refrigeration makes them hard and dulls the flavors. They’ll stay perfect for 4-5 days this way (if they last that long in your house!). If you need to keep them longer, freeze them instead – more on that in the FAQs!
One last storage secret: if your powdered sugar coating looks dull after storing, just give them a light dusting of fresh powdered sugar right before serving. It brings back that beautiful snowy appearance instantly!
Chocolate Crinkle Cookies FAQs
After years of baking these cookies (and fielding countless questions from friends and family), I’ve heard it all! Here are the answers to the most common chocolate crinkle cookie questions that pop up in my kitchen.
Can I freeze the dough?
Absolutely! In fact, I often make extra dough just for freezing. Roll the chilled dough into balls (without the powdered sugar coating), then freeze them on a baking sheet for about an hour before transferring to an airtight container or freezer bag. They’ll keep for up to 3 months this way. When you’re ready to bake, just roll them in powdered sugar while still frozen and add 1-2 minutes to the baking time. Easy-peasy!
Why did my cookies spread too much?
Oh boy, I’ve been there! The most common culprit is dough that wasn’t chilled enough – that hour in the fridge is crucial. Other possibilities: your baking powder might be old (test it!), your oven temperature could be off (get an oven thermometer!), or you might have used too much oil (measure carefully!). Also, make sure your baking sheets are cool before adding new dough balls – hot pans make the dough spread before baking even starts.
Can I use Dutch-process cocoa powder?
Great question! While you can use Dutch-process cocoa, it’ll change the texture slightly. Dutch-process cocoa is treated to reduce acidity, which affects how it interacts with the baking powder. The cookies will still taste delicious, but they might be slightly denser and less crackly. If you do use it, you might want to add 1/4 teaspoon cream of tartar to help with the rise. Personally, I stick with natural cocoa powder for that classic chocolate crinkle cookie texture I love!
Got more questions? Drop them in the comments below – I’m always happy to help troubleshoot cookie emergencies!
Nutritional Information
Before we dive into numbers, let me be real with you – I’m all about enjoying delicious treats without stressing over every calorie. That said, I know some folks like to keep track, so here’s the deal: these chocolate crinkle cookies are richer than your average cookie thanks to all that cocoa goodness, but they’re not crazy indulgent. The nutritional values are estimates and can vary based on the exact ingredients you use (like whether you go for organic sugar or conventional).
One thing I’ve learned from years of baking? Life’s too short to skip the powdered sugar coating – that’s where half the magic happens! If you’re watching your sugar intake, you could try rolling them in a sugar substitute made for baking, but fair warning – the texture won’t be quite the same. My philosophy? Bake with love, share generously, and savor every bite!
Share Your Chocolate Crinkle Cookies
Alright, baking buddy – now it’s your turn! I’d absolutely love to see how your chocolate crinkle cookies turn out. Did you nail those perfect cracks on the first try? Maybe you came up with an amazing new variation? Snap a photo and share it with me on Instagram – tag me so I can cheer you on! There’s nothing I love more than seeing your baking successes (and even the happy accidents – some of my best recipes started as mistakes!).
If you tried this recipe, take two seconds to leave a star rating below – it helps other bakers know what to expect. And hey, if you’ve got any brilliant tips or tricks I didn’t mention, share them in the comments! We’re all in this delicious baking journey together. Now go enjoy those cookies – you’ve earned every fudgy bite!
Print
10 Heavenly Chocolate Crinkle Cookies You’ll Crave
- Total Time: 1 hour 27 minutes
- Yield: 24 cookies 1x
- Diet: Vegetarian
Description
Chocolate crinkle cookies are rich, fudgy cookies rolled in powdered sugar for a cracked, snowy appearance. Perfect for holidays or any occasion.
Ingredients
- 1 cup all-purpose flour
- 1/2 cup unsweetened cocoa powder
- 1 teaspoon baking powder
- 1/4 teaspoon salt
- 3/4 cup granulated sugar
- 1/4 cup vegetable oil
- 2 large eggs
- 1 teaspoon vanilla extract
- 1/2 cup powdered sugar (for rolling)
Instructions
- Preheat your oven to 350°F (175°C). Line a baking sheet with parchment paper.
- In a bowl, whisk together flour, cocoa powder, baking powder, and salt.
- In another bowl, mix granulated sugar, oil, eggs, and vanilla until smooth.
- Gradually add the dry ingredients to the wet ingredients, stirring until combined.
- Chill the dough for at least 1 hour for easier handling.
- Roll dough into 1-inch balls, then coat each ball in powdered sugar.
- Place balls on the baking sheet, spacing them 2 inches apart.
- Bake for 10-12 minutes until the edges are set but centers are soft.
- Cool on the baking sheet for 5 minutes before transferring to a wire rack.
Notes
- Chilling the dough helps prevent excessive spreading.
- Use a cookie scoop for uniform dough balls.
- Store in an airtight container for up to 5 days.
- Prep Time: 15 minutes
- Cook Time: 12 minutes
- Category: Dessert
- Method: Baking
- Cuisine: American
Nutrition
- Serving Size: 1 cookie
- Calories: 90
- Sugar: 9g
- Sodium: 35mg
- Fat: 4g
- Saturated Fat: 1g
- Unsaturated Fat: 2.5g
- Trans Fat: 0g
- Carbohydrates: 14g
- Fiber: 1g
- Protein: 1g
- Cholesterol: 15mg
Keywords: chocolate crinkle cookies, holiday cookies, fudgy cookies, powdered sugar cookies


