
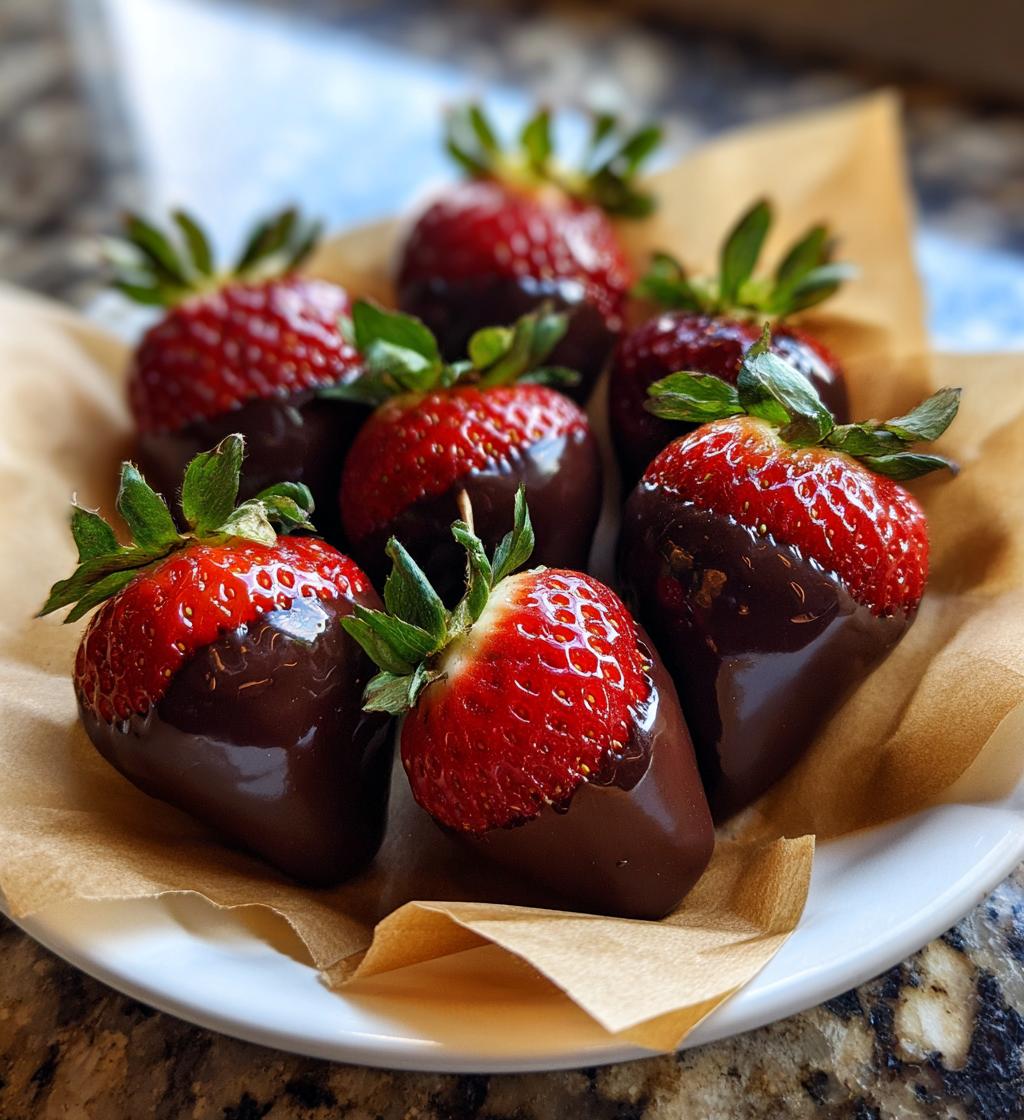
Chocolate covered strawberries are more than just a treat; they’re a delightful experience that brings a touch of elegance to any occasion. Their *aesthetic appeal* is undeniable, with bright red strawberries dipped in glossy, rich chocolate that sparkles in the light. I remember the first time I made these for a friend’s birthday party—I was instantly hooked! Watching everyone’s faces light up as they took that first bite was pure joy. There’s something magical about the combination of sweet, juicy strawberries and smooth chocolate that feels indulgent yet refreshing.
This recipe is special to me because it’s so simple yet incredibly satisfying. You don’t need to be a professional chef to whip these up in just 20 minutes! Plus, the best part? You can easily customize them to match any theme or occasion, making them perfect for everything from romantic date nights to festive gatherings. Trust me, once you dive into this *chocolate covered strawberries aesthetic*, you’ll find yourself making them again and again. Let’s get started on creating some beautiful, tasty treats!
Ingredients for Chocolate Covered Strawberries Aesthetic
To create these stunning chocolate covered strawberries, you’ll want to gather the following ingredients:
- 1 pound fresh strawberries: Look for plump, ripe strawberries that are bright red and free from blemishes. Their natural sweetness is key to making this treat shine!
- 8 ounces dark chocolate: Choose high-quality dark chocolate for a rich flavor. You can use chocolate chips or a chocolate bar—just make sure it’s at least 60% cocoa for that deep, indulgent taste.
- 2 tablespoons coconut oil: This will help the chocolate melt smoothly and give it a lovely sheen. Plus, it adds a hint of tropical flavor that pairs beautifully with the strawberries.
Having these fresh ingredients on hand will set you up for success in creating your beautiful chocolate covered strawberries. Let’s dive into the preparation next!
How to Prepare Chocolate Covered Strawberries Aesthetic
Getting your chocolate covered strawberries just right is all about following a few simple steps. Trust me, once you get the hang of it, you’ll be amazed at how easy and fun this can be! Let’s break it down:
Step-by-Step Instructions
- Wash and dry the strawberries thoroughly: Start by rinsing your strawberries under cold water. Make sure to gently scrub them to remove any dirt. After washing, pat them dry with paper towels. This step is crucial because any moisture will prevent the chocolate from sticking properly. You want those strawberries to be perfectly dry!
- Melt the dark chocolate and coconut oil: Grab a microwave-safe bowl and combine the dark chocolate and coconut oil. Microwave in 30-second intervals, stirring in between, until everything is melted and smooth. It usually takes about 1-2 minutes total. Be careful not to overheat; you want a silky consistency, not a burnt mess!
- Dip each strawberry into the melted chocolate: Holding the strawberry by the green stem, dip it into the chocolate, swirling it gently to coat it completely. Let any excess chocolate drip off, and don’t be shy to get a little messy—this is where the fun begins!
- Place the dipped strawberries on a parchment-lined baking sheet: Line a baking sheet with parchment paper to make cleanup a breeze. Arrange your strawberries in a single layer, making sure they don’t touch each other. This will help the chocolate set without sticking.
- Refrigerate until the chocolate hardens: Pop the baking sheet into the refrigerator for about 15-20 minutes, or until the chocolate is fully set. You’ll know they’re ready when the chocolate feels firm to the touch. The wait is worth it for that perfect snap!
And there you have it! With these simple steps, you’ll create a stunning batch of chocolate covered strawberries that are as beautiful as they are delicious. Now, let’s move on to why you’ll love this recipe so much!
Why You’ll Love This Recipe
- Quick and Easy: You can whip these up in just 20 minutes! Perfect for last-minute gatherings or a sweet surprise.
- Flavorful Delight: The combination of juicy strawberries and rich chocolate creates an irresistible flavor explosion that everyone loves.
- Visually Appealing: These chocolate covered strawberries are a feast for the eyes! Their glossy finish and vibrant colors make them a stunning centerpiece for any table.
- Customizable: Feel free to get creative! You can switch up the chocolate types, add toppings like crushed nuts or sprinkles, or even drizzle white chocolate for an artistic touch.
- Perfect for Any Occasion: Whether it’s a romantic date night, a birthday celebration, or a simple dessert for movie night, these treats fit right in.
Trust me, once you make these, they’ll become a go-to recipe for any occasion that calls for a little sweetness and style!
Tips for Success
Now that you’re ready to make your chocolate covered strawberries, here are some pro tips to ensure they turn out perfectly every time. These little tricks will help you achieve that stunning finish and delicious flavor!
Choose the Right Chocolate
For the best results, opt for high-quality chocolate. I love using dark chocolate with at least 60% cocoa for a rich taste, but feel free to experiment with milk or white chocolate if that’s more your style! Just remember, the better the chocolate, the better the strawberries will taste.
Temperature Matters
Make sure your strawberries are completely dry before dipping them. Any moisture can cause the chocolate to seize up and not adhere well. I usually let them air dry after washing, and even give them a light pat with a paper towel just to be safe!
Use a Deep Bowl for Dipping
When melting your chocolate, use a deep bowl. This makes it easier to dip the strawberries without getting your fingers messy. Plus, a deeper bowl gives you more room to swirl the strawberries around for an even coat!
Don’t Rush the Cooling Process
Once you’ve dipped your strawberries, give them time to set in the fridge. I know it’s tempting to sneak a taste right away, but patience is key! Allowing them to cool completely will give you that satisfying chocolate snap when you bite in.
Get Creative with Toppings
Don’t shy away from adding fun toppings! After dipping, sprinkle some crushed nuts, colorful sprinkles, or even a drizzle of white chocolate for a beautiful contrast. This not only enhances the aesthetic but adds an extra layer of flavor!
Serve Them Right
For the best presentation, arrange your chocolate covered strawberries on a decorative plate or stand. You can even line the plate with parchment paper for a polished look. And if you’re making a large batch, consider using a cake stand to elevate the display.
With these tips, you’ll be well on your way to mastering the art of chocolate covered strawberries! They’ll not only taste amazing but will also look like a work of art. Happy dipping!
Variations for Chocolate Covered Strawberries Aesthetic
Now that you’ve got the basics down, let’s have some fun with variations to enhance your chocolate covered strawberries aesthetic! The beauty of this recipe is how easily it adapts to your personal taste and the occasion. Here are some delightful ideas to shake things up a bit:
Different Types of Chocolate
While dark chocolate is a classic choice, don’t be afraid to experiment! Try using:
- Milk Chocolate: For a sweeter, creamier flavor that’s perfect for chocolate lovers who prefer a milder taste.
- White Chocolate: This adds a lovely contrast to the strawberries and creates a beautiful aesthetic. Just melt it gently to avoid burning!
- Flavored Chocolate: Think about using chocolate infused with orange, mint, or even raspberry for a unique twist!
Colorful Drizzles
Once your strawberries are dipped and set, add a splash of color! Melt some colored candy melts or white chocolate tinted with food coloring, and drizzle it over the top to create a fun design. This not only enhances the aesthetic but also adds a playful touch to your presentation.
Fun Toppings
Get creative with toppings to add both texture and beauty. Here are some ideas:
- Crushed Nuts: Sprinkling pistachios, almonds, or hazelnuts adds a delightful crunch and a nutty flavor that pairs beautifully with chocolate.
- Sprinkles: Colorful sprinkles or edible glitter can turn these treats into a festive centerpiece for parties!
- Coconut Flakes: Toasted coconut gives a tropical vibe and a lovely chewy texture that contrasts well with the chocolate.
- Sea Salt Flakes: A sprinkle of sea salt on top of dark chocolate creates a sweet-savory explosion that’s simply irresistible.
Layering Flavors
For a flavor boost, consider dipping your strawberries in a layer of flavored ganache or a thin layer of peanut butter before dipping them in chocolate. This adds an exciting surprise in every bite!
Mini Chocolate Covered Strawberry Bites
If you want to go a step further, try making mini versions! Use smaller strawberries and dip them in chocolate for bite-sized treats that are perfect for parties. They look adorable and are easy to pop into your mouth!
These variations will not only elevate the aesthetic of your chocolate covered strawberries but also impress your guests. So, feel free to mix and match these ideas for your next gathering, and watch everyone’s faces light up with delight! Happy dipping and decorating!
Storage & Reheating Instructions
Once you’ve created your stunning chocolate covered strawberries, you’ll want to savor them for as long as possible! Storing them correctly will help maintain their freshness and that gorgeous aesthetic.
First things first: if you have any leftovers (which is rare, but it happens!), gently place the strawberries in a single layer in an airtight container. Make sure they’re not stacked on top of each other, as this can cause the chocolate to smudge or stick. If you need to layer them, add parchment paper between the layers to protect that beautiful chocolate coating.
Store the container in the refrigerator. Chocolate covered strawberries are best enjoyed within 1-3 days after making them. The strawberries will still taste delicious, but they do lose their initial crispness over time, so keep that in mind!
Now, reheating? Well, you won’t really want to reheat these treats since chocolate doesn’t hold up well to heat after it has set. Instead, just take them out of the fridge about 10-15 minutes before you plan to enjoy them. This will allow them to come to room temperature, enhancing their flavor and making them even more enjoyable!
So, there you have it! With these simple storage tips, you can keep your chocolate covered strawberries fresh and ready to impress anyone who stops by. Happy snacking!
Nutritional Information Disclaimer
While I strive to provide accurate nutritional information for my chocolate covered strawberries, please keep in mind that nutrition can vary based on the specific ingredients and brands you choose. Factors like the size of the strawberries, the type of chocolate, and any additional toppings can all influence the final nutritional values.
For the most precise information, I recommend checking the labels of the ingredients you use. This way, you can enjoy these delightful treats while staying mindful of your dietary needs. Happy indulging!
FAQ Section
Q1. Can I use frozen strawberries for chocolate covered strawberries?
I wouldn’t recommend it! Frozen strawberries tend to lose their texture and flavor once thawed, making them soggy and less appealing. Fresh strawberries are key to achieving that delightful aesthetic and taste!
Q2. How can I make sure the chocolate coating is smooth?
To get that silky, smooth chocolate coating, be sure to melt the chocolate slowly and stir it well as it melts. Using coconut oil, as mentioned in the recipe, helps create that beautiful sheen and prevents the chocolate from seizing. Just remember to use a microwave-safe bowl and heat in short intervals!
Q3. Can I make chocolate covered strawberries in advance?
You can definitely make them a day ahead! Just keep them stored in an airtight container in the fridge. They’re best enjoyed within 1-3 days for optimal freshness, but making them in advance is a great time-saver for parties!
Q4. What’s the best way to decorate chocolate covered strawberries?
Getting creative with toppings is a fun way to enhance their aesthetic! After dipping, consider drizzling melted white chocolate or colorful candy melts over the strawberries. You can also sprinkle crushed nuts, sprinkles, or coconut flakes for added texture and visual appeal!
Q5. How do I know when the chocolate is set?
You’ll know the chocolate is set when it feels firm to the touch and has a glossy finish. It typically takes about 15-20 minutes in the fridge, but you can also leave them at room temperature for a bit longer. Just be patient—it’s worth the wait for that perfect bite!

Chocolate Covered Strawberries Aesthetic: 5 Steps to Bliss
- Total Time: 20 minutes
- Yield: 12 servings 1x
- Diet: Vegetarian
Description
Chocolate covered strawberries are a delightful treat that combines sweet strawberries with rich chocolate.
Ingredients
- 1 pound fresh strawberries
- 8 ounces dark chocolate
- 2 tablespoons coconut oil
Instructions
- Wash and dry the strawberries thoroughly.
- Melt the dark chocolate and coconut oil in a microwave-safe bowl.
- Dip each strawberry into the melted chocolate, covering it completely.
- Place the dipped strawberries on a parchment-lined baking sheet.
- Refrigerate until the chocolate hardens.
Notes
- Use fresh strawberries for the best flavor.
- Experiment with different types of chocolate.
- Add toppings like sprinkles or crushed nuts if desired.
- Prep Time: 15 minutes
- Cook Time: 5 minutes
- Category: Dessert
- Method: No-bake
- Cuisine: American
Nutrition
- Serving Size: 3 strawberries
- Calories: 150
- Sugar: 10g
- Sodium: 20mg
- Fat: 8g
- Saturated Fat: 4g
- Unsaturated Fat: 4g
- Trans Fat: 0g
- Carbohydrates: 20g
- Fiber: 2g
- Protein: 2g
- Cholesterol: 0mg
Keywords: chocolate covered strawberries aesthetic


